
Related Manuals for Henny Penny Electric SpaceSaver Plus 610


Summary of Contents for Henny Penny Electric SpaceSaver Plus 610
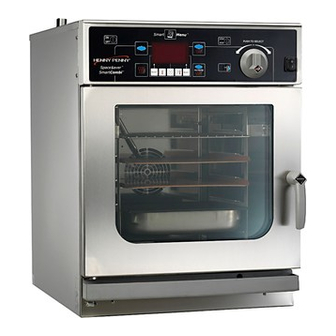
- Page 1 Operating Manual Electric Space$aver™ & Electric Space$aver™ Plus Model Model No. Electric Space$aver™ 605 ECS-605 Electric Space$aver™ Plus 610 ESC-610...
- Page 3 During this time, any frypot that fails due to manufacturing or workmanship issues will be replaced at no charge for parts, labor, or freight. Henny Penny will either install a new frypot at no cost or provide a new or reconditioned replacement fryer at no cost.
-
Page 5: Table Of Contents
Contents Appliance description ..........11 Intended use ................11 Incorrect use................11 Hazards of improper use ............11 Training of operating personnel..........11 Changing Language ..............12 Safety instuctions............13 Transport through cold surrounding ......... 13 Cleaning ..................14 Defective Appliance..............15 After Use................... - Page 6 Contents Dry Heat Mode ............24 Setting the Temperature ............24 Setting the Time ................ 24 Probe temperature setting............24 Humidity Control ..............24 Starting Dry Heat Mode ............24 Displaying actual temperatures ..........24 Changing the setting..............24 End of Dry Heat Mode .............. 24 Rethermalization Mode ...........
- Page 7 Contents Changing settings ............. 36 Default settings ................. 36 To access the Setup Mode............36 Custom Programming..........40 Creating your own programs ............ 40 Copying a cooking program............40 Saving changed program............40 Creating a program ..............41 Locking/unlocking cookbook ........... 41 Starting selected program ............
- Page 8 Contents Tender steaming ............54 Advantages tender steaming............54 The following should be taken into consideration ....54 Tender steaming tips ..............54 Forced steaming............55 Advantages of forced steaming ..........55 The following should be taken into consideration ....55 Forced steaming tips:..............
- Page 9 Contents Cleaning ..................64 Rinsing ..................64 Cleaning door gasket..............64 Drying ..................64 Deliming ................... 64 "WaveClean®" automatic cleaning ....... 65 "2-in-1" cartridge ..............65 Storage of cartridges ..............65 Preparing the unit..............65 Select the cleaning level............65 Cooking chamber too hot............
- Page 10 Contents Operating Manual...
-
Page 11: Appliance Description
Space$aver™ Appliance description Intended use The Space$aver™ combi is intended for use exclusively for commercial applications. It is not to be operated as a household appliance and doing so voids any warranty and liability Space$aver™’s must only be used to cook food using the specified grills, containers, baking trays, mobile oven racks and inserts. -
Page 12: Changing Language
Space$aver™ Appliance description Electric Space$aver™... -
Page 13: Safety Instuctions
Space$aver™ Appliance description Safety instructions The Space$aver™ conforms to all safety standards. However, this does not rule out all risks, such as those caused by operator error. The following safety instructions must therefore be observed when operating the Space$aver™. • Do not place cooking containers where the food being cooked generates liquid e. -
Page 14: Cleaning
Space$aver™ Appliance description Cleaning Always wear chemical splash goggles or face shield andprotective rubber gloves when cleaning the cooking space with corrosive cleaning agents. Severe burns and possible blindness could result. Observe the manufacturer's instructions. If solution comes in contact with your eyes, rinse thoroughly with cool water and see a physician immediately. -
Page 15: Defective Appliance
Space$aver™ Appliance description Defective appliance Do not operate the appliance with a damaged door seal. Broken or damaged door seals may result in damage to electrical and electronic components. Replacement should only be undertaken by a cetified service technician. The door seal is pushed into place. When fitting, perfect seating is essential, i.e. -
Page 16: Door Lock Of
Space$aver™ Appliance description Door lock of Opening 1.Turn door handle to the right or left. The door then opens. 2. Open the door fully. If the door handle is released, it returns to the vertical position. Closing Press the door closed with door handle vertical. -
Page 17: Overview
Space$aver™ Appliance description display and console Space$aver™ 1 ON/OFF button 2 Cooking mode button with LED: Moist Heat 3 Display: program, temperature, time and additional functions 4 Selector button: Smart Menu 5 Cooking mode button with LED: CombiDial Combi steaming Turn right/left: setting the 6 Start/Stop button temperature, time, etc. - Page 18 Space$aver™ Appliance description Space$aver™ Space$aver™ & Plus 1-Steam outlet vents 2-Air intake vents for cooking chamber 3-Combidial 4-Display 5-Film keypad with LEDs 6-On/Off switch 7-Appliance door 8-Insulating glass pane 9-Condensate catch trough 10-Door handle 11-Cooking chamber illumination 12-Temperature sensor for cooking cham- 13-Core-temperature probe 14-Fan 15-Fan cover...
-
Page 19: Operation
Space$aver™ Operation Operating modes The Space$aver™ has a number of different operating modes: • Smart Menu automatic cooking • Moist Heat • Combination of Moist and Dry heat • Dry Heat • Rethermalization • Delta-T cooking • Slow Roast & Holding (SRH) •... -
Page 20: Smart Menu
Space$aver™ "Smart Menu" The Smart Menu cooking programs were developed to have the clear advantage of being adaptable to your specific require- ments and wishes and saveable in the corresponding category. Switch on the steamer with the On/Off button and press the Smart Menu button: automatic Cooking Pictograms for the individual program groups are displayed in... -
Page 21: Prior Programs
Space$aver™ Prior programs Pressing the Right-Side Selection button displays the last pro- gram used. Preheating For optimum cooking results, we recommend the "Ready2Cook" button (Page 44). Different programs Different programs can be selected (Page 20). Location of the selection The location of the selection frame after the Smart Menu but- ton is pressed can be set (Page 20). -
Page 22: Moist Heat Mode
Space$aver™ Operation Moist Heat Mode Use the “moist heat” program to boil, steam, blanch and preserve. Setting the temperature Switch on the Space$aver™ with the “On/ Off“ button. Press the Moist Heat button ‹the display shows “212°F” selection Steaming 212°F “(100°C)”... -
Page 23: Combisteaming
Space$aver™ Operation Combination of Moist and Dry Heat Mode “Combi-steaming“ is especially suited to large roasts, cakes and pastries. Setting the temperature Press the “On/Off” button.. Press the “Combi Mode” button and the display shows “302°F‹ Combi-steaming (150°C)” and “0:00”. 302°F 0:00 Turn the CombiDial to adjust the flashing temperature and... -
Page 24: Dry Heat Mode
Space$aver™ Operation Dry Heat Mode “Dry Heat” cooking is best suited to products that do not require any humidity. Setting the temperature Press the “On/Off“ button. “180°C“ Press the Dry Heat button and the display shows 356°F Hot air and “0:00” appear. 356°F 0:00 Turn the CombiDial to adjust the cabinet temperature. -
Page 25: Rethermalization Mode
Space$aver™ Operation Rethermalization Mode This mode is used to reheat meals on plates or dishes, or cooked foods in pans or on grids, without any loss of quality. This mode has a special pre-set air circulation setting. Setting the temperature Press the “On/Off”... -
Page 26: Probe Cooking
Space$aver™ Operation Probe Cooking Probe cooking is particularly recommended for food requiring long cooking. Probe cooking works in all modes. Here, the temperature is measured with a probe inserted down into the center of the food being cooked and compared to the (selected) probe temperature to be reached. -
Page 27: Positioning The Probe
Space$aver™ Operation Positioning the probe When cooking a number of products, always position the probe in the center of the product and also set the product in the center of the oven chamber (center shelf). Always place the probe into the thickest part of the food to be cooked. -
Page 28: Do Not Overheat Core-Temperature Probe
Space$aver™ Operation Do not overheat core- temperature probe So that the temperature probe can be inserted into frozen food, DO Not heat probe with a lighter or another heat source. Over- heating can cause the temperature probe to explode. Drill an insertion channel With frozen food, first drill an insertion channel... -
Page 29: Delta-T Cooking
Space$aver™ Operation Electric Space$aver™... - Page 30 Space$aver™ Operation Electric Space$aver™...
-
Page 31: Delta-T Cooking
Space$aver™ Operation Delta-T cooking When using Delta-T cooking, the probe is always used. The cooking temperature of the combi is base upon the core temperature of the product being cooked and the set Delta-T temperature. In general, the following equation can be applied for Delta -T cooking: Actual core temperature + Delta-T temperature = Combi Cooking temperature Temperature... -
Page 32: Starting Delta-T Cooking
Space$aver™ Operation Starting Delta-T cooking Press the Start/Stop button. The display shows the current cooking and set probe 176°C ∆T temperatures. 122°F 176°F Steam Current temperature To display the actual cooking & probe temperature, press and hold the Cooking or Probe Temperature buttons. display End of Delta-T cook cycle The buzzer sounds when the probe temperature has been... -
Page 33: Slow Roast & Hold
Space$aver™ Operation Slow Roast & Hold (Over-night Cooking) Temperatures ranging from 155-212°F (60 -100°C) are used in low temperature cooking (SRH). The benefits are as follows: • Less drying out • Even cooking • Less crust formation • More yield/Less shrinkage SRH has two phases: 1 - Cooks product to a set core temperature 2 - Lets product “rest”, “mature”... - Page 34 Space$aver™ Operation Final core temperature Cooking Food (temp. to be Program stages temperature maintained) Roast beef 132°F (55°C) 140°F 60°C Roast pork 167°F (75°C) 176°F 80°C 1. Dry Heat 2. SRH Roast veal 158°F (70°C) 167°F 75°C Roast lamb 167°F (75°C) 176°F 80°C Electric Space$aver™...
-
Page 35: Starting Srh
Space$aver™ Operation Setting SRH cooking mode Press the On/Off button. Before SRH cooking, enter the first program step, i.e. "Dry Heat", "Moist Heat", "Combination of Moist and Dry Heat" or "Rethermalization" (see also the "Entry of several program steps" chapter). 25.03.03 09:30 Press the Right-Select button to select “... -
Page 36: Steam Injection
Space$aver™ Operation Steam injection The "Steam Injection" cooking mode can be used for baking pieces of dough that require lots of steam. If the cooking temperature is higher than 266°F (130°C), steam injection will not work! Cool down the cooking chamber to below 266°F (130°C) with Ready2Cook if necessary. -
Page 37: Rest Period
Space$aver™ Rest period An operational pause (NOP) can be selected with the "rest pe- riod" cooking type. Selecting rest period Switch the appliance on with the "on/off" button. The button LED illuminates. 0:10 Cooking mode? Call up the menu with the right-hand selector button. RackControl DT/LT/... -
Page 38: Changing Settings
Space$aver™ Changing settings Default settings The Space$aver™ comes from the factory pre-set. These settings can be changed to your individual needs to a certain extent. To access the Settings Mode Press the Left-Side Select button to access the Menu Mode. Once in the Menu Mode and display shows “Menu”, use the 1 Man. - Page 39 Space$aver™ Operation Settings Standard Setting range Explanation setting Automatic change between summer time / winter Local time Time/Date Time/date time operator See parameter No. 144 for date format "On” means that when cooking is completed, the light will flash in addition to the buzzer sounding. Light flashes On/Off The duration of the flashing matches the buzzerr, i.e.
-
Page 40: Creating Your Own Programs
Space$aver™ Operation Settings Standard Setting range Explanation setting Time ext. An external air extraction hood can be switched on at the end of the program. Hood 0 - 600 (seconds) 0 = buzzer off Time buzzer 0 - 180 In additional to the buzzer, the Start/Stop button can (seconds) also be made to flash;... -
Page 41: Creating A Program
Space$aver™ Operation Settings Standard Setting range Explanation setting 0 Only your own cooking Different country-specific cookbooks can be loaded programs via cookbook switching. Deleted AutoChef cooking 1 German; programs can also be restored here. For this purpose, 2 UK English; select cookbook number and then save. -
Page 42: Custom Programming
Space$aver™ Operation Custom Programming Creating your own The Space$aver™ stores 300 cooking programs. There are two options for entering your own recipes in the recipe book. programs 1. Duplicate a program from the cookbook, adjust the temper- ature, time etc. of the individual program steps as desired and save in the cookbook with a new name. -
Page 43: Additional Functions
Space$aver™ Additional functions Additional functions You can optimise the cooking cycle by using additional functions. Delayed Start Time In a delayed start, the cooking program doesn’t start until the set delay time has counted down. The oven chamber temperature is shown in the display during countdown. If using the delayed start, temperatures in the oven chamber may promote the growth of harmful bacteria on the products to be cooked. -
Page 44: Preheating
Space$aver™ Additional functions Ready2Cook Many cooking programs (e.g. baking) require the oven to be preheated. The Preheat Mode has a temperaure range of to preheat the oven chamber up to 527°F (275°C). Starting Preheat Press the Ready2Cook button: the Space$aver™ will heat to about 15% above the temperature of step 1, of the program or Preheating set temperature. -
Page 45: More Functions
Space$aver™ Additional functions More functions The additional functions can be used to adapt individual 673°F cooking steps to the food to be cooked or to improve the 0:15 cooking results. The Left-Select button can be used to call up More Home the additional function while the data is being entered. -
Page 46: Rackcontrol
Space$aver™ Additional functions RackControl For single-step cooking programs, the "RackControl" addi- tional function allows monitoring of five (different) cooking times. If products with different cooking times, e.g. potatoes, cauli- flower, peas, carrots and meat, are to be cooked at one time or if the same dishes are to be cooked at different times, we rec- ommend using the "RackControl"... -
Page 47: Activating "Rackcontrol
Space$aver™ Additional functions Activating "RackControl" Switch on the steamer with the "on/off" button and 4/17/2007 9.59 select "RackControl" with the right-hand selector button. RackCont. Menu DT/LT/... Confirm the flashing "RackControl" display with the RackCon- right-hand selector button. trol Back Confirm The "Cooking mode?"... -
Page 48: Termintating "Rackcontrol
Space$aver™ More functions The display shows the cooking time ( ) for all 5 areas RackControl °F (R) of 0 min. R: 1 2 3 4 5 : 0 0 0 0 0 The arrow indicates the range selected for the time specification. -
Page 49: End-Of-Step Signal
Space$aver™ Additional functions End-of-step signal With multi-step cooking programs, the end-of-step signal can be activated for each cooking step. As a result, the end of the cooling step (time expired/probe temperature reached) is signalled by a 10-second audible tone. The next cooking step is started immediately, i.e. starting of the next cooking step is not delayed by the signal. - Page 50 Space$aver™ Additional functions Electric Space$aver™...
- Page 51 Space$aver™ Additional functions Electric Space$aver™...
- Page 52 Space$aver™ More functions Electric Space$aver™...
-
Page 53: Practical Tips
Space$aver™ Practical tips Cool down mode The steaming mode can be used for cooling down the oven chamber. Press Moist Heat button. Set the required temperature, enter the time and then press Start/Stop. The steamer quickly cools down without filling the room with noise and heat. -
Page 54: Tender Steaming
Space$aver™ Practical tips • Steam noodles in non-perforated containers. For one part noodles, you need at least 5 parts water for cooking. • To steam dumplings place dumplings on top of a perforated container lined with greaseproof paper. Uncover immediately after cooking. If they are to be served over a longer time, keep warm in water thickened with starch. -
Page 55: Forced Steaming
Space$aver™ Practical tips Forced steaming Advantages of Forced • Forced steaming is mainly suited to non-sensitive foods, such as potatoes, beets, and carrots. steaming • Cooking times are shortened in comparison with steaming at 212°F (100°C) by approximately 10%. The following should be •... -
Page 56: The Following Should Be Taken Into Consideration
Space$aver™ Practical tips The following should be • Preheat the Space$aver™ for at least 10 - 15 minutes before baking using the preheating function. taken into consideration: • The higher the oven temperature, the more the food will brown; however, the higher the weight loss. •... -
Page 57: Slow Roast & Hold
Space$aver™ Practical tips Slow Roast & Hold (SRH) Advantages of SRH • Red meat is particularly suited to slow roasting. • As a result of gentle cooking, the uncooked weight of large pieces of meat remains virtually intact, thus preventing excessive shrinkage and toughening. -
Page 58: Rethermalization
Space$aver™ Practical tips Rethermalization This program not only enables you to rethermalize food on plates or trays within a short period, but also with full-size GN pans. Advantages of • You always achieve the optimum oven chamber conditions with rethermalization. Rethermalization •... -
Page 59: Rethermalization Tips
Space$aver™ Practical tips Rethermalization tips • Place fish and meat on a bed of product, so that it rethermalizes evenly and does not stick to the plate. • Cook meats to rare state, so that it will be cooked to medium after rethermalization. - Page 60 Space$aver™ Practical tips Electric Space$aver™...
-
Page 61: Cleaning
Space$aver™ Cleaning Safety notes To prevent damage to the appliance: • Always turn appliance off before cleaning. • Clean appliance after every use. • Do not use a high-pressure water or steam cleaner to clean the appliance • Do not use abrasive cleaners, or cleansers/sanitizers containing chlorine, bromine, iodine, or ammonia chemicals. -
Page 62: Cleaning The Door
Space$aver™ Cleaning Cleaning the door To avoid burns, allow the unit to cool before cleaning. The glass panes are provided with a special infrared-reflective coating. Do not use abrasives or cloth for cleaning. Do not use grill cleaner, as it can cloud the surface of the glass. -
Page 63: Manual Cleaning
Space$aver™ Cleaning Manual cleaning Preparation of the oven chamber Remove baking trays, grids and containers from the unit before starting manual cleaning. These extra pieces will deflect the water and the cleaning process will be disrupted. Clean the trays, grids and pans separately, e.g. in a dishwasher. -
Page 64: Cleaning
Space$aver™ Cleaning When soaking time is over “Spray cleaner” appears in the Man. Cleaning display.Open the door and spray the interior, the heat source and the Spray cleaner Temperature 122°F fan wheel (via the openings in the ventilation guide plate) with Time --:-- Cancel... -
Page 65: Waveclean®" Automatic Cleaning
Space$aver™ Cleaning “WaveClean“ cleaning WaveClean does not clean the door gasket. It must be cleaned separately. See Cleaning door gasket section. "2-in-1" combination "WaveClean" is an automatic cleaning system that cleans and rinses the cooking chamber with a cartridge combination cartridge ("2-in-1"). Only this original cartridge may be used for this purpose. -
Page 66: Cooking Chamber Too Hot
Unscrew the top of the cartridge and place the cartridge. Insert cartridge WaveClean extra 2:15 [3] in the Foldaway Cartridge Assembly.. Use only Henny Penny 2-in-1 cartridges. Cancel Confirm Two cartridges can be used if unit needs more cleaning and “WaveClean extra”... -
Page 67: Start Waveclean
Space$aver™ Cleaning Start WaveClean Close the door and then press the Right-Hand Select button. The display shows “WaveClean” and the time remaining as the timer counts down. WaveClean extra 2:15 Confirm Cancel DO NOT open door during WaveClean operation, or burns or personal injury could result. -
Page 68: Waveclean" Problems
Space$aver™ "WaveClean" Problems Problem Possible cause Remedy Align appliance • Cartridges do Appliance is tilted horizontally not activate properly Power failure Service Appli. malfunction • Residual cleaner Cartridge too close Bend cartridge to floor due to bent holder back into rinse water holder place... -
Page 69: Errors
Space$aver™ Errors Error message Cause Correction Water valve closed, Water valve open No water appliance defective Contact customer service Stop using appliance; Call Certified Sevice Unit overheated Appliance defect Agent High limit Appliance defect Call Certified Sevice Agent Fan overheating. Allow to cool down. -
Page 70: Resetting (Initializing) Control Electronics
Space$aver™ Errors Resetting (initializing) the Program running errors (e.g. specified settings were not kept); can be corrected by resetting (initializing) the electronic control electronics controls. This resets the electronics to the start mode. The stored program will not be deleted. To reset the system, press and hold the On/Off button (with the appliance switched on) for approx. -
Page 71: Haccp
Space$aver™ HACCP Printing reports The Space$aver™ stores up to 200 HACCP reports, depending on the number of program stages. A laptop or a serial mini-printer is used to produce the reports via the RS 232 serial interface. The maximum Asterisk= length of the RS 232 Programme name Record has been... -
Page 72: The Haccp Report
Space$aver™ HACCP The HACCP report A summary of the product core temperature settings will be printed out in hourly blocks. The cycle time (5, 10 or 15 min) is indicated after the information on the time. Press and hold the Right-Select button to print the reports from the report selected to the latest ("000") report (day or week overview). - Page 74 Henny Penny Corporation P.O.Box 60 Eaton,OH 45320 1-937-456-8400 1-937-456-8402 Fax Toll free in USA 1-800-417-8417 1-800-417-8434 Fax www.hennypenny.com *fm05-046-B* Henny Penny Corp., Eaton, Ohio 45320, Revised 08-01-08 Manufactured by: MKN Maschinenfabrik Wolfenbüttel, Germany...
Need help?
Do you have a question about the Electric SpaceSaver Plus 610 and is the answer not in the manual?
Questions and answers