Advertisement
Quick Links
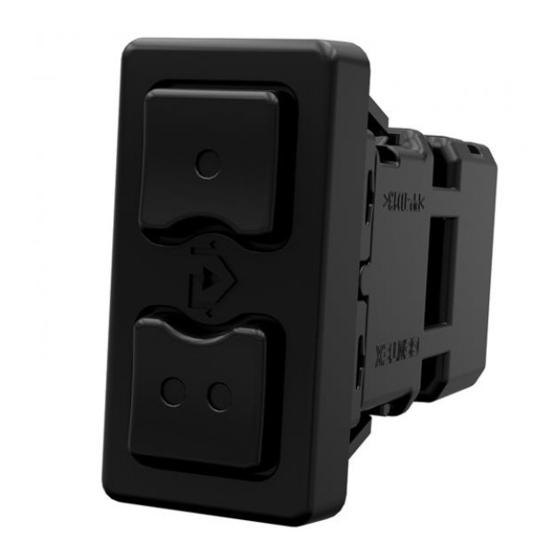
HOMELINK
®
P/N 2882082
APPLICATION
Verify accessory fitment at Polaris.com.
BEFORE YOU BEGIN
Read these instructions and check to be sure all parts and tools are accounted for.
Please retain these installation instructions for future reference and parts ordering
information.
KIT CONTENTS
This kit contains parts for installation of the HomeLink
also required (sold separately).
This Kit includes:
REF
QTY
PART DESCRIPTION
1
1
Switch Module, HomeLink
2
2
Harness, HomeLink
1
Instructions
HomeLink
®
is a registered trademark of Gentex Corporation.
TOOLS REQUIRED
• Safety Glasses
• Pliers, Push Pin
• Screwdriver Set, Torx®
IMPORTANT
Your HomeLink
®
Door Opener Kit is exclusively designed for your vehicle. Please read the installation
instructions thoroughly before beginning. Installation is easier if the vehicle is clean and free of debris. For your
safety, and to ensure a satisfactory installation, perform all installation steps correctly in the sequence shown.
DOOR OPENER KIT
®
®
Instr 9927256
®
Kit only. Prior installation of a Battery Connection Kit is
• Utility Knife/Cutting Tool
• Socket Set, Metric
• Wrench Set, Metric
Rev 01 2016-07
Page 1 of 8
PART NUMBER
4016679
2413595
9927141
Advertisement

Related Manuals for Polaris HomeLink 2882082


Summary of Contents for Polaris HomeLink 2882082
- Page 1 DOOR OPENER KIT P/N 2882082 APPLICATION Verify accessory fitment at Polaris.com. BEFORE YOU BEGIN Read these instructions and check to be sure all parts and tools are accounted for. Please retain these installation instructions for future reference and parts ordering information.
- Page 2 ASSEMBLY TIME Approximately 30–40 minutes INSTALLATION INSTRUCTIONS RANGER INSTALLATION • GENERAL: i. Remove five plastic push pin rivets 1. Shift vehicle transmission into “PARK”. Turn key to from forward side of upper dash panel as “OFF” position and remove from vehicle. shown.
- Page 3 iii. Using fingers, remove center storage box b. Carefully pull control panel away from main dash panel. If necessary for access, label by pressing top edge of box down, and disconnect other electrical harnesses disengaging box locking tabs from main from control panel switches.
- Page 4 b. Carefully pull control panel away from main • GENERAL: dash panel. If necessary for access, label Drill out one accessory plug (1/4 inch) on and disconnect other electrical harnesses forward side of firewall, then install from control panel switches. fuseholder (location similar to FULL-SIZE c.
- Page 5 RZR INSTALLATION 1. Shift vehicle transmission into “PARK”. Turn key to “OFF” position and remove from vehicle. 2. Gain access. a. Remove hood. b. Remove windshield, as applicable. c. Remove seat to gain battery access. 3. Disconnect black negative (-) cable from battery. 4.
-
Page 6: Programming Instructions
PROGRAMMING INSTRUCTIONS ADDITIONAL INFORMATION PROGRAMMING A NEW HOMELINK ® REMOTE For more information, or for custom training instructions specific to your device, visit NOTE http://www.HomeLink.com. The HomeLink ® Remote is the same unit as the installed switch module BEFORE PROGRAMMING THE HOMELINK ®... - Page 7 ROLLING CODE DEVICES REPROGRAMMING A SINGLE HOMELINK ® REMOTE BUTTON This procedure is only required if referenced in another section. Use this procedure to overwrite one of the switch module buttons after a device has been registered IMPORTANT to it. Use a stepladder or other appropriate and safe NOTE device to perform the following steps.
-
Page 8: Fcc And Ic Information
FCC AND IC INFORMATION SOMMER ROLLING CODE PROGRAMMING This device complies with FCC rules part 15 and NOTE Industry Canada RSS-210. Operation is subject to the If the HomeLink ® remote will be programmed to following two conditions: operate TWO openers, and only ONE of them is 1.
Need help?
Do you have a question about the HomeLink 2882082 and is the answer not in the manual?
Questions and answers