Table of Contents
Advertisement
Quick Links
GB
CONTENTS
Introduction ................................................................................................................................................... 3
Certification ................................................................................................................................................... 4
Your new gas fireplace in general .................................................................................................................. 5
Before installation .................................................................................................................................. 5
Gas connection ..................................................................................................................................... 5
Safety ............................................................................................................................................................. 6
Gas supply emergency stop .................................................................................................................. 6
Delivery packaging ........................................................................................................................................ 7
Overview of contents .................................................................................................................................... 8
Information plate ................................................................................................................................... 8
Removing the glass ....................................................................................................................................... 9
Fitting the burner ........................................................................................................................................ 12
Flue system .................................................................................................................................................. 15
Positioning flue terminals ............................................................................................................................ 16
Horizontal wall terminal, type C11 .............................................................................................................. 17
Vertical roof terminal, type C31 ................................................................................................................... 18
Pipework .............................................................................................................................................. 18
Installation of fireplace ................................................................................................................................ 19
Installation dimensions ........................................................................................................................ 19
Distance between combustible material ............................................................................................. 20
Adjusting the base frame ........................................................................................................................... 27
Fitting secondary burners ............................................................................................................................ 28
Arranging ceramic "logs" and embers layer ............................................................................................... 29
Arranging ceramic "logs" and the embers layer ......................................................................................... 30
Visio 70-43-39 3S - Visio 70-43-39 LC - Visio 70-43-39 RC - Visio 70-43 F (Visio 3) .......................... 31
Visio 90-55-39 3S - Visio 90-55-39 LC - Visio 90-55-39 RC - Visio 90-55 F (Visio 4) .......................... 33
Visio 160-45-32 3S - Visio 160-45-32 LC - Visio 160-45-32 RC - Visio 160-45 F (Visio 5) .................. 35
Visio 43-49-65 RD - Visio 43-49-65 T (Visio 6) .................................................................................... 40
Visio 40-55-90 RD - Visio 40-55-90 T (Visio 7) .................................................................................... 42
Fitting the frame .......................................................................................................................................... 44
Start-up: Control box, power supply, receiver and remote control ............................................................. 45
Connection of control box for LED light ............................................................................................ 45
Remote control ............................................................................................................................................ 46
Inserting batteries in the remote control ............................................................................................. 46
Synchronisation of the remote control and receiver ........................................................................... 46
INSTALLATION MANUAL
INSTALLATION MANUAL
We are not responsible for typographical errors.
GB - 1
Advertisement
Table of Contents

Related Manuals for RAIS VISIO 4 Series


Summary of Contents for RAIS VISIO 4 Series
-
Page 1: Table Of Contents
INSTALLATION MANUAL INSTALLATION MANUAL CONTENTS Introduction ..............................3 Certification ..............................4 Your new gas fireplace in general ........................5 Before installation ..........................5 Gas connection ............................. 5 Safety ................................6 Gas supply emergency stop ........................6 Delivery packaging ............................7 Overview of contents ............................ - Page 2 Declaration of conformity ..........................75 Troubleshooting ............................77 Dimensional drawings and installation drawings ..................78 RAIS Visio Gas 70-43-39 3S ......................... 78 RAIS Visio Gas 70-43-39 LC ........................ 79 RAIS Visio Gas 70-43-39 RC ........................ 80 RAIS Visio Gas 70-43 F ........................81 RAIS Visio Gas 90-55-39 3S .........................
-
Page 3: Introduction
INSTALLATION MANUAL Introduction Congratulations on the acquisition of your new gas fireplace and on becoming a RAIS or ATTIKA customer! You have chosen a gas fireplace where quality, design and function go hand-in-hand. Follow us on all of our digital platforms to get the latest tips, know-how and inspiration. -
Page 4: Certification
INSTALLATION MANUAL Certification This gas fireplace is tested and certified for use in several countries (see the information plate on the back of the installation manual). The gas fireplace has been tested for use with natural gas, town gas, LPG and biogas. This installation manual covers the following models: (VISIO 3) Visio Gas 70-43-39 3S –... -
Page 5: Your New Gas Fireplace In General
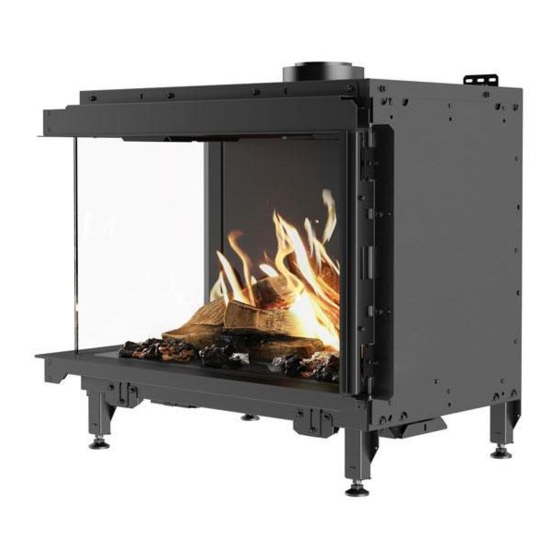
INSTALLATION MANUAL Your new gas fireplace in general This RAIS product is a highly efficient convection gas fireplace with a sealed combustion chamber for a balanced flue system. The fireplace has variable heating power and is equipped with a burner which has been developed using the latest burner technology. -
Page 6: Safety
The gas supply may not be reconnected until an authorised heating and plumbing/gas technician has examined the fireplace and approved it. RAIS/ATTIKA recommends 20 mm gas supply pipes for town gas burners. Safety It is important that the fireplace is correctly installed in consideration of the environment and people’s safety. -
Page 7: Delivery Packaging
1000-2000 Phone +45 98 47 90 33 - Fax +45 98 47 92 91 has a higher melting point and therefore cannot be recycled. E-mail: info@rais.dk - Homepage: www.rais.dk TILLADTE AFVIGELSER FOR VINKELMÅL... -
Page 8: Overview Of Contents
1 bag sharp/1 bag rounded Information plate All RAIS/ATTIKA gas fireplaces have an information plate which states the fireplace’s gas type, gas pressure, power, etc. The information plate is laid on top of the gas fireplace on delivery. Position the information plate on the inside of the inspection hatch so that the heating and plumbing contractor can access it. -
Page 9: Removing The Glass
INSTALLATION MANUAL Removing the glass The fireplace is supplied with the glass fitted. The glass must be removed in order to fit the fireplace burner. Follow these instructions when the glass has to be removed. Scan the QR code to see a video of how to remove the glass. - Page 10 INSTALLATION MANUAL 3. Take hold of the two metal edges for the fireplace on the glass and pull the glass out towards the front. 4. Lift the glass until it is free of the base frame. 5. The glass can now be removed. 10 - GB...
- Page 11 INSTALLATION MANUAL When the glass is to be refitted, follow the five steps in reverse order. NB! There is wedge in the middle of the gas fireplace frame, which ensures the glass is fitted correctly. This wedge must fit between the two notches on the glass.
-
Page 12: Fitting The Burner
INSTALLATION MANUAL Fitting the burner On delivery, the gas fireplace burner is supplied separated from the base plate. Follow these steps to fit the gas burner. 1. Remove the burner and hose from the bag. 2. Remove the four front-fitted screws on the bottom of the fireplace. 12 - GB... - Page 13 INSTALLATION MANUAL 3. Fit the burner in the combustion chamber using the four screws. Check that the gasket between the burner and the fireplace base is intact. 4. Now pull the gas block, pipe and receiver towards the side where the inspection hatch is desired to be positioned.
- Page 14 INSTALLATION MANUAL 5. Position the bottom grate above the burner. 14 - GB...
-
Page 15: Flue System
(also known as concentric flue system) in the way stated by RAIS/ATTIKA. The flue pipes recommended by RAIS/ATTIKA have been approved together with the fireplace and the fireplace may only be installed when using these. -
Page 16: Positioning Flue Terminals
INSTALLATION MANUAL Positioning flue terminals The table below shows how different flue terminals can be positioned in the house and how large the safety distances must be. Dimension Terminal position Distance Directly below an opening, an opening window See national regulatory requirements. or ventilation duct. -
Page 17: Horizontal Wall Terminal, Type C11
INSTALLATION MANUAL Horizontal wall terminal, type C11 Dimensions of flue pipe: The fireplace is supplied with an outlet spigot Ø100/Ø150 mm or Ø130/Ø200 mm, depending on the model. This flue dimension can be used for the entire flue. Alternatively, a Ø130/Ø200 adapter can be fitted, so that this flue dimension can be used for the rest of the flue. -
Page 18: Vertical Roof Terminal, Type C31
INSTALLATION MANUAL Vertical roof terminal, type C31 Dimensions of flue pipe: The fireplace is supplied with an outlet spigot Ø100/Ø150 mm or Ø130/Ø200 mm, depending on the model. This flue dimension can be used for the entire flue. Alternatively, a Ø130/Ø200 adapter can be fitted, so that this flue dimension can be used for the rest of the flue. -
Page 19: Installation Of Fireplace
25 mm at the side of and under horizontal flue pipes if these are insulated. The installation space must be equipped with convection openings which have a minimum area of 200 . RAIS/ATTIKA recommends an area for convection air above the fireplace of at least 700 cm , and an area for convection air below the fireplace of at least 500 cm There should be free space of at least 50 mm around the entire fireplace to allow convection. -
Page 20: Distance Between Combustible Material
Approved: D M Y 30-12-1899 INDUSTRIVEJ 20, 9900 FREDERIKSHAVN, DENMARK Corrections: Phone +45 98 47 90 33 - Fax +45 98 47 92 91 E-mail: info@rais.dk - Homepage: www.rais.dk Front modeller afstande til brændbart Drawing name: Project: Established: Format: Revision: Drawing no.:... - Page 21 Approved: D M Y 30-12-1899 INDUSTRIVEJ 20, 9900 FREDERIKSHAVN, DENMARK Corrections: Phone +45 98 47 90 33 - Fax +45 98 47 92 91 E-mail: info@rais.dk - Homepage: www.rais.dk Hjørne modeller afstande til brændbart Drawing name: Project: Established: Format: Revision: Drawing no.:...
- Page 22 Approved: D M Y 30-12-1899 INDUSTRIVEJ 20, 9900 FREDERIKSHAVN, DENMARK Corrections: Phone +45 98 47 90 33 - Fax +45 98 47 92 91 E-mail: info@rais.dk - Homepage: www.rais.dk Hjørne modeller afstande til brændbart Drawing name: Project: Established: Format: Revision: Drawing no.:...
- Page 23 Project manager: Approved: D M Y INDUSTRIVEJ 20, 9900 FREDERIKSHAVN, DENMARK Corrections: Phone +45 98 47 90 33 - Fax +45 98 47 92 91 E-mail: info@rais.dk - Homepage: www.rais.dk Drawing name: 3 Glas modeller afstande til brændbart Project: Established: Format: Revision: Drawing no.:...
- Page 24 INSTALLATION MANUAL INSTALLATION MANUAL Tunnel models: 1000 1000 24 - GB...
- Page 25 INSTALLATION MANUAL INSTALLATION MANUAL If you want to position flammable material above your fireplace, you must follow these minimum distances. Mantel 0 mm 150 mm 50 mm 200 mm 100 mm 250 mm 150 mm 300 mm 200 mm 350 mm 250 mm 400 mm 300 mm...
- Page 26 INSTALLATION MANUAL A-A ( 1:5 ) Applicable distance requirements for flammable material around the fireplace: Fireplace opening Cement board / Skamotec Wall Face of finished wall Designed by Checked by Approved by Min. between edge of opening and wall 26 - GB...
-
Page 27: Adjusting The Base Frame
INSTALLATION MANUAL Adjusting the base frame If instead of the standard frame (6 mm), a thicker base frame is used, the height can be adjusted on the brackets. See image. GB - 27... -
Page 28: Fitting Secondary Burners
INSTALLATION MANUAL Fitting secondary burners The burners must be set down over the pipe that sticks through the perforated plate. NB: There is a left burner and a right burner. This means that it is important that the burners are positioned as shown, i.e. -
Page 29: Arranging Ceramic "Logs" And Embers Layer
INSTALLATION MANUAL Arranging ceramic “logs” and embers layer It is very important that you follow this when positioning ceramic “logs” and the embers layer in the fireplace. Failure to carry this out correctly will result in a flame profile that is less than optimal. -
Page 30: Arranging Ceramic "Logs" And The Embers Layer
INSTALLATION MANUAL Arranging ceramic “logs” and the embers layer Below you can see the different ceramic “logs” that are used specifically with your fireplace. First, find the model number on your fireplace’s information plate and then the guide for laying the parts correctly. -
Page 31: Visio 70-43-39 3S - Visio 70-43-39 Lc - Visio 70-43-39 Rc - Visio 70-43 F (Visio 3)
INSTALLATION MANUAL Visio 70-43-39 3S – Visio 70-43-39 LC – Visio 70-43-39 RC – Visio 70-43 F (Visio 3) You will find these ceramic logs in the package: (NB! Must not be used with this model) Procedure: 1. Start by securing two burners in the fireplace’s 2. - Page 32 INSTALLATION MANUAL 3. Next, spread the glass stones (both the 4. Spread the embers layer (both the grey and rounded and ‘broken’ glass stones) across the the black) across both the glass stones and area with the LED light. the base plate with the holes. Ensure that you do not cover the pilot area and the holes there.
-
Page 33: Visio 90-55-39 3S - Visio 90-55-39 Lc - Visio 90-55-39 Rc - Visio 90-55 F (Visio 4)
INSTALLATION MANUAL Visio 90-55-39 3S – Visio 90-55-39 LC – Visio 90-55-39 RC – Visio 90-55 F (Visio 4) You will find these ceramic logs in the package: Procedure: 1. Start by securing two burners in the fireplace’s 2. Place the filaments on the pilot area to base plate (see the section Fitting secondary create an ember effect. - Page 34 INSTALLATION MANUAL 3. Next, spread the glass stones (both the 4. Spread the embers layer (both the grey and rounded and ‘broken’ glass stones) across the the black) across both the glass stones and area with the LED light. the base plate with the holes. Ensure that you do not cover the pilot area and the holes there.
-
Page 35: Visio 160-45-32 3S - Visio 160-45-32 Lc - Visio 160-45-32 Rc - Visio 160-45 F (Visio 5)
INSTALLATION MANUAL Visio 160-45-32 3S – Visio 160-45-32 LC – Visio 160-45-32 RC – Visio 160-45 F (Visio 5) You will find these ceramic logs in the package: GB - 35... - Page 36 INSTALLATION MANUAL Procedure: 1. Start by securing four burners in the fireplace’s base plate as shown in the image (see the section Fitting secondary burners for a more detailed procedure). 2. Next, spread the glass stones (both the rounded and the ‘broken’ glass stones) across the area with the LED light.
- Page 37 INSTALLATION MANUAL 4. Place the filaments on the pilot area to create an ember effect. 5. Position log no. 10 as shown in the image. 6. Position log no. 1 (with the recess) over the left burner. GB - 37...
- Page 38 INSTALLATION MANUAL 7. Position log no. 2 (with the recess) over the right burner. 8. Position log no. 6 so that it rests on log no. 10. 9. Position log no. 3 so that it rests on log no. 6. 10.
- Page 39 INSTALLATION MANUAL 11. Position log no. 4 so that it rests on log no. 6. 12. Position log no. 8 (with the recess ) over the outer left burner. 13. Position log number 9 (with the recess) over the outer right burner. 14.
-
Page 40: Visio 43-49-65 Rd - Visio 43-49-65 T (Visio 6)
INSTALLATION MANUAL Visio 43-49-65 RD – Visio 43-49-65 T (Visio 6) You will find these ceramic logs in the package: (NB! Must not be used with this model) Procedure: 1. Start by securing two burners in the fireplace’s 2. Place the filaments on the pilot area to create base plate (see the section Fitting secondary an ember effect. - Page 41 INSTALLATION MANUAL 5. Position log no. 3 as shown in the image. 6. Position log no. 4 as shown in the image. 7. Position log no. 5 as shown in the image. 8. Position log no. 2 (with the recess) over the left burner.
-
Page 42: Visio 40-55-90 Rd - Visio 40-55-90 T (Visio 7)
INSTALLATION MANUAL Visio 40-55-90 RD – Visio 40-55-90 T (Visio 7) You will find these ceramic logs in the package: (NB! Must not be used with this model) Procedure: 1. Start by securing two burners in the fireplace’s 2. Place the filaments on the pilot area to create base plate (see the section Fitting secondary an ember effect. - Page 43 INSTALLATION MANUAL 5. Position log no. 3 as shown in the image. 6. Position log no. 4 as shown in the image. 7. Position log no. 5 as shown in the image. 8. Position log no. 2 (with the recess) over the left burner.
-
Page 44: Fitting The Frame
INSTALLATION MANUAL Fitting the frame When the logs and embers layer are correctly positioned in the gas fireplace, refit the glass as described in the section “Removing the glass”. Lastly, fit the frame on fireplace. Procedure to fit the frame: 1. -
Page 45: Start-Up: Control Box, Power Supply, Receiver And Remote Control
INSTALLATION MANUAL Start-up: Control box, power supply, receiver and remote control The following electrical parts accompany this gas fireplace: Control box for LED Power supply/adapter Receiver Remote control light Connection of control box for LED light The control box is positioned behind the inspection hatch. -
Page 46: Remote Control
INSTALLATION MANUAL Remote control In this section you can learn how to set up the remote control for the gas fireplace. Inserting batteries in the remote control The remote control uses 2 x AAA 1.5 V batteries. When using the fireplace for the first time in the year, you should replace the batteries. -
Page 47: Connection Of Myfire Wi-Fi-Box
INSTALLATION MANUAL Connection of MyFire wi-fi-box If you wish to use more than the accompanying remote control, Visio Gas can also be remotely controlled using an app on a smartphone or tablet. To do this you must connect a MyFire wi-fi-box. MyFire wi-fi-box (accessory) To connect the MyFire wi-fi-box with the receiver, which is positioned behind the inspection hatch,... -
Page 48: Configuration Of The Myfire App
INSTALLATION MANUAL Configuration of the MyFire app Read this section to learn how to configure the MyFire app on your smart phone or tablet. When you configure the MyFire app, you must use your SSID key and code for the wireless network (wi-fi). - Page 49 INSTALLATION MANUAL To connect the MyFire-wi-fi-box to the wi-fi router (home network) you must ensure that: • The home network is accessible. • The name and code for the network is correct. • The wi-fi-router SSID key is not hidden. •...
-
Page 50: Starting The Gas Fireplace
INSTALLATION MANUAL Starting the gas fireplace Learn how to start up the gas fireplace after installation in this section. Pressure test The fireplace is pre-set to provide the correct amount of heat (kW), which is described under the specifications. There is no need for further adjustments. “Inlet pressure” (supply pressure to the gas block) and “Burner pressure”... -
Page 51: Functional Test When Lighting The Fire For The First Time
INSTALLATION MANUAL Mark off the gas type on information plate on the fireplace. It is either natural gas, propane gas or town gas. Functional test when lighting the fire for the first time Read this section to learn how to check the function of the start-up of your gas fireplace. 1. -
Page 52: Lighting For First Time
INSTALLATION MANUAL Lighting for first time See the separate user manual for how to use the remote control. Before lighting the fire for the first time, ensure that all of the packaging, labels etc. are removed from the fireplace and the glass is cleaned. Light the gas fireplace and allow it to burn on high heat for a couple of hours. -
Page 53: Service And Maintenance
Service procedure Switch off the fireplace and shut off the gas supply. Make sure the fireplace is completely cold before you begin. RAIS/ATTIKA cannot be held liable for injuries that result from touching a hot fireplace. Service procedure proposal: 1. Protect the floor by laying out a blanket or other covering. - Page 54 If the glass has a layer of soot, clean the glass using a special glass cleaner which can be purchased from your RAIS dealer. However, be aware that non-reflecting glass must never be cleaned using special glass cleaner – only use water. Only clean the glass when the oven is cold.
-
Page 55: Warranty
• RAIS/ATTIKA is not liable for faults or defects caused by the installation of the gas fireplace. The authorised installation technician is responsible for approving the position of the fireplace, choice of materials and installation of the flue pipe. -
Page 56: Accessories
3713507 - MyFire wi-fi Box incl. cable (App-based control of the stove) Spare parts list If spare parts other than those recommended by RAIS/ATTIKA are used, the warranty is rendered void. All replaceable parts can be purchased as spare parts from your RAIS/ATTIKA dealer. Item number... - Page 57 INSTALLATION MANUAL Item number Description Product name 3245007 VISIO 3 SIDE GLASS L/R STD Visio Gas 70 3S/LC/RC/F 3245008MON VISIO 4 FRONT GLASS STD Visio Gas 90 3S/LC/RC/F 3245009 VISIO 4 SIDE GLASS L/R STD Visio Gas 90 3S/LC/RC/F 3245010MON VISIO 5 FRONT GLASS STD Visio Gas 160 3S/LC/RC/F 3245011...
-
Page 58: Technical Information
INSTALLATION MANUAL Technical information Country specific gas types and pressure Country Natural gas AT-Austria I2H, G20 at 20 mbar I3P(50),G31 at 50 mbar;I3B/P(50),G30/G31 at 50 mbar BE-Belgium I2E+, G20/G25 at 20/25 mbar I3+,G31/G31 at 28/37 mbar; I3P(37),G31 at 37 mbar; I3B/P(30),G30/G31 at 30 mbar BG-Bulgaria I2H, G20 at 20 mbar... - Page 59 INSTALLATION MANUAL Country Natural gas LT-Lithuania I2H, G20 at 20 mbar I3+,G31/G31 at 28/37 mbar; I3P(37),G31 at 37 mbar; I3B/P(30),G30/G31 at 30 mbar LU-Luxembourg I2E, G20 at 20 mbar LV -Latvia I2H, G20 at 20 mbar MT-Malta I3B/P(30),G30/G31 at 30 mbar NL-The Netherlands I2L, G25 at 25 mbar I3P(50),G31 at 50 mbar;...
-
Page 60: Technical Data
INSTALLATION MANUAL Technical data Visio 70/43 F - Visio 70/43/39 3S - Visio 70/43/39 LC - Visio 70/43/39 RC Gas type G20/G25 G25/G25.3 G20/G25 I2H, I2E I2E+ I2L / I2EK I2ELL (Natural gas - LNG) I2(43.46 -45.3 MJ/ m3 (0°C)) Supply Pressure mbar 20/25... - Page 61 INSTALLATION MANUAL Gas type G30/G31 G30/G31 I3B/P(30) I3P(50) I3P(37) I3P(30) (Liquid petroleum gas - LPG) Supply Pressure mbar 30 / 37 Nominal Heat Input 10.5 10.5 10.5 10.5 Gross (Hs) Nominal Heat Input Net (Hi) Consumption m³/hr 0.295 0.295 / 0.38 0.38 0.38 Burner Pressure...
- Page 62 INSTALLATION MANUAL Visio 90/55 F - Visio 90/55/39 3S - Visio 90/55/39 LC - Visio 90/55/39 RC Gas type G20/G25 G25/G25.3 G20/G25 I2H, I2E I2E+ I2L / I2EK I2ELL (Natural gas - LNG) I2(43.46 -45.3 MJ/ m3 (0°C)) Supply Pressure mbar 20/25 Nominal Heat Input...
- Page 63 INSTALLATION MANUAL Gas type G30/G31 G30/G31 I3B/P(30) I3P(50) I3P(37) I3P(30) (Liquid petroleum gas - LPG) Supply Pressure mbar 30 / 37 Nominal Heat Input 14.4 14.4 14.4 14.4 11.5 Gross (Hs) Nominal Heat Input 12.9 12.9 12.9 12.9 10.3 Net (Hi) Consumption m³/hr 0.4 / 0.51...
- Page 64 INSTALLATION MANUAL Visio 160/45 F - Visio 160/45/32 3S - Visio 160/45/32 LC - Visio 160/45/32 RC Gas type G20/G25 G25/G25.3 G20/G25 I2H, I2E I2E+ I2L / I2EK I2ELL (Natural gas - LNG) I2(43.46 -45.3 MJ/ m3 (0°C)) Supply Pressure mbar 20 / 25 Nominal Heat Input...
- Page 65 INSTALLATION MANUAL Gas type G30/G31 G30/G31 I3B/P(30) I3P(50) I3P(37) I3P(30) (Liquid petroleum gas - LPG) Supply Pressure mbar 30 / 37 Nominal Heat Input 22.4 22.4 22.4 19.5 Gross (Hs) Nominal Heat Input 20.5 17.4 Net (Hi) Consumption m³/hr 0.62 0.62 / 0.78 0.78 0.78...
- Page 66 INSTALLATION MANUAL Visio 43/49/65 RD - Visio 43/49/65 T Gas type G20/G25 G25/G25.3 G20/G25 I2H, I2E I2E+ I2L / I2EK I2ELL (Natural gas - LNG) I2(43.46 -45.3 MJ/ m3 (0°C)) Supply Pressure mbar 20/25 Nominal Heat Input 14.5 14.5 / 13.3 13.3 12.0 Gross (Hs)
- Page 67 INSTALLATION MANUAL Gas type G30/G31 G30/G31 I3B/P(30) I3P(50) I3P(37) I3P(30) (Liquid petroleum gas - LPG) Supply Pressure mbar 30 / 37 Nominal Heat Input 14.4 14.4 14.4 14.4 11.5 Gross (Hs) Nominal Heat Input 12.9 12.9 12.9 12.9 10.3 Net (Hi) Consumption m³/hr 0.4 / 0.51...
- Page 68 INSTALLATION MANUAL Visio 40/55/90 RD - Visio 40/55/90 T Gas type G20/G25 G25/G25.3 G20/G25 I2H, I2E I2E+ I2L / I2EK I2ELL (Natural gas - LNG) I2(43.46 -45.3 MJ/ m3 (0°C)) Supply Pressure mbar 20/25 Nominal Heat Input 14.5 14.5 / 13.3 13.3 12.0 Gross (Hs)
- Page 69 INSTALLATION MANUAL Gas type G30/G31 G30/G31 I3B/P(30) I3P(50) I3P(37) I3P(30) (Liquid petroleum gas - LPG) Supply Pressure mbar 30 / 37 Nominal Heat Input 14.4 14.4 14.4 14.4 11.5 Gross (Hs) Nominal Heat Input 12.9 12.9 12.9 12.9 10.3 Net (Hi) Consumption m³/hr 0.4 / 0.51...
-
Page 70: Performance Declaration
DECLARATION OF PERFORMANCE INSTALLATION MANUAL 70 - GB... - Page 71 DECLARATION OF PERFORMANCE INSTALLATION MANUAL GB - 71...
- Page 72 DECLARATION OF PERFORMANCE INSTALLATION MANUAL 72 - GB...
- Page 73 DECLARATION OF PERFORMANCE INSTALLATION MANUAL GB - 73...
- Page 74 DECLARATION OF PERFORMANCE INSTALLATION MANUAL 74 - GB...
-
Page 75: Declaration Of Conformity
DECLARATION OF CONFORMITY INSTALLATION MANUAL GB - 75... - Page 76 DECLARATION OF CONFORMITY INSTALLATION MANUAL 76 - GB...
-
Page 77: Troubleshooting
INSTALLATION MANUAL TROUBLESHOOTING TROUBLESHOOTING See the troubleshooting section in the user guide. GB - 77... -
Page 78: Dimensional Drawings And Installation Drawings
INSTALLATION MANUAL Dimensional drawings and installation drawings RAIS Visio Gas 70-43-39 3S 484** 438,5 RAIS Visio Gas 70-43-39 3S-6541 78 - GB... -
Page 79: Rais Visio Gas 70-43-39 Lc
INSTALLATION MANUAL RAIS Visio Gas 70-43-39 LC 484** 438,5 RAIS Visio Gas 70-43-39 LC-6541 GB - 79... -
Page 80: Rais Visio Gas 70-43-39 Rc
INSTALLATION MANUAL RAIS Visio Gas 70-43-39 RC 484** 438,5 RAIS Visio Gas 70-43-39 RC-6541 80 - GB... -
Page 81: Rais Visio Gas 70-43 F
INSTALLATION MANUAL RAIS Visio Gas 70-43 F 484** 342,5 RAIS Visio Gas 70-43F-6541 GB - 81... -
Page 82: Rais Visio Gas 90-55-39 3S
INSTALLATION MANUAL RAIS Visio Gas 90-55-39 3S 1087 484** 543,5 RAIS Visio Gas 90-55-39 3S-6541 82 - GB... -
Page 83: Rais Visio Gas 90-55-39 Lc
INSTALLATION MANUAL RAIS Visio Gas 90-55-39 LC 484** 543,5 1036 RAIS Visio Gas 90-55-39 LC-6541 GB - 83... -
Page 84: Rais Visio Gas 90-55-39 Rc
INSTALLATION MANUAL RAIS Visio Gas 90-55-39 RC 484** 543,5 1036 RAIS Visio Gas 90-55-39 RC-6541 84 - GB... -
Page 85: Rais Visio Gas 90-55 F
INSTALLATION MANUAL RAIS Visio Gas 90-55 F 484** 451,5 RAIS Visio Gas 90-55 F-6541 GB - 85... -
Page 86: Rais Visio Gas 160-45-32 3S
INSTALLATION MANUAL RAIS Visio Gas 160-45-32 3S 1787 414** 1467 1677 893,5 1787 RAIS Visio Gas 160-45-32 3S-6541 86 - GB... -
Page 87: Rais Visio Gas 160-45-32 Lc
INSTALLATION MANUAL RAIS Visio Gas 160-45-32 LC 414** 1467 1636 893,5 1736 RAIS Visio Gas 160-45-32 LC-6541 GB - 87... -
Page 88: Rais Visio Gas 160-45-32 Rc
INSTALLATION MANUAL RAIS Visio Gas 160-45-32 RC 414** 1467 1636 893,5 1736 RAIS Visio Gas 160-45-32 RC-6541 88 - GB... -
Page 89: Rais Visio Gas 160-45 F
INSTALLATION MANUAL RAIS Visio Gas 160-45 F 1690 414 ** 1467 1598 801,5 1690 RAIS Visio Gas 160-45 F-6541 GB - 89... -
Page 90: Rais Visio Gas 43-49-65 Rd
INSTALLATION MANUAL RAIS Visio Gas 43-49-65 RD 522** RAIS Visio Gas 43-49-65 RD-6541 90 - GB... -
Page 91: Rais Visio Gas 43-49-65 T
INSTALLATION MANUAL RAIS Visio Gas 43-49-65 T 522** 761,5 RAIS Visio Gas 43-49-65 T-6541 GB - 91... -
Page 92: Rais Visio Gas 40-55-90 Rd
INSTALLATION MANUAL RAIS Visio Gas 40-55-90 RD 492** 1037 1090 RAIS Visio Gas 40-55-90 RD-6541 92 - GB... -
Page 93: Rais Visio Gas 40-55-90 T
INSTALLATION MANUAL RAIS Visio Gas 40-55-90 T 1051 492** 1000 RAIS VIsio Gas 40-55-90 T-6541 GB - 93... -
Page 94: Examples Of Extraction Solutions
INSTALLATION MANUAL Examples of flue solutions Vertical roof terminal Distance “V” 500 mm – 12 m (min–max) 94 - GB... - Page 95 INSTALLATION MANUAL Vertical room terminal/existing chimney with bend (renovation drawing) (Flexible smoke duct routing Ø100 AISA-316Ti) 1,2,3,6 Distance “H” = 0–3 m (min–max) Distance “V1” 500 mm – 10 m (min–max) Distance “V2” 500 mm – 10 m (min–max) Distance “V3” 500 mm – 10 m (min–max) Distance “V”...
- Page 96 INSTALLATION MANUAL Vertical pitched roof terminal Distance “H” = 0–3 m (min–max) Distance “V1” 500 mm – 10 m (min–max) Distance “V2” 500 mm – 10 m (min–max) Distance “V3” 500 mm – 10 m (min–max) Distance “V” (= V1+V2+V3) = 1.2–12.0 m (min–max) Distance “V”...
- Page 97 INSTALLATION MANUAL Vertical roof terminal with bend Distance “H” = 0–3 m (min–max) Distance “V1” 500 mm – 10 m (min–max) Distance “V2” 500 mm – 10 m (min–max) Distance “V” (= V1+V2) = 1–12 m (min–max) Distance “V” = 2 x “H” (min) GB - 97...
- Page 98 INSTALLATION MANUAL Existing chimney (renovation drawing) (Flexible smoke duct routing Ø100 AISA-316Ti) 1,2,3,6 Distance “V” 1–12 m (min–max) *Existing chimney/smoke duct must be inspected by a qualified technician. 98 - GB...
-
Page 99: Extraction Parts
INSTALLATION MANUAL Flue parts GB - 99... - Page 100 INSTALLATION MANUAL 100 - GB...
- Page 101 INSTALLATION MANUAL GB - 101...
- Page 102 INSTALLATION MANUAL 102 - GB...
-
Page 103: Information Plate
30 mbar RO, SE, SI, SK, TR AT, CH, CZ, DE, FR, SK G30↔G31 @ 10.5 I3B/P(50) 50 mbar Hergestellt für /Produced for: ATTIKA FEUER AG, Brunnmatt 16, CH-6330 Cham / RAIS A/S, Industrivej 20, DK-9900 Frederikshavn GB - 103... - Page 104 30 mbar RO, SE, SI, SK, TR AT, CH, CZ, DE, FR, SK G30↔G31 @ 14.4 I3B/P(50) 50 mbar Hergestellt für /Produced for: ATTIKA FEUER AG, Brunnmatt 16, CH-6330 Cham / RAIS A/S, Industrivej 20, DK-9900 Frederikshavn 104 - GB...
- Page 105 I3B/P(30) 30 mbar RO, SE, SI, SK, TR AT, CH, CZ, DE, FR, SK G30↔G31 @ I3B/P(50) 50 mbar Hergestellt für /Produced for: ATTIKA FEUER AG, Brunnmatt 16, CH-6330 Cham / RAIS A/S, Industrivej 20, DK-9900 Frederikshavn GB - 105...
- Page 106 30 mbar RO, SE, SI, SK, TR AT, CH, CZ, DE, FR, SK G30↔G31 @ 14.4 I3B/P(50) 50 mbar Hergestellt für /Produced for: ATTIKA FEUER AG, Brunnmatt 16, CH-6330 Cham / RAIS A/S, Industrivej 20, DK-9900 Frederikshavn 106 - GB...
- Page 107 30 mbar RO, SE, SI, SK, TR AT, CH, CZ, DE, FR, SK G30↔G31 @ 14.4 I3B/P(50) 50 mbar Hergestellt für /Produced for: ATTIKA FEUER AG, Brunnmatt 16, CH-6330 Cham / RAIS A/S, Industrivej 20, DK-9900 Frederikshavn GB - 107...
- Page 108 INSTALLATION MANUAL 108 - GB...
Need help?
Do you have a question about the VISIO 4 Series and is the answer not in the manual?
Questions and answers