Table of Contents
Advertisement
Quick Links
Advertisement
Table of Contents

Subscribe to Our Youtube Channel
Related Manuals for RAIS VIVA L USA


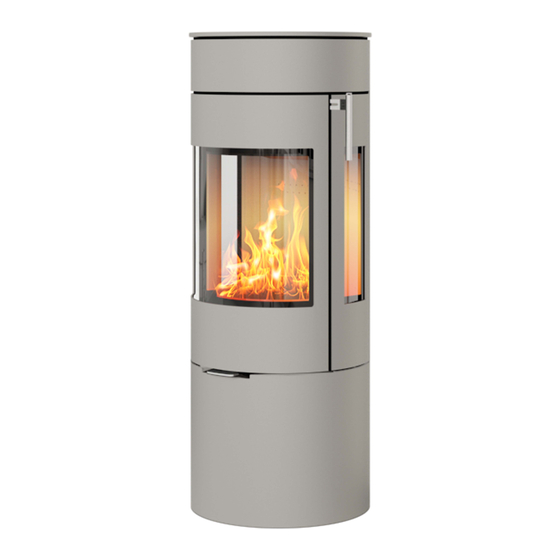
Summary of Contents for RAIS VIVA L USA
- Page 1 U S E R M A N U A L VIVA L USA...
-
Page 2: Spare Part Drawings
VIVA 100/120/160 L USA Sparepart drawing... -
Page 3: Spare Part Drawings
VIVA 100/120/160 L G USA Sparepart drawing... - Page 4 FIRE ENVIRONMENTALLY FRIENDLY! 5 Eco-friendly advices for sensible heating - common sense both environmentally and economically. 1. Effective lighting. Use small pieces of wood (fir tree) and a suitable fire lighter, for example paraffined wood wool/saw- dust. Open the air damper, so plenty of air is fed to the stove and the gases from the heated wood can burn rapidly.
-
Page 5: Table Of Contents
US English User Manual VIVA L USA LIST OF CONTENT - VIVA L USA OMNI report no. : # 0138WS017E Revision Date (DMY) : 22-02-2017 SPARE PART DRAWINGS ........2-3 INTRODUCTION . -
Page 6: Date (Dmy)
Introduction Congratulations on the purchase of your new RAIS woodburning stove. A RAIS woodburning stove is more than just a source of heat, it is a symbol of the emphasis you put on decorating your home with superiorly designed high-quality products. - Page 7 US English User Manual VIVA L USA U.S. ENVIRONMENTAL PROTECTION AGENCY Certified to comply with 2020 particulate emission standards using crib wood. 1.1 g/hr, Method 28R This wood heater needs periodic inspection and repair for proper operation. It is against federal regulations to operate this wood heater in a manner inconsistent with operating instructions in this manual.
-
Page 8: Specifications
US English User Manual VIVA L USA Specifications:... -
Page 9: Convection
Glass and replacement of glass. All RAIS stoves supplied with Robax® glass in the door. Robax® glass is a ceramic glass type suitable for stoves. The glass is installed from RAIS as an integral part of the door and stove. -
Page 10: Chimney
User Manual VIVA L USA Chimney RAIS stoves must be installed using a Class A UL 103 HT approved factory-built chimney system or a code-approved masonry chimney with a flue liner. In Canada, the appliance must be connected to a factory-built chimney conforming to CAN/ULC- S629. -
Page 11: Chimney
US English User Manual VIVA L USA Required Installation Components: A. Chimney Cap B. Insulated Chimney C. Storm Collar D. Roof Flashing E. Ceiling Support Box or Joist Shield/Firestop Spacer F. Chimney Connector For venting vertically into a Class A chimney, a single wall pipe (at least 24 gauge) may be used in the room where the stove is installed. -
Page 12: Installation
US English User Manual VIVA L USA f thIs stove Is not Installed properly a home fIre may result o reduce thIs rIsk please follow the dIrectIons for InstallatIon carefully Installation Precautions and Specifications Before installation, remember to consult your local building inspector or fire marshal to determine the need to obtain a permit. -
Page 13: Name Tag
US English User Manual VIVA L USA... - Page 14 US English User Manual VIVA L USA...
-
Page 15: Clearances To Combustible Walls
D: Ceiling Height 22.5” / 572mm Model: VIVA L USA. VIVA L G USA. VIVA L CA USA. VIVA L G CA USA Model: VIVA L USA. VIVA L G USA. VIVA L CA USA. VIVA L G CA USA E: Front Wall / Furnishing 29”... - Page 16 **Rear/Top vent option US English User Manual VIVA L USA Ceiling ** Rear / Top vent option Celing Please refer to NFPA guidelines in USA and CAN/CSA B365-M91 in Canada. See further floor Évent arrière 21" 22" 12" 11" 14"...
-
Page 17: Clearances To Non-Combustible Walls
US English User Manual VIVA L USA Clearance to non-combustible wall We recommend a minimum clearance to non-combustible material of at least 2” (50 mm) so that cleaning is easy. The cleaning door of the chimney should be acces- sible at all times. -
Page 18: Firewood
US English User Manual VIVA L USA Firewood Only burn wood that has been seasoned for at least one full year (two years is bet- ter). If the wood has not been seasoned or dried, energy will be lost in evaporating the water held in the wood. -
Page 19: Ventilation
US English User Manual VIVA L USA Ventilation Extractor fans may not be fitted in the same room as the stove, as this can cause the stove to emit smoke and fumes into the room. The stove requires a permanent and adequate air supply to operate safely and ef- fectively. - Page 20 US English User Manual VIVA L USA Place the stove with the the “Front” label 90° to the back wall. this is the midle position of the swivel base. When the swivel base has been released, the stove can turn 45° right or left from the label. when the stove is installed, remove the label by pulling it out.
-
Page 21: Adjusting The Combustion Air
US English User Manual VIVA L USA Adjusting the combustion air All RAIS stoves are equipped with an easy-to-use handle for adjusting the air con- trol. Alternatively, the stove can be equipped with a self-regulating, automatic CleverAIR ™ air damper. -
Page 22: Using The Stove
US English User Manual VIVA L USA REMEMBER THE STOVE IS HOT WHILE IN OPERATION, SO KEEP CHILDREN, CLOTING, AND FURNITURE AWAY. CONTACT WITH A STOVE WHEN BURNING MAY CAUSE SKIN BURNS.Warn- ing: Do not fire the stove with the door open! Using the stove Only use wood as fuel as described in the firewood section of this manual. -
Page 23: Carbon Monoxide Detectors
First Fire Your new RAIS should be broken into gently for top performance and to prevent paint damage, cracks in the firebrick, and excessive wear and tear. Start with a small fire (never overload the firebox) to allow the materials to get accustomed to the higher temperatures, and then gradually increase the intensity. -
Page 24: Lighting And Fuelling
US English User Manual VIVA L USA Lighting and fuelling PLEASE NOTE! If the air system is connected, the valve must remain open ".Top-down" lighting • Start by placing 3-4 pieces of chopped wood - approx. 1 ½-2 kg in the bottom of the combustion chamber. - Page 25 US English User Manual VIVA L USA...
-
Page 26: Fuel Caution
Never use gasoline, gasoline-type lantern fuel, kerosene, charcoal lighter fluid, naphtha, engine oil, or similar liquids to start or freshen up a fire in your RAIS stove. Keep all such liquids well away form the stove while it is in use. -
Page 27: Warning
Advarsel US English User Manual VIVA L USA Hvis brændet kun ulmer eller ryger, og der tilføres for lidt luft, udvikles der Hvis brændet kun ulmer eller ryger, og der tilføres for lidt luft, udvikles der Hvis brændet kun ulmer eller ryger, og der tilføres for lidt luft, udvikles der Warning!! uforbrændte røggasser. -
Page 28: Change Of Chimney Connection
US English User Manual VIVA L USA Change of chimney connection The stove is delivered ready for top outlet, but may be changed to back outlet in the following way: Sample photos Strike out the knock out plate at the rear of stove. -
Page 29: Maintaining The Installation
US English User Manual VIVA L USA Maintaining the installation. Establish a routine for the fuel, wood burner and firing tecnique. Check daily for creosote build-up until experience shows how often you need to clean to be safe. Be aware that the hotter the fire the less creosote is deposited, and weekly cleaning may be necessary in mild weather even though monthly cleaning may be enough in the coldest months. - Page 30 US English User Manual VIVA L USA Then lower the left side, and take it out. Remove the Back left skamol corner, by carefully lifting it up and out. Remove the steel skamol bracket, holding the Upper baffle plate. Remove the Upper baffle plate, by lowering the left side.
-
Page 31: Disposal Of Ashes
US English User Manual VIVA L USA reosote ormatIon and eed for emoval hen wood Is burned slowly It produces tar and other organIc vapors whIch combIne wIth expelled moIsture to form creosote creosote vapors condense In the relatIvely cool chImney flue of a slow... -
Page 32: Trouble Shooting
US English User Manual VIVA L USA Trouble Shooting Smoke seeping through the door: • Not enough draft in the chimney (<12 Pa) • Check if there are any obstructions in the chimney or the wind pipe • Check whether the kitchen exhaust fan is in use and if so, turn it off and open the... -
Page 33: Accessories
US English User Manual VIVA L USA Accessories 2711590 - Swivel base - VIVA 8142390 - Flue collar for Swivel base 6KG heat accumulating stones for 2796521 - Viva 120 L 4-pcs. set. 2876521 - Viva 160 L 16-pcs. set... -
Page 34: Spare Part List Viva 100/120/160
Spare parts VIVA 100/120/160 L USA Only use the specified original Rais components! If spare parts other than those recommended by RAIS are used, the warranty is voided. All replaceable parts can be bought as spare parts from your RAIS distributor. - Page 35 Spare parts VIVA 100/120/160 L G USA (model with sideglasses) Only use the specified original Rais components! If spare parts other than those recommended by RAIS are used, the warranty is voided. All replaceable parts can be bought as spare parts from your RAIS distributor.
- Page 36 RAIS A/S Industrivej 20 DK-9900 Frederikshavn www.rais.com...
Need help?
Do you have a question about the VIVA L USA and is the answer not in the manual?
Questions and answers