Advertisement
Available languages
Available languages
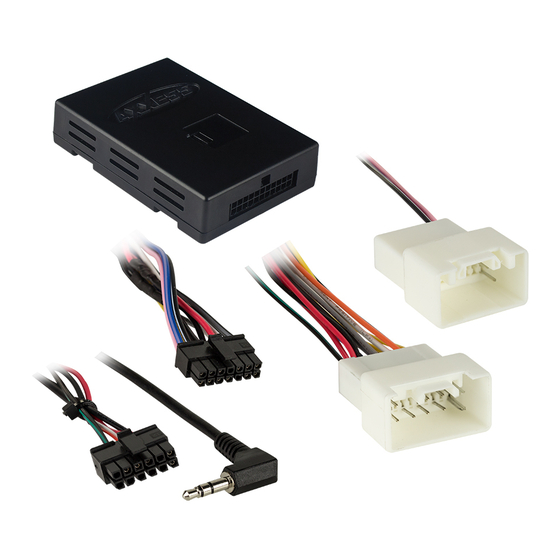
INTERFACE COMPONENTS
• MITO-03 interface
• MITO-03 harness
• 16-pin harness
APPLICATIONS
Mitsubishi
Lancer
2014-2017
Outlander
2014-2019
AxxessInterfaces.com
Mitsubishi Amplifier Interface
2014-2019
INTERFACE FEATURES
• Pre-wired ASWC-1 harness (ASWC-1 sold separately)
• Designed for amplified models
• Retains balance and fade
• Micro-B USB updatable
© COPYRIGHT 2019 METRA ELECTRONICS CORPORATION
MITO-03
I N S T A L L A T I O N I N S T R U C T I O N S
TABLE OF CONTENTS
Connections ............................................................2
Installation .............................................................3
Programming .........................................................3
Adjustments ...........................................................3
TOOLS & INSTALLATION ACCESSORIES REQUIRED
• Crimping tool and connectors, or solder gun,
solder, and heat shrink • Tape • Wire cutter
• Zip ties
Product Info
REV. 9/25/19 INSTMITO-03
Advertisement
Table of Contents

Related Manuals for Axxess MITO-03


Summary of Contents for Axxess MITO-03
- Page 1 • Retains balance and fade • Crimping tool and connectors, or solder gun, • Micro-B USB updatable solder, and heat shrink • Tape • Wire cutter • Zip ties INTERFACE COMPONENTS • MITO-03 interface • MITO-03 harness • 16-pin harness Product Info APPLICATIONS Mitsubishi...
- Page 2 If the ASWC-1 is not being used, disregard this harness. If it will be used, refer to the vehicle specific ASWC-1 instruction from Axxess Interfaces for radio • Connect the Purple wire to the right rear positive speaker output.
- Page 3 3. Connect the MITO-03 harness to the MITO-03 interface, and then to the wiring harness in ADJUSTMENTS the vehicle. 4. If an ASWC-1 (sold separately) will be used, do not connect it until the MITO-03 is programmed and fully functional. Audio Level Adjustment 1. Locate the potentiometer on the interface by the 16-pin harness.
- Page 4 MITO-03 I N S T A L L A T I O N I N S T R U C T I O N S Having difficulties? We’re here to help. Contact our Tech Support line at: 386-257-1187 Or via email at: techsupport@metra-autosound.com...
- Page 5 DE INSTALACIÓN REQUERIDOS • Actualizable Micro-B USB • Herramienta de ponchadora y conectores, o pistola de soldadura, soldadura y termocontracción • Cinta • Cortacables • Zip lazos COMPONENTES DE LA INTERFASE • Interfase MITO-03 • Arnés MITO-03 • Arnés de 16 pins Información del producto APLICACIONES Mitsubishi...
- Page 6 • Conecte el cable púrpura con la salida positiva de la bocina derecha de atrás. Axxess Interfaces para las conexiones de radio y la programación. No tenga en cuenta el arnés • Conecte el cable púrpura/negro con la salida negativa de la bocina derecha de atrás.
- Page 7 3. Conecte el arnés MITO-03 a la interfaz MITO-03 y luego al arnés de cableado del vehículo. 4. Si se utilizará un ASWC-1 (se vende por separado), no lo conecte hasta que el MITO-03 esté programado y sea completamente funcional.
- Page 8 MITO-03 I N S T R U C C I O N E S D E I N S T A L A C I Ó N ¿Tienes dificultades? Estamos aquí para ayudar. Póngase en contacto con nuestra línea de soporte técnico en: 386-257-1187 O por correo electrónico a:...
Need help?
Do you have a question about the MITO-03 and is the answer not in the manual?
Questions and answers