
Subscribe to Our Youtube Channel
Related Manuals for AMP Lighting AviatorPro


Summary of Contents for AMP Lighting AviatorPro
- Page 1 INSTALLATION & MAINTENANCE GUIDE Low Voltage Landscape Lighting ® AviatorPro ® BDL-GGT1-B-BZ Help Hotline: 1-813-978-3900 • Mon-Fri 9am-6pm (EST) w w w. a m p l i g h t i n g . c o m...
-
Page 2: Important Safety Instructions
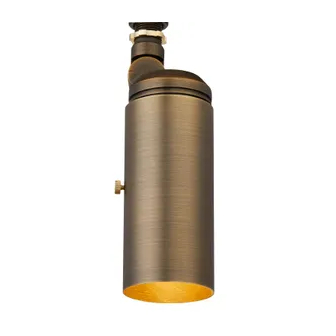
INSTALLATION & MAINTENANCE GUIDE AviatorPro ® BDL-GGT1-B-BZ Important Safety Instructions: Read Before Installation This luminaire is intended for installation in accordance with local codes and the National Electric Code (NEC). Failure to adhere to these codes and instructions may result in serious injury, property damage and void the warranty. - Page 3 Package Contents A. (1) Fixture Parts Required (sold separately) C. (1) LED MR16 Lamp A. (3) Self-tapping Screws B. (3) Wall Anchors Product Dimensions 3.10” 5.00” 2.55” Remove Glare Guard and Shield from Fixture Use a screwdriver to loosen the set screw.
- Page 4 INSTALLATION & MAINTENANCE GUIDE AviatorPro ® BDL-GGT1-B-BZ Install Lamp Insert the lamp with correct wattage and type marked on the fixture label. CAUTION: Do not exceed maximum wattage marked on luminaire label. Socket NOTE: DO NOT touch lamp with bare hands. Use soft cloth to handle lamp.
- Page 5 INSTALLATION & MAINTENANCE GUIDE AviatorPro ® BDL-GGT1-B-BZ Install Fixture Determine your desired location for Wall Anchors the fixture. Pass self-tapping screws through the holes on the surface mount. Thread self-tapping screws into the wall surface to secure the Self-tapping Screw fixture.
- Page 6 INSTALLATION & MAINTENANCE GUIDE AviatorPro ® BDL-GGT1-B-BZ Adjust Angle of Lamp Loosen the knuckle and adjust the Knuckle luminaire to your desired angle and Adjustment then tighten adjustment screw. Install/Replace Lamp Loosen the set screw on the glare guard, then remove the glare guard and lens to expose the lamp.
- Page 7 customersupport@amplighting.com • 813.978.3900 –7–...
- Page 8 Help Hotline: 1-813-978-3900 • Mon-Fri 9am-6pm (EST) Specifications and product details subject to change without notice. © Copyright 2019, AMP Lighting, Lutz FL USA 33549 • All rights reserved. ® customersupport@amplighting.com • 813.978.3900 w w w. a m p l i g h t i n g . c o m IS-AAC-AL-GGT1-B-BZ-ver1.pdf...
Need help?
Do you have a question about the AviatorPro and is the answer not in the manual?
Questions and answers