
Related Manuals for Akai AK-T70R32


Summary of Contents for Akai AK-T70R32
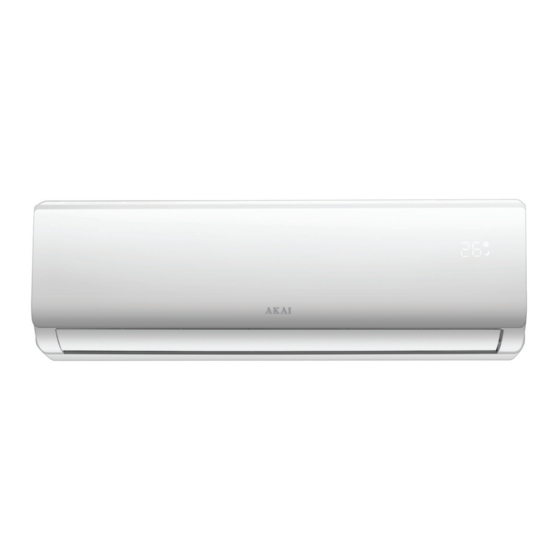
- Page 1 PROTECT YOUR WARRANTY This unit must be installed by a registered, licensed installer as required by Government regulations. 7.3kW Reverse Cycle Inverter Split System Air Conditioner USER MANUAL Model Number AK-T70R32...
-
Page 2: Table Of Contents
Contents General Safety Instructions Product Overview Getting Started Instructions FAQs and Troubleshooting Guide Other Useful Information After Sales Support 1300 886 649 (AUS) 0800 836 761 (NZ) | info@tempo.org... -
Page 3: General Safety Instructions
General Safety Instructions IMPORTANT SAFETY INSTRUCTIONS READ CAREFULLY AND KEEP FOR FUTURE REFERENCE Read this manual thoroughly before getting the appliance installed, maintained or using it. The manual contains many important safety statements concerning use of this appliance. Always read and observe all safety statements. They reduce the risk of fire, electric shock and injury when correctly adhered to. - Page 4 General Safety Instructions (Cont.) • Damaged cord: If the supply cord is damaged, it must be replaced by the manufacturer, its service agent or similarly qualified persons in order to avoid a hazard. Contact our after sales support centre for advice. •...
- Page 5 General Safety Instructions (Cont.) • Air flow direction: The airflow direction should be properly adjusted. The flaps should be directed downwards in heating and upwards in cooling mode. • Plants and animals: Do not direct the airflow onto plants or animals, as long and direct exposure to cold air from an air conditioner could adversely affect them.
- Page 6 General Safety Instructions (Cont.) Important safety precautions concerning refrigerant R32 WARNING: Combustible & Dangerous This symbol alerts you to take care as the appliance contains a flammable refrigerant: R32 (difluoromethane). Take extra care when installing the unit and when carrying out maintenance. The refrigerant used in this air conditioner, R32, is an odourless hydrocarbon gas with a high level of environmental compatibility, with just...
- Page 7 General Safety Instructions (Cont.) • After installation, the service technician must: – Check that air cannot enter the refrigerant system – Check for refrigerant leaks when moving the air conditioner – Carry out a test cycle under controlled conditions after installing the unit and record the operating data.
-
Page 8: Product Overview
Product Overview • This Reverse Cycle Inverter Air Conditioner is made up of an indoor and outdoor unit (Fig. 1 & 2), which are connected through properly insulated copper pipes (not supplied) and an electrical connecting cable. • The indoor unit is installed on a wall of the room to be air conditioned (it must not be installed in a laundry or similar room with high humidity levels). - Page 9 Product Overview (Cont.) Fig. 2: Outdoor unit Outdoor unit 6 Outdoor unit rating label 7 Terminal block cover 8 Air outlet grille 9 Gas valve 10 Liquid valve NOTE: Due to continued product improvement, images and illustrations in this manual may vary slightly from the product purchased.
- Page 10 Product Overview (Cont.) Fig. 3: Installation hardware (not to scale) Installation hardware Other inclusions (not pictured) 11 Power cable Remote control holder (for wall-mounting) 12 Copper nuts (x4) AAA Batteries (x2) 13 Drainage pipe Instruction manual 14 Sealing colloid Installation manual 15 Pipe insulation (open tube) Warranty certificate 16 Binding tape...
-
Page 11: Getting Started
Getting Started Unpacking • When unpacking the appliance, keep the original packaging carton and materials in a safe place. It will help prevent any damage if the product needs to be transported in the future. • In the event it is to be disposed of, please recycle all packaging materials where possible. - Page 12 Getting Started (Cont.) How it works • The indoor air, sucked in by the fan, enters Fig. 4 the unit through the grille at the front panel and passes through a filter, which collects any dust (Fig. 4). • The air is then conveyed to the heat ex- changer, where it is cooled and dehumidified or heated, depending on your setting.
- Page 13 Getting Started (Cont.) Preparing the remote control Inserting/replacing batteries • Remove the cover from the battery compart- Fig. 5 ment by sliding it off the housing (Fig. 5). • Insert two new AAA (1.5V) batteries, ensuring the polarities (+/-) match the markings. •...
-
Page 14: Instructions
Instructions Indoor unit LED display Fig. 7 Function Temperature display Indicates the set temperature (in °C) Illuminates when the Timer function is Timer activated Illuminates when the Sleep function is Sleep activated NOTE: The shape and position of switches and indicators may vary slightly according to the model, but their function is the same. - Page 15 Instructions (Cont.) Remote control buttons Fig. 8 Button Function Start or stop operation. POWER MODE Select the mode of operation. Select the fan speed. Activate or deactivate the deflectors SWING [R/L] right/left air movement. MUTE Activate the mute function. HEALTH Not available on this model.
- Page 16 Instructions (Cont.) Remote control display Fig. 9 Symbol Indicator AUTO mode indicator COOLING mode indicator DEHUMIDIFYING / DRY mode indicator FAN ONLY mode indicator HEATING mode indicator TIMER ON indicator TIMER OFF indicator I FEEL indicator DEFLECTOR or FLAP SWING indicator AUTO FAN indicator LOW FAN SPEED indicator...
- Page 17 Instructions (Cont.) Using the remote control • Direct the remote control towards the Fig. 10 signal receptor at the front panel of the indoor unit, as illustrated (Fig. 10). • Ensure that there are no objects between the remote control and the signal receptor at the front of the air conditioner’s indoor unit.
- Page 18 Instructions Instructions (Cont.) Airflow swing control The airflow direction (Fig. 12) ensures even Fig. 12 distribution of cool air in the room (or warm air, in heating mode). • Press the SWING to activate the button deflectors for right/left air movement. •...
- Page 19 Instructions (Cont.) COOLING mode Fig. 14 In COOLING mode (Fig. 14) the air conditioner will cool down the room to your set temperature and reduce the humidity in the air at the same time. • To activate the cooling function, press the MODE button on the remote control until the cooling symbol ( ) appears on the...
- Page 20 Instructions (Cont.) IMPORTANT! • If the unit is fitted with a ‘Hot Start’ function, startup will be delayed for a few seconds to ensure an immediate output of hot air. • In HEATING mode the unit will automatically activate a defrost cycle if there is an excessive amount of frost on the condenser.
- Page 21 Instructions (Cont.) DRY (DEHUMIDIFYING) mode Fig. 17 In DRY mode (Fig. 17), the unit will alternate cooling and fan only cycles to reduce the humidity in the air, making the room more comfortable. • To activate DRY mode, press the MODE button until the dry symbol ( ) appears in the display.
- Page 22 Instructions (Cont.) TIMER ON function Fig. 20 Program the timer to switch the unit on automatically (Fig. 20). • To program the start time, make sure the unit is switched off. • Press the TIMER button on the remote control for the first time to activate the timer, then use the to set button...
- Page 23 Instructions (Cont.) TIMER OFF function Fig. 22 Program the timer to switch the unit off automatically (Fig. 22). • To program the switch-off time, the air conditioner must be switched on. • Press the TIMER button on the remote control for the first time to activate the timer, then use the to set button...
- Page 24 Instructions (Cont.) AUTO mode Fig. 24 In AUTO mode (Fig. 24) the fan speed and temperature are set automatically according to the room temperature (tested by the temperature sensor incorporated in the indoor unit) to ensure and maintain comfortable conditions. •...
- Page 25 Instructions (Cont.) I SET function Fig. 26 In COOLING, HEATING, FAN and DRY mode you can save certain settings as your favourites so you do not have to select them again the next time you want to run the air conditioner on these settings.
- Page 26 Instructions (Cont.) Self-clean function Fig. 27 An automatic self-clean function helps clean away dirt and bacteria that has accumulated on the evaporator. • Press the CLEAN part (right side) of the button to enter this function in any mode (Fig. 27). •...
-
Page 27: Faqs And Troubleshooting Guide
FAQs and Troubleshooting Guide If you experience problems with your air conditioner, check for solutions in the table below. If the problem cannot be solved by simple adjustments, contact our after sales support centre, or contact a licensed air conditioner technician. Problem Possible cause and solution The appliance... - Page 28 FAQs and Troubleshooting Guide (Cont.) Problem Possible cause and solution Insufficient airflow, • Unsuitable temperature setting — adjust the fan by either hot or cold. pressing the FAN button. • Obstructed air intakes and outlets — clear any obstructions. • Dirty air filter — clean the filter, see ‘Air filters’, p. 30. •...
-
Page 29: Other Useful Information
Other Useful Information Service required! Switch off the appliance immediately, cut off the power supply and call our after sales support line for service in the event of: • Loud and unusual noises during operation. • Faulty electronic control board. •... - Page 30 Other Useful Information (Cont.) Fig. 29 Air filters After running for a particular period, the air conditioner will display “CL” and remind you to clean the filter (Fig. 29). • Open the front panel following the direction of the arrow (Fig. 30). •...
- Page 31 Other Useful Information (Cont.) Replacing the batteries The batteries in the remote control will need replacing when the indoor unit no longer emits a confirmation beep when you press a button. Insert two new AAA (1.5V) batteries, ensuring the polarities (+/-) match the markings. For more details and an illustration, please refer to page 13.
- Page 32 Other Useful Information (Cont.) Technical specifications AK-T70R32 Model Number Cooling 7300W Capacity Heating 8000W Cooling 8.2A Current Heating 9.4A Cooling 13.5A Rated Current (AS/NZS 60335) Heating 14.5A Cooling 1800W Power Input Heating 2100W Cooling 2800W Rated Power Input (AS/NZS 60335)
- Page 33 Other Useful Information (Cont.) Licensed installer details Please ask your licensed installer/electrician to fill in the details below (or in the INSTALLATION manual) so you have them on record should you need to contact the installer in the future. Proof of professional installation is also required for warranty claims. Please fill in the details below: Name of licensed installer: ..............
- Page 34 This page has been left blank intentionally. After Sales Support 1300 886 649 (AUS) 0800 836 761 (NZ) | info@tempo.org...
- Page 35 This page has been left blank intentionally. After Sales Support 1300 886 649 (AUS) 0800 836 761 (NZ) | info@tempo.org...
- Page 36 Warranty returns Should you for any reason need to return this product for a warranty claim, make sure to include all accessories with the product. Product does not work? If you encounter problems with this product, or if it fails to perform to your expectations, make sure to contact our After Sales Support Centre on 1300 886 649.
Need help?
Do you have a question about the AK-T70R32 and is the answer not in the manual?
Questions and answers