Table of Contents
Advertisement
Advertisement
Table of Contents

Related Manuals for Icom IC-F29SR2


Summary of Contents for Icom IC-F29SR2
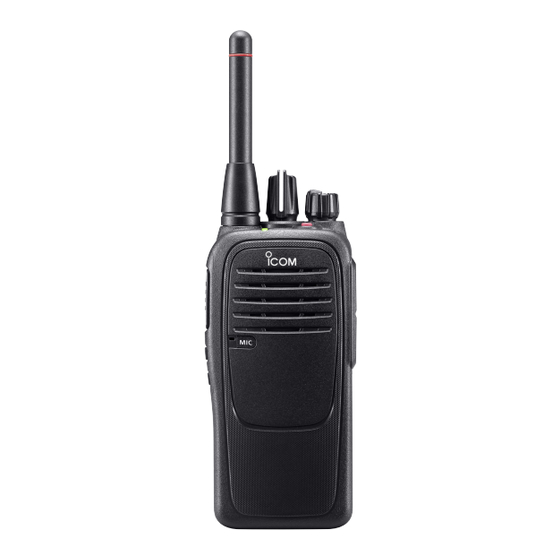
- Page 1 OPERATING GUIDE PMR446 TRANSCEIVER iF29SR2...
-
Page 2: Table Of Contents
INTRODUCTION Thank you for choosing this Icom product. This product is designed and built with Icom’ s state of the art technology and craftsmanship. With proper care, this product should provide you with years of trouble-free operation. IMPORTANT FIRST, CAREFULLY READ THE BASIC MANUAL that is provided with the transceiver. -
Page 3: Accessories
ACCESSORIES Section Accessory attachments D Battery pack Attach or detach the battery pack, as shown to the To attach To detach right. Battery release buttons To attach the battery pack: 1. Place the tabs on the bottom of the battery pack into the slots at the bottom of the transceiver. -
Page 4: D Jack Cover
ACCESSORIES Accessory attachments (Continued) D Jack cover NOTE: The transceiver meets IP67 requirements for dust-tight and waterproof protection only when the jack cover or the optional HM-168LWP speaker microphone is attached. To attach the jack cover: 1. Place the jack cover over the speaker-microphone jack. -
Page 5: Programmable Key Functions
PROGRAMMABLE KEY FUNCTIONS Section Programmable key functions If you use the CS-F29SR2 programming software (purchase separately), you can assign the functions described below to [TOP], [Upper], and [Lower]. [TOP] NOTE: Refer to the instruction manual that comes with the transceiver for the default settings of these keys. -
Page 6: Led Indicator
LED INDICATOR Section About the LED indicator The LED indicator indicates the status of various parameters of the transceiver as follows: (Reference: R is Red, G is Green, O is Orange) • Programming (reading or writing data) R G R G R G R G R G R G R G R G R G R G R G R G R G R G R G R G •... -
Page 7: Settings
SETTINGS Section Setting the Beep function You can turn the Beep function ON or OFF. When it is OFF, the channel announcement is also turned OFF. NOTE: Turn ON the Beep function when you set the beep and announce level, ringer level, microphone [ROTARY SELECTOR] gain, squelch level, VOX function, VOX gain, or the group code number, to check the current level setting... -
Page 8: Setting The Beep And Announcement Level
SETTINGS Setting the beep and announcement level You can adjust the beep and announcement level between 1 and 5, or 1 (linked) and 5 (linked). When a linked option is selected, the beep audio level is adjustable by rotating [VOL]. [ROTARY SELECTOR] NOTE: Turn ON the Beep function before you start setting the beep and announcement level. -
Page 9: Setting The Ringer Level
SETTINGS Setting the ringer level You can adjust the ringer level between 1 ~ 5, or 1 (Linked) ~ 5 (Linked). When a linked option is selected, the ringer audio level is adjustable by rotating [VOL]. [ROTARY SELECTOR] NOTE: Turn ON the Beep function before you start setting the ringer level. -
Page 10: Setting The Microphone Gain
SETTINGS Setting the microphone gain You can adjust the microphone gain. Higher values make the microphone more sensitive to the user voice. NOTE: Turn ON the Beep function before you start [ROTARY SELECTOR] setting the microphone gain. (p. 6) [VOL] 1. -
Page 11: Setting The Squelch Level
SETTINGS Setting the squelch level You can adjust the squelch level. The squelch circuit mutes the received audio, depending on the squelch level setting. NOTE: Turn ON the Beep function before you start [ROTARY SELECTOR] setting the squelch level. (p. 6) [VOL] 1. -
Page 12: Setting The Vox Function
SETTINGS Setting the VOX function You can turn the VOX function ON or OFF. The VOX function automatically switches between receive and transmit during voice operation. NOTE: Turn ON the Beep function before you start [ROTARY SELECTOR] setting the VOX function. (p. 6) [VOL] 1. -
Page 13: Setting The Vox Gain
SETTINGS Setting the VOX gain You can adjust the VOX gain. Higher values make the VOX function more sensitive to the user voice. NOTE: Turn ON the Beep function before you start setting the VOX gain. (p. 6) [ROTARY SELECTOR] 1. -
Page 14: Setting The Group Code Number
SETTINGS Setting the group code number D CTCSS tone setting This transceiver has 50 preset CTCSS tones. CTCSS operation enables silent standby, since you will only receive calls from group members using the [ROTARY SELECTOR] same CTCSS tone. 1. Rotate [VOL] to turn OFF the transceiver. [VOL] 2. -
Page 15: D Dtcs Code Setting
SETTINGS Setting the group code number (Continued) D DTCS code setting This transceiver has 84 preset DTCS codes. DTCS operation enables silent standby, since you will only receive calls from group members using the same DTCS code. [ROTARY SELECTOR] 1. Rotate [VOL] to turn OFF the transceiver. 2. - Page 16 A-7360-3EU 1-1-32 Kamiminami, Hirano-ku, Osaka 547-0003, Japan © 2017 Icom Inc.
Need help?
Do you have a question about the IC-F29SR2 and is the answer not in the manual?
Questions and answers