Table of Contents
Advertisement
Advertisement
Chapters
Table of Contents

Related Manuals for Festo DGE-25 ZR RF Series


Summary of Contents for Festo DGE-25 ZR RF Series
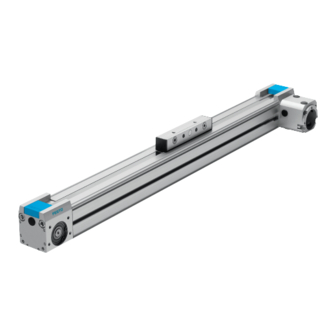
- Page 1 Toothed belt axis DGE-…-ZR-RF Repair instructions (en) 7DGE_ZR_RFb_en...
- Page 2 Imprint Version: 7DGE_ZR_RFb_en (11.2011) Copyright: ©Festo AG & Co. KG P.O. Box D-73726 Esslingen Editorial team: SC-S Tel.: +49 (0) 711/347-0 E-mail: service_international@festo.com Internet: http://www.festo.com The reproduction, distribution and utilisation of this document as well as the communication of its contents to others without explicit authorisation is prohibited.
- Page 3 These repair instructions have been prepared with care. Festo AG & Co. KG does not, however, accept liability for any errors in these repair instructions or their consequences. Likewise, no liability is accepted for direct or consequential damage resulting from improper use of the products.
-
Page 4: Table Of Contents
4.4.2 Installing the drive covers 4.5 Assembly and function check 4.5.1 No-load torque Maintenance Cleaning and lubricating the toothed belt axis 5.2 Checking and lubricating the roller bearing guide Toothed belt pretension Tools Standard tools Special tools Devices and meters Devices for in-house assembly Liability 4 / 44 Festo 7DGE_ZR_RFb_en... -
Page 5: Important Information
• Operating instructions This document contains important Can be found in the online spare information about the professional parts catalogue on the Festo web- Contain information about the repair of the toothed belt axis of the site (spareparts.Festo.com). installation and removal of the type DGE-…-ZR-RF in the sizes 25, 40... -
Page 6: General Safety Information
Repairs must only be carried out in conjunction with these repair instructions as well as the respective operating instructions for the device. Note Instead of carrying out the repair yourself, your local Festo sales office offers the option of having the repair carried out by Festo. Environment Components and equipment replaced as part of a repair must be disposed of in accordance with the locally valid envi- ronmental protection regulations. -
Page 7: Types And Part Numbers
534391 axes DGE-… -ZR-RF can be found in the product catalogue DGE-40-…-ZR-RF 534392 or on the Festo website (www.Festo.com). DGE-63-…-ZR-RF 534393 Overview of variants and mounting directions This diagram provides an overview of the mounting directions and variants for the toothed belt axis. -
Page 8: Component Overview
10 - GK 11 - GV This diagram is intended only to provide an overview of the individual components. To order spare and wearing parts, please use the online spare parts catalogue on the Festo website (spareparts.Festo.com). 8 / 44 Festo 7DGE_ZR_RFb_en... - Page 9 Tightening torque 2.9 Nm Sealing cap Coupling housing Centring ring Coupling housing module See operating instructions for assembly Coupling module See operating instructions for assembly Socket head screw DIN 912-M4×12-8.8 Tightening torque 2.9 Nm Coupling Festo 7DGE_ZR_RFb_en 9 / 44...
-
Page 10: Dge-40
10 - GK 11 - GV This diagram is intended only to provide an overview of the individual components. To order spare and wearing parts, please use the online spare parts catalogue on the Festo website (spareparts.Festo.com). 10 / 44 Festo 7DGE_ZR_RFb_en... - Page 11 Tightening torque 5.9 Nm Sealing cap Coupling housing Centring ring Coupling housing module See operating instructions for assembly Coupling module See operating instructions for assembly Socket head screw DIN 912-M5×6-8.8 Tightening torque 10.5 Nm Coupling Festo 7DGE_ZR_RFb_en 11 / 44...
-
Page 12: Dge-63
10 - GK 11 - GV This diagram is intended only to provide an overview of the individual components. To order spare and wearing parts, please use the online spare parts catalogue on the Festo website (spareparts.Festo.com). 12 / 44 Festo 7DGE_ZR_RFb_en... - Page 13 Tightening torque 24 Nm Sealing cap Coupling housing Centring ring Coupling housing module See operating instructions for assembly Coupling module See operating instructions for assembly Socket head screw DIN 912-M5×20-10.9 Tightening torque 25 Nm Coupling Festo 7DGE_ZR_RFb_en 13 / 44...
-
Page 14: Repair Steps
– Check which closed-loop controller settings can be adapted (e.g. jerk limitation, smoothing of the acceleration profile). 14 / 44 Festo 7DGE_ZR_RFb_en... -
Page 15: Replacing The Toothed Belt
– Use the Festo “Positioning Drives” sizing software, available via the Festo website (www.Festo.com). • Ambient conditions/material resistance Check whether the ambient temperature is within the permissible range. - Page 16 4.1.4 “Cutting the toothed belt to length”. • Pull the old toothed belt carefully out of the axis until the new belt is pulled through it. • Separate the old toothed belt from the new one. 16 / 44 Festo 7DGE_ZR_RFb_en...
- Page 17 Tighten the threaded pin using the appropriate torque (see table). Note It is critical that the torques be observed. Excessive torques will bend the clamping body. Type Torque DGE-25 0.5 Nm DGE-40 4.0 Nm DGE-63 5.0 Nm Festo 7DGE_ZR_RFb_en 17 / 44...
- Page 18 If the clamping bodies protrude, the socket head screws will not reach the minimum screw-in depth and could be torn out. Note Set the toothed belt pretension as described in section 4.1.2 “Checking and setting the toothed belt pretension”. 18 / 44 Festo 7DGE_ZR_RFb_en...
-
Page 19: Checking And Setting The Toothed Belt Pretension
• If necessary, push the relevant clamp piece through the recess in the cylinder barrel between the toothed belt and cylinder barrel. It must touch the clamp- ing body. Festo 7DGE_ZR_RFb_en 19 / 44... - Page 20 The pretension of the toothed belt is not an indicator of wear! The values specified here are based on a new toothed belt. The pretension of the toothed belt diminishes during storage and operation. This is a normal process and not an indication of wear. 20 / 44 Festo 7DGE_ZR_RFb_en...
-
Page 21: Additional Information On Checking The Toothed Belt Pretension
The frequency value is calculated using the specified values for strand force (pretension force), belt mass and length of the free belt strand according to the following formula: Natural frequency of the freely oscillating strand [Hz] Strand length [m] Pretension force [N] Weight per metre of the toothed belt [kg/m] Festo 7DGE_ZR_RFb_en 21 / 44... -
Page 22: Cutting The Toothed Belt To Length
4.1.4 Cutting the toothed belt to length The toothed belt is ordered from the online spare parts catalogue (spareparts.Festo.com) using the appropriate part number (dependent on the size and version of the toothed belt axis). The part number is a module number and is dependent on the size of the toothed belt axis. You must specify the stroke and the type of slide required for your toothed belt axis in addition to the part number when ordering. -
Page 23: Dismantling The Toothed Belt Axis
Loosen the socket head screw in the clamping bodies and unscrew it. • Move the slide to the left and right to release the clamping bodies from the slide. • Push the two clamping bodies out of the axis through the recesses in the cylinder barrel. Festo 7DGE_ZR_RFb_en 23 / 44... - Page 24 Loosen the socket head screws in the drive cover and unscrew them. • Pull the drive cover away from the cylinder barrel. Note The drive covers are connected to the cylinder barrel using spring pins. A certain amount of force is required to pull them away. 24 / 44 Festo 7DGE_ZR_RFb_en...
-
Page 25: Dismantling The Drive Covers
Lever the sealing discs out of the drive cover. • Remove the retaining ring opposite the drive trunnion. Note In the case of toothed drive shafts with two or no drive trunnions, you can remove any retaining ring. Festo 7DGE_ZR_RFb_en 25 / 44... - Page 26 • Insert the retaining ring. Note Check that the retaining ring is correctly positioned. • Press the sealing discs into the drive cover so that the deep-groove ball bearings have extra protection against soiling. 26 / 44 Festo 7DGE_ZR_RFb_en...
-
Page 27: Profile Track Roller Guide
6 Eccentric trunnions Note Festo recommends, as a basic principle, that you always replace the entire drive if a defect occurs in the profile track roller guide. Replacement of the roller bearings is undertaken by users at their own risk. -
Page 28: Dismantling The Slides
(horizontal/vertical) as well as the specified maximum drive torque or the feed force correspond to the permissible values for the toothed belt axis used. • Use the Festo “Positioning Drives” sizing software, available via the Festo website (www.Festo.com), to size the toothed belt axis. Note Block-shaped acceleration profiles (no jerk limitation) cause high peaks in the drive force that can lead to overloading of the drive. - Page 29 You may need to hold the eccentric screw from underneath. Alternatively you can use an Allen socket and a socket with milled spanner flat (see section 6.1 “Standard tools” and section 6.4 “Devices for in-house assembly”). • Remove the flat washers from the hole. Festo 7DGE_ZR_RFb_en 29 / 44...
- Page 30 Do not mix up the fitting washers and flat washers. The mounting directions can be disregarded since the track rollers are sym- metrical. • Push the new track rollers followed by the fitting washers onto the centring screws. 30 / 44 Festo 7DGE_ZR_RFb_en...
- Page 31 The oil-impregnated wiper seals are important for the operating performance of the roller guide and must not be omitted. If they are not fitted, the wear on the roller guide will be increased and the toothed belt axis will suffer premature failure. Festo 7DGE_ZR_RFb_en 31 / 44...
-
Page 32: Setting The Track Roller Pretension
The pretension is set without the toothed belt attached. • Unscrew the hex nuts of the eccentric screws and apply Loctite 243 to them. • Replace the hex nuts on the eccentric screws, but do not tighten them yet. 32 / 44 Festo 7DGE_ZR_RFb_en... - Page 33 40 Nm • Repeat the setting process on the second track roller. • Check the pretension setting by measuring the displacement force of the slide (see section 4.3.3 “Measuring the displacement force of the slide”). Festo 7DGE_ZR_RFb_en 33 / 44...
-
Page 34: Measuring The Displacement Force Of The Slide
Guide the toothed belt through the toothed belt guide in the cylinder barrel as shown. The toothed profile must be facing upwards. Warning Note the minimum bending radii when handling the toothed belt (see section 4.1.4 “Cutting the toothed belt to length”). 34 / 44 Festo 7DGE_ZR_RFb_en... - Page 35 • Insert the left-hand end of the toothed belt together with the clamping plate into the clamping body. • Align the toothed belt axially with the centre of the clamping body. Festo 7DGE_ZR_RFb_en 35 / 44...
- Page 36 Note the minimum bending radius for assembly and storage (see section 4.1.4 “Cutting the toothed belt to length”). • Push the clamping body into the axis through the recess in the cylinder barrel. 36 / 44 Festo 7DGE_ZR_RFb_en...
-
Page 37: Assembly And Function Check
It must be possible to move the slide without much resistance or jerking when idle, without a drive attached or load con- nected. This check is based on the technician's instinct and experience. It is not possible to specify precise test values. Festo 7DGE_ZR_RFb_en 37 / 44... -
Page 38: Maintenance
A detailed description of the steps for care and maintenance can be found in the operating instructions. Additional infor- mation on assembly aids and lubricants can be found on the Festo website (www.Festo.com). Cleaning and lubricating the toothed belt axis No machine components need to be greased when repairing the toothed belt axis. -
Page 39: Tools
The following special tools are required to repair and maintain the toothed belt axis: Designation Additional Festo order no. Photo information One-hand high-pressure Pinpoint nozzle for 647 958 grease gun miniature funnel-type lubrication nipple See “Assembly aids” in the online spare parts catalogue on the Festo website (www.Festo.com). Festo 7DGE_ZR_RFb_en 39 / 44... -
Page 40: Devices And Meters
Available exclusively from Schaefer Technik GmbH www.schaefer-technik.de – Acoustic belt tension meter (frequency meter) for measurement without test equipment. Not available via Festo. Manufacturer/supply: Optibelt GmbH www.optibelt.com or comparable meter from other manufacturers. 200926 Mounts the acoustic test probe in the test equipment by means of clamping friction. -
Page 41: Devices For In-House Assembly
-0,05 -0,05 g=20 mm g=30 mm Liability The General Terms and Conditions of Festo AG & Co. KG, which can be viewed on the Festo website (www.Festo.com) apply. Festo 7DGE_ZR_RFb_en 41 / 44... - Page 42 Festo shall have the correspond- status as the last printed edition. and 2 completely to a third party. The third ing rights of use. Festo permits the user to party must be made explicitly aware of these 2. Furthermore, Festo cannot be held liable use the electronic documentation under the conditions of use.
- Page 45 Toothed belt pretension test equipment Operating instructions (en) 7Tension01_TBb_en...
- Page 46 Imprint Version: 7Tension01_TBb_en (11.2011) Copyright: ©Festo AG & Co. KG P.O. Box D-73726 Esslingen Editorial team: SC-S Tel.: +49 (0) 711/347-0 E-mail: service_international@festo.com Internet: http://www.festo.com The reproduction, distribution and utilisation of this document as well as the communication of its contents to others without explicit authorisation is prohibited.
- Page 47 These operating instructions have been prepared with care. Festo AG & Co. KG does not, however, accept liability for any errors in these operating instructions or their consequences. Likewise, no liability is accepted for direct or consequential damage resulting from improper use of the product.
- Page 48 6.3.1 Checking the toothed belt pretension 6.3.2 Setting the toothed belt pretension 6.3.3 Additional information on checking the toothed belt pretension Quick guide DGE-…-ZR(-KF) DGE-…-ZR-RF EGC-…-TB-KF ELGA-TB-G-… Maintenance and care Accessories and ordering data Assembly and function check Tools Liability 4 / 20 Festo 7Tension01_TBb_en...
-
Page 49: Important Information
This sign provides information on the steps required for environmentally friendly use of materials and equipment, as well as the guidelines and regulations that may need to be observed. Documents This sign contains references to other sections or documents containing additional information. Festo 7Tension01_TBb_en 5 / 20... -
Page 50: General Safety Information
Mounting kit for ELGA-TB 1 Position stop bolt 2 Position stop, left 3 Position stop, right 4 Distance piece for ELGA-TB-G-120 5 Distance piece for ELGA-TB-G-80 6 Distance piece for ELGA-TB-G-70 7 Transport holder for distance pieces 6 / 20 Festo 7Tension01_TBb_en... -
Page 51: Function And Application
Checking and setting the toothed belt pretension must only be performed on toothed belt axes whose electric power units have been disconnected. The information in the corresponding repair instructions for the respective toothed belt axis apply to the steps described in these operating instructions. Festo 7Tension01_TBb_en 7 / 20... -
Page 52: Application And Operation
• If necessary, push the relevant clamp piece through the recess in the cylinder barrel between the toothed belt and the cylinder barrel. It must touch the clamping body. 8 / 20 Festo 7Tension01_TBb_en... -
Page 53: Preparing The Test Equipment
25 mm EGC-50-TB-KF 25 mm EGC-70-TB-KF 25 mm EGC-80-TB-KF 25 mm EGC-120-TB-KF 25 mm EGC-185-TB-KF 25 mm ELGA-TB-G-70 25 mm ELGA-TB-G-80 25 mm ELGA-TB-G-120 25 mm • Screw the plunger housing back into the test equipment. Festo 7Tension01_TBb_en 9 / 20... -
Page 54: Attaching The Stop Bolts
13 mm DGE-40-ZR-RF 13 mm DGE-63-ZR-RF 13 mm EGC-50-TB-KF 8 mm EGC-70-TB-KF 11 mm EGC-80-TB-KF 13 mm EGC-120-TB-KF 13 mm S.L.: C, S.R.: F EGC-185-TB-KF 13 mm ELGA-TB-G-70 11 mm ELGA-TB-G-80 11 mm ELGA-TB-G-120 11 mm 10 / 20 Festo 7Tension01_TBb_en... -
Page 55: Attaching The Test Equipment
Push the test equipment forwards so that the position stops on the cylinder barrel touch the toothed belt axis. Note (DGE-…-ZR-KF) The guide rail of the toothed belt axis must be pointing forwards to check the toothed belt pretension. Festo 7Tension01_TBb_en 11 / 20... - Page 56 • Push the test equipment backwards so that it is touching the guide rail. Note The test equipment is attached to the guide rail by means of integrated magnets. 12 / 20 Festo 7Tension01_TBb_en...
- Page 57 • Push the measurement head of the acoustic belt tension meter all the way into the holder on the test equipment. Festo 7Tension01_TBb_en 13 / 20...
-
Page 58: Checking And Setting The Toothed Belt Pretension
The belt must be able to oscillate freely. Push clamp pieces into the toothed belt axis if necessary (see section 6.2 “Preparing the test equipment”). To assess the toothed belt pretension, several measurements should be made to balance out any measurement tolerances. 14 / 20 Festo 7Tension01_TBb_en... -
Page 59: Setting The Toothed Belt Pretension
A force stimulus is applied to the toothed belt to start it oscillating. The natural frequency of the toothed belt generated in this way is recorded using a meter and displayed as a frequency value in hertz. Festo 7Tension01_TBb_en 15 / 20... -
Page 60: Quick Guide
25 mm S.L. 8 mm/A EGC-70-TB-KF 25 mm S.R. 11 mm/B EGC-80-TB-KF 25 mm S.L. 13 mm/C EGC-120-TB-KF 25 mm S.L. or S.R. 13 mm/S.L.: C, S.R.: F EGC-185-TB-KF 25 mm S.L. or S.R. 13 mm/E 16 / 20 Festo 7Tension01_TBb_en... -
Page 61: Elga-Tb-G
ELGA-TB-G-80 25 mm S.L. or S.R. 11 mm/E ELGA-TB-G-120 25 mm S.L. or S.R. 13 mm/E Maintenance and care If necessary, clean the toothed belt pretension test equipment using a soft cloth and gentle detergent. Festo 7Tension01_TBb_en 17 / 20... -
Page 62: Accessories And Ordering Data
TB-TE-EQ4/760460 (ELGA-TB) and test equipment TB-TE-EQ5/760461 (ERMB/EHMB). Assembly and function check After completing the setting work on the toothed belt axis, the correct function must be checked using the relevant chap- ters in the repair instructions. 18 / 20 Festo 7Tension01_TBb_en... -
Page 63: Tools
Refer to the repair instructions for the respective toothed belt axis for an overview of the tools and aids for setting the toothed belt pretension. Liability The General Terms and Conditions of Festo AG & Co. KG, which can be viewed on the Festo website (www.Festo.com) apply. Festo 7Tension01_TBb_en... - Page 64 Festo shall have the correspond- status as the last printed edition. and 2 completely to a third party. The third ing rights of use. Festo permits the user to party must be made explicitly aware of these 2. Furthermore, Festo cannot be held liable use the electronic documentation under the conditions of use.
Need help?
Do you have a question about the DGE-25 ZR RF Series and is the answer not in the manual?
Questions and answers