Table of Contents
Advertisement
Quick Links
Advertisement
Table of Contents

Related Manuals for Contec CPS-AO-1604LI


Summary of Contents for Contec CPS-AO-1604LI
- Page 1 CONPROSYS Analog Ouput Module CPS-AO-1604LI Hardware Manual CONTEC CO., LTD.
-
Page 2: Check Your Package
Check Your Package Thank you for purchasing the CONTEC product. This product consists of the items listed below. Check, with the following list, that your package is complete. If you discover damaged or missing items, contact your retailer. Product Configuration List - Product [CPS-AO-1604LI] …1... -
Page 3: Copyright
No part of this document may be copied or reproduced in any form by any means without prior written consent of CONTEC CO., LTD. CONTEC CO., LTD. makes no commitment to update or keep current the information contained in this document. -
Page 4: Table Of Contents
Analog Output (AO) .......................... 15 Nomenclature and Functions Nomenclature of Components ........................17 Component Functions ..........................18 LED Indicator ............................. 18 Analog Output Connector ......................... 18 Stack Bus ............................19 System Reference Specification .............................. 19 Physical Dimensions .......................... 20 CPS-AO-1604LI... - Page 5 List of Optional Products CPS-AO-1604LI Hardware Manual...
-
Page 6: Before Using The Product
No electrolytic capacitor Without an electrolytic capacitor, which has a limited life, we are creating the product with a longer life. How to use Visit our website for the CPS-MCS341 system setup guide. (http://www.contec.com) CPS-AO-1604LI Hardware Manual... -
Page 7: Customer Support
You can download updated driver software and differential files as well as sample programs in several languages. Note: For product information Contact your retailer if you have any technical questions regarding a CONTEC product or need its price, delivery time, or estimate information. Limited Two-Year Warranty CONTEC products are warranted by CONTEC CO., LTD. -
Page 8: Safety Precautions
WARNING indicates a potentially hazardous situation which, if not avoided, WARNING could result in death or serious injury. CAUTION indicates a potentially hazardous situation which, if not avoided, CAUTION may result in minor or moderate injury or in property damage. CPS-AO-1604LI Hardware Manual... -
Page 9: Handling Precautions
- Do not use or store this product in the presence of chemicals. - CONTEC reserves the right to refuse to service a product modified by the user. - In the event of failure or abnormality (foul smells or excessive heat generation), unplug the power cord immediately and contact your retailer. - Page 10 - To avoid electric shock, please do not touch the system with a wet hand. - The specification of this product is subject to change without notice for enhancement and quality improvement. Even when using this product continuously, be sure to read the manual of CONTEC’s website and understand the contents.
- Page 11 1 Before Using the Product CPS-AO-1604LI Hardware Manual...
-
Page 12: Setup
Figure 2.1. Unlock the fixed hooks-1 < 1 / 2 > (2) By using the screwdriver as leverage, move it upward in the direction of the arrow to unlock. ドライバー支点突起 Projection tip Figure 2.1. Unlock the fixed hooks-1 < 2 / 2 > CPS-AO-1604LI Hardware Manual... - Page 13 The point of the screwdriver Figure 2.2. Unlock the fixed hooks-2 < 1 / 2 > (2) Rotate the screwdriver 90-degree in either direction. The point of the screwdriver Figure 2.2. Unlock the fixed hooks-2 < 2 / 2 > CPS-AO-1604LI Hardware Manual...
-
Page 14: Affixing And Detaching Of The Stacking Devices
(3) Engage the rail on the left side of the stacking device with the rail on the right side of the mounted controller or of the other device. Then, slid the stacking device all the way toward DIN rail. Figure 2.3. Affixing the stacking device < 3 / 5 > (4) Lock the hooks of the stacking device. CPS-AO-1604LI Hardware Manual... - Page 15 2 Setup Figure 2.3. Affixing the stacking device < 4/ 5 > (5) Put back the end cover to the device. Figure 2.3. Affixing the stacking device < 5 / 5 > CPS-AO-1604LI Hardware Manual...
- Page 16 (2) Unlock the fixed hooks of the device. Figure 2.4. Detaching the stacking device < 2 / 3 > (3) With the hooks unlocked, pull it toward you. Figure 2.4. Detaching the stacking device < 3 / 3 > CPS-AO-1604LI Hardware Manual...
-
Page 17: Installation Conditions
Long-term usage might increase the temperature and lead to a malfunction or other troubles. - When using the product in a high temperature environment, its life time will be shorten. Perform the forced air cooling to counteract. CPS-AO-1604LI Hardware Manual... - Page 18 2 Setup Spaces between the product and surrounding objects (ambient temperature exemplar) 50mm 50mm 50mm *The measurement points are shown as the circles in the figures above. Figure 2.6. Spaces between the product and surrounding objects (exemplar) CPS-AO-1604LI Hardware Manual...
-
Page 19: Cable Connection
After the insertion, secure the wire rod with screws. Compatible wires are AWG 28 - 16. CAUTION Removing the connector plug by grasping the cable can break the wire. Approx. 9 - 10mm Figure 2.7. Cable connection CPS-AO-1604LI Hardware Manual... -
Page 20: Analog Output (Ao)
Analog Ground Figure 2.8. Connecting to a Floating Load (Flat Cable) Connector Module Cable Target FLOATING Analog Output SUPPLY 22 to 24V Max. Loading registor RL Analog Ground Figure 2.9. Connecting to a Fixed Load (Flat Cable) CPS-AO-1604LI Hardware Manual... - Page 21 In situations where the connecting cable is subject to the effects of noise, the accurate current output can fail. The connecting cable should be installed away from any source of noise. CPS-AO-1604LI Hardware Manual...
-
Page 22: Nomenclature And Functions
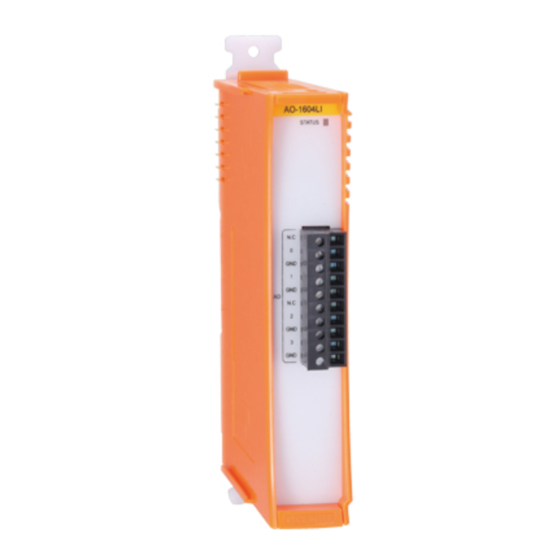
① STATUS ③ ② Figure 3.1. CPS-AO-1604LI 1. LED : Indicates the status of the product. 2. Analog Output : Use the 10-pin connector, included in this package. 3. Stack Bus: Used for the stacking module power supply and communication. -
Page 23: Component Functions
This pin is not connected. This indicates the analog output signals of AO2. Analog ground shares with 4 channels of analog output signals. This indicates the analog output signals of AO3. This indicates analog ground for output signals CPS-AO-1604LI Hardware Manual... -
Page 24: Stack Bus
15G half-sine shock for 11ms in X, Y, and Z directions (JIS C60068-2-27- Impact resistance compliant, IEC60068-2-27-compliant) *3 With the optional DIN rail fitting power supply : 10-55Hz (See the manual of optional power product for details) CPS-AO-1604LI Hardware Manual... -
Page 25: Physical Dimensions
4 System Reference Physical Dimensions 25.2 94.7 AO-1604LI S TA TUS [mm] Figure 4.1. Physical dimensions CPS-AO-1604LI Hardware Manual... - Page 26 CPS-PWD-90AW24-01 : DIN rail fitting power supply 90[w] (Input: 100 - 240VAC, Output: 24VDC 3.8 A) CPS-PWD-30AW24-01 : DIN rail fitting power supply 30[w] (Input: 100 - 240VAC, Output: 24VDC 1.3 A) * Visit the Contec website regarding information on the optional products CPS-AO-1604LI Hardware Manual...
- Page 27 3-9-31, Himesato, Nishiyodogawa-ku, Osaka 555-0025, Japan Japanese http://www.contec.co.jp/ English http://www.contec.com/ Chinese http://www.contec.com.cn/ No part of this document may be copied or reproduced in any form by any means without prior written consent of CONTEC CO., LTD. [01222016] Management No NA04661 Parts No...
Need help?
Do you have a question about the CPS-AO-1604LI and is the answer not in the manual?
Questions and answers