
Related Manuals for Hunter Stoves DI Lusso Eco R6 Cube


Summary of Contents for Hunter Stoves DI Lusso Eco R6 Cube
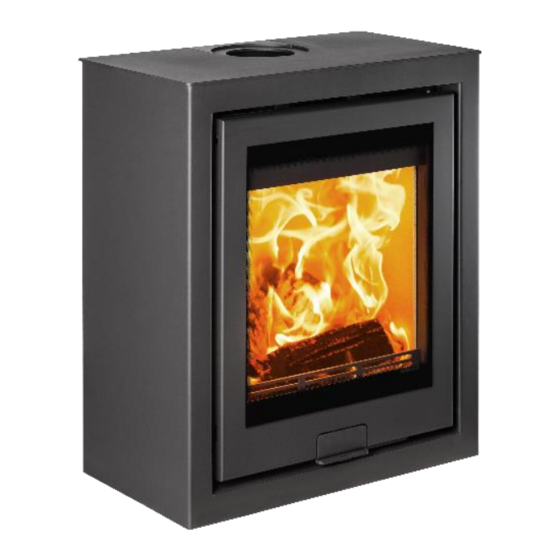
- Page 1 Eco R4 Cube Eco R5 Cube Eco R6 Cube Instructions for: Installation/Operating/Maintenance/Servicing JINDLECU REV A 01/11/18...
-
Page 2: Stove Models
STOVE MODELS ECO R4 ARCO ECO R4 QUATTRO EDDLC04A EDDLC04Q ECO R5 ARCO ECO R5 QUATTRO EDDLC05A EDDLC05Q ECO R6 ARCO ECO R6 QUATTRO EDDLC06A EDDLC06Q... -
Page 3: Table Of Contents
Welcome to the Hunter Stoves family and thank you for purchasing a Di Lusso stove. This stove was designed and built to be a high- performance heating appliance, and we hope it will bring you great enjoyment. The natural environment is important to us, so our stoves are manufactured to provide you with a clean and efficient burn that will keep you warm through cold winter nights. -
Page 4: Techincal Specification
Technical Specification Eco R4 Eco R5 Eco R6 Cube Cube Cube (Both) (Both) (Both) Energy Efficiency Class Nominal Heat Output Wood 4.9kW 6.3kW 6.2kW Energy Efficiency Efficiency Wood Mean CO (@13% O₂) Wood 0.09% 0.12% 0.09% Appliance Mass 105kg 156kg 146kg Recommended Fuels Wood... -
Page 5: Important Information
PLEASE ENSURE THAT IT IS COMPLETED PRIOR TO USE. General Guidance It is important that your stove is correctly installed and operated as Hunter Stoves Group cannot accept responsibility for any fault arising through incorrect installation, use, maintenance or servicing. -
Page 6: Safety
(e.g. anti-downdraught cowl). Carbon Monoxide Detector Hunter Stoves recommend a Carbon Monoxide Detector that conforms to the latest issue of BS EN 50292 is placed in the same room as the appliance. The installation of such an alarm is not considered as a substitute for regular maintenance or servicing or the appliance and Flue system. -
Page 7: Remove Internal Components
Removing Internal Components All internal components must be removed prior to fitting the stove. This will make handling the stove easier; allow access to fixings and the flue outlet; as well as protect the internal components from damage during the installation process. To open the stove door, pull on the door lever to release it from the magnet. - Page 8 5. Remove the three rear brick sections (Eco R4) and two rear bricks (Eco R5/Eco R6) noting their positions and orientation. 6. Lift up and remove the base brick(s) 7. Remove the Air Valve Cassette by removing the socket screws holding it in place, turning both air controls to the fully open position (clockwise) and then gently pulling on the fascia to slide the cassette out from under the firebox.
-
Page 9: Installation Procedure
Installation Procedure Note: If installing the direct air kit, follow the instructions supplied with the kit before. proceeding. If using installation method B, fit the flue heat shield to the back of the stove using the supplied screws. 2. Offer the stove into position and adjust the levelling feet as required. 3. - Page 10 6. Seal the flue adaptor/pipe to the flue collar using fire cement. 7. Refit the outer top plate and fixing screws to complete the installation. Eco R6 Only Unpack the baffle and identify the two halves. 2. Stack the two baffle halves with the right-hand baffle sat on top of the left-hand baffle as shown. 3.
-
Page 11: Appliance Dimensions
Appliance Dimensions ECO R4 CUBE ‘ ’ TOVE ODEL IMENSION IDED ECO R5 CUBE TOVE ODEL IMENSION ‘ ’ QUATTRO ECO R6 CUBE ‘ ’ TOVE ODEL IMENSION ARCO/QUATTRO... -
Page 12: Pre Installation Requirements
Pre-Installation Requirements LEASE CHECK THE FOLLOWING Any existing chimney/flue system must be confirmed as suitable for this appliance as defined in Building Regulations Document J. It must be swept and inspected, by a competent person (see notes), to confirm that is structurally sound and free from cracks and obstructions. The diameter of the Flue should not be less than 127mm and not more than 200mm. -
Page 13: Legal Requirements
Legal Requirements Hunter Stoves Group requests that before installation and/or use of this appliance that you read these instructions carefully to ensure that all the relevant requirements are fully understood. These instructions cover the basic principles to ensure satisfactory installation of the stove, although detail may need slight modification to suit particular local site conditions. - Page 14 ECO R6 EN13240 EN13240 NS FIRE WALL NS FIRE WALL FOR NORWAY ONLY (BELOW) Note: combustible material refers to any material that will degrade when subjected to heat e.g. plaster. No combustible material must be stored underneath the stove. Note: To achieve the specified distances to combustible materials, twin-wall insulated flue pipe must be used, starting no higher than 75mm above the stove.
- Page 15 Method A: Use a 5” twin-wall flue pipe adaptor with a flat bottom face and a spigot length of between 30mm and 110mm. The supplied flue heat shield is not required when using this method because the adaptor is flush with the top plate. Method B: Use an adaptor that has a spigot or conjoining pipe length of between 110mm and 190mm.
-
Page 16: Commissioning And Handover
Please check that all components are correctly assembled and working correctly. Ensure the Air Controls are working correctly. Hunter Stoves Group recommend that you carry out a smoke draw test to check the soundness of the chimney/flue system and seals: Place a Smoke Pellet in the centre of the Grate, ensure that all of the Air Controls are fully open and close the Door. - Page 17 The user should be warned to use a fireguard to BS 8423 in the presence of children, aged and/or infirm persons. Hunter Stoves Group also recommend that a CO alarm is fitted into the room where the appliance is located.
-
Page 18: Operating Instructions
Operating Instructions Read the ‘General Guidance’ Section at the start of these instructions before operating your stove for the first time. Allow sufficient clearance between the stove and pictures, plasma screen televisions or ornaments etc., as these could be damaged and could potentially create a fire hazard (For more information read the ‘Material Clearance’... - Page 19 Tertiary Air Tertiary Air enters the firebox through the series of holes in the rear wall. This air supply helps to reduce emissions into the atmosphere. The tertiary air supply is fixed and cannot be adjusted. Lighting the Stove Open both air controls fully and light one or two firelighters placed centrally on the bottom grate, allowing the flames to become established before placing several pieces of small dry kindling in a criss- cross fashion above the firelighters, taking care not to smother the fire.
-
Page 20: Maintenance & Servicing
Recommended Fuels Hunter Stoves Group recommend that only wood logs with a moisture content of less than 20% and anthracite or a manufactured briquette smokeless fuel which is suitable for closed door appliances are used on this appliance (with Multifuel Kit only). Burning wet or unseasoned wood will create excess smoke emissions, tar deposits in the stove and chimney and will not produce a satisfactory heat output. - Page 21 To replace a worn valve, remove the air valve cassette, lift off the worn valve and replace with new. Annual Service Hunter Stoves Group recommend that this appliance is serviced annually, preferably prior to the start of the heating season, thus avoiding any delay in receiving replacement components, should you need them.
-
Page 22: Troubleshooting
TROUBLESHOOTING ISSUE CAUSE RESOLUTION Problem starting the fire and Low flue draught Speak to your installer keeping it burning Wood with moisture content over 20% Ensure use of dry seasoned wood with less than 20% moisture content Unable to control fire High flue draught Speak to your installer Short burn time... -
Page 23: Optional Extras
ISSUE CAUSE RESOLUTION Creosote build-up in chimney Wood with moisture content over 20% Use dry seasoned wood (less than 20% moisture content). Operate at a high temperature for short periods each time the appliance is used to avoid large build-ups of tars and creosotes. - Page 24 Spares Information Eco R4 Cube (All) (Complete Door Code: HMR04ARRT027) Eco R5 Cube (Both) (Complete Door Code: HMR05ARRT005)
-
Page 25: Spares
Eco R6 Cube (Both) (Complete Door Code: HMR06ARRT005) BODY ASSEMBLY SPARES Eco R4 Cube (Both) - Page 26 Eco R5 Cube (Both) Eco R6 Cube (Both)
- Page 27 Air Controls Eco R4 Cube (Both) Complete Air Control Assembly HMR04ARRT004 Di Lusso R5 (Both) Complete Air Control Assembly DEE05ARRT009 Di Lusso R6 (All) Complete Air Control Assembly DER06ARRT008...
-
Page 28: Installation & Commissioning Checklist
INSTALLATION & COMMISSIONING CHECKLIST PURCHASE INFORMATION Dealer/Retailer Name Address Telephone Number Email Date Purchased INSTALLER INFORMATION Installer Name Address Telephone Number Email APPLIANCE INFORMATION Date Installed Appliance Stock Code Appliance Description Serial Number COMMISSIONING CHECK (Complete & Sign) Does the chimney/flue system meet the appropriate standard? Has the chimney/flue system been swept and passed the soundness test? Has this appliance passed the flue draught test? Please write down the flue draught reading:... -
Page 30: Full Warranty Information
This is needed in the event of a claim during the warranty period. Only genuine Hunter Stoves spare parts or consumables can be used in the servicing and maintenance of the appliance during any standard or extended warranty period. These can be sourced from your authorised supplier directly or through our website spares portal. - Page 31 Cost associated with the removal and re-installation of an appliance subject to a warranty claim. Hunter Stoves Group total liability will only extend to the total purchase price paid for the goods in any warranty claim. Hunter Stoves Group reserve the right to replace, repair or refund to value of goods purchased.
- Page 32 Further Information For extra guidance on using your stove, please visit our YouTube channel by searching ‘Hunter Stoves Group’ or see the helpful hints section of our website; www.hunterstoves.co.uk. This appliance is suitable for intermittent burning. This appliance should not be used in a shared flue. All genuine Hunter Group spares can be purchased through our website www.hunterstoves.co.uk/spares or through your authorised dealer.
Need help?
Do you have a question about the DI Lusso Eco R6 Cube and is the answer not in the manual?
Questions and answers