Table of Contents
Advertisement
Quick Links
Advertisement
Table of Contents

Related Manuals for BodyCraft ECT1000g


Summary of Contents for BodyCraft ECT1000g
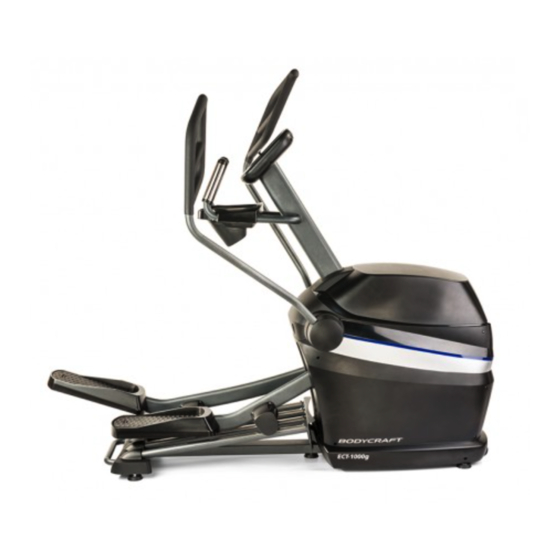
- Page 1 ECT1000g Elliptical Cross Trainer...
- Page 2 Bodycraft•offers•a•complete•array•of•high•quality•fitness•equipment. Please•refer to•our web site at www.bodycraft.com to view more ways to enhance your lifestyle. Your Bodycraft ECT1000g has all the quality and design elements to make your workout extremely• efficient• and• comfortable. Your• new Elliptical Cross Trainer• is• a serious• cardio fitness machine•...
-
Page 3: Table Of Contents
TABLE OF CONTENTS Product Safety ………………………….…………………………….. 1 Parts Contents………………………….…………………………….. 2 Placement …………………………………………………………… 3 Assembly ……………………………………………….…………….. 4 Maintenance & Adjustment ……………………………..………… 8 Stretching……………………………………………………………... 9 Computer Operation…………………………………………………... 10 Troubleshooting ……………………………………………..………… 18 Exploded View (Assemblies)…………………………..…………….. 19 Assemblies Parts List………………………………………..………… 20 Exploded View ……………………………………….……………… 21 Detailed Parts List…………………………………………..…………... -
Page 4: Product Safety
Product Safety Basic precautions should always be followed, including the following safety instructions when using this equipment: Read all instructions before using this equipment. 1. It is recommended that you perform stretching exercises before using this equipment. 2. Please make sure all components are not damaged and in working order before use. 3. -
Page 5: Parts Contents
Parts Contents Mast Cover Computer Cover Mast Console Axis Cover Right Pedal Main Frame Left Arm Right Arm Hardware Pack Right Arm Cover Left Arm Cover... -
Page 6: Placement
206cm 82cm Moving Tilt the ECT1000g up from the back to engage the wheels on the front of the machine. Important!:The ECT1000g is heavy. 2 people are required to move this machine. Placement The ECT1000g should be placed on a solid level surface. -
Page 7: Assembly
Assembly Mast Wire Harness Connectors Preinstalled Bolts x4 Bolt 5 Nut 7 Main Frame Right Pedal Pedal Installation 1. Install the Right Pedal to the Main Frame using one M10 Bolt 5 and one M10 Nut 7 as shown. Tighten. Mast Installation 1. - Page 8 Assembly Located at the back of Computer the Computer Console Console Main Frame Console Installation 1. Remove the four pre-installed Screws from the rear of the Computer Console. 2. Connect the Wire Harness Connectors leading out from the top of the Mast to the Wire Harness Connectors from the back of the Computer Console.
- Page 9 Assembly Right Handlebar Right Cover M10*90 Bolt 7 M8*45 Bolt 6 Left Handlebar Washers 4 Nut 3 M10*90 Bolt 7 Left Arm Cover Nut 3 M8*45 Washers 4 Bolt 6 Handlebar Installation 1. Install the Left and Right Handlebars one at a time by loosely installing two each M8*45 Bolt 6 with two each Washers 4 and two each M10*90 Bolt 7 with two each M10 Nuts 3 as shown.
- Page 10 Assembly Mast Cover Cover M5*12 Screw 1 M5*12 Screw 2 Axis Cover M5*12 Screw 1 Covers Installation 1. Install the Axis Cover onto the Mainframe using two M5*12 Screws 1 and two M5*12 Screws 2 as shown. Tighten. 2. Install Cover onto the Mainframe using two M5*12 Screws 1 as shown. Tighten. 3.
-
Page 11: Maintenance & Adjustment
If you haven’t used your elliptical trainer for a long period of time, the battery can drain. You can recharge it by simply working out or it can also be charged using an optional power supply. Please contact Bodycraft for additional information. -
Page 12: Stretching
STRETCHING Quadriceps Stretch With one hand against a wall for balance, reach behind you and pull your right foot up. Bring your heel as close to your buttocks as possible. Hold for 15 counts and repeat with left foot up. Inner Thigh Stretch Sit with the soles of your feet together with your knees pointing outward. -
Page 13: Computer Operation
COMPUTER Computer Operation Instructions Please thoroughly read these instructions before use. It is important that you get familiar with the computer console and understand the functions. Below is the console layout and detailed operation instructions. Layout: Extendable Tablet Holder Interactive Touch Screen Display Reading... - Page 14 COMPUTER Interactive Touch Screen Display The screen menu’s will change as you interact with the display. Touching Icons on the screen will guide you – through various options. Here are a few common screens you will see and their operations ·...
- Page 15 COMPUTER o Just Go button: touch this button to jump start Quick Start program. The time will count up. You may adjust resistance level at any time or touch Cool Down button to end program and enter cool down. o Settings button: touch this button to see product record as well as changing the units system from English to Metric.
- Page 16 COMPUTER Basic Operation Power up: Since this is a self-generating product, user must pedal the product to power up the · console. Pause a program: If a program is running and there is no RPM for a few seconds, the console will ·...
- Page 17 COMPUTER Workout Programs Besides Quick Start function, there are 9 program options as well as favorite programs for your selection: Manual, Random, Interval, Hill Climb, Strength, Target HR, HR Interval, Fat Burn, Cardio and Favorites. Quick Start: Pressing “GO” key or “Just Go” on screen during home screen/idle mode will quick start the console.
- Page 18 COMPUTER HR programs: The Heart Rate programs are designed to keep you training at the chosen heart rate level. These programs will only work when there is a valid heart rate signal. For the safety, the program is to start with a warm up session to get the heart rate up close to 20% of the target before it begins the heart rate training session.
- Page 19 Built in Wireless Heart Rate Receiver Note: Chest strap transmitter does not come with this unit; contact BODYCRAFT, or your dealer for purchase. This product is equipped with a built-in receiver for your heart rate monitoring. Any heart rate telemetry strap that transmits at 5Khz is compatible.
- Page 20 COMPUTER (Note: The transmitter is on automatically when being worn. It is off when it is not connected to your body. However, as moisture may activate the transmitter, thoroughly dry the transmitter to prolong battery life.) Erratic Heart Rate Readings: Erratic readings on the receiver can be caused by electromagnetic disturbances.
-
Page 21: Troubleshooting
You can try relocating the machine to a different part of the room. If you continue to have problems, please contact Bodycraft for additional troubleshooting of wireless heart rate issues. -
Page 22: Exploded View (Assemblies)
Assemblies View... -
Page 23: Assemblies Parts List
Assemblies Parts List PARTS LIST 15 19... -
Page 24: Exploded View
Detailed Exploded View... -
Page 25: Detailed Parts List 1/3
Detailed Parts List 1/3 DESCRIPTION QTY. WELDMENT, BASE FRAME SCREW, M5 X 0.8 X 12.0L, PAN HEAD, TYPE 1 CROSS RECESSED, BZ WELDMENT, CRANK SHAFT PULLEY, FLYWHEEL PLATE, PULLEY WASHER SCREW, M6 X 1.0 X 25.0L SHCS, STL, GR 8.8, BZ, SPRING WASHER NUT, HEX, NYLON INSERT, STL, M6 MAGNET, 14 DIA. - Page 26 72 SENSOR, SPEED 73 CABLE ASSEMBLY, MAIN, BASE 74 CABLE ASSEMBLY, BRAKE GENERATOR INDUCTOR 75 CABLE ASSEMBLY, GENERATOR BRAKE POWER 76 PLASTIC, SHROUD, FRONT 77 PLASTIC, SHROUD, LEFT 78 DECAL, LARGE BODYCRAFT 79 DECAL, MODEL ECT1000G 80 PLASTIC, SHROUD, RIGHT...
- Page 27 Detailed Parts List 3/3 DESCRIPTION QTY. 81 PLASTIC, SHROUD, REAR 82 PLASTIC, AXIS PANEL 83 DECAL, SMALL BODYCRAFT 84 COVER, REAR RAIL 85 PLASTIC, SHROUD, TOP 86 LOCK CORE 87 SCREW, M3.5 X 24 X 10, TRUSS HEAD, TYPE 1 CROSS RECESSED, BZ 88 COVER, MAST BOOT 89 SCREW, M5 X 0.8 X 10.0L, TRUSS HEAD, TYPE 1 CROSS RECESSED, SS...
-
Page 28: Warranty
*This warranty is in lieu of all warranties, expressed or implied, and/or all other obligations or liabilities on our part and we neither assume nor authorize any person to assume for us any other obligation or liability in connection with the sale of your BodyCraft product. Under no...
Need help?
Do you have a question about the ECT1000g and is the answer not in the manual?
Questions and answers