
Subscribe to Our Youtube Channel
Summary of Contents for Peleman Flat Bed Foil Printer
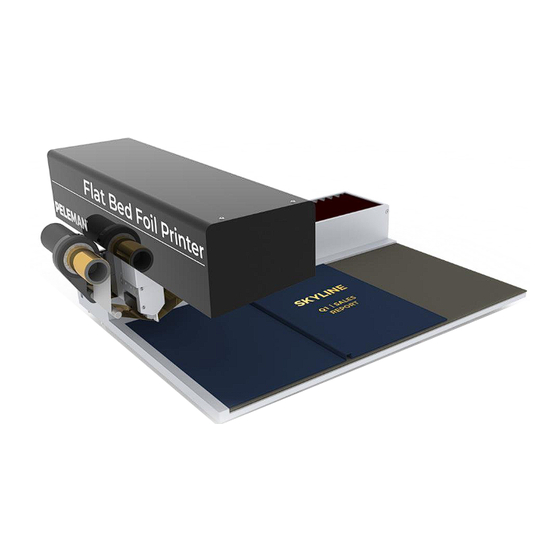
- Page 1 USER GUIDE Flat Bed Foil Printer Version 2.21 August 2019 Flat Bed Foil Printer PC Tool version 1.2.x.0 Firmware version 2.47...
-
Page 2: Table Of Contents
3 GETTING STARTED ..................................12 3.1 Unboxing ....................................12 3.2 What’s Inside? ..................................13 3.3 Setting Up The Flat Bed Foil Printer ......................... 14 4 FOIL HANDLING ..................................18 4.1 About The Foil ..................................18 4.2 Specifications Per Group ............................20 4.3 How To Insert The Foil .............................. - Page 3 Flat Bed Foil Printer User Guide 5.5.12 Rulers & Guidelines ............................44 5.5.13 Multiple jobs ................................ 45 5.5.14 Design Zooming.............................. 46 5.6 Open Design ..................................46 5.7 Print Design ..................................46 5.8 Tools ......................................47 5.8.1 Settings ................................... 47 5.8.2 PELEMAN Products ............................50 5.8.3 Check for Updates ............................
- Page 4 Flat Bed Foil Printer User Guide 10.2.1 Type 1a and 1b ..............................76 10.2.2 Type 2a ..................................77 10.3 Built-in Printing Settings for Foils and Materials ..................78 10.4 Custom material grid ..............................80 10.5 Default Template Specifications ......................... 82 10.5.1 Preset Margins ..............................
- Page 5 Figure 39: Snap Setting in Tools ............................48 Figure 40: Setting in Tools for Automatic Search for Updates ..............48 Figure 41: Setting in Tools to Enable All Flat Bed Foil Printer Messages ..........48 Figure 42: Setting in Tools to Customise Printing Parameters ..............48 Figure 43: Settings for Printing Parameters .......................
- Page 6 Figure 57: Calibration Start Screen ............................. 57 Figure 58: Torque Sensor Test ............................... 58 Figure 59: Service Menu in Tools ............................60 Figure 60: About Flat Bed Foil Printer..........................60 Figure 61: Built-In Software Help ............................61 Figure 62: Uninstall Option in Start Menu ........................62 Figure 63: Uninstall Options in Control Panel ......................
- Page 7 Flat Bed Foil Printer User Guide LIST OF TABLES Table 1: Compatible versions of software and firmware ..................11 Table 2: Foil Colours ..................................18 Table 3: Specifications and Indications of Foil Groups ..................20 Table 4: Keyboard Shortcuts ..............................73 Table 5: Settings for group A: Gold, Silver, Red and Blue Foils ..............
- Page 8 Flat Bed Foil Printer User Guide Peleman Industries...
-
Page 9: About This Manual
1 ABOUT THIS MANUAL This guide summarises the basic know-how required to install and operate the Flat Bed Foil Printer and its associated Flat Bed Foil Printer PC Tool utility applications of the latest versions starting from 1.2.0.0. Visit our websites to download previous versions of the software like 1.0.0.63, with associated user guide: https://flatbedfoilprinter.com/... -
Page 10: About Flat Bed Foil Printer
Flat Bed Foil Printer your work always stands out. Flat Bed Foil Printer is an innovative digital printer that prints text and images with foil directly from a digital file on almost any flat and smooth material like paper, plastic as well as laminated cardboard materials. -
Page 11: Specifications
Flat Bed Foil Printer User Guide 2.2 Specifications 2.2.1 Technical specifications • Weight: 25 kg • Size of machine: L: 615mm x W: 503mm x H: 295mm / in ‘home’ position L: 690mm • Printer table dimensions: 600 mm x 310 mm •... -
Page 12: Software Specifications
Flat Bed Foil Printer User Guide 2.2.2 Software specifications • Operating systems for software version 1.0.0.63: Windows XP, Vista, Windows 7 • Operating systems for software version 1.0.2.0: Windows XP, Vista, Windows 7 • Operating systems for software version 1.1.x.0: Windows 7, Windows 8, Windows 10 Early versions of software can in some cases be installed on latest Windows versions with turned off driver signature enforcement. -
Page 13: Getting Started
Continue by lifting the wooden box up. Now you can remove protective buffers. Make sure you have space on the table where you wish to place the Flat Bed Foil Printer. Machine to be moved by two persons. Make sure that the Flat Bed Foil Printer is placed firmly on a desk. -
Page 14: What's Inside
• Lock removal instructions SPUP0000107 • Screwdriver SPUP0000111 • Spine support set (UFPRSUP0002 +3 +4 +5) • Empty core UFPR0000005 • USB drive Flat Bed Foil Printer SPUP0000144 • Paper ring SPUP0000142 • Lock X-axis SPUP0000097 • 4x screw with cross head SPUP0000028 •... -
Page 15: Setting Up The Flat Bed Foil Printer
Flat Bed Foil Printer User Guide Figure 5: Flat Bed Foil Printer Package Contents 3.3 Setting Up The Flat Bed Foil Printer Tip: Scan the QR code to access the demonstrational video Make sure you remove the ‘locking tool’ and supports first, before connecting the printer to power supply. -
Page 16: Figure 6: Lock Tool And Support Removal
Flat Bed Foil Printer User Guide Figure 6: Lock Tool and Support Removal Connect the Flat Bed Foil Printer to the computer with the provided USB cable. Make sure your computer has a grounded connection to the power supply. Attention! Make sure the printing table is clear of objects and the lock tool has been removed. -
Page 17: Figure 8: Use Supplied Underlay Materials For Different Applications
Flat Bed Foil Printer User Guide Depending on the medium that you will print on, use the acrylic plate or the foam pad. You don’t need to remove one of the two completely. However, for some materials the result will be better when only one of two is being used on the aluminium printing table. -
Page 18: Figure 9: Different Possibilities To Use Double Paper Clamp To Hold The Substrate
Flat Bed Foil Printer User Guide Use double paper clamp Recently we started to add a paper clamp in the package (item UFPR0000021). You can use it to fasten your substrate. It can be used as a clamp to hold the substrate or as an end stop to avoid covers from moving during printing. -
Page 19: Foil Handling
4 FOIL HANDLING 4.1 About The Foil The foil is the original thermal transfer ribbon (TTR) for Flat Bed Foil Printer. Foils shown below are used to print on covers and other materials. To ensure that the Flat Bed Foil Printer works correctly, we recommend using only the original foil. - Page 20 Flat Bed Foil Printer User Guide Picture Item Code New Name Group UFPR00000IG Metal Gold UFPR0000020 Metal Blue UFPR0000019 Metal Red UFPR0000012 Metal Silver UFPR0000013 Metal Gold UFPR0000006 Black UFPR0000014 White Peleman Industries...
-
Page 21: Specifications Per Group
Flat Bed Foil Printer User Guide Picture Item Code New Name Group UFPR0000005 Core 4.2 Specifications Per Group Below you will find specifications and indications for each group. You can use this as a reference to decide which foil can be ordered for your specific needs. - Page 22 Flat Bed Foil Printer User Guide Foil specifications Group Resin Wax-Resin Carrier Thickness 4.5µm 4.5µm 12 µm 4.5µm +/-4.5µm Total Thickness +/- 6,8 µm +/-7,6 µm +/-13,5µm +/-8.5µm 7 µm Specifications food-contact safe Scratch resistance **** **** **** **** Gasoline resistance...
-
Page 23: How To Insert The Foil
Flat Bed Foil Printer User Guide Very poor Poor Good **** Very good ***** Excellent No data available (yet) None 4.3 How To Insert The Foil Tip: Scan the QR code to access the demonstrational video First, connect the new foil coil to an empty core. Make sure the metal rings are on the same side and connect the coils using the adhesive layer or use a piece of tape. -
Page 24: How To Remove The Foil
For optimal use, the foil must be tight against the printhead. If needed, wind manually the left side counterclockwise, Figure 11: Foil Inserted in fead of Flat Bed Foil Printer 4.4 How To Remove The Foil To change or remove the foil, gently pull both rolls at the same time. If you would like to remove one of the sides, cut the foil, replace empty core or replace foil with another colour. -
Page 25: Flat Bed Foil Printer Pc Tool
5 FLAT BED FOIL PRINTER PC TOOL 5.1 Introduction The Flat Bed Foil Printer software application, Flat Bed Foil Printer PC Tool is used as an interface between the user and the associated Flat Bed Foil Printer interface board. This chapter of the manual focusses on the basic know-how required to install and use the Flat Bed Foil Printer PC Tool. -
Page 26: Printhead Calibration
To switch ON: settings-> Printhead Calibration (ON) Printhead changed? Adjust the value! 5.2.3 New foil groups Peleman updated the foil identification system to provide better overview of existing foils and differences. The foils are divided in groups according to their specifications. All foils within one group have same specifications and same settings can be used for printing. -
Page 27: Software Installation
Figure 12: Files Required for Installation To install the Flat Bed Foil Printer PC Tool, open the folder where these two files are located and start setup.exe to install the software application and the associated drivers. Follow the installation steps to perform the installation. -
Page 28: Launch Application
5.4 Launch Application To launch the application after installation, go to All Programs in the Start Menu, followed by Flat Bed Foil Printer PC Tool subfolder and finally select Flat Bed Foil Printer PC Tool as shown in figure 13. -
Page 29: Creating A New Design
‘User’ tab or to select it from a list of preset templates. Template names refer to PELEMAN product names. Make sure that the print object matches the selected template. Failure to do so can cause severe damage to the printer. -
Page 30: Object Orientation
Flat Bed Foil Printer User Guide Click on Design Print button to open the new design based on the selected template and associated object orientation. A screen similar to figure 17 will appear on the screen. Figure 17: Design Window Based on Selected Template and Object Placement With the help of available tools provided in the toolbar, create the desired text and graphics to be printed on the cover. -
Page 31: Printing On Spine
Flat Bed Foil Printer User Guide 5.5.2 Printing on Spine Printing on spine is only possible when the spine is horizontally oriented. Figure 18 illustrates the placement of print areas according to the orientation of the cover. Figure 18: Vertical Spine Orientation (Left) and Horizontal Spine Orientation (Right) Important notes about printing on spine: •... -
Page 32: Parts Of Printing Object
Flat Bed Foil Printer User Guide 5.5.3 Parts of Printing Object Cover with Spine A cover with a spine should always lay flat on the printer’s main table as seen in figure 19. The printer will print on the side facing upwards. A cover usually encompasses three printable parts, i.e. -
Page 33: Print Margins
Narrow margins are 8mm and available during custom template creation. Section 10.5.1 may be referred to see the values of these margins. Flat Bed Foil Printer PC Tool will automatically reject elements to be placed on these print margins. -
Page 34: Design Toolbar
Flat Bed Foil Printer User Guide 5.5.6 Design Toolbar The design toolbar, shown in figure 21, can be seen at the top of the design tab sub- window. It offers various functionalities for different purposes. The toolbar groups can be reorganised and relocated into different lines to suit the user’s needs. -
Page 35: Figure 23: Design Toolbar Group 2 - Tools
Flat Bed Foil Printer User Guide Rotate Tool: Rotate a selected element. Drag the element to rotate it. See section 5.5.10 for more information Select Tool: Enable selection and Show Hide Variable: movement of design elements and Show / hide the variable marking print areas. -
Page 36: Figure 25: Design Toolbar Group 4 - Text Editing
Flat Bed Foil Printer User Guide Group 4: Text Editing Underline: Underline Font Family: Available text of selected font types that can be Align Right: Align text boxes used in text boxes. Font selected of the selected text boxes current text of the... -
Page 37: Figure 26: Design Toolbar Group 5 - Element Alignment
Flat Bed Foil Printer User Guide Group 5: Element Alignment Align Right: Align Align Middle: Align the Align Left: Align the right side of the selected middles of the selected left side elements to the same elements to the same... -
Page 38: Figure 28: Design Toolbar Group 7 - Xy Coordinates
Flat Bed Foil Printer User Guide Group 7: XY Coordinates Units of XY Coordinates: May be either mm or inch based on the selected setting in ‘Tools’ Figure 28: Design Toolbar Group 7 – XY Coordinates X Coordinate: Indicates the X... -
Page 39: Saving Design
To save a new design, press the Save button in the design toolbar. A dialog box will appear to enter the name of a file. The Flat Bed Foil Printer design files will have the file extension .upf. The default path for saving any design is a subfolder named Flat Bed Foil Printer Designs located in the My Documents folder. -
Page 40: Figure 31: Image Thresholding Menu
Please note that only the following image file types are supported by the Flat Bed Foil Printer PC Tool: BMP, GIF, JPG, TIFF and PNG. Select the desired image file and click the Open button of the file selection dialog box. -
Page 41: Figure 32: Image Of Palm Tree Placed Inside Print Area
Flat Bed Foil Printer User Guide When Dithering is selected, the image is formed by a cluster of closely placed dots, creating an illusion of contrast When Threshold is selected, the image is black and white, without any contrast. The threshold can be adjusted using the plus and minus buttons. -
Page 42: Selection, Movement And Alignment Of Elements
Flat Bed Foil Printer User Guide Tip: Drag down the dotted line to open the print area for images larger than 57 mm. 5.5.9 Selection, Movement and Alignment of Elements An element may be selected by clicking on the Select tool shown as an arrow in figure 23 and then clicking on the element. -
Page 43: Rotation Of Elements
Section 5.5.9 of this document may be referred to for more information. 5.5.11 Foil Colour Layers The Flat Bed Foil Printer supports all foil colours discussed in section 4.1. Each colour is handled as a separate layer. These layers are shown in a separate layer sub-window that is visible on the right side of the design tab. -
Page 44: Figure 33: Layer Window
Flat Bed Foil Printer User Guide Figure 33: Layer Window Multiple colours may be used on one object. Add separate layers in layer window for each colour. Elements inserted in one foil colour layer stay visible when another foil colour layer is selected. -
Page 45: Rulers & Guidelines
Flat Bed Foil Printer User Guide 5.5.12 Rulers & Guidelines The rulers are usually used to align elements in the design window. Two types of rulers can be seen during the design process, i.e. horizontal ruler and vertical ruler. The horizontal ruler is displayed at the top of the design and is used to align elements horizontally. -
Page 46: Multiple Jobs
Flat Bed Foil Printer User Guide 5.5.13 Multiple jobs When printing multiple books with different text, it is suggested to use the multiple jobs + variable functions. • Step 1: Create a text box and enter your text (example “name”). This text will be changed by your custom text in data file later. -
Page 47: Design Zooming
Flat Bed Foil Printer User Guide • Step 7: The print process will start. Follow the instructions on the screen and replace the cover after each print. 5.5.14 Design Zooming Users may zoom IN or zoom OUT within the design window using either the slider or the associated plus and minus buttons provided at the bottom right side of the application as shown in figure 35. -
Page 48: Tools
5.8 Tools Other multiple tools are available in Flat Bed Foil Printer PC Tool. These additional tools are related to different settings, updates, service request, calibrating the Flat Bed Foil Printer, creating and managing templates and more. -
Page 49: Figure 38: Ruler Display Setting In Tools
Enable all Flat Bed Foil Printer messages. Messages can disabled by choosing the “Don’t display this message again” option. By default, all messages are enabled. Figure 41: Setting in Tools to Enable All Flat Bed Foil Printer Messages • Printing Parameters Customisation of parameters associated with printing. -
Page 50: Figure 43: Settings For Printing Parameters
Flat Bed Foil Printer User Guide supported foil. The parameters include torque, burn time and printing speed for both sides of the cover as well as for spine. • Torque value is between 0 and 240. Increasing the torque value will result in more pressure on the printing material. -
Page 51: Peleman Products
This setting is used to move the head to preset position, suitable for transporting the Flat Bed Foil Printer to a different location. This position is also frequently used for servicing the machine. This preset position is the so-called safe location, with the locking tool must be mount for transportation. -
Page 52: Check For Updates
Flat Bed Foil Printer User Guide 5.8.3 Check for Updates Cheching the availability of new software and firmware updates from the designated server. It may also be used to update firmware or software by downloading the updates from the server. -
Page 53: Request For Service
/ software. Users may click on Update printer firmware to get the updated firmware from the server and install it on the Flat Bed Foil Printer. This button only becomes enabled when a new firmware update is found on the server. -
Page 54: Figure 50: Screen For Managing Templates
Flat Bed Foil Printer PC Tool by their product names as templates. If a PELEMAN product cannot be found, please check for updates or create a new template. Go to section 5.8.3 to read more about updating the Flat Bed Foil Printer PC Tool. -
Page 55: Figure 52: Screen For Selecting Type Of New Template
Enter the exact dimensions of the print object. If the entered dimensions are not supported by the Flat Bed Foil Printer, warning messages will appear. If the dimensions are correct, the desired template might not be supported by the Flat Bed Foil Printer, either because the dimensions are too large or too small. -
Page 56: Figure 54: Screen For Inserting Dimensions Of Window In New Template
In the next screen shown in figure 55, the user will be required to select a unique name for the new template. Please note that the names of Flat Bed Foil Printer existing templates cannot be used for new templates. Click on Save button to create a new template. -
Page 57: Testing And Calibration
Flat Bed Foil Printer User Guide 5.8.6 Testing and Calibration 5.8.6.1 Calibrate Printhead Due to production tolerances, the R-value between different printheads can vary from the “ideal” value of 3000. The different R-values between printheads result in different print results as the value directly influences the amount of heat generated by the printhead. -
Page 58: Figure 57: Calibration Start Screen
Figure 57: Calibration Start Screen Please note that it is required to use a basic Peleman cover or sheet of paper with the minimum dimensions of 150x150 mm and place it properly in the corner as shown in the image. -
Page 59: Figure 58: Torque Sensor Test
Flat Bed Foil Printer User Guide 5.8.6.4 Torque sensor test Figure 58: Torque Sensor Test To test the pressure sensor, use the ‘Torque Sensor Test’ tab. It can be used when the head error is displayed on the screen or when you have issues in downwards movement. - Page 60 Flat Bed Foil Printer User Guide version (for latest version) and/or replace the loadcell. Doublecheck the connector first before contacting our specialist and describe to them your troubleshooting steps. The ‘Move to Reading Position’ button and ‘Set Torque’ functionalities are reserved for further troubleshooting by technicians.
-
Page 61: Service Menu
Auto status consists of fields relating to the Flat Bed Foil Printer firmware and is very useful to a technician to check all errors. Please make a screenshot and send it together with your issue description when asking for support. -
Page 62: Help Button
Flat Bed Foil Printer User Guide 5.8.9 Help Button The help option opens a tab containing help information related to the software. Figure 61: Built-In Software Help In newer software versions three options are displayed: • User Guide: by clicking on this option the user guide related to this software version will be displayed. -
Page 63: Uninstall
To uninstall the software application, go to Programs and Features within the control panel to see the list of installed programmes. Select Flat Bed Foil Printer PC Tool from the list of installed programs as shown in figure 63. Then either select Uninstall from the menu options displayed above the list of programs or right click on Flat Bed Foil Printer PC Tool &... -
Page 64: Uninstallation Using Installation Setup
Launch setup.exe using the installation source media that was used to install the software. Select Remove Flat Bed Foil Printer PC Tool from the given options as shown in figure 64 and then click on Finish button. Follow the instruction on the screen to complete the process. -
Page 65: Maintenance
Flat Bed Foil Printer User Guide 6 MAINTENANCE 6.1 Basic maintenance Every machine needs maintenance to perform at its best over a long period of time, please note the following recommendations and keep an eye on the components discussed below. -
Page 66: Advanced Maintenance
Flat Bed Foil Printer User Guide We recommend to remove old grease from spindles and lubricate these with new grease. Also, excessive lubrication from linear guides can be removed to prevent it from falling on electronics or printing table. Please check this after every 10.000 printing sessions, especially after the first 10.000 sessions. - Page 67 Flat Bed Foil Printer User Guide After every 100.000 print sessions, we recommend to change motor and spindle in x, y and z [SPUP0000007 + SPUP0000008 + SPUP0000009]. Otherwise, there will be too much play which will cause incorrect print position and ‘printer is damaged’...
-
Page 68: Troubleshooting
Flat Bed Foil Printer User Guide 7 TROUBLESHOOTING 7.1 Troubleshooting Bad Print Result Tip: Scan the QR code to access the demonstrational video a. Is the foil installed and spinning correctly? Is the foil tight enough against the head? If not, wind the foil manually until it is tight b. -
Page 69: Troubleshooting - Calibration
Flat Bed Foil Printer User Guide Are you using the correct settings? Check selected material. If correctly selected, go to ‘Settings’ -> ‘customize’ and check parameters. d. Ensure the surface of the ring is clean and straight. Inspect for splinters and remove if needed. -
Page 70: Troubleshooting - Errors
Change USB cable or try other USB port. The USB communication library file known as winusb.dll is required by the Flat bed Foil Printer PC Tool application. The subject DLL is usually generated and installed during initial installation of Windows USB driver framework when the associated USB hardware device is connected to the system for the first time. -
Page 71: Head Error
Flat Bed Foil Printer User Guide 7.4.3 Head error a. Remove the foil and press the head upwards manually 5 – 10 times till the end to loosen the mechanism inside. b. Check torque via software. Go to ‘Tools’ -> ‘Testing and Calibration’ -> ‘Read Torque’. -
Page 72: Shipping And Transportation
Flat Bed Foil Printer User Guide 8 SHIPPING AND TRANSPORTATION Tip: Scan the QR code to access the demonstrational video When shipping the machine to get it repaired or transporting it to another location, we advise to use the original box and lock the head with head locking tool. -
Page 73: Frequently Asked Questions (Faqs)
Flat Bed Foil Printer User Guide 9 FREQUENTLY ASKED QUESTIONS (FAQs) How to install the associated USB communication drivers for Flat Bed Foil Printer? Ans. Driver will be automatically installed during the software installation process. Please note that for some software versions you will need to switch off the driver signature enforcement (see troubleshooting section). -
Page 74: Appendices
To right align the selected lines of text in the selected text box Ctrl + S To save currently active Flat Bed Foil Printer design Ctrl + Shift + P To open multi-print dialog box for currently active Flat Bed Foil Printer design Ctrl + T To open tools... - Page 75 Flat Bed Foil Printer User Guide KEYBOARD DESCRIPTION SHORTCUTS Down Arrow (↓) To move the cursor to the lower line in the selected text box, when text editing is active To move down the selected element / selected print area, when text...
-
Page 76: Supported Template Dimensions
Flat Bed Foil Printer User Guide KEYBOARD DESCRIPTION SHORTCUTS without enabling editing. To deselect currently selected design element and select its parent print area. To deselect currently selected print area, if no design element is selected. 10.2 Supported Template Dimensions Printer table dimensions: 600 mm x 600 mm. -
Page 77: Type 1A And 1B
Flat Bed Foil Printer User Guide 10.2.1 Type 1a and 1b • up to 310 mm • max. printing length 350 mm • 5 mm – 36 mm • 0.1 mm - max 25 • max. 25 mm • e+f: max. 25 mm... -
Page 78: Type 2A
Flat Bed Foil Printer User Guide 10.2.2 Type 2a • up to 480 mm (printed area up to 300mm) • max. length 480 mm (printed area up to 450mm) • 0.1 mm - max 25 mm Figure 69: Dimensions of Single Side Cover Page height cannot be larger than 480 mm. -
Page 79: Built-In Printing Settings For Foils And Materials
Flat Bed Foil Printer User Guide 10.3 Built-in Printing Settings for Foils and Materials Table 5: Settings for group A: Gold, Silver, Red and Blue Foils Torque Burn Print Motor Spine Time Speed Speed Torque* Aluminium 1600 Graphite 1600 Quartz (Black Metallic) -
Page 80: Table 8: Settings For Group D: Black Foil
Flat Bed Foil Printer User Guide Table 8: Settings for group D: Black Foil Torque Burn Speed Motor Spine Time Speed Torque* Aluminium 2400 Graphite 2400 Quartz (Black Metallic) 2400 Azur (Blue Metallic) 2400 Ruby (Bordeaux Metallic) 2400 Gold (Metallic) -
Page 81: Custom Material Grid
Flat Bed Foil Printer User Guide Torque Burn Speed Motor Spine Time Speed Torque* Leather 2400 Matt 2400 Clear 1900 *Use the correct tools for printing on the spine. 10.4 Custom material grid This grid contains custom materials that can be used as an indication to start printing. - Page 82 Flat Bed Foil Printer User Guide Material Foil Torque Burn Time Print Motor group Speed speed Extruded Acrylic 60-100 1200-1300 PU Coated materials 2050 PU Coated materials 2400 Artificial leather 1750 *Gift boxes - laminated 80-200 2500 Photo paper 50-100...
-
Page 83: Default Template Specifications
Flat Bed Foil Printer User Guide 10.5 Default Template Specifications 10.5.1 Preset Margins Preset margins for all default and user templates: • Margins on all sides of hard covers: 19mm • Margins on all sides of soft covers: 8mm •... - Page 84 Flat Bed Foil Printer User Guide UniCover Hard LS Portrait 60 Hard Portrait UniCover Hard LS Portrait 80 Hard Portrait UniCover Hard LS Portrait 80 Hard Portrait Wrapped window UniCover Hard LS Portrait 100 Hard Portrait UniCover Hard LS Portrait 120...
- Page 85 Flat Bed Foil Printer User Guide UniCover Plus / Flex A4 Soft Portrait Portrait 340 UniCover Plus / Soft Portrait Flex LS Portrait 15 UniCover Plus / Soft Portrait Flex LS Portrait 40 UniCover Plus / Soft Portrait Flex LS Portrait 60...
-
Page 86: What's New
Flat Bed Foil Printer User Guide 10.6 What’s new 10.6.1 Version 1.0.0.63 Basic version working perfectly on most computers with O.S. on Windows 7 and earlier versions. For installation on Windows 8 and 10, you’ll need to install the software (driver) with turned off driver signature enforcement. -
Page 87: Version 1.2.0.0
Template size adjustment for A4 hard covers (back and front are 1mm smaller now) Other small improvements and bug fixes 10.7 Parts and Accessories List Most frequently requested parts: SPUP0000138 Flat Bed Foil Printer printhead cleaning wipes SPUP0000097 Locking Tool UFPR0000021 Double paper clamp [NEW]... - Page 88 UFPR0000019 Group B Metal Red ribbon UFPR0000012 Group C Metal Silver ribbon UFPR0000013 Group C Metal Gold ribbon UFPR0000014 Group E White ribbon UFPRELEC017 Printhead SPUP0000140 Hexagonal tool set for Flat Bed Foil Printer (for basic repair and check) Peleman Industries...
Need help?
Do you have a question about the Flat Bed Foil Printer and is the answer not in the manual?
Questions and answers