Table of Contents
Advertisement
Quick Links
Advertisement
Table of Contents

Related Manuals for Getac UX10


Summary of Contents for Getac UX10
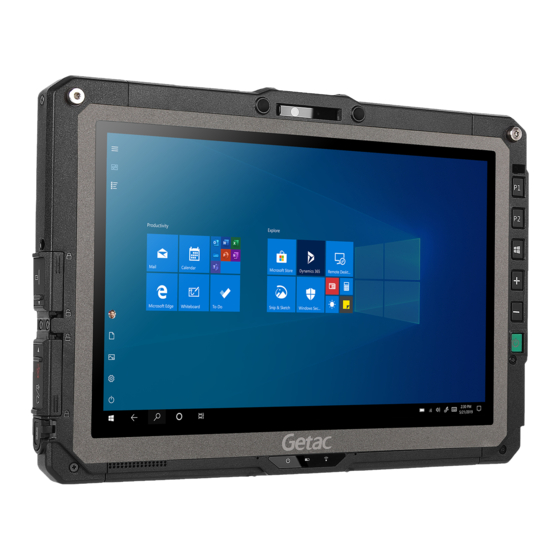
- Page 1 UX10 USER MANUAL Rugged Mobile Computing Solutions...
- Page 2 All brand and product names are trademarks or registered trademarks of their respective companies. NOTE The information in this manual is subject to change without notice. For the latest version of the manual, please visit the Getac website at www.getac.com.
-
Page 3: Table Of Contents
Table of Contents Chapter 1 Getting Started ..............1 Getting the Tablet PC Running ..........2 Unpacking ................2 Installing the Battery Pack ............ 3 Installing the Micro-SIM Card (Optional) ......4 Using the Tether ..............5 Connecting to AC Power ............6 Turning On and Off the Tablet PC ........ - Page 4 Advanced Menu ..............49 Security Menu ..............51 Boot Menu ................52 Exit Menu ................53 Chapter 6 Using Getac Software ............ 54 OSD Control Panel ..............55 G-Manager ................56 G-Camera .................. 57 Chapter 7 Care and Maintenance ........... 58 Protecting the Tablet PC ............
- Page 5 Cleaning Guidelines ............. 61 Battery Pack Guidelines ............61 Touchscreen Guidelines ............63 When Traveling ................ 64 Chapter 8 Troubleshooting ............. 65 Preliminary Checklist ..............66 Solving Common Problems ............67 Battery Problems ..............67 Bluetooth Problems ............. 67 Display Problems ..............68 Fingerprint Scanner Problems ..........
-
Page 6: Chapter 1 Getting Started
Chapter 1 Getting Started This chapter first tells you step by step how to get the Tablet PC up and running. Then, you will find a section briefly introducing the external components of the Tablet PC. NOTE: Depending on the model you purchased, the appearance of your Tablet PC may not be exactly the same as those shown in this manual. -
Page 7: Getting The Tablet Pc Running
Getting the Tablet PC Running Unpacking After unpacking the shipping carton, you should find these standard items: UX10 Tablet PC AC adapter AC power cord Battery pack Stylus Tether Document(s) Driver disc (optional) Inspect all the items. -
Page 8: Installing The Battery Pack
Installing the Battery Pack 1. With the battery pack correctly oriented, attach its connector side to the battery compartment at an angle ( ) and then press down the other side ( ). The battery release latch should automatically engage. ... -
Page 9: Installing The Micro-Sim Card (Optional)
Installing the Micro-SIM Card (Optional) 1. Locate the micro-SIM card slot. Slide the protective cover to the unlocked position ( ) and open the cover. 2. Remove one screw to detach the small metal plate that covers the micro-SIM card slot. 3. -
Page 10: Using The Tether
Using the Tether A tether is provided for attaching the stylus to your Tablet. 1. Insert one of the tether’s loop ends through the hole of the stylus (as indicated by below). Then, insert the other end through the first loop ... -
Page 11: Connecting To Ac Power
Connecting to AC Power CAUTION: Use only the AC adapter included with your Tablet PC. Using other AC adapters may damage the Tablet PC. NOTE: The battery pack is shipped to you in power saving mode that protects it from charging/discharging. -
Page 12: Turning On And Off The Tablet Pc
Turning On and Off the Tablet PC Turning On Press the power button ( ) to start up. The Windows operating system should start. NOTE: Tapping the screen during startup may invoke a pre-boot menu (unless the default settings have been changed). If the menu appears, simply select Continue. -
Page 13: Identifying Hardware Components
Identifying Hardware Components CAUTION: You need to open the protective covers to access the connectors. When not using a connector, make sure to close the cover completely for water- and dust-proof integrity. (Engage the locking mechanism if existing.) Front Components... - Page 14 Component Description Camera cover Covers the camera lens. Slide the cover to open or close it. The cover provides privacy protection. Camera lens Allows you to use the camera function. IR sensor Detects the infrared energy of objects to form an (optional) image.
- Page 15 Component Description Indicators Lights blue when the power is on. Power Blinks blue when the system is in Sleep mode. Battery Lights amber when the battery is being charged. Lights green when battery charging is completed. Blinks green to indicate the battery’s built-in high temperature protection mechanism is activated.
-
Page 16: Rear Components
Rear Components Component Description Flash Provides extra light when taking pictures. Camera lens Allows you to use the camera function. When the camera lens is in use, the indicator beside it lights up. Stylus holder Holds the stylus. ... -
Page 17: Right-Side Components
Component Description Battery pack Supplies power to your Tablet PC when external power is not connected. NOTE: If you have the high capacity battery model, the battery pack looks different from the one shown here. Select models have one of the below components. a Bridge battery Provides enough extra power for the purpose of and smart card... -
Page 18: Left-Side Components
Left-Side Components Slide the cover toward the unlocked position ( ) to open the cover. Component Description HDMI connector Connects a HDMI monitor or TV set. Micro-SIM card Accepts a micro-SIM card for models having the slot (optional) WWAN module. -
Page 19: Top Components
Top Components... -
Page 20: Bottom Components
Component Description a None Or can be one of the below components depending on your model: b Barcode scanner Scans and reads barcodes. lens c HF RFID antenna Reads data from HF RFID tags. d USB 3.0 port Connects a USB device. e USB 3.1 Gen1 Connects a USB device that supports USB Type-C Type-C port... -
Page 21: Operating Your Tablet Pc
Chapter 2 Operating Your Tablet PC This chapter provides information about the use of the Tablet PC. If you are new to computers, reading this chapter will help you learn the operating basics. If you are already a computer user, you may choose to read only the parts containing information unique to your Tablet PC. -
Page 22: Navigating On The Screen
Navigating on the Screen The screen of your Tablet PC is touch-sensitive. You can operate the Tablet PC by touching the screen with your finger or the stylus. CAUTION: Do not use a sharp object such as a ballpoint pen or pencil on the touchscreen. - Page 23 The following table shows how you use the touchscreen to obtain equivalent mouse functions. Equivalent Term/Action Mouse Function Tap: Touch the screen once. Click/Point Double-tap: Touch the screen twice rapidly. Double-click Tap and hold: Tap and hold until a popup menu appears. Right-click Drag: Hold the stylus (or finger) on the screen and drag Drag across the screen until reaching your destination.
- Page 24 Actions Gestures Descriptions = finger down; = finger up) Rotate Use rotating to move a picture or other item on the screen in a circular direction (clockwise or counter- clockwise). The gesture Move two fingers in opposing works in applications directions.
-
Page 25: Using The Dual Mode Display (Optional)
Using the Dual Mode Display (Optional) Dual mode display (if your model has the feature) incorporates both touchscreen and digitizer functions. The display is set to Touchscreen mode by default. Touchscreen mode provides all the functionalities that an ordinary touchscreen has. When the Tablet PC receives signals from the digitizer pen, the display automatically switches to Digitizer mode. -
Page 26: Using Network And Wireless Connections
Using Network and Wireless Connections Using the LAN (Optional) Select models have the LAN module. To connect the network cable to the LAN module, connect one end of the LAN cable to the RJ-45 connector on the Tablet PC and the other end to the network hub. -or- NOTE: The location of the connector depends on your model. -
Page 27: Using The Wlan
Using the WLAN The WLAN (Wireless Local Area Network) module of your Tablet PC supports IEEE 802.11a/b/g/n/ac. Turning On/Off the WLAN Radio To turn on the WLAN radio: Select Settings Network & Internet Wi-Fi. Slide the Wi-Fi switch to the On position. -
Page 28: Using The Bluetooth Feature
Using the Bluetooth Feature The Bluetooth technology allows short-range wireless communications between devices without requiring a cable connection. Data can be transmitted through walls, pockets and briefcases as long as two devices are within range. Turning On/Off the Bluetooth Radio To turn on the Bluetooth radio: Select ... -
Page 29: Using The Wwan Feature (Optional)
Using the WWAN Feature (Optional) A WWAN (Wireless Wide Area Network) uses mobile telecommunication cellular network technologies to transfer data. The WWAN module of your Tablet PC supports 3G and 4G LTE. NOTE: Your model only supports data transmission. Voice transmission is not ... -
Page 30: Chapter 3 Managing Power
Chapter 3 Managing Power Your Tablet PC operates either on external AC power or on internal battery power. This chapter tells you how you can effectively manage power. To maintain optimal battery performance, it is important that you use the battery in the proper way. -
Page 31: Ac Adapter
AC Adapter CAUTION: The AC adapter is designed for use with your Tablet PC only. Connecting the AC adapter to another device can damage the adapter. The AC power cord supplied with your Tablet PC is for use in the country ... -
Page 32: Battery Pack
Battery Pack The battery pack is the internal power source for the Tablet PC. It is rechargeable using the AC adapter. NOTE: Care and maintenance information for the battery is provided in the “Battery Pack Guidelines” section in Chapter 7. Charging the Battery Pack NOTE: Charging will not start if the battery’s temperature is outside the allowed... -
Page 33: Initializing The Battery Pack
Initializing the Battery Pack You need to initialize a new battery pack before using it for the first time or when the actual operating time of a battery pack is much less than expected. Initializing is the process of fully charging, discharging, and then charging. It can take several hours. -
Page 34: Battery Low Signals And Actions
When the battery pack is not installed in the Tablet PC and you want to know the battery charge, you can press the push-button to see the number of LEDs that light up. Each LED represents 20% charge. Battery Low Signals and Actions The battery icon changes appearance to display the current state of the battery. -
Page 35: Replacing The Battery Pack
Replacing the Battery Pack CAUTION: There is danger of explosion if the battery is incorrectly replaced. Replace the battery only with the Tablet PC manufacturer’s battery packs. Discard used batteries according to the dealer’s instructions. Do not attempt to disassemble the battery pack. ... - Page 36 3. Fit another battery pack into place. With the battery pack correctly oriented, attach its connector side to the battery compartment at an angle ( ) and then press down the other side ( ). The battery release latch should automatically engage.
-
Page 37: Hot Swapping The Battery Pack (Optional)
Hot Swapping the Battery Pack (Optional) You can hot swap the battery pack if your model has the bridge battery. “Hot swapping” means you can safely replace the battery pack without shutting down while your Tablet PC is running on battery power. Hints and Reminders See “Replacing the Battery Pack”... - Page 38 About the Bridge Battery For models having the bridge battery: The bridge battery is not user-replaceable and is invisible to the operating system. It never functions as the power source as long as the battery pack is installed. The bridge battery is charged by external AC power if the AC adapter is ...
-
Page 39: Power-Saving Tips
Power-Saving Tips Aside from enabling your Tablet PC’s power saving mode, you can do your part to maximize the battery’s operating time by following these suggestions. Do not disable Power Management. Decrease the LCD brightness to the lowest comfortable level. ... -
Page 40: Using Options And Peripherals
Chapter 4 Using Options and Peripherals This chapter describes the use of optional modules and the connection of peripherals. -
Page 41: Using The Fingerprint Scanner (Optional)
Using the Fingerprint Scanner (Optional) CAUTION: For optimal performance, both the scanning surface and the finger should be clean and dry. Clean the scanning surface when needed. You can use adhesive tape to remove dirt and oil from the scanner surface. It is not recommended that you use the fingerprint scanner in a below- ... -
Page 42: Fingerprint Login
3. Follow the onscreen instructions to complete. When placing your finger on the scanner, make sure you position your finger correctly as described and illustrated below. • Maximum contact area: Place your finger to completely cover the scanner with maximum contact surface. •... -
Page 43: Using The Barcode Scanner (Optional)
Using the Barcode Scanner (Optional) NOTE: For enhanced applications and customization of the module, you can use the Barcode Manager program. (For detailed information on the program, see the program’s online help.) The maximum operating temperature for the barcode scanner is 50 °C ... -
Page 44: Connecting Peripheral Devices
Connecting Peripheral Devices Connecting a Display Monitor If you want the benefits of a larger display screen with higher resolution, you can connect an external display monitor to your Tablet PC Your Tablet PC has an HDMI connector. Select models have a VGA connector. To switch the display output, use Windows Control Panel or OSD Control Panel. -
Page 45: Connecting A Usb Device
Connecting a USB Device USB Type A Your Tablet PC has a USB 3.1 Gen 2 port for connecting USB devices, such as a digital camera, scanner, printer, modem, and mouse. USB 3.1 Gen 2 supports a transfer rate up to 10 Gbit/s. NOTE: USB 3.1/3.0 port is backward compatible with USB 2.0 port. -
Page 46: Connecting A Serial Device
NOTE: You can still connect a USB device that has traditional connector types to the USB-C connector as long as you have a proper adapter. Connecting a Serial Device Select models have a serial port for connecting a serial device such as a serial mouse or serial communication device. -
Page 47: Connecting An Audio Device
Connecting an Audio Device The combo connector is the “4-pole TRRS 3.5mm” type (Apple iPhone Recessed) so you can connect a compatible headset microphone. SAFETY WARNING: To prevent possible hearing damage, do not listen at high volume levels for long periods. -
Page 48: Using Various Card Readers
Using Various Card Readers Using MicroSD Cards (Optional) If your model has the microSD card reader, you can use microSD cards for removable storage media. To insert a microSD card: 1. Locate the storage card reader and open the protective cover. 2. -
Page 49: Using Smart Cards (Optional)
Using Smart Cards (Optional) Select models have a smart card reader. With an embedded microcontroller, smart cards have the unique ability to store large amounts of data, carry out their own on-card functions (e.g., encryption and mutual authentication), and interact intelligently with a smart card reader. To insert a smart card: 1. -
Page 50: Using The Rfid Reader (Optional)
RFID antenna -or- RFID antenna NOTE: When not using an RFID card, do not leave it within or near the antenna area. For enhanced applications and customization of the module, contact your authorized Getac dealer. -
Page 51: Reading Magnetic Stripe Cards (Optional)
Reading Magnetic Stripe Cards (Optional) If your model has the magnetic stripe reader, you can read magnetic stripe cards. With the card’s magnetic stripe facing front, swipe the card through the slot. NOTE: Make sure to press the magnetic stripe firmly against the reader when swiping the card. -
Page 52: Using Bios Setup
Chapter 5 Using BIOS Setup BIOS Setup Utility is a program for configuring the BIOS (Basic Input/ Output System) settings of the computer. BIOS is a layer of software, called firmware, that translates instructions from other layers of software into instructions that the computer hardware can understand. -
Page 53: When And How To Use
When and How to Use NOTE: The actual setting items on your model may differ from those described in this chapter. The availability of some setting items depends on the configuration of your Tablet PC. You need to run BIOS Setup Utility when: You see an error message on the screen requesting you to run BIOS ... -
Page 54: Menu Descriptions
Menu Descriptions Information Menu The Information menu contains the basic configuration information of the system. There are no user-definable items in this menu. NOTE: The “Asset Tag” information appears when you have entered the asset number for this computer using the asset management program. The program is provided in the Asset tag folder of the Driver disc. - Page 55 System Policy allows you to choose between Performance and Balance. If battery life is your first priority, select Balance. If you need system performance more than battery life, select Performance. AC Initiation sets if connecting AC power will automatically start or ...
-
Page 56: Security Menu
Recovery Partition allows you to restore your Windows 10 system to the factory default state by using the “recovery partition” feature. Recovery partition is a portion of your hard disk drive that is set aside by the manufacturer to hold the original image of your system. WARNING: Using this feature will reinstall Windows to your system and configure it ... -
Page 57: Boot Menu
Password on Boot allows you to enable or disable the entering of password for booting up your system. Secure Boot Configuration (This item appears only when the password has been set.) Secure Boot enables or disables Secure Boot. Secure Boot is a feature that helps prevent unauthorized firmware, operating systems, or UEFI drivers from running at boot time. -
Page 58: Exit Menu
Exit Menu The Exit menu displays ways of exiting BIOS Setup Utility. After finishing with your settings, you must save and exit so that the changes can take effect. Exit Saving Changes saves the changes you have made and exits BIOS ... -
Page 59: Using Getac Software
Chapter 6 Using Getac Software Getac software includes application programs for specific computer components and utility programs for overall management. This chapter briefly introduces the programs. -
Page 60: Osd Control Panel
OSD Control Panel The OSD (On Screen Display) Control Panel provides a user-friendly interface for you to quickly activate or operate certain functions on your Tablet PC with a simple click of the screen. To open the OSD Control Panel, start the program named OSDC. The following screen appears. -
Page 61: G-Manager
G-Manager G-Manager allows you to view, manage, and configure several system functions and features. The G-Manager home menu presents four categories. Select a category name to open it. For detailed information, see the program’s online help. Select About Help. -
Page 62: G-Camera
G-Camera G-Camera is a geo-tagging camera application. Geographical information can be embedded into JPEG files as EXIF 2.2 metadata. NOTE: G-Camera uses the standard location service of Windows. To start the G-Camera application, select G-Camera. In the middle is the preview window with status display. At the two sides are various buttons. -
Page 63: Care And Maintenance
Chapter 7 Care and Maintenance Taking good care of your Tablet PC will ensure a trouble-free operation and reduce the risk of damage to your Tablet PC. This chapter gives you guidelines covering areas such as protecting, storing, cleaning, and traveling. -
Page 64: Protecting The Tablet Pc
Protecting the Tablet PC To safeguard the integrity of your Tablet PC data as well as the Tablet PC itself, you can protect the Tablet PC in several ways as described in this section. Using an Anti-Virus Strategy You can install a virus-detecting program to monitor potential viruses that could damage your files. -
Page 65: Taking Care Of The Tablet Pc
Taking Care of the Tablet PC Location Guidelines For optimal performance, use the Tablet PC where the recommended temperature is between 0 °C (32 °F) and 55 °C (131 °F). (Actual operating temperature depends on product specifications.) Avoid placing the Tablet PC in a location subject to high humidity, ... -
Page 66: Cleaning Guidelines
To avoid damaging the screen, do not touch it with any sharp object. LCD image sticking occurs when a fixed pattern is displayed on the screen for a prolonged period of time. You can avoid the problem by limiting the amount of static content on the display. - Page 67 Charge the battery pack between 10 °C ~ 30 °C (50 °F ~ 86 °F) temperature range. A higher environment temperature will cause the battery pack’s temperature to rise. Avoid charging the battery pack inside a closed vehicle and in hot weather condition. Also, charging will not start if the battery pack is not within the allowed temperature range.
-
Page 68: Touchscreen Guidelines
Touchscreen Guidelines Use your finger or the stylus on the display. Using a sharp or metallic object other than your finger or stylus may cause scratches and damage the display, thereby causing errors. Use a soft cloth to remove dirt on the display. The touchscreen surface ... -
Page 69: When Traveling
When Traveling Before traveling with your Tablet PC, make a backup of your hard disk data into flash disks or other storage devices. As an added precaution, bring along an extra copy of your important data. Make sure that the battery pack is fully charged. ... -
Page 70: Chapter 8 Troubleshooting
Chapter 8 Troubleshooting Computer problems can be caused by hardware, software, or both. When you encounter any problem, it might be a typical problem that can easily be solved. This chapter tells you what actions to take when solving common computer problems. -
Page 71: Preliminary Checklist
Preliminary Checklist Here are helpful hints to follow before you take further actions when you encounter any problem: Try to isolate which part of the Tablet PC is causing the problem. Make sure that you turn on all peripheral devices before turning on the ... -
Page 72: Solving Common Problems
Solving Common Problems Battery Problems The battery does not charge (Battery Charge indicator does not light amber). Make sure that the AC adapter is properly connected. Make sure that the battery is not too hot or cold. Allow time for the ... -
Page 73: Display Problems
Make sure that both devices are compatible. Display Problems Nothing appears on the screen. During operation, the screen may automatically turn off as a result of power management. Press any key to see if the screen comes back. The brightness level might be too low. -
Page 74: Hardware Device Problems
The following message appears during the fingerprint login process – “Couldn’t recognize that fingerprint. Make sure you’ve set up your fingerprint in Windows Hello.” When placing your finger on the scanner, make sure your finger aims at the center of the scanner surface and covers as much area as possible. If a fingerprint login frequently fails, try enrolling again. -
Page 75: Sensor Problems
− Connect the AC adapter to the Tablet PC. − Replace the empty battery pack with a fully charged one. Sensor Problems The built-in digital compass doesn’t seem to be accurate. Rotating the display can affect the accuracy of the digital compass. This ... -
Page 76: Software Problems
Software Problems An application program does not work correctly. Make sure that the software is correctly installed. If an error message appears on the screen, consult the software program’s documentation for further information. If you are sure the operation has stop, reset the Tablet PC. ... -
Page 77: Wlan Problems
WLAN Problems I cannot use the WLAN feature. Make sure that the WLAN feature is turned on. Transmission quality is poor. Your Tablet PC may be in an out-of-range situation. Move your Tablet PC closer to the Access Point or another WLAN device it is associated with. -
Page 78: Other Problems
Make sure that your Tablet PC is configured with the same security option (encryption) to the Access Point. Use the Web Manager/Telnet of the Access Point to check whether it is connected to the network. Reconfigure and reset the Access Point. ... -
Page 79: Resetting The Tablet Pc
Resetting the Tablet PC You may have to reset (reboot) your Tablet PC on some occasions when an error occurs and the program you are using hangs up. If you are sure the operation has stopped and you cannot use the “restart” function of the operating system, reset the Tablet PC. -
Page 80: System Recovery
System Recovery Using Windows RE Windows 10 has a recovery environment (Windows RE) that provides recovery, repair, and troubleshooting tools. The tools are referred to as Advanced Startup Options. You can access these options by selecting Settings Update & Security. There are several choices: System Restore ... -
Page 81: Using Recovery Partition
Using Recovery Partition When necessary, you can restore your Windows 10 system to the factory default state by using the “recovery partition” feature. Recovery partition is a portion of your hard disk drive that is set aside by the manufacturer to hold the original image of your system. -
Page 82: Using The Driver Disc (Optional)
Using the Driver Disc (Optional) NOTE: You can download the latest drivers and utilities from Getac website http://www.getac.com Support. The Driver disc contains drivers and utilities required for specific hardware in your Tablet PC. Since your Tablet PC comes with drivers and utilities pre-installed, you normally do not need to use the Driver disc. -
Page 83: Appendix A Specifications
Appendix A Specifications NOTE: Specifications are subject to change without any prior notice. Parts Specifications - Intel® Core™ i7-8665U Quad Core, 1.9GHz up to 4.8GHz, 8MB Intel® Smart Cache - Intel® Core™ i7-8565U Quad Core, 1.8GHz up to 4.6GHz, 8MB Intel® Smart Cache - Intel®... - Page 84 Parts Specifications Optional I/O One of the below on the top side: Barcode scanner / HF RFID reader / USB 3.0 / USB 3.1 Gen 1 Type-C / RS232 serial / VGA /RJ-45 / microSD card slot Card readers MicroSD (option) Smart Card (option) HF RFID (option) Magnetic stripe card (option)
-
Page 85: Appendix B Regulatory Information
Appendix B Regulatory Information This appendix provides regulatory statements and safety notices on your Tablet PC. NOTE: Marking labels located on the exterior of your Tablet PC indicate the regulations that your model complies with. Please check the marking labels and refer to the corresponding statements in this appendix. -
Page 86: On The Use Of The System
Please note: The use of a non-shielded interface cable with this equipment is prohibited. Company name: Getac USA Address: 15495 Sand Canyon Rd., Suite 350 Irvine, CA 92618 USA Phone: 949-681-2900... -
Page 87: Ansi Warning
Canada Canadian Department of Communications Radio Interference Regulations Class B Compliance Notice This Class B digital apparatus meets all requirements of the Canada Interference-Causing equipment regulations. Cet appareil numérique de Classe B respecte toutes les exigences du Règlement Canadien sur le matériel brouileur. This digital apparatus does not exceed the Class B limits for radio noise emissions from digital apparatus set out in the Radio Interference Regulations of the Canadian Department of Communications. -
Page 88: Safety Notices
Safety Notices About the Battery If the battery is mishandled, it may cause fire, smoke or an explosion and the battery’s functionality will be seriously damaged. The safety instructions listed below must be followed. Danger Do not immerse the battery with liquid such as water, sea water or soda. ... - Page 89 Caution Do not use the battery where static electricity (more than 100V) exists that might damage the protection circuit of the battery. When children are using the system, parents or adults must ensure that they are using the system and battery correctly. Keep the battery away from flammable materials during charging and ...
- Page 90 FRENCH ATTENTION: II y a danger d’explosion s’il y a remplacement incorrect de la batterie. Remplacer uniquement avec une batterie du même type ou d’un type équivalent recommandé par le constructeur. Mettre au rebut les batteries usagées conformément aux instructions du fabricant. Attention (for USA Users) The product that you have purchased contains a rechargeable battery.
- Page 91 Heat Related Concerns Your device may become very warm during normal use. It complies with the user-accessible surface temperature limits defined by the International Standards for Safety (IEC 60950-1 and IEC 62368). Still, sustained contact with warm surfaces for long periods of time may cause discomfort or injury. To reduce potential heat-related concerns, follow these guidelines: Keep your device and its AC adapter in a well-ventilated area when in ...
-
Page 92: On The Use Of The Rf Device
On the Use of the RF Device USA and Canada Safety Requirements and Notices IMPORTANT NOTE: To comply with FCC RF exposure compliance requirements, the antenna used for this transmitter must not be co-located or operating in conjunction with any other antenna or transmitter. Radio Frequency Interference Requirements and SAR This device meets the government’s requirements for exposure to radio waves. - Page 93 Reorient or relocate the receiving antenna. Increase the separation between the equipment and receiver. Connect the equipment into an outlet on a circuit different from that to which the receiver is connected. Consult the dealer or an experienced radio/TV technician for help. ...
-
Page 94: European Union Ce Marking And Compliance Notices
European Union CE Marking and Compliance Notices Statements of Compliance English This product follows the provisions of the European Directive 2014/53/EU. Danish Dette produkt er i overensstemmelse med det europæiske direktiv 2014/53/EU. Dutch Dit product is in navolging van de bepalingen van Europees Directief 2014/53/EU. - Page 95 Swedish Denna produkt har tillverkats i enlighet med EG-direktiv 2014/53/EU. Notices CE Max power: WLAN 2.4G: 19.69 dBm WLAN 5G: 21.82 dBm Bluetooth: 10.51 dBm WWAN: 23.69 dBm RFID (13.56): -23.80 dBuA/10m The device is restricted to indoor use only when operating in the 5150 to 5350 MHz frequency range.
-
Page 96: User Notification Of Take-Back Service
Getac-brand products for free. Getac understands the institutional customers will likely be recycling multiple items at once and as such. Getac wants to make the recycling process for these larger shipments as streamlined as possible. Getac works with recycling vendors with the highest standards for protecting our environment, ensuring worker safety, and complying with global environmental laws. -
Page 97: Energy Star 7.0
® Please reference ENERGY STAR related information from http://www.energystar.gov. ® As an ENERGY STAR Partner, Getac Technology Corporation has determined ® that this product meets the ENERGY STAR guidelines for energy efficiency. An ENERGY STAR ® qualified computer uses 70 % less electricity than computers without enabled power management features. - Page 98 By using less energy, these products help lower consumers’ utility bills, and prevent greenhouse gas emissions. Getac Product Compliance All Getac products with ENERGY STAR ® logo comply with the ENERGY STAR ®...
-
Page 99: Battery Recycling
Battery Recycling For the U.S. and Canada only: To recycle the battery, please go to the RBRC Call2Recycle website or use the Call2Recycle Helpline at 800-822-8837. Call2Recycle® is a product stewardship program providing no-cost battery and cellphone recycling solutions across the U.S. and Canada. Operated by Call2Recycle, Inc., a 501(c)4 nonprofit public service organization, the program is funded by battery and product manufacturers committed to responsible recycling. -
Page 100: About Battery And External Enclosure Replacement
Getac authorized service centers. The battery pack is user-replaceable. Replacement instructions can be found in “Replacing the Battery Pack” in Chapter 3. The bridge battery and button cell must be replaced by Getac authorized service centers. Visit the website at http://us.getac.com/support/support-select.html authorized service center information.
Need help?
Do you have a question about the UX10 and is the answer not in the manual?
Questions and answers