Getac ZX10 User Manual
Hide thumbs
Also See for ZX10:
- User manual (42 pages) ,
- Quick manual (41 pages) ,
- Instruction manual (11 pages)
Table of Contents
Advertisement
Quick Links
Advertisement
Table of Contents

Related Manuals for Getac ZX10


Summary of Contents for Getac ZX10
- Page 1 ZX10 USER MANUAL Rugged Mobile Computing Solution...
- Page 2 They may differ from the actual screens and presentations generated by the actual product. Your device is based on Android™ 11 operating system, with additions by Getac. For the latest version of the manual, please visit the Getac website at www.getac.com.
-
Page 3: Table Of Contents
Table of Contents Chapter 1 Getting Started ..............1 Identifying Hardware Components .......... 1 Front Components ..............1 Back Components ..............4 Right-Side Components ............5 Left-Side Components ............5 Top Components..............6 Bottom Components ............. 6 Getting Your Device Ready for Use ........... 7 Installing the Micro-SIM Card (Select Models Only) .... - Page 4 Using the Barcode Scan Key (Select Models Only) .... 34 GetacIME Settings ..............35 DisplayLink Presenter ............... 36 NFC Reader (Select Models Only) ..........37 Getac deployXpress Client (Select Models Only) ....38 Chapter 5 Managing Your Device ..........39 Managing Power ..............39 Battery Protection Mechanism ...........
- Page 5 Appendix A Specifications ..............53 Appendix B Regulatory Information ..........55 Safety Precautions ..............55 About Charging ..............55 About the AC Adapter ............55 About the Battery ..............56 Heat Related Concerns ............57 North America ................58 USA ..................58 Canada ..................
-
Page 6: Chapter 1 Getting Started
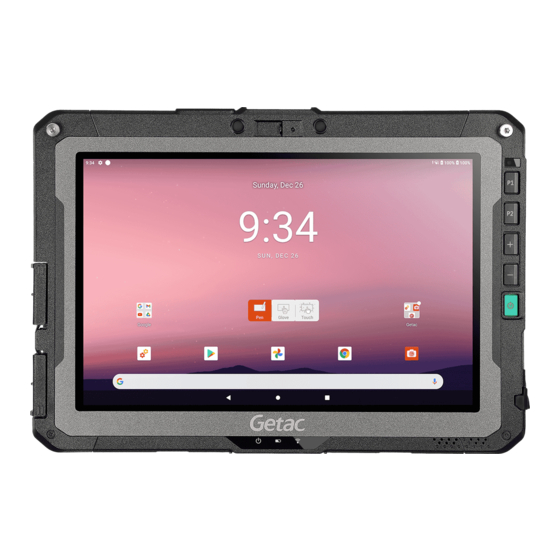
Chapter 1 Getting Started This chapter introduces you to the external components of your device and guides you through the process of setting up your device for use. NOTE: Depending on the specific model you purchased, the color and look of your model may not exactly match the graphics shown in this document. - Page 7 Select Models Only Component Description Camera cover Covers the camera lens. (optional) Slide the cover to open or close it. The cover provides privacy protection. Camera lens Allows you to use the camera function. The front lens (optional) supports 8 MP with fixed focus.
- Page 8 NOTE: When carrying the device around, always use the handle. When placing the device on a table top for work, rotate the handle backwards to serve as a stand. NOTE: The hardware buttons (except the power button) can be re-defined using Getac Settings.
-
Page 9: Back Components
Back Components Component Description Stylus Serves as the input device by tapping on the touchscreen to make selections and enter information. Battery pack Supplies power to your device when external power is not connected. NOTE: If you have the high-capacity battery model, the battery pack looks different from the one shown here. -
Page 10: Right-Side Components
Right-Side Components Component Description Power connector Connects to the AC adapter. Locks the device to a stationary object for Kensington lock security. Left-Side Components For covers with an arrowhead icon, push the cover toward one side to unlock and the other side to lock. -
Page 11: Top Components
Top Components Component Description Barcode scanner Scans barcodes. lens (optional) Bottom Components Component Description Docking Connects to the office or vehicle dock (purchased connector separately). Tri antenna Connects to the docking station for using external passthrough GPS/WWAN/WLAN antenna. (optional) -
Page 12: Getting Your Device Ready For Use
Getting Your Device Ready for Use Installing the Micro-SIM Card (Select Models Only) Your device supports dual SIM operation. If you have only one SIM card, insert it in SIM 1 slot. Noting the orientation, insert the micro-SIM card all the way into the slot. SIM 1 SIM 2 If two SIM cards are detected during system startup, you will be prompted... -
Page 13: Installing The Battery Packs
Installing the Battery Packs The device has two battery compartments for two battery packs; each is installed in the same way. NOTE: If you have the high-capacity battery model, the battery pack looks different from the one shown here. The removal/installation method is the same. 1. -
Page 14: Using The Tether
Using the Tether A tether is provided for attaching the stylus to your device. 1. Thread one of the tether’s loops through the hole of the stylus ( Then, insert the other loop through the first loop ( ) and pull the ... -
Page 15: Connecting To Ac Power And Charging The Battery
Battery NOTE: Specific models do not have the AC adapter and power cord as standard items. To purchase the AC adapter kit for your model, contact a Getac authorized distributor. (Check https://www.getac.com/en/contact/ contact information.) The battery pack is shipped to you in power saving mode that protects it ... -
Page 16: Performing The Initial Startup
Performing the Initial Startup NOTE: You must use AC power when starting up the device for the very first time. When turning on your device for the very first time, you will be guided through a setup process. 1. Make sure that your device is connected to AC power. 2. -
Page 17: Chapter 2 Operating Basics
Chapter 2 Operating Basics This chapter familiarizes you with the basic operations of your device. CAUTION: Do not expose your skin to the device when operating it in a very hot or cold environment. The device can get uncomfortably warm when you use it in high temperatures. ... -
Page 18: Navigating On The Screen
Navigating on the Screen Use the stylus (or your finger) to navigate and select objects on the screen. Here are some common terms that you should know when using the touchscreen: Touch the screen once with the stylus (or finger) to open an item or select an object. -
Page 19: Touch Mode
Home screen. Select this mode when liquids, Enables simultaneous use with such as raindrops, are falling Getac stylus or finger touch. on the screen and should be (You must use the stylus rejected as input. Works best supplied with your model.) -
Page 20: Using Applications
You can add app icons, shortcuts, widgets, and other items to any part of the Home screen where there’s free space. Using Applications Swipe up from the bottom of the Home screen to open the All Apps screen. The screen holds icons for all of the apps on your device. Tap an icon to open the app. -
Page 21: Status Bar
Status Bar The Status Bar appears at the top of almost every screen. It displays icons indicating the current status (on the right) and icons indicating that you’ve received notifications (on the left), along with the current time. Quick Settings and Notifications Panel You can open Quick Settings and Notifications Panel by swiping down from the top of the screen. -
Page 22: Entering Information
Your device has two virtual keyboards (Gboard and GetacIME). Gboard: This is the default Google™ keyboard. GetacIME: This is a virtual keyboard developed by Getac. (See “GetacIME” in Chapter 4 for detailed information on using the keyboard.) Barcode Scan (available for select models only) -
Page 23: Quick Qr Code Scanning (Select Models Only)
If your model has the barcode scanner lens, you can quickly scan an QR code to access a website. Note that you have to define a hardware button as “Trigger” via the Getac Settings app first. (See “Getac Settings” in Chapter 5 for setup information.) 1. -
Page 24: Notes
Notes Pulse repetition rate: 57.67 Hz Scan angle: 360° tilt; ±60° pitch; ±60° skew ... -
Page 25: Chapter 3 Getting Connected
To check or modify settings, go to Settings Network & internet Mobile network. To check the specific WWAN module information, go to Getac Settings and check the items under LTE. Using Dual SIM Only one SIM can be activated at a time. You can switch between SIM 1 and SIM 2 according to your needs. -
Page 26: Using Wi-Fi Networks
If you insert the second SIM card in SIM 2 slot during power on, you will be prompted to restart the system. The second SIM card will remain invisible in Settings until you restart the system. Hot-Swapping a SIM Card Hot-swapping is supported on the activated SIM. -
Page 27: Using The Bluetooth Function
Using the Bluetooth Function NOTE: Getac does not guarantee the product’s compatibilities with the Bluetooth headsets/devices from all manufacturers. Turning On/Off the Bluetooth Radio Open Quick Settings and tap the Bluetooth icon. Pairing with a Bluetooth Device The first time you use a new Bluetooth device with your device, you must “pair”... -
Page 28: External Connections
USB connector on your computer. NOTE: With a proper adapter, you can still connect a USB peripheral that has a Type-A connector to this Type-C connector. However, Getac does not guarantee the compatibility with all USB peripherals via the adapter. DisplayPort over USB-C ... -
Page 29: Connections Via Usb Type-A
Connections via USB Type-A Your device has a USB 2.0 Type-A host connector for connecting USB peripheral devices, such as a USB drive. Using a MicroSD Card Inserting a microSD card 1. Locate the microSD card slot and open the cover. 2. -
Page 30: Connecting An Audio Device
Connecting an Audio Device The audio combo connector is the “4-pole TRRS 3.5mm” type so you can connect a compatible headset microphone. SAFETY WARNING: To prevent possible hearing damage, do not listen at high volume levels for long periods. Using a Smart Card (Select Models Only) To insert a smart card: 1. - Page 31 3. Close the cover. To remove a smart card: 1. Make sure that the third-party smart card software is not accessing the smart card. 2. Open the cover. 3. Press the edge of the card to release it and then pull the card out of the slot.
-
Page 32: Chapter 4 Getac Applications
For instructions on using the preinstalled apps from Google, check Google official website for online help. You can use Update Center to update Getac apps to the latest version. (See “Updating Getac Apps” in Chapter 6 for information.) Getac Camera Use the Getac Camera app to take photos and record videos. -
Page 33: Taking Photos
Taking Photos 1. Open the Getac Camera app. If you are in Video mode, tap to switch to Camera mode. Photo view Video mode Settings Shutter Control buttons Zoom control A white circle will appear briefly in the center, indicating the focus area. -
Page 34: Recording Videos
Recording Videos 1. Open the Getac Camera app. If you are in Camera mode, tap to switch to Video mode. Video playback Camera mode Settings Record Control buttons Zoom control A white circle will appear briefly in the center, indicating the focus area. -
Page 35: Control Buttons
If you want to capture a still image while recording, tap 5. To stop recording, tap 6. An image from your most recent video is displayed as a thumbnail at the corner. You can tap the thumbnail to view the video. The video will be saved as a MP4 file in the predefined folder. -
Page 36: Camera Settings
Flash - Off (default) (for Video mode) - On To switch between the front and back camera lens. Camera Switch Camera Settings While in Getac Camera, tap at the top left corner to open the settings menu. - Page 37 Item Description Camera Double tap to To set if you can take the photo by double tapping capture where you want to focus in the preview window. Timer To set the countdown timer for taking the photo. Angle To set if the device orientation angle is displayed in the preview window.
- Page 38 Options are: • Internal Storage • SD card Reset Settings Reset settings To reset all Getac Camera settings to the default values. to default Set Settings Via QR code Import To import Getac Camera settings from another device by settings scanning the QR code on that device.
-
Page 39: Getacime
GetacIME GetacIME (Input Method Editor) is an English keyboard that incorporates a “barcode scan” key (available for select models only). To switch to the GetacIME keyboard, tap at the bottom right of the screen and select GetacIME. Using the Barcode Scan Key (Select Models Only) If your model has the barcode scanner lens, you will see the Barcode Scan on the GetacIME keyboard. -
Page 40: Getacime Settings
5. By default settings, the scan beam will turn on again shortly afterwards, ready for the next barcode. To end the scanning session, tap the Barcode Scan key. GetacIME Settings To open GetacIME Settings, use one of the below methods: When GetacIME is open, tap to access its settings menu. -
Page 41: Displaylink Presenter
Item Description Barcode Scan To enable or disable continuous scanning mode. continuously When enabled, the scan beam will always turn on again shortly after a successful scan or timeout. When disabled, the scanner is in single scanning mode. Barcode To add character(s) before/after each decoded data prefix/suffix string. -
Page 42: Nfc Reader (Select Models Only)
To read information from NFC/RFID tags: 1. Tap the Getac Settings app icon , which can be found in the default Home screen, the Getac folder, and the All Apps screen. 2. Tap NFC reader. 3. Bring the tag near the RFID antenna. -
Page 43: Getac Deployxpress Client (Select Models Only)
Getac deployXpress Client (Select Models Only) Getac deployXpress is a cloud-based deployment solution for Getac Android devices. It helps IT administrators better manage Getac devices in the enterprise or organization. On each client device to be deployed, an app named deployXpress Client is pre-installed. -
Page 44: Managing Your Device
Chapter 5 Managing Your Device This chapter tells you how to manage power and customize your device. Managing Power The operating time of a fully charged battery depends on how you are using the device. Some functions, such as using multimedia or operating a microSD card, may consume the battery power considerably. -
Page 45: Low Battery Signals And Actions
NOTE: This automatic battery protection is not equivalent to “Battery Charging Mode” in Getac Settings. When the battery is in an automatic protection mode as described above, the mode has priority over the Battery Charging Mode. When the battery is out of the automatic protection mode, the Battery Charging Mode takes effect. - Page 46 NOTE: You can hot swap one battery pack while the other one is supplying the power. The appropriate temperature range for hot swapping the battery pack is between -21°C (-5.8 °F) and 45 °C (113 °F). Removing both battery packs (which is discouraged in normal circumstances) ...
-
Page 47: Power-Saving Tips
4. Fit another battery pack into place. With the battery pack correctly oriented, attach its connector side to the battery compartment at an angle ( ) and then press down the other side ( 5. Slide the battery latch toward the locked position ( CAUTION: Make sure the battery latch is correctly locked, not revealing the underneath red part. -
Page 48: Battery Guidelines
If you don’t need it, turn off automatic syncing for all apps. Avoid power-consuming apps. To check which apps consume the most battery power, go to Settings Battery. Battery Guidelines For optimal performance of the battery, take note of the following: During charging, do not disconnect the AC adapter before the battery ... -
Page 49: Customizing Your Device
For information on standard Android settings, check Google official website for online help. Getac Settings Use Getac Settings to configure functions specific to your device. Tap the Getac Settings app icon , which can be found in the default Home... - Page 50 The following table describes the configurable items. Item Description Physical buttons P1 button To assign a function or app to a hardware button on your device. Tap a button name and select from the P2 button available options in the popup menu. (+) Plus Button (-) Minus Button Physical buttons...
- Page 51 Besides configuring settings for specific components, you can also view device information in Getac Settings, such as sensor status, certain hardware and firmware information, etc.
-
Page 52: Care And Maintenance
Chapter 6 Care and Maintenance This chapter provides various care and maintenance information. Restart or Hard Reboot Restart To restart the device, press and hold the power button until a menu pops up. Then tap Restart. If the device somehow cannot display the power off menu, you can force the device to power off by pressing and holding the power button for more than 8 seconds. -
Page 53: Update Center
To open the app, tap the Update Center app icon , which can be found in the Getac folder and the All Apps screen. When opening the app for the very first time, you will be asked to allow the installation. Tap the on/off switch to turn it on and then tap ... - Page 54 You will see this screen if the OS is up to date. You will see this screen if an update is found available at the server. Tap DOWNLOAD NOW. After the download is completed, a window pops up to inform you. Tap UPDATE in the popup window.
-
Page 55: Updating Getac Apps
Updating Getac Apps After opening Update Center, tap Application. The information you see depends on the current status of your device. If an update is found available after a check (either manually or automatically), you will see the UPDATE button for the app. -
Page 56: Update Center Scan
Android version only. You will not be notified of a new Android version. Update Center Scan The “Scan” feature is available for specific customers only. With a QR code provided by Getac, updates can be performed by scanning the QR code. -
Page 57: Caring For Your Device
Caring for Your Device Taking good care of your device will ensure trouble-free operation and reduce the risk of damage to your device. Keep your device away from excessive moisture and extreme temperatures. Avoid exposing your device to direct sunlight or strong ultraviolet light ... -
Page 58: Appendix A Specifications
Appendix A Specifications NOTE: Specifications are subject to change without any prior notice. Parts Specifications Qualcomm® Snapdragon™ 660, Octa-core, 1.95 GHz, maximum 2.2 GHz Video Controller UMA, Qualcomm® Adreno™ 512 GPU Display 10.1-inch (16:10) TFT LCD, WUXGA 1920 x 1200, sunlight Panel readable, 800 nits standard brightness, protection film Touchscreen... - Page 59 Parts Specifications Power AC adapter Universal 65 W; input: 100240 V AC, 50/60 Hz; output: 19 V Battery pack Standard: Lithium-ion Polymer type, 1 cell, 3.84 V, typical 4990 mAh, minimum 4870 mAh High capacity: Lithium-ion Polymer type, 2 cells, 3.84 V, typical 9980 mAh, minimum 9470 mAh Dimension 275 x 192 x 17.9 mm (10.8 ×...
-
Page 60: Appendix B Regulatory Information
Appendix B Regulatory Information This appendix provides regulatory statements and safety notices on your device. NOTE: Marking labels located on the exterior of your device indicate the regulations that your model complies with. Please check the marking labels on your device and refer to the corresponding statements in this chapter. Some notices apply to specific models only. -
Page 61: About The Battery
Do not use the AC adapter in a high moisture environment. Never touch the AC adapter when your hands or feet are wet. Allow adequate ventilation around the AC adapter when using it to operate the device or charge the battery. Do not cover the AC adapter with paper or other objects that will reduce cooling. -
Page 62: Heat Related Concerns
Stop charging if the charging process cannot be finished. In case of a leaking battery, keep the battery away from flames and do not touch it. Caution Do not use the battery where static electricity (more than 100V) exists ... -
Page 63: North America
Never place your device or AC adapter on furniture or any other surface that might be marred by exposure to heat since the base of your device and the surface of the AC adaptor may increase in temperature during normal use. - Page 64 (1) This device may not cause harmful interference. (2) This device must accept any interference received, including interference that may cause undesired operation. Company name Getac Inc. 15495 Sand Canyon Rd., Suite 350 Address Irvine, CA 92618 USA Phone...
-
Page 65: Canada
Canada Canadian ICES-003 CAN ICES-3(B)/NMB-3(B) This device contains licence-exempt transmitter(s)/receiver(s) that comply with Innovation, Science and Economic Development Canada’s licence- exempt RSS(s). Operation is subject to the following two conditions: (1) This device may not cause interference. (2) This device must accept any interference, including interference that may cause undesired operation of the device. -
Page 66: User Notification Of Take-Back Service
If you have a Getac computer that needs to go to a recycling house, Getac can help you. Just contact us at (866) 394 – 3822 or by email at GUSA.RecycleProgram@getac.com to obtain a prepaid shipping label at no charge to you, pack up your equipment in a box of your choice and send it off. -
Page 67: Europe Marking And Compliance Notices
Europe Marking and Compliance Notices Statements of Compliance English This product follows the provisions of the European Directive 2014/53/EU. Danish Dette produkt er i overensstemmelse med det europæiske direktiv 2014/53/EU. Dutch Dit product is in navolging van de bepalingen van Europees Directief 2014/53/EU. - Page 68 Swedish Denna produkt har tillverkats i enlighet med EG-direktiv 2014/53/EU. Notices Max power: WLAN 2.4G: 17.5 dBm WLAN 5G: 11.5 dBm BT: 10 dBm NFC: -19.13 dBuA/m@10m WWAN: 24 dBm The device is restricted to indoor use only when operating in the 5150 to 5350 MHz frequency range.
-
Page 69: Restriction Of Hazardous Substances (Rohs) Directive
Restriction of Hazardous Substances (RoHS) Directive EU RoHS Getac products meet the requirements of Directive 2011/65/EU on the restriction of the use of certain hazardous substances in electrical and electronic equipment. For more information about RoHS, go to: https://www.getac.com/us/environment/ Company name Getac Technology GmbH. -
Page 70: Rf Exposure Information (Sar)
® Please reference ENERGY STAR related information from http://www.energystar.gov. ® As an ENERGY STAR Partner, Getac Technology Corporation has determined that this product meets the ENERGY STAR ® guidelines for energy efficiency. All Getac products with ENERGY STAR ® logo comply with the ENERGY STAR ®...
Need help?
Do you have a question about the ZX10 and is the answer not in the manual?
Questions and answers