Getac UX10 Series Manual
Hide thumbs
Also See for UX10 Series:
- User manual ,
- Operation manual (61 pages) ,
- Maintenance manual (10 pages)
Table of Contents
Advertisement
Quick Links
Advertisement
Table of Contents

Related Manuals for Getac UX10 Series


Summary of Contents for Getac UX10 Series
- Page 1 UX10 Series Rugged Mobile Computing Solutions...
- Page 2 All brand and product names are trademarks or registered trademarks of their respective companies. NOTE The information in this manual is subject to change without notice. For the latest version of the manual, please visit the Getac website at www.getac.com.
-
Page 3: Table Of Contents
Table of Contents Chapter 1 Getting Started .............. 1 Getting the Tablet PC Running ........... 2 Unpacking ................2 Installing the Micro-SIM Card (Optional) ......... 2 Installing the Battery Pack ............3 Using the Tether..............4 Connecting to AC Power ............5 Turning On and Off the Tablet PC .......... - Page 4 Hot Swapping the Battery Pack (Optional) ......30 Appendix A Specifications............... 33 Appendix B Regulatory Information ..........35 Safety Notices ................36 About the Battery ..............36 About the AC Adapter ............38 Heat Related Concerns ............39 North America ................40 USA ..................
-
Page 5: Chapter 1 Getting Started
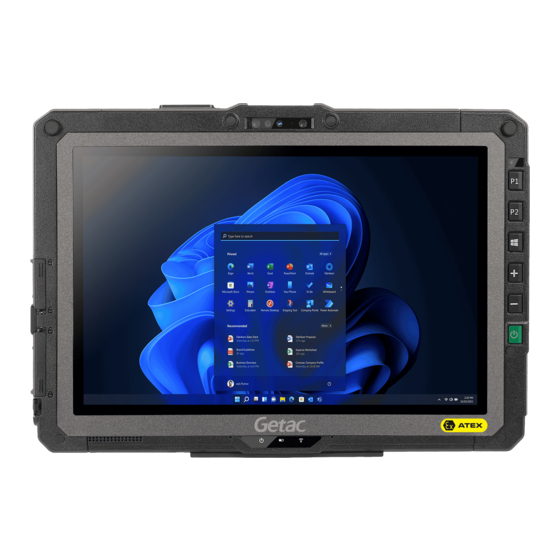
Chapter 1 Getting Started This chapter first tells you step by step how to get the Tablet PC up and running. Then, you will find a section briefly introducing the external components of the Tablet PC. NOTE: Depending on the model you purchased, the appearance of your Tablet PC may not be exactly the same as those shown in this manual. -
Page 6: Getting The Tablet Pc Running
Inspect all the items. If any item is damage or missing, notify your dealer immediately. NOTE: Specific models do not have the AC adapter and power cord as standard items. To purchase the AC adapter kit for your model, contact a Getac authorized distributor. (Check https://www.getac.com/en/contact/ for contact information.) -
Page 7: Installing The Battery Pack
2. Slide the SIM card holder tray toward the OPEN direction to unlock. Lift up the tray and, noting the orientation, insert the SIM card into the tray. 3. Close the holder tray and slide it back to the locked position. Installing the Battery Pack 1. -
Page 8: Using The Tether
Battery release latch 2. Slide the security lock to the locked position ( Locked Unlocked CAUTION: Make sure the lock is correctly locked, not revealing the underneath red part. Using the Tether A tether is provided for attaching the stylus to your Tablet PC. 1. -
Page 9: Connecting To Ac Power
2. Insert the other loop end to the tether hole on the Tablet PC (as indicated by below). Then, insert the stylus end through the loop (as indicated by below) and pull it tight. NOTE: If the hard handle is installed, attach the tether to the D-ring on the hard handle. -
Page 10: Turning On And Off The Tablet Pc
The battery pack is shipped to you in power saving mode that protects it from charging/discharging. It will get out of the mode to be ready for use when you install the battery pack and connect AC power to the Tablet PC for the very first time. - Page 11 Turning Off When you finish a working session, you can stop the system by turning off the power or leaving it in Sleep or Hibernation mode: To... Do this... Power off Tap Start Power Shut down. (Shutdown) Sleep Press the power button.* -or- Tap Start ...
-
Page 12: Identifying Hardware Components
Identifying Hardware Components CAUTION: You need to open the protective covers to access the connectors. When not using a connector, make sure to close the cover completely for water- and dust-proof integrity. (Engage the locking mechanism if existing.) Front Components Component Description ... - Page 13 Component Description Light sensor Detects the surrounding lighting condition for automatic adjustment of the LCD brightness. P1 button Opens or closes the OSD Control Panel. When pressed longer: Serves as the Ctrl+Alt+Del keyboard keys. P2 button The default function is Camera or Barcode Trigger depending on your model.
- Page 14 Component Description Blinks red rapidly (once per 0.5 second) when there is a thermal protection problem. Ask for repair service in case this happens. Blinks amber when the battery charging is in an abnormal state. Replace the battery in case this happens.
-
Page 15: Rear Components
Rear Components Component Description Flash Provides extra light when taking pictures. Camera lens Allows you to use the camera function. When the camera lens is in use, the indicator beside it lights up. Stylus holder Holds the stylus. ... -
Page 16: Right-Side Components
Battery Powers the computer when no external power source is connected. NOTE: If you have the high-capacity battery model, the battery pack looks different from the one shown here. Select models have one of the below components. Bridge battery Provides enough extra power for the purpose of hot swapping the battery pack. -
Page 17: Top Components
Component Description Power connector Connects the AC adapter. Combo audio Connects a set of headphones or external speakers with amplifier. connector Supports a headset microphone with 4-pole TRRS 3.5mm jack. USB 3.1 Gen 2 port Connects a USB device. ... -
Page 18: Bottom Components
d MicroSD card slot Accepts a microSD card for removable storage media. Component Description e RS-232 serial Connects a serial device. connector f RJ45 connector Connects the LAN cable. g USB 3.0 port Connects a USB device. Bottom Components Component Description ... -
Page 19: Operating Your Tablet Pc
Chapter 2 Operating Your Tablet PC This chapter provides information about the use of the Tablet PC. If you are new to Tablet PCs, reading this chapter will help you learn the operating basics. If you are already a computer user, you may choose to read only the parts containing information unique to your Tablet PC. -
Page 20: Navigating On The Screen
(as shown below). Enables simultaneous use Select this mode when liquids, with Getac stylus or finger such as raindrops, are falling on touch. (You must use the the screen and should be stylus supplied with your rejected as input. - Page 21 The following table shows how you use the touchscreen to obtain equivalent mouse functions. Equivalent Mouse Term/Action Function Tap: Touch the screen once. Click/Point Double-tap: Touch the screen twice rapidly. Double-click Tap and hold: Tap and hold until a popup menu appears. Right-click Drag: Hold the stylus (or finger) on the screen and drag Drag...
- Page 22 Actions Gestures Descriptions = finger down; = finger up) Rotate Use rotating to move a picture or other item on the screen in a circular direction (clockwise or counter- clockwise). The gesture Move two fingers in opposing works in applications directions.
-
Page 23: Using The Dual Mode Display (Optional)
Using the Dual Mode Display (Optional) Dual mode display (if your model has the feature) incorporates both touchscreen and digitizer functions. The display is set to Touchscreen mode by default. Touchscreen mode provides all the functionalities that an ordinary touchscreen has. When the Tablet PC receives signals from the digitizer pen, the display automatically switches to Digitizer mode. -
Page 24: Using Network And Wireless Connections
Using Network and Wireless Connections Using the LAN (Optional) Select models have the LAN module. To connect the network cable to the LAN module, connect one end of the LAN cable to the RJ45 connector on the Tablet PC and the other end to the network hub. -or- NOTE: The location of the connector depends on your model. -
Page 25: Using The Bluetooth Feature
If you want to quickly turn off all wireless radio, simply switch on Airplane mode. You can control the Airplane mode using one of the below methods. Select the network icon in the lower right of the taskbar. Then, select the ... -
Page 26: Using The Wwan Feature (Optional)
Use the Airplane Mode button in the OSD Control Panel. Connecting to another Bluetooth Device 1. Make sure that the Bluetooth function is enabled (as described above). 2. Make sure that the target Bluetooth device is turned on, discoverable and within close range. - Page 27 To turn off the WWAN radio: You can turn off the WWAN radio the same way you turn it on. If you want to quickly turn off all wireless radio, simply switch on Airplane mode. You can control the Airplane mode using one of the below methods. Select the network icon in the lower right of the taskbar.
-
Page 28: Chapter 3 Managing Power
Chapter 3 Managing Power Your Tablet PC operates either on external AC power or on internal battery power. This chapter tells you how you can effectively manage power. To maintain optimal battery performance, it is important that you use the battery in the proper way. -
Page 29: Ac Adapter
AC Adapter CAUTION: The AC adapter is designed for use with your Tablet PC only. Connecting the AC adapter to another device can damage the adapter. The AC power cord supplied with your Tablet PC is for use in the country ... -
Page 30: Battery Pack
Battery Pack The battery pack is the internal power source for the Tablet PC. It is rechargeable using the AC adapter. Charging the Battery Pack NOTE: Charging will not start if the battery’s temperature is outside the allowed range, which is between 0 C (32 F) and 50 C (122 F). -
Page 31: Checking The Battery Level
is the process of fully charging, discharging, and then charging. It can take several hours. The G-Manager program provides a tool called “Battery Recalibration” for the purpose. Checking the Battery Level NOTE: Any battery level indication is an estimated result. The actual operating time can be different from the estimated time, depending on how you are using the Tablet PC. -
Page 32: Battery Low Signals And Actions
Battery Low Signals and Actions The battery icon changes appearance to display the current state of the battery. Battery Battery Level Description Icon Discharging The icon shows the charge remaining in 10-percent increments until the charge reaches the low-battery level. The battery charge has reached the low-battery level. - Page 33 You can hot swap the battery pack if your model has the bridge battery. If you have the high-capacity battery model, the battery pack looks different from the one shown here. The removal and installation method is the same. 1.
-
Page 34: Hot Swapping The Battery Pack (Optional)
4. Slide the security lock to the locked position ( Locked Unlocked CAUTION: Make sure the lock is correctly locked, not revealing the underneath red part. Hot Swapping the Battery Pack (Optional) You can hot swap the battery pack if your model has the bridge battery. “Hot swapping”... - Page 35 means there is not enough extra power for you to safely hot swap the battery pack. Battery Hot Swapping Indicator Once a battery pack is removed, the display brightness level will be fixed at a low level and cannot be adjusted. If a charged battery pack is not inserted within 2 minutes, the Tablet PC ...
-
Page 37: Appendix A Specifications
Appendix A Specifications NOTE: Specifications are subject to change without any prior notice. Parts Specifications Alder Lake U Platform - Intel® Pentium™ 8505, up to 4.4GHz, 8M cache - Intel® Core™ i5-1235U, up to 4.4GHz, 12M cache - Intel® Core™ i5-1245U, up to 4.4GHz, 12M cache - Intel®... - Page 38 Parts Specifications Barcode scanner 1D and 2D (option) LAN (option) Intel® i219-LM Gigabit Network Connection, 10/100/1000 Mbps Ethernet Wireless LAN + Intel® AX211 2x2 802.11 AX + Bluetooth 5.2 combo (vPro) Bluetooth WWAN (option) 4G LTE Dual SIM: Micro-SIM 3FF and eSIM One of the below depending on your model: - Integrated GPS - Discrete GPS...
-
Page 39: Appendix B Regulatory Information
Appendix B Regulatory Information This appendix provides regulatory statements and safety notices on your Tablet NOTE: Marking labels located on the exterior of your Tablet PC indicate the regulations that your model complies with. Please check the marking labels and refer to the corresponding statements in this appendix. -
Page 40: Safety Notices
Safety Notices About the Battery If the battery is mishandled, it may cause fire, smoke or an explosion and the battery’s functionality will be seriously damaged. The safety instructions listed below must be followed. Danger Do not immerse the battery with liquid such as water, sea water or soda. ... - Page 41 In case of a leaking battery, keep the battery away from flames and do not touch it. Pack the battery tightly during transport. Caution Do not use the battery where static electricity (more than 100V) exists that might damage the protection circuit of the battery.
-
Page 42: About The Ac Adapter
DEUTSCH VORSICHT: Explosionsgefahr bei unsachgemäßem Austausch der Batterie. Ersatz nur durch denselben oder einen vom Hersteller empfohlenen gleich- wertigen Typ. Entsorgung gebrauchter Batterien nach Angaben des Herstellers. FRENCH ATTENTION: II y a danger d’explosion s’il y a remplacement incorrect de la batterie. -
Page 43: Heat Related Concerns
Heat Related Concerns Your device may become very warm during normal use. It complies with the user-accessible surface temperature limits defined by the International Standards for Safety. Still, sustained contact with warm surfaces for long periods of time may cause discomfort or injury. To reduce potential heat-related concerns, follow these guidelines: Keep your device and its AC adapter in a well-ventilated area when in use or ... -
Page 44: North America
North America Federal Communications Commission Radio Frequency Interference Statement NOTE: This equipment has been tested and found to comply with the limits for a Class B digital device pursuant to Part 15 of the FCC Rules. These limits are designed to provide reasonable protection against harmful interference in a residential installation. - Page 45 Replace the battery with battery model BP3S2P2100S-01 or BP3S3P3450P- 03, manufactured by Getac Technology Corporation only. Use of another battery may present a risk of fire or explosion. California Proposition 65 For California USA:...
- Page 46 Almost all electronic products contain 1 or more of the chemicals listed under Proposition 65. This does not mean the products pose a significant risk of exposure. As the consumers have the right to know about the products they purchase, we are giving this warning on our packaging and user manual to keep our consumers well informed.
-
Page 47: Canada
Canada Canadian ICES-003 CAN ICES-3(B)/NMB-3(B) This device contains licence-exempt transmitter(s)/receiver(s) that comply with Innovation, Science and Economic Development Canada’s licence-exempt RSS(s). Operation is subject to the following two conditions: (1) This device may not cause interference. (2) This device must accept any interference, including interference that may cause undesired operation of the device. - Page 48 This device and its antenna(s) must not be co-located or operating in conjunction with any other antenna or transmitter. Cet appareil est conforme aux limites d'exposition DAS incontrôlée pour la population générale de la norme CNR-102 d'Industrie Canada et a été testé en conformité...
-
Page 49: User Notification Of Take-Back Service
For Product Recycling: If you have a Getac computer that needs to go to a recycling house, Getac can help you. Just contact us at (866) 394 – 3822 or by email at GUSA.RecycleProgram@getac.com to obtain a prepaid shipping label at no charge to you, pack up your equipment in a box of your choice and send it off. -
Page 50: Europe Marking And Compliance Notices
Europe Marking and Compliance Notices Statements of Compliance English This product follows the provisions of the European Directive 2014/53/EU. Danish Dette produkt er i overensstemmelse med det europæiske direktiv 2014/53/EU. Dutch Dit product is in navolging van de bepalingen van Europees Directief 2014/53/EU. - Page 51 Swedish Denna produkt har tillverkats i enlighet med EG-direktiv 2014/53/EU. Notices Max power: WLAN 2.4G: 16.48 dBm WLAN 5G: 17.56 dBm WLAN 6G: 17.49 dBm Bluetooth: 9.31 dBm WWAN : 23.85 dBm RFID(13.56): -35 dBuA/10m (-3.5dBuA/m) SRD 510.6MHz: -33.68 dBuA/m The device is restricted to indoor use only when operating in the 5150 to 5350 MHz frequency range.
-
Page 52: Restriction Of Hazardous Substances (Rohs) Directive
Restriction of Hazardous Substances (RoHS) Directive EU RoHS Getac products meet the requirements of Directive 2011/65/EU on the restriction of the use of certain hazardous substances in electrical and electronic equipment. For more information about RoHS, go to: https://www.getac.com/us/environment/ Company name Getac Technology GmbH. -
Page 53: Energy Star
® All Getac products with ENERGY STAR ® logo comply with the ENERGY STAR ® standard, and the power management feature is enabled by default. Getac’s ENERGY STAR ® qualified products are listed on the EPA website. https://www.energystar.gov/products... -
Page 54: About Battery And External Enclosure Replacement
Getac authorized service centers. The battery pack is user-replaceable. Replacement instructions can be found in “Replacing the Battery Pack” in Chapter 3. The bridge battery and button cell must be replaced by Getac authorized service centers. Visit the website at http://us.getac.com/support/support-select.html authorized service center information.
Need help?
Do you have a question about the UX10 Series and is the answer not in the manual?
Questions and answers