
Related Manuals for Security Tronix ST-IP-DVF-1


Summary of Contents for Security Tronix ST-IP-DVF-1
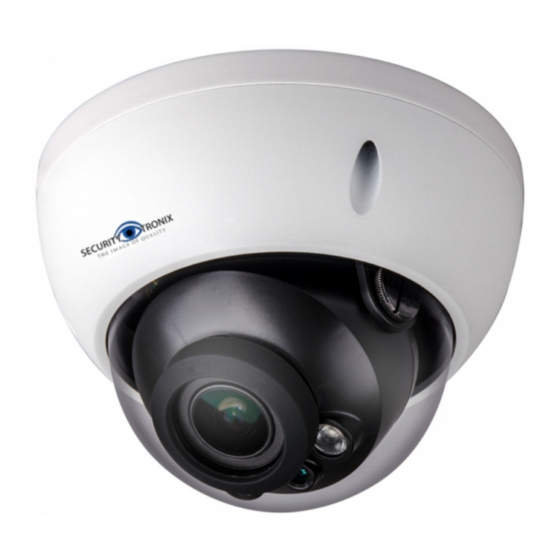
- Page 1 ST-IP-DVF-1 ST-IP-DVF-2 HD Mini Network Dome Camera Quick Start Guide Version 1.0.0...
- Page 2 Welcome Thank you for purchasing our Network camera. This Quick Start Guide is designed to get your system up and running as easily as possible. This document applies to both the ST-IP-MD36-1 and ST-IP-MD36-2 camera models (1mp & 2mp). Please read the following safeguard and warnings carefully before you use this camera. Please keep this document for future reference.
- Page 3 3. Operation and Daily Maintenance Please do not dismantle the camera; Doing so may void your warranty. It is recommended to use this camera with a surge-protection device. The grounding holes of the product are recommended to be grounded to further enhance the reliability of the camera.
- Page 4 Please refer to the disk for more details, check and download corresponding user’s manual and tool. Before installation, please open the package and check all the components are included. Contact your local retailer ASAP if something is broken in your package. Accessory Name Amount Network Camera Unit...
-
Page 5: Table Of Contents
Table of Contents Structure ........................1 Components ....................... 1 Physical Properties .................... 2 Alarm Setup ....................... 3 Camera Installation ......................4 Installation Steps ....................4 Micro SD Card Installation .................. 6 Lens Adjustment ....................7 Network Configuration ....................8 Modify IP Address ....................8 Login WEB Interface .................. -
Page 6: Structure
1 Structure Note: The following diagram is for reference only, to illustrate the camera component and cable port functions. Camera component and cable port function may differ according to different models, please refer to the actual camera for details. 1.1 Components Refer to the following figure for hardware configuration. -
Page 7: Physical Properties
Connect to DC 12V power, input power. Alarm signal input/output (optional, Port 4 I/O port not supported by ST-IP-DVF-1 / 2) Network data in/out and PoE. Note: Port 5 Internet access port Some cameras do not support PoE. Input audio signal, receive analog audio... -
Page 8: Alarm Setup
Note: Alarm is not supported by ST-IP-DVF-1 / 2 Alarm input, output description: Step 1 Connect alarm input device to the alarm input of I/O cable. Step 2 Connect alarm output device to the alarm output of I/O cable, alarm output is Normally Open circuit output which connects a10K resistor to 3.3V externally. -
Page 9: Installation Steps
Different models may have different ways to install due to different appearance, please refer to the corresponding figures according to the actual products. Manual Vari-focal Camera Figure 2-1... - Page 10 Important Before installing the camera, please make sure the installation surface can support at least 3x the weight of the camera and the bracket. Follow the steps listed below to install the camera. Please refer to Figure 2-1 for reference. Step 1 Use the included hex wrench to open dome enclosure by loosening the 3 hex screws on the exterior of the camera’s dome.
-
Page 11: Camera Installation
Figure 2-2 Note: If the camera needs to be restored to factory settings, long press the “Reset” button shown in Figure 2-2 for 10 seconds while the camera is powered on If the camera needs to use the WPS function, short press the “Reset” button shown in Figure 2- 2 for 1~2 seconds when the camera is powered on, then press the WPS button of the router, generally the camera can be connected to the corresponding router within 1 minute (only supported by some models). -
Page 12: Lens Adjustment
Figure 2-3 Micro SD Card installation illustration 1 Figure 2-4 Micro SD Card installation illustration 2 2.3 Lens Adjustment Step 1 Loosen adjustment screw C slightly, and then move the threaded rod of adjustment screw C slightly to rotate the lens barrel it is connected to. Adjust the lens focal length to the needed position according to the image display. -
Page 13: Network Configuration
3 Network Configuration The IP address of each camera is the same when leaving the SecurityTronix factory (default IP192.168.1.108). For the smoothest project installation, please allocate a useable IP segment of the entire network according to the actual network environment. 3.1 Modify IP Address IP address can be acquired and modified through the quick configuration tool for the cameras which is accessed via a wired network;... -
Page 14: Login Web Interface
Figure 3-1 Step 3 Modify the camera IP address on the “Net” interface, click “Save” to finish modification. See Figure 3-2 for more details. Figure 3-2 3.2 Login WEB Interface Note: Different devices may have different WEB interfaces, the figures below are just for reference, please refer to the document <<WEB Operation Manual>>... - Page 15 Figure 3-3 Step 3 Install controls according to the system prompt; see Figure 3-4 for the WEB main interface. Modify the administrator password as soon as possible after you have successfully logged in. Figure 3-4...
- Page 16 Note • This quick start guide is for reference only. Slight difference may be found in the user interface. • All the designs and software here are subject to change without prior written notice. • Please visit our website or contact your local service engineer for more information. SecurityTronix offers live, human tech support for our products 24 hours a day, 7 days a week, 365 days a year.
Need help?
Do you have a question about the ST-IP-DVF-1 and is the answer not in the manual?
Questions and answers