Table of Contents
Advertisement
Quick Links
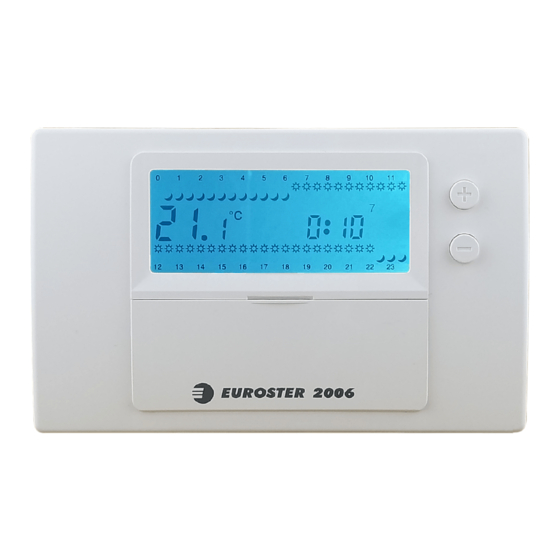
EUROSTER 2006/2006TXRX – INSTALLATION AND OPERATION MANUAL
MANUFACTURER: P.H.P.U. AS, ul. Polanka 8a/3, 61-131 Poznań, Poland
SPECIFICATION
EEPROM memory backup
for Heating or Cooling,by factory preset
temperature display range: 0 ~ 50°C
temperature control range: 5 ~ 35°C for Room mode, 5 ~ 45°C for Floor-heating
mode
temperature sampling rate: 1 minute
switching differential(Hysteresis): 0.4°C or 1°C selectable to users
temperature sensing calibration: ± 2°C
temperature adjusting scale: 0.2°C (fast forward adjusting function, pressing + or
- for 3 seconds)
temperature display scale: 0.1°C
all 7-Day independently programmed
24-Hour- format, spread into 48 time adjusting zone
thermostat operate Power: 2 X AA 1.5 Vdc LR 6 Alkaline Battery-low indication
(when power goes below 2.4 Vdc)
thermostat output: 16(3.5) AMP / 250 Vac, Voltage-free, SPDT.
dimension: 138 L x 86 W x 29 H mm
CHOOSING INSTALLATION LOCATION
For obtaining thermostat's best performance upon using, recommend user to follow up
with precaution listed below.
1.
Place thermostat on wall inside the room approximate 1.5 meter above floor.
2.
Avoid position where temperature sensing easily interfered by ambience, such as,
directly
exposed
/refrigerator, right next to entrance/ exit/window, etc.
EUROSTER 2006/2006TX
Installation and operation manual
Manual version: 11.05.2017
to
Sun-Light,
too
near
to
any
Heat-Generate
1
devices
Advertisement
Table of Contents

Related Manuals for EUROSTER 2006


Summary of Contents for EUROSTER 2006
- Page 1 EUROSTER 2006/2006TXRX – INSTALLATION AND OPERATION MANUAL EUROSTER 2006/2006TX Installation and operation manual MANUFACTURER: P.H.P.U. AS, ul. Polanka 8a/3, 61-131 Poznań, Poland Manual version: 11.05.2017 SPECIFICATION EEPROM memory backup for Heating or Cooling,by factory preset temperature display range: 0 ~ 50°C ...
- Page 2 EUROSTER 2006/2006TXRX – INSTALLATION AND OPERATION MANUAL Prevent thermostat from installed at position that furniture may interfere air-flow, stagnant air-flow location is not suitable for installing thermostat. Keep thermostat away from high humid ambience, high humidity is hazardous to thermostat's operational duration.
-
Page 3: Wiring Guide
EUROSTER 2006/2006TXRX – INSTALLATION AND OPERATION MANUAL TO OPEN TOP HOUSING Using the Philips screwdriver, release the screw that keeps front and back parts of the housing together. Beginning from the left side, open the thermostat. Take care of two hooks located on the right side of thermostat. - Page 4 EUROSTER 2006/2006TXRX – INSTALLATION AND OPERATION MANUAL Gas - Fired boiler Heating / Cooling System TO ADJUST HYSTERESIS (SWITCHING-DIFFERENTIAL) 1. Point Rotary switch to “RUN”. 2. Press and hold both for 3 seconds. 3. Shown as on LCD, to press either to select required Hysteresis.
- Page 5 EUROSTER 2006/2006TXRX – INSTALLATION AND OPERATION MANUAL 3. Press to select the day of week. 4. Press again to enter adjusting hour of day. 5. Press to adjust. 6. Repeat procedure of pressing to finish adjusting minute of hour. 7. LCD display shall automatically return to main page 5 seconds after clock adjusting completed.
- Page 6 EUROSTER 2006/2006TXRX – INSTALLATION AND OPERATION MANUAL Monday to Friday from 6:00 am to 10:00 pm from 10:00 pm to 6:00 am Saturday and Sunday from 6:30 am to 10:30 pm from 10:30 pm to 6:30 am TO SET HOLD (PERMANENT OVERRIDE) 1.
- Page 7 The programmable temperature controller EUROSTER in the TXRX wireless version is, in terms of programming, the equivalent of EUROSTER wired version. In the packaging there is a user guide for the appropriate wired model. The difference is in how the on / off signal is transmitted.
-
Page 8: Outside View
TX. 3. The signal sent to EUROSTER RX has a nature of coded digital transmission. This allows for an operation of multiple EUROSTER TX controllers on a small area... -
Page 9: Operation
EUROSTER TX sends every minute a short coded message confirming the status of the relay of the EUROSTER RX receiver. It is indicated by lighting of the green LED for about 1 second. For this reason, the indicator of the controller can light up earlier than the control device is turned on. - Page 10 EUROSTER 2006/2006TXRX – INSTALLATION AND OPERATION MANUAL WIRING DIAGRAM EXAMPLE EUROSTER TXRX Presented diagrams are simplified and do not contain all the elements needed for the correct operation of the system. With a 230 V AC powered device 1. Electrical connector cube 2.
-
Page 11: Troubleshooting List
Radio frequency: 433.92 MHz Output cable length: 2 m Dimensions: 112 x 64 x 68 mm In case of a complaint the complete EUROSTER TXRX must be supplied to the point of sale with the warranty card. SET CONTENTS 5. EUROSTER TX 6. - Page 12 Directive 2012/19/EU of the European Parliament and of the Council. The product contains an internal battery subject to the selective collection in accordance with the provisions of the Directive 2006/66/EC of the European Parliament and of the Council.
-
Page 13: Warranty Certificate
EUROSTER 2006/2006TXRX – INSTALLATION AND OPERATION MANUAL WARRANTY CERTIFICATE EUROSTER 2006/2006TXRX Warranty terms: 1. The warranty is valid for 24 months from the device sale date. 2. Claimed thermostat together with this warranty certificate must be supplied to the seller.
Need help?
Do you have a question about the 2006 and is the answer not in the manual?
Questions and answers