Table of Contents
Advertisement
EUROSTER Q7 – INSTALLATION AND OPERATION MANUAL
DANGER!
Please read this manual carefully prior to installing the thermostat.
Voltages hazardous to life may be present on the thermostat output cables,
therefore only qualified technicians may install the thermostat.
Do not install any thermostats showing signs of mechanical damage.
1. Control of the thermostat
Do not use the thermostat in rooms with excessive humidity, significant dustiness or with
presence of caustic or flammable vapors.
If necessary wipe it carefully with a damp cloth.
Do not use strong detergents, solvents or any other cleaning liquids or powders. Avoid con-
tact with water or other liquids.
Do not lubricate, grease or apply any other preservatives.
Protect against high and freezing temperatures.
Movable elements should operate easily and do not need any force to be applied on them
under any circumstances.
In case any problems occur with proper operation of the thermostat, please contact your
technician or Euroster service.
2. Batteries.
Low batteries indication
If the icon
appears on the display, it is necessary to replace the batteries.
It is recommended to replace the batteries with new ones prior to each heating season.
Use alkaline batteries only.
Do not use rechargeable batteries because their voltage is 1.2 V, which does not
ensure the proper operation of the thermostat.
Replacement of batteries
The battery compartment cover is on the bottom of the thermostat.
EUROSTER Q7
version: 18.07.2014
SAFETY RULES AND MAINTENANCE
I.
1
Advertisement
Table of Contents

Subscribe to Our Youtube Channel
Related Manuals for EUROSTER Q7


Summary of Contents for EUROSTER Q7
- Page 1 EUROSTER Q7 – INSTALLATION AND OPERATION MANUAL EUROSTER Q7 version: 18.07.2014 SAFETY RULES AND MAINTENANCE DANGER! Please read this manual carefully prior to installing the thermostat. Voltages hazardous to life may be present on the thermostat output cables, therefore only qualified technicians may install the thermostat.
-
Page 2: User Functions
EUROSTER Q7 – INSTALLATION AND OPERATION MANUAL Secure the cover with your hand not to let the batteries fall out when pulling out the cover. Pull the cover to the right. When replacing the batteries, pay particular attention to their polarity. -
Page 3: Basic Settings
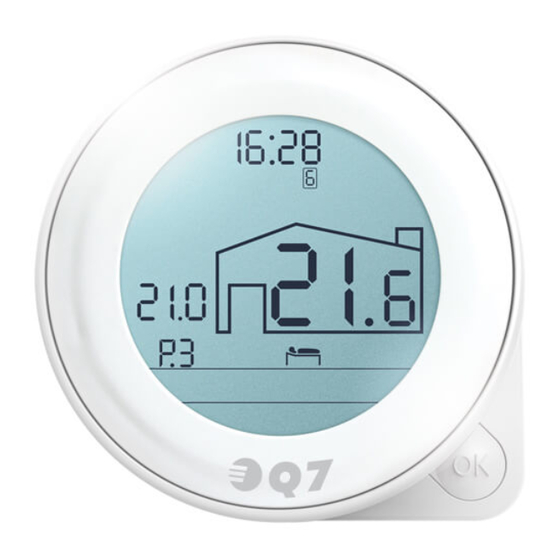
EUROSTER Q7 – INSTALLATION AND OPERATION MANUAL Standard appearance of the operating window: b. Knob and button pressing OK button for a short time backlights the display and unlocks the knob holding OK button longer (over 1 s) results in:... - Page 4 EUROSTER Q7 – INSTALLATION AND OPERATION MANUAL PROGRAMS (2) SERVICE (3) The menu items with numbers assigned to them are listed in the table below. MENU ITEM ITEM MENU ITEM MODES VACATION AIRING PARTY HOLD EXIT PROGRAMS EDIT...
- Page 5 EUROSTER Q7 – INSTALLATION AND OPERATION MANUAL last two digits of year, month hour minutes After confirming minutes, the thermostat updates the entered date and the service menu may be exited or other functions may be selected.
- Page 6 EUROSTER Q7 – INSTALLATION AND OPERATION MANUAL e. Operation algorithms Two operational options of activating the heating (cooling) algorithm are available: HYSTE- RESIS or PWM. In order to select between them, enter SERVICE (3) menu / ALGORITHM (item 305). Select HYSTERESIS or PWM accordingly and confirm.
- Page 7 EUROSTER Q7 – INSTALLATION AND OPERATION MANUAL 4. PROGRAMS (RANGES) – PROGRAMING OF TEMPERATURES AND THEIR DURA- TION It is possible to program up to 9 ranges with various temperatures per day. It is possible to set up various ranges for each day of the week.
- Page 8 EUROSTER Q7 – INSTALLATION AND OPERATION MANUAL After confirming the icon, P with a proper number is displayed again. The thermostat will automatically arrange the ranges in the proper sequence, therefore their numbering may change. When P1 is flashing, the knob may be turned to check other ranges of the same day. Exit editing by holding OK longer.
-
Page 9: Service Functions
EUROSTER Q7 – INSTALLATION AND OPERATION MANUAL The operating window view reappears at the thermostat and icon is visible. Switching the vacation mode off: if it is active – press OK if it is set for future activation – enter VACATION mode and select NO b. - Page 10 EUROSTER Q7 – INSTALLATION AND OPERATION MANUAL OPERATING TIME (item 301) – operating time counter of a heating (air- conditioning) device Checking the total time of relay operation In order to reset the counter, after displaying the time press OK shortly. After pressing OK again, the counter is zeroed.
- Page 11 EUROSTER Q7 – INSTALLATION AND OPERATION MANUAL When learning is active (item 306 – YES), the thermostat records the temperature and time when it was modified. If similar temperatures (differing by no more than 0.4ºC) will be set by a user at similar times (time difference not exceeding 60 minutes) in subsequent days of the Mon-Fri or Sat- Sun period, then such manual setting will be stored in the PROGRAMS menu (item 2).
- Page 12 EUROSTER Q7 – INSTALLATION AND OPERATION MANUAL Learning may be turned off (item 306 – NO) at any time without losing the stored ranges. Please remember that reactivating learning deletes all stored ranges. Irrespective of the learning mode, the ranges may be deleted, freely changed or added manually in the PROGRAMS menu (item 2) at any time.
- Page 13 It is recommended to consult a technician or EUROSTER technical service prior to resetting the device. Reset is implemented with a separate code: 7153, irrespective of the code set in the service menu.
-
Page 14: Installation And Connection
EUROSTER Q7 – INSTALLATION AND OPERATION MANUAL devices switched on by the thermostat (pump, valve, boiler or others). Setting these options enables selection of preliminary settings, mainly algorithms, to the particular configuration without the need to modify them manually in the service menu. - Page 15 EUROSTER Q7 – INSTALLATION AND OPERATION MANUAL INSTALLATION OF THE THERMOSTAT AND BATTERIES Lead all necessary cables prior to mounting the thermostat. Connect the thermostat with a stranded wire with a diameter adequate to the switched load (minimum 0.75 mm , maxi- mum 1.5 mm...
- Page 16 EUROSTER Q7 – INSTALLATION AND OPERATION MANUAL SAMPLE CONNECTION DIAGRAMS The following diagrams are simplified and do not cover all the elements necessary for the correct installation. In arrangement with a gas boiler In a floor heating arrangement In a heating/cooling arrangement FLOOR SENSOR CONNECTION Screw the floor sensor to connector A (terminals no.
-
Page 17: Technical Data
AA batteries screw anchors Installation and Operation Manual with Warranty Certificate mounting template STANDARDS AND CERTIFICATES Euroster Q7 thermostat conforms to the following EU Directives: EMC, LVD and RoHS. The EC Declaration of Conformity is available at: http://www.euroster.com.pl... -
Page 18: Warranty Certificate
EUROSTER Q7 – INSTALLATION AND OPERATION MANUAL ELECTRONIC WASTE MANAGEMENT INFORMATION We made every effort to ensure that this thermostat lifetime is as long as possible. However, the device is subject to natural wear. If the device would not meet your requirements any more, you are kindly requested to have it brought in to an electronic waste management facility.
Need help?
Do you have a question about the Q7 and is the answer not in the manual?
Questions and answers