Table of Contents
Advertisement
Quick Links
Advertisement
Table of Contents

Related Manuals for Colorjet Verve Hybrid


Summary of Contents for Colorjet Verve Hybrid
- Page 2 This manual serves as the reference tool which guides their customers how to use or operate the Verve Hybrid machine without anyone else assistance. The information provided in this document ensures its uniqueness and language quality.
-
Page 3: Table Of Contents
Opening an Image File ............................. 24 Print Position ..............................25 Checking Printing Status ..........................25 Maintenance Menu .............................. 26 Feeding Password ............................29 6. Head Height Adjustment ............................30 7. Machine Calibration ............................. 32 Page 2 of 45 Verve Hybrid... - Page 4 Ink Not Filling ............................... 41 Print Stops in Between Printing ........................... 41 Print is Shifting wrt Fabric/ Junk Printing ......................41 Print is Blur ................................42 Lines in Prints ............................... 42 13. Error Code Specifications ........................... 43 Page 3 of 45 Verve Hybrid...
-
Page 5: About Document
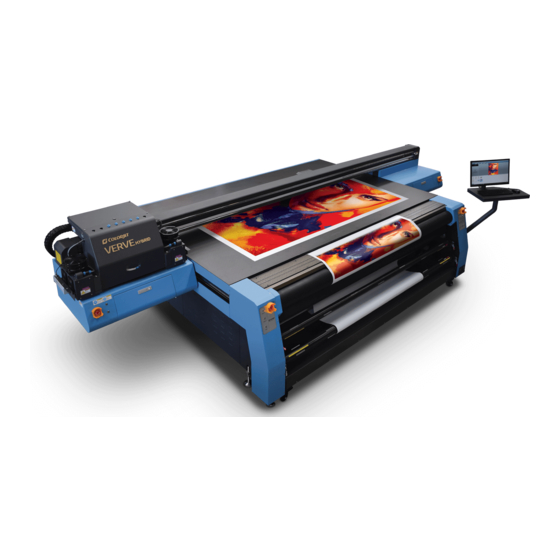
Thus, this document is designed to facilitate both types of users. 2. Machine Overview The Verve Hybrid is shown in the image below: Fig 1: Displaying the Verve Hybrid Page 4 of 45... -
Page 6: Getting Familiar With Print Control Center Interface
3. Getting Familiar with Print Control Center Interface The Print Control Center interface is shown in the image below: Control Menu Quick Access Buttons Fig 2: Displaying the ColorJet UV Print Control Center Error Messages The description of the Print Control Center is given as below: •... -
Page 7: Printer Manager Settings
Height same with image: If enabled, the height of the color bar is same as the image height. • Spray setting o Auto Spray: Set the duration (number of passes) for auto spraying. Page 6 of 45 Verve Hybrid... - Page 8 Fig 4: Displaying the Move Tab Using the Move tab, the Y Speed can be updated as per the requirements. The Preference tab is shown in the image below: Fig 5: Displaying the Preference Tab Page 7 of 45 Verve Hybrid...
- Page 9 Fig 6: Displaying the Calibration Wizard The Multilayer print tab is shown in the image below: Fig 7: Displaying the Multilayer print Using the Preference tab, the measuring unit can be set or changed. Page 8 of 45 Verve Hybrid...
-
Page 10: Setting Carriage And Gantry Position
To lift the carriage in Up and Down, click on the Lift Control button, as shown below: Fig 9: Clicking the Lift Control Button The Lift Control dialog box is shown as below: Fig 10: Lifting Carriage Up and Down Page 9 of 45 Verve Hybrid... -
Page 11: Getting Ready For Printing
Step 5: Turn ON the Main Power switch located on the right side of the machine, as shown below: Fig 11: Turning ON the Main Power Switch Step 6: Check water level in the Chiller Unit and fill it, if required: Fig 12: Filling RO Water Page 10 of 45 Verve Hybrid... - Page 12 Step 10: Press the Media Height button to sense the media height (Refer to Fig 10). Step 11: To initialize the machine, first open the Print Control Center and get it ready for use. Now, the machine starts initializing automatically. Page 11 of 45 Verve Hybrid...
- Page 13 Step 14: Press the Purging button (Refer to Fig 10) and clean print heads using the tissue provided with the printer. Step 15: Bring down the carriage by pressing the Lifter Move to Print Height button (Refer to Fig 14) Step 16: Perform Nozzle test. Now, printer is ready for printing. Page 12 of 45 Verve Hybrid...
-
Page 14: Loading Media
Enter the X Offset value in the Detector X-Offset to PrintPos field. b. Enter the Y Offset value in the Detector Y-Offset to PrintPos field. c. After providing offset details, click on the Apply button (Refer to Fig 14). Page 13 of 45 Verve Hybrid... -
Page 15: Filling Ink
To refill ink, remove the Main Ink Tank cap and refill ink as per the color sticker, as shown below: Fig 19: Displaying the Main Ink Tanks and It’s Connectors The sequence of Ink Main Tanks is shown below: Page 14 of 45 Verve Hybrid... -
Page 16: Print Control Center Operations
Pass Feather Settings: Set feather mode (Even, Shade, and User) and feather level (Small, Normal and Large). • Miscellaneous Functions: User can also perform the following functions: o Media Advance speed o Skip White o Colorbar follow image Page 15 of 45 Verve Hybrid... -
Page 17: White And Varnish Settings
After selecting the desired above-mentioned option for white color, select the printing direction from the Material Dir list box available on the Properties dialog box. • Forward: Color over white. • Reverse: White over color. For example, Reverse case is used while printing on glass. Page 16 of 45 Verve Hybrid... - Page 18 RIP Data: Varnish color is printed as per the RIP file. After selecting the desired option for varnish color, select the varnish thickness and curing in the Varn Thick and Varn Curing list boxes available on the Properties dialog box, as shown below: Page 17 of 45 Verve Hybrid...
-
Page 19: Layer Mode
This means, the first layer of Color (CMYK) is printed, then White and Varnish is printed in the last. The Lay Mode and its related options are shown in the image below: Fig 23: Layer Mode and Its Related Options Page 18 of 45 Verve Hybrid... -
Page 20: Printer Setting
Step 2: Select the file path which user wants to import. Step 3: After selecting the file path, click on the Open button to import the selected file. The process of importing print settings gets started. After importing settings, click on the Apply button. Page 19 of 45 Verve Hybrid... -
Page 21: Task Select Menu
After selecting the file path, click on the Save button to save the file. Task Select Menu The Task Select button is shown in the image below: Fig 26: Displaying the Task Select Screen Page 20 of 45 Verve Hybrid... - Page 22 • UV Full Power: Sets Full (High) power of the UV lamps. • X Mirror Print: Enables or disables X mirror print. • Y Mirror Print: Enables or disables Y mirror print. Page 21 of 45 Verve Hybrid...
-
Page 23: Dpi And Passes
The Image Color Ink Volume screen appears as shown below: Fig 28: Displaying the Image Color Ink Volume Screen In the above image, user can easily estimate the ink requirements for the selected image. Page 22 of 45 Verve Hybrid... -
Page 24: Changing Print Format
Open File: Open image file for printing. • Print Position: Set print settings like speed, print direction, X origin, and Y origin. • Status: Issue test print command. Let’s discuss each option one by one in upcoming section. Page 23 of 45 Verve Hybrid... -
Page 25: Opening An Image File
(Refer to Fig 23). If the image file is opened using the Operation menu, user gets the following benefits: a) Create printing job queue b) Prepare image file for ready to print. Page 24 of 45 Verve Hybrid... -
Page 26: Print Position
After making the desirable changes, click on the Start Print button to give the test print, as shown below: Fig 33: Displaying the Media Thickness Dialog Box Page 25 of 45 Verve Hybrid... -
Page 27: Maintenance Menu
The Maintenance menu is shown in the below: Fig 35: Displaying the Maintenance Menu The Maintenance menu consists several tabs viz. Calibration, Motion, Voltage, Carriage Lifter, and System Information. Let’s see all these menus one by one in the upcoming section. Page 26 of 45 Verve Hybrid... - Page 28 In the above image, user has to provide the value of X and Y Move Length which defines the distance travelled while moving the carriage and gantry manually in a single click of an arrow key (Refer to the marked area). The Voltage tab is shown as below: Fig 37: Displaying the Voltage Tab Page 27 of 45 Verve Hybrid...
- Page 29 The Carriage Lifter tab is shown as below: Fig 38: Displaying the Carriage Lifter The Carriage Lifter tab is used for lifting the carriage in the Up or Down position. Additionally, this tab also helps in detecting the media height. Page 28 of 45 Verve Hybrid...
-
Page 30: Feeding Password
When the time period is completed, printer gets stopped and needs new password to start. For new password, user needs to approach service personnel and enter the password in the given field as shown below: Fig 40: Enter System Password Page 29 of 45 Verve Hybrid... -
Page 31: Head Height Adjustment
Fig 41: Selecting the Carriage Lifter Tab Step 3: Enter the X offset value in the Detector X-Offset to PrintPos field. Step 4: Enter the Y offset value in the Detector Y-Offset to PrintPos field. Page 30 of 45 Verve Hybrid... - Page 32 Step 6: After this, click on the Apply button to apply changes if any (refer to Fig 38). Caution: • This functionality may not detect soft material. • Uneven surface may damage the print head. Page 31 of 45 Verve Hybrid...
-
Page 33: Machine Calibration
Calibration result is shown in the image below: From the above image, user needs to select the value of best aligned pattern and feed (by adding or subtracting in the current value) in the mark field (Refer to Fig 39). Page 32 of 45 Verve Hybrid... -
Page 34: Head Cleaning
Step 3: Select the Carriage Lifter tab. Step 4: Click on the Lifter Back Zero/Up Arrow icon button to lift up the carriage for blotting, as shown below: Fig 45: Lifting Up the Carriage Page 33 of 45 Verve Hybrid... - Page 35 Leaving head plate uncapped for longer duration (3-4 days), while printer off, will block nozzles permanently due to ink solidification. • Color bar should always be enabled while printing and idle spray should always be enabled for long life of the Print Head. Page 34 of 45 Verve Hybrid...
-
Page 36: Head Spraying
Head spraying should be performed to avoid mixing of colors and also may open few blocked nozzles. To perform head spraying, click on the Flash button available on the Right Panel, as shown below: Fig 47: Clicking on the Flash Button Page 35 of 45 Verve Hybrid... -
Page 37: Shutdown Procedure
Step 2: Move the carriage over the print bed and bring down the carriage to the minimum position using the down arrow as shown below: Fig 49: Set the Carriage Position at Minimum Down Page 36 of 45 Verve Hybrid... - Page 38 Step 5: Move the Main Power switch in anti-clock direction to switch off the printer, as shown below: Fig 51: Turn OFF the Main Power Button Step 6: Turn Off the main switch. After switch OFF, properly cover the printer to protect from the dust. Page 37 of 45 Verve Hybrid...
-
Page 39: Do's And Don't
Avoid ink spilling on the Print Head and head cables • Don’t use expiry ink and store ink at favorable environment • Avoid printing without Colorbar • Avoid head damage due to media and Print Head confliction Page 38 of 45 Verve Hybrid... -
Page 40: Maintenance
Use clean cloth to clean up the dust and residual oil on the tracks. • Should keep water, ink, oil away from the Encoder scale. Power System Maintenance • Ground wire should always be checked whether loose or disconnection. Page 39 of 45 Verve Hybrid... -
Page 41: Control System Maintenance
Check for leakage between joint & ink tank and joint & valve settings. • Check for damages on ink tubes. • Check Ink impurities in the ink tanks as this will affect the ink supplying. Page 40 of 45 Verve Hybrid... -
Page 42: Troubleshooting
Encoder scale is having ink stains (print shows vertical color bands) • Encoder sensor is not clean • Pulley or belt is loose or teeth wear out and slipping • Fibre optic data cable is faulty Page 41 of 45 Verve Hybrid... -
Page 43: Print Is Blur
Head height is disturbed and not calibrated for above • Incorrect resolution is selected • Media surface is uneven Lines in Prints • Nozzle blocked in heads (check nozzle test) • Incorrect feed step (calibration required) Page 42 of 45 Verve Hybrid... -
Page 44: Error Code Specifications
This can happen when new software installed. copy wf in that "confirm Ricoh printhead folder and when error comes during initialize, go to voltage waveform file exist? setting and enable user pwd and select wf, load cong and apply Page 43 of 45 Verve Hybrid... - Page 46 For Any Query Please Contact Us www.colorjetgroup.com Call us on +91-120-4548195 Email on info@colorjetgroup.com For Ink Enquiry:- sales@colorjetgroup.com For Support:- support@colorjetgroup.com...
Need help?
Do you have a question about the Verve Hybrid and is the answer not in the manual?
Questions and answers