Table of Contents
Advertisement
Quick Links
Advertisement
Table of Contents

Related Manuals for Colorjet Vulcan Prime


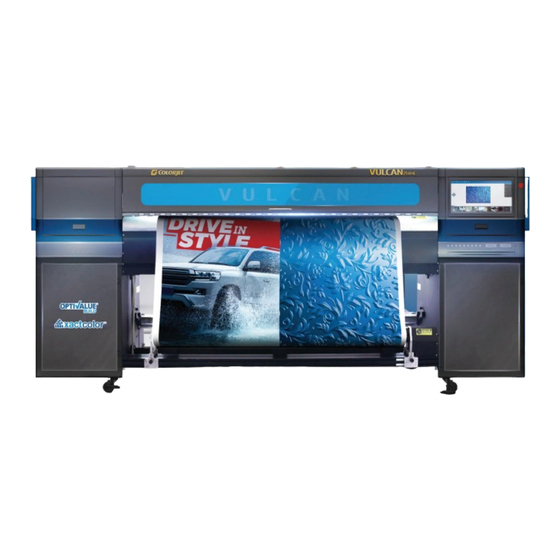
Summary of Contents for Colorjet Vulcan Prime
- Page 2 This manual serves as the reference tool which guides their customers how to use or operate the Vulcan Prime machine without anyone else assistance. The information provided in this document ensures its uniqueness and language quality.
-
Page 3: Table Of Contents
Layer Mode ..............................20 Printer Setting ..............................21 Task Select Menu ..............................23 DPI and Passes ..............................25 Checking the Image Ink Color Volume ......................25 Operation Menu ..............................26 Opening an Image File ............................. 27 Vulcan Prime Page 2 of 46... - Page 4 Ink Not Filling ............................... 43 Print Stops in Between Printing ........................... 43 Print is Shifting wrt Fabric/ Junk Printing ......................43 Print is Blur ................................43 Lines in Prints ............................... 43 13. Error Code Specifications ........................... 44 Vulcan Prime Page 3 of 46...
- Page 5 Machine Errors ..............................44 Vulcan Prime Page 4 of 46...
-
Page 6: About Document
Fig 1: Displaying the Front View 1. Console (TFT Screen) 2. Emergency Button 3. Control Panel 4. Wheel 5. Take-up Roller 6. Leveller 7. Ink Refilling Switch Vulcan Prime Page 5 of 46... -
Page 7: Back View
B. Rev/Fwd: Control the power and direction of the controlling modes viz. Auto or Manual. Supply motor. B. Rev/Fwd: Control the power and direction of the Bed Vacuum Regulator: Turn ON/OFF the bed vacuum. Take Up motor. Vulcan Prime Page 6 of 46... -
Page 8: Usb Port
USB Port of the machine is shown in the image below: Fig 4: Displaying the USB Port REV/FWD Button: Manually Switch Supply Roller Direction Vulcan Prime Page 7 of 46... -
Page 9: Getting Familiar With Print Control Center Interface
Initialization Status Quick Access Buttons Ink Refilling Status Error Messages Fig 5: Displaying the ColorJet UV Print Control Center USB Status Print Control Center has the following Options Control Menu: Consist of several menu or sub menu Quick Access Buttons: Display frequently performed options viz. -
Page 10: Arrow Key Controls
To stop the movement, user must press the Stop button. Fig 6: The Control Arrow Keys Note: Carriage/Media can move by pressing the CTRL + Arrow keys available on the keyboard. Vulcan Prime Page 9 of 46... -
Page 11: Getting Ready For Printing
Step 5: Turn ON the Main Power switch located on the bottom left side from the back of the machine, as shown below: Fig 7: Turning ON the Main Power Switch Step 6: Check water level in the Chiller Unit and fill it, if required: Fig 8: Filling RO Water Vulcan Prime Page 10 of 46... - Page 12 User needs to maintain the head negative air pressure between -2.5 to -3.0. If the negative pressure is slightly being high or low, adjust it using the regulator knob. The Negative Air Pressure display is shown in the image below: Fig 10: Displaying the Negative Pressure Vulcan Prime Page 11 of 46...
-
Page 13: Loading Media
Step 12: Perform Nozzle test. Now, printer is ready for printing. Loading Media Follow these steps to load media: Step 1: Push back the Media Lever, as shown below: Fig 11: Lifting Up the Media Lever Vulcan Prime Page 12 of 46... - Page 14 • Check the ink level in main tanks and refill it, if required. The Media Path is shown in the image below: Pinch Roller Supply Rollers Take-up Rollers Fig 12: Displaying the Media Path Vulcan Prime Page 13 of 46...
-
Page 15: Refilling Ink
To refill ink, open the right door from back of the printer and replace ink bottles, if empty. To refill ink, remove the Main Ink Tank cap and refill ink as per the color sticker. The main ink tanks are shown in the image below: Fig 13: Displaying the Main Ink Tanks Vulcan Prime Page 14 of 46... -
Page 16: Chiller Operating Instructions
Connect the signal cable (make sure the input voltage is within 3-24V). When the signal pass, the UV LED lamp is ON and when the signal stop the UV LED lamp is OFF. • Adjustment the potentiometer to control the power of the UV LED lamp. Vulcan Prime Page 15 of 46... -
Page 17: Parameter Settings
Press the switch to change the setting item, press the + - button to modify the parameter value of the item. o D1 will show the item code, D2 show the parameter value and the D3 shows value remains same. Vulcan Prime Page 16 of 46... -
Page 18: Chiller Code Instructions
Condenser Temp Water shortage alarm delay Low Water Temp Limit High Water Temp Limit Heating Wire Start Temp This value must be at least 2 C lower than the C4 High Indoor Temp Limit Vulcan Prime Page 17 of 46... -
Page 19: Print Control Center Operations
Skip White • White Color Settings: Using the above screen, user Color Compensation • can make white color settings like Full, RIP Color Y Image Space Control and more). Vulcan Prime Page 18 of 46... -
Page 20: White Settings
RIP Color: White color is printed as per the RIP file. Valid Image: White color is printed same as the percentage of CMYK color in the selected image. Vulcan Prime Page 19 of 46... -
Page 21: Layer Mode
Fig 16: Layer Mode and Its Related Options Note: The layer mode is used when the white print head is in-line with colors. When we select the Lay Mode, the printing speed gets slow. Vulcan Prime Page 20 of 46... -
Page 22: Printer Setting
Step 2: Select the file path which user wants to import. Step 3: After selecting the file path, click on the Open button to import the selected file. The process of importing print settings gets started. After importing settings, click on the Apply button. Vulcan Prime Page 21 of 46... - Page 23 This option enables to save the current printer settings (in the .cbk file format) which can be used in future. After clicking on the Export button, the following screen appears: Fig 18: Exporting the Current Print Settings After selecting the file path, click on the Save button to save the file. Vulcan Prime Page 22 of 46...
-
Page 24: Task Select Menu
Follow these steps to open and print a file: Step 1: After opening the Task Select screen, navigate to the location where the printable file is stored (Refer to Fig. 19). Step 2: Double-click on the image icon. Vulcan Prime Page 23 of 46... - Page 25 Y axis as well as horizontal and vertical distance between images. Step 3: Click on the Print button to print the selected file. Additionally, user can also make change as per the requirements. Vulcan Prime Page 24 of 46...
-
Page 26: Dpi And Passes
DPI and Passes Vulcan Prime DPI and passes are given as below: Mode Passes Mode 1 360x900 Mode 2 720x600 Mode 3 720x900 Mode 4 720x1200 Mode 5 720x1800 Mode 6 720x2400 Checking the Image Ink Color Volume Click on the Ink Volume button on the Properties dialog box (Refer to Fig 20) to check the requirement of each color ink to print the selected image. -
Page 27: Operation Menu
Open File: Open image file for printing. • Print Position: Set print settings like speed, print direction, X origin, and Y origin. • Status: Issue test print command. Let’s discuss each option one by one in upcoming section. Vulcan Prime Page 26 of 46... -
Page 28: Opening An Image File
Step 2: Select the file by navigating the file location. Step 3: After selecting the file, click on the Open button (Refer to Fig 23). The Properties dialog box appears with printing options of the selected image file. Vulcan Prime Page 27 of 46... - Page 29 Step 4: Click the OK button to add the image file in the printing queue (job list area), as shown in the image below: Fig 24: Creating Printing Queue Vulcan Prime Page 28 of 46...
- Page 30 After clicking the OK button, the file is shown in the job list area, as shown in the image below: Fig 25: Displaying the Printing Queue Job List Area Vulcan Prime Page 29 of 46...
-
Page 31: Print Position
Print position option enables users to set the printing speed, print direction, X origin and Y origin, as shown below: Fig 26: Setting the Print Position Note: This option enables user to define printing direction like right only, left only, and bi-direction. Vulcan Prime Page 30 of 46... -
Page 32: Checking Printing Status
(Refer to Fig 26). The Test Result is shown in the image below: Fig 27: Displaying the Test Result Maintenance Menu The Maintenance menu is shown in the below: Fig 28: Displaying the Maintenance Menu Vulcan Prime Page 31 of 46... - Page 33 In the above image, user has to provide the value of X and Y Move Length which defines the distance travelled while moving the carriage and media manually in a single click of an arrow key (Refer to the marked area). Vulcan Prime Page 32 of 46...
- Page 34 The Voltage tab is shown as below: Fig 30: Displaying the Voltage Tab This section is only used by the service engineer. Vulcan Prime Page 33 of 46...
-
Page 35: Feeding Password
Feeding Password In Vulcan Prime, there is a hardware key associated with the Main Board. This hardware key is required to run the printer and valid for certain time period. When the time period is completed, printer gets stopped and needs new password to start. -
Page 36: Machine Calibration
The Bi-direction Calibration result is shown in the image below: From the above image, user needs to select the value of best aligned pattern and feed (by adding or subtracting in the current value) in the mark field (Refer to Fig 33). Vulcan Prime Page 35 of 46... -
Page 37: Head Cleaning
Avoid head damage due to media and Print Head confliction. • Don’t use expiry ink and store the ink at favourable environment. • Print head nozzles should be kept clean, dust free, and also prevent from oxidation. Vulcan Prime Page 36 of 46... -
Page 38: Head Purging
Head spraying should be performed to avoid mixing of colors and also may open few blocked nozzles. To perform head spraying, click on the Flash button available on the Right Panel, as shown below: Fig 36: Clicking on the Flash Button Vulcan Prime Page 37 of 46... -
Page 39: Shutdown Procedure
Step 5: Turn off the Printer Main Power button to close the printer, as shown below: Fig 38: Turn OFF the Main Power Button Step 6: Turn Off the main switch. After switch OFF, properly cover the printer to protect it from the dust. Vulcan Prime Page 38 of 46... -
Page 40: Do's And Don't
Avoid ink spilling on the Print Head and head cables • Don’t use expiry ink and store ink at favorable environment • Avoid printing without Colorbar • Avoid head damage due to media and Print Head confliction Vulcan Prime Page 39 of 46... -
Page 41: Maintenance
Control System Maintenance Static discharge • The operator must discharge his own electrostatic charge before touching the electronic components and parts. • Don’t touch the pin connectors and welded joints on circuit boards, integrated circuit boards. Vulcan Prime Page 40 of 46... -
Page 42: Ink Supply System Maintenance
Clean the condenser fins and fan blades every 7 days (cleaning method: open the air inlet and then blowout the dust of condenser with air pressure gun). • Replace the circulating water every 1 to 2 months and clean the water tank, water pipe and joints. Vulcan Prime Page 41 of 46... - Page 43 • Fasten the electrical wiring inside the electrical control cabinet with a fixed screw every six month to prevent the screw loosening, which results in poor contact. Vulcan Prime Page 42 of 46...
-
Page 44: Troubleshooting
No proper calibration viz. bi-direction and step • Incorrect resolution is selected • Media surface is uneven Lines in Prints • Nozzle blocked in heads (check nozzle test) • Incorrect feed step (calibration required) Vulcan Prime Page 43 of 46... -
Page 45: Error Code Specifications
This can happen when new software installed. copy wf in that "confirm Ricoh printhead folder and when error comes during initialize, go to voltage waveform file exist? setting and enable user pwd and select wf, load cong and apply Vulcan Prime Page 44 of 46... - Page 47 For Any Query Please Contact Us www.colorjetgroup.com Call us on +91-120-4548195 Email on info@colorjetgroup.com For Ink Enquiry:- sales@colorjetgroup.com For Support:- support@colorjetgroup.com...
Need help?
Do you have a question about the Vulcan Prime and is the answer not in the manual?
Questions and answers