Table of Contents
Advertisement
Quick Links
Advertisement
Table of Contents

Subscribe to Our Youtube Channel
Related Manuals for Colorjet VERVE mini


Summary of Contents for Colorjet VERVE mini
- Page 2 User Manual of Verve Mini Verve Mini User Manual Page 1 of 50...
- Page 3 Foreword This user manual briefly describes the operational aspects of the Verve Mini machine. In this document, the step-wise instructions for handling various aspects of the machine with visual screens are provided for easy and better understanding. It also describes the error messages encountered while working with the machine with appropriate remedial actions required to be taken by the user.
-
Page 4: Table Of Contents
Checking the Image Ink Color Volume .................. 31 Operation Menu ........................31 Opening an Image File ......................32 Print Position ......................... 33 Checking Printing Status ......................33 Maintenance Menu ........................34 Feeding Password ........................37 Verve Mini User Manual Page 3 of 50... - Page 5 Print Stops in Between Printing ....................47 Print is Shifting wrt Fabric/Junk Printing ................... 47 Print is Blur ..........................47 Lines in Prints ..........................47 Error Code Specifications ....................48 Machine Errors .......................... 48 Verve Mini User Manual Page 4 of 50...
-
Page 6: About Document
Sometimes, the targeted audience has little knowledge about the printer but in most cases, the targeted audience is familiar with the terminologies of printer and printing business. Thus, this document is designed to facilitate both types of users. Verve Mini User Manual Page 5 of 50... -
Page 7: Machine Overview
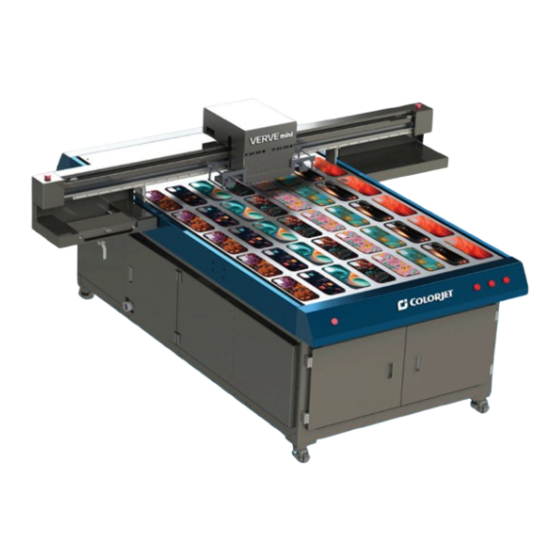
2. MACHINE OVERVIEW Verve Mini is a true Flatbed UV printer that redefines the printing experience faster and more exhilarating with less investment and offers a big opportunity. It is a UV Flatbed Printer with an automatic head adjuster of up to 100 mm. Equipped with Ricoh heads, the configuration supports 6 Colours in both 6 Heads and 7 Heads options. - Page 8 Figure 2: Machine View (Right Side) Figure 3: Machine View (Right Side) Table 2: Different Parts of Machine View 1. Overflow buzzer alarm 2. Machine Power Switch 3. Machine Power Cable 4. Vacuum Pump Power Cable Verve Mini User Manual Page 7 of 50...
-
Page 9: Head Configuration
HEAD CONFIGURATION Verve Mini head configurations are as follows: 6 HEADS, 6 COLORS IN 2 LINES- Color and Varnish printing is done in three different processes. Color Printing>Varnish Printing>Varnish Curing Color Arrangement 6 heads, 6 Colors arranged in 2 lines... - Page 10 Arrangement 7 heads, 6 Colors arranged in 3 lines CMKY WW V Colors Ricoh Gh2220 Head Model 60 Sqft/hr. (6 pass) Speed (6 pass) 100 mm Z height Verve Mini User Manual Page 9 of 50...
-
Page 11: Getting Familiar With The Print Control Center Interface
Note: Print Control centre is required to install and execute, to initialize the printer Control Menu Quick Access Buttons Figure 4: ColorJet UV Print Control Center The description of the Print Control Center is given as below: • Control Menu: Comprising various menu or sub-menu options such as Print Option, Task Select, Operation, Maintenance, and Help providing a variety of functions in a well-organized manner. -
Page 12: Setting Carriage And Gantry Position
To elevate or lower the carriage, click on the Lift Control button, as shown below: Figure 6: Lift Control Button The Lift Control dialog box is shown below: Figure 7: Lifting Carriage Up and Down Verve Mini User Manual Page 11 of 50... -
Page 13: Getting Ready For Printing
Turn ON the Main Power switch located on the right side of the machine, as shown below: Figure 8: Turning ON the Main Power Switch Step 6 Check the water level in the Chiller Unit and fill it if required: Figure 9: Filling RO Water Verve Mini User Manual Page 12 of 50... - Page 14 This printer does not self-initialize on power. It gets initialized only on running/executing the Print Control Centre software. Step 11 Rotate the ink valve of each color in an anti-clock direction using the key to open it, as shown below: Verve Mini User Manual Page 13 of 50...
- Page 15 Press the Purging Button (Figure 14) and wait for a few seconds. Step 15 Now push back the tray with soft hands. Step 16 Clean the print heads using the head cleaning wiper provided with the printer. Verve Mini User Manual Page 14 of 50...
- Page 16 Step 17 Click the Flash Button to avoid mixing of colors. Figure 14: Flash Option Step 18 Conduct the nozzle test. Now the printer is ready for printing. Verve Mini User Manual Page 15 of 50...
-
Page 17: Loading Media
Enter the Y Offset value in the Detector Y-Offset to PrintPos field. e. After providing offset details, click on the Apply button. f. Click the Detect Media Height button to ascertain the head height. Verve Mini User Manual Page 16 of 50... -
Page 18: Filling Ink
To refill ink, remove the Main Ink Tank cap and refill ink as per the color sticker, as shown below: Figure 17 Main Ink Tanks and their Connectors The sequence of Ink Main Tanks is shown below: Verve Mini User Manual Page 17 of 50... -
Page 19: Low Ink Alarm Board
Within the printer machine, a low ink alarm board is integrated. Upon depletion of any ink within the Main Ink Tank, the alarm is activated indicated by LED lights on the rear panel, prompting the user to refill the respective ink bottle. Figure 18: Low Ink Alarm Lights Verve Mini User Manual Page 18 of 50... -
Page 20: Negative Pressure
Following the latest upgrade, the Negative system has been enhanced with a bigger reservoir tank to accommodate more vacuum buffers. Figure 19: Air Reservoir Tank Verve Mini Negative pipeline Verve Mini User Manual Page 19 of 50... - Page 21 Following are the few upgradations done in the Negative system from the previous version: • Reservoir sub-tank connection modified with an overflow buzzer alarm, relays, and solenoid for overflow safety. • Improved, overflow-proof, and stable negative system. Verve Mini User Manual Page 20 of 50...
-
Page 22: Chiller Operating Instructions
After 3-5 minutes of operation, air will be out from the pipes because the length and reservoir volume of the water tank are enough. If not, replenish the coolant as needed. Verve Mini User Manual Page 21 of 50... -
Page 23: About Uv Led Lamp
Angular UV LED Curing Process to ensure LED reflection does not damage the print head. Figure 22: UV Mounting Bracket • LED lamp cover is given to block direct flash from UV LED. Figure 23: LED Lamp Cover Verve Mini User Manual Page 22 of 50... -
Page 24: Print Control Center Operations
(like Full, RIP Color, Valid Image, etc.). and set their required thickness(layers) • Pass Feather Settings: Pass Feather settings option can be reached by clicking Main Screen icons> Print Option>Pass Feather Option. Verve Mini User Manual Page 23 of 50... - Page 25 (normally in the range 1-4). Thus, increasing the sharpness of thin letters/lines. • Function: The user can also select functions like Skip White, and Colorbar height. Verve Mini User Manual Page 24 of 50...
-
Page 26: White And Varnish Settings
The Varnish Color settings are shown in the image below: Figure 27: Varnish Color Settings Description of different options for the Varnish Color printing: • No Print: No varnish color is printed. Verve Mini User Manual Page 25 of 50... - Page 27 With 7-head configurations, color, and varnish are printed with LED curing. To enable varnish printing (over color) and curing, desired passes must be selected with “with the color” or “with the varnish.” There are additional steps required. Figure 29: Varn Thick and Varn Curing Verve Mini User Manual Page 26 of 50...
-
Page 28: Saving Printer Settings
Follow these steps to import the file: Step 1 Click on the Import button to import a file (Refer to Figure 24). The Open dialog box appears on the screen, as shown below: Figure 31: Open Dialog Box Verve Mini User Manual Page 27 of 50... - Page 29 After clicking on the Export button, the following screen appears: Figure 32: Exporting the Current Print Settings After selecting the file path, click on the Save button to save the file. Verve Mini User Manual Page 28 of 50...
-
Page 30: Task Select Menu
After opening the Task Select screen, navigate to the location where the printable file is stored (Refer to Figure 34). Step 2 Double-click on the image icon. The Properties dialog box appears, as shown below: Figure 34: Properties Dialog Box Verve Mini User Manual Page 29 of 50... -
Page 31: Dpi And Passes
Step 3 Click on the Print button to print the selected file. Additionally, users can also make changes as per the requirements. DPI AND PASSES Verve Mini DPI and passes are given as below: Passes 6 and 12 720X900 8, 12 and 16... -
Page 32: Checking The Image Ink Color Volume
OPERATION MENU In the operation menu, the user must click the open file to select the image file's path. The Operation Menu screen is shown in the image below: Figure 36: Operation Menu Verve Mini User Manual Page 31 of 50... -
Page 33: Opening An Image File
If the image file is opened using the Operation menu, the user gets the following benefits: a) Create a printing job queue b) Prepare the image file for ready to print. Verve Mini User Manual Page 32 of 50... -
Page 34: Print Position
After making the desirable changes, click on the Start Print button to give the test print, as shown below: Figure 39: Media Thickness Dialog Box The Test Result is shown in the image below: Verve Mini User Manual Page 33 of 50... -
Page 35: Maintenance Menu
The Maintenance menu consists of several tabs viz. Calibration, Motion, Voltage, Carriage Lifter, and System Information. Let us see all these menus one by one in the upcoming section. The Motion tab is shown as below: Verve Mini User Manual Page 34 of 50... - Page 36 (Refer to the marked area). Other options are disabled as they can only be accessed by the service engineer. The Voltage tab is shown as below: Figure 43: Voltage tab Verve Mini User Manual Page 35 of 50...
- Page 37 The System Information tab provides a complete set of information about the Print Control Center system installed on the user's computer. Additionally, users can input the password before its expiration, as shown below: Verve Mini User Manual Page 36 of 50...
-
Page 38: Feeding Password
Figure 45: System Information Tab FEEDING PASSWORD In Verve Mini, the printer requires a new password to continue operating after the allotted time. For a new password, the user needs to share the above screen with service personnel to get the... -
Page 39: Calibration
From the above image, the user needs to select the value of the best-aligned pattern and feed (by adding or subtracting the current value) in the marked field (Refer to Figure 47). Verve Mini User Manual Page 38 of 50... -
Page 40: Head Cleaning
Open the Ink Valve using the key provided with the printer. Figure 50: Ink Valve Key Step 2 Ensure the waste bracket is pulled in front just below the carriage. Step 3 Press the Purging Button and wait for a few seconds. Verve Mini User Manual Page 39 of 50... -
Page 41: Head Spraying
Head spraying should be performed to avoid mixing of colors and may open a few blocked nozzles. To perform head spraying, click on the Flash button available on the Right Panel, as shown below: Figure 52: Flash Button Verve Mini User Manual Page 40 of 50... -
Page 42: Shutdown Procedure
Figure 55: Turn Off the Main Power Button Step 5 Turn Off the main switch from the switchboard. After switching it OFF, properly cover the printer to protect it from the dust. Verve Mini User Manual Page 41 of 50... -
Page 43: Do's And Don't
• Avoid ink spilling on the Print Head and head cables • Do not use expiry ink and store ink in a favorable environment • Avoid head damage due to media and Print Head conflict Verve Mini User Manual Page 42 of 50... -
Page 44: Maintenance
• Use a clean cloth to clean up the dust and residual oil on the tracks. • Keep water, ink, and oil away from the Encoder scale. POWER SYSTEM MAINTENANCE • Always check the ground wire whether loose or disconnected. Verve Mini User Manual Page 43 of 50... -
Page 45: Control System Maintenance
0.5 meters on both sides of the air inlet and outlet. • Before switching on the machine, ensure the water tank is filled. After one minute of operation, refill to prevent low water level alarms leading to abnormal operation. Verve Mini User Manual Page 44 of 50... - Page 46 • Replace the circulating water every 1 to 2 months and clean the water tank, water pipe, and joints. • Fasten the electrical wiring inside the electrical control cabinet with a fixed screw every six months to prevent the screw from loosening, which results in poor contact. Verve Mini User Manual Page 45 of 50...
-
Page 47: Troubleshooting
• Ink overflowed in the air reservoir. • Ink pipe is having cut/bend • Ink pump is not working/connector loose/open • Sub tank float connector is loosely connected to the headboard • Sub tank float is not working Verve Mini User Manual Page 46 of 50... -
Page 48: Print Stops In Between Printing
• Head height is disturbed and not calibrated for the above • Incorrect resolution is selected • Media surface is uneven LINES IN PRINTS • Nozzle blocked in heads (check nozzle test) • Incorrect feed step (calibration required) Verve Mini User Manual Page 47 of 50... -
Page 49: Error Code Specifications
The Security dog has Contact your equipment provider expired The Stage has expired Contact your equipment provider to get a new stage password The security dog time Contact your equipment provider is wrong! Verve Mini User Manual Page 48 of 50... - Page 50 "confirm Ricoh go to voltage setting and enable user pwd and select wf, printhead waveform load cong, and apply file exists? Verve Mini User Manual Page 49 of 50...
- Page 51 For Any Query Please Contact Us www.colorjetgroup.com Call us on 7217885728 Email on info@colorjetgroup.com For Ink Enquiry:- sales@colorjetgroup.com...
Need help?
Do you have a question about the VERVE mini and is the answer not in the manual?
Questions and answers