
Related Manuals for Xterra AIR350


Summary of Contents for Xterra AIR350
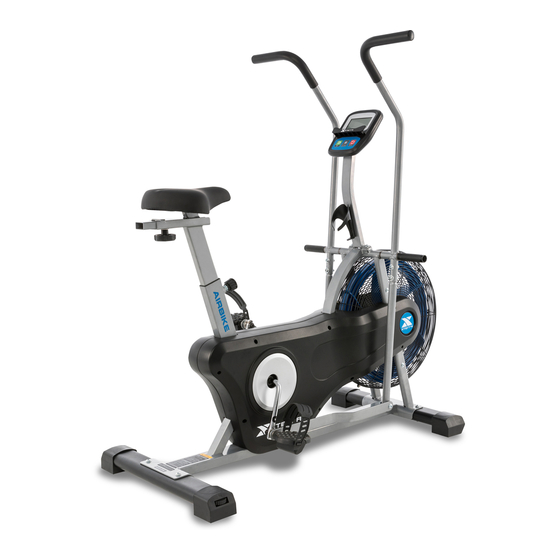
- Page 1 AIR350 Airbike OWNER’S MANUAL PLEASE CAREFULLY READ THIS ENTIRE MANUAL BEFORE OPERATING YOUR NEW Airbike...
-
Page 3: Table Of Contents
Table Of Contents Product Registration Important Safety Instructions Important Operation Instructions AIR350 Assembly Instructions Final Preparations Exploring Your New Bike Troubleshooting Manufacturer’s Limited Warranty WARRANTY COMPLIANCE THIS INDOOR CYCLE IS INTENDED FOR RESIDENTIAL USE ONLY AND IS WARRANTED FOR THE APPLICATION. ANY OTHER APPLICATION VOIDS THIS... -
Page 4: Product Registration
XTERRA Fitness will do all we can to make your ownership experience as pleasant as possible for many years to come. -
Page 5: Important Safety Instructions
WARNING: This product can expose you to chemicals including Toluene and Acrylamide which are known to the State of California to cause cancer and birth defects or other reproductive harm. For more information go to www.P65Warnings.ca.gov SAVE THESE INSTRUCTIONS - THINK SAFETY! AIR350 AIRBIKE... -
Page 6: Important Operation Instructions
6. Proper installation and regular maintenance are required to ensure user’s safety. Maintenance is the sole responsibility of the owner. AIR350 AIRBIKE... -
Page 7: Air350 Assembly Instructions
AIR350 Assembly Pack Checklist AIR350 AIRBIKE... - Page 8 AIR350 Assembly Pack Checklist Part No. Description Q’TY Main Frame Handrail Arm Lower Handrail Arm Upright Post Seat Post Seat Slider Front Stabilizer Rear Stabilizer Computer 14/15 Foot Pedal Seat Cup Holder Large Screw Moving Shaft User Manual Hardware Parts...
- Page 9 AIR350 Assembly Pack Checklist Grease AIR350 AIRBIKE...
- Page 10 5. Connect the Connection Wire (54) at the top of the Upright Post (5) to the wire of the Console (11). Feed any extra length of wire back into the Upright Post(5), then use 4 Screws (58) to mount the Console (11) to the Upright Post (5). AIR350 AIRBIKE...
- Page 11 Attaching the Stabilizers 1. Using 2 sets of Screws (57) and M8 Washers (69) attach the Front Stabilizer (9) to the Main Frame (1). 2. Repeat the same steps to attach the Rear Stabilizer (10) to the Main Frame (1). AIR350 AIRBIKE...
- Page 12 2. Repeat this process to attach the parts of the Right Handrail Arm (2). Note: When connecting the Upper Arms to the Lower Arms the Powder Washer (70) is on the outside of the arms, And the connection points labeled “A” in the diagram above should face inwards towards each other. AIR350 AIRBIKE...
- Page 13 Main Frame (1). Tighten the screw in the direction as shown in the illustration above with the Allen Wrench (93). 3. Tightening the Large Screw (59): Insert the Wrench into the holes on the Large Screws (59) and turn them in opposite directions to thoroughly tighten the Large Screw (59). AIR350 AIRBIKE...
- Page 14 Make sure the bolt on the Left pedal (14) penetrates the crank fully. Lock the Left pedal (14) with the Left Lock nut (75). Finish tightening with the Wrench (93). 3. Repeat on the Right side making sure to turn the pedal clockwise. AIR350 AIRBIKE...
- Page 15 3. Attach the Seat Slider (7) to the Seat Post (6) with Knob (22) and M10 Washer (77). 4. Insert the Seat Post (6) into the Main Frame (1) and lock it at desired height with the Adjustment Knob (24). CHECK ALL BOLTS AND NUTS ARE TIGHTENED BEFORE USING THE MACHINE. AIR350 AIRBIKE...
-
Page 16: Final Preparations
9. Dismount the bike. Loosen the knob under the seat and slide the seat forward or backward as desired; tighten the knob. AIR350 AIRBIKE... -
Page 17: Exploring Your New Bike
Exploring Your New Bike Getting Familiar with the Control Panel AIR350 Console Functions TIME 0:00 ~ 99:59 (Minute:Second) SPEED 0 ~ 999.9 K per hour CALORIES 0.0 ~ 999.99 ~ 9999 Kcal DISTANCE 0.1 ~ 999.9 K BATTERY TYPE (2) Two AAA OPERATING TEMPERATURE 0˚C ~ 40˚C;... -
Page 18: Troubleshooting
• Check that the batteries are correctly positioned and are in proper contact with the battery springs. • The batteries in the computer may be dead. Remove and replace with new batteries. AIR350 AIRBIKE... -
Page 19: Manufacturer's Limited Warranty
Effective June 13, 2019 - AIR350 Airbike LIMITED WARRANTY XTERRA Fitness Inc. warrants all its home use Airbike parts for a period of time listed below, from the date of retail sale, as determined by a sales receipt or in the absence of a sales receipt, eighteen (18) months from the original factory shipping date. XTERRA Fitness’s responsibilities include providing new or remanufactured parts, at XTERRA Fitness’s option, and technical support to our independent... - Page 20 3000 Nestle Road Jonesboro, AR 72401 - Phone:870-336-4286 - Fax:870-935-7611 www.xterrafitness.com ©2019 All Rights Reserved. AIR350 Owner’s Manual AIR350 AIRBIKE...
Need help?
Do you have a question about the AIR350 and is the answer not in the manual?
Questions and answers