Table of Contents
Advertisement
Advertisement
Table of Contents

Related Manuals for BIO RAD S3e


Summary of Contents for BIO RAD S3e
- Page 1 Flow Cytometry/FACS – Bio-Rad S3e Cell Sorter...
-
Page 2: Table Of Contents
Contents Brief Description ..........................3 Reference ............................3 Location ............................3 Suggestion for “Materials and Methods” ..................4 Suggestion for “Acknowledgements” ................... 4 People and Contacts........................4 Features and Specifications ......................5 Lasers/Filter-Sets ........................... 6 Additional Equipment ........................7 System Overview ........................... 7 WARNINGS and Advice ......................... -
Page 3: Brief Description
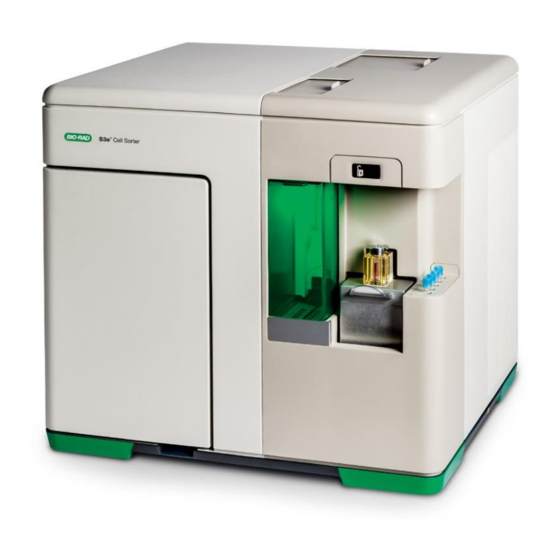
Brief Description The S3e cell sorter is equipped with two lasers and four fluorescent detectors, plus both forward and side scatters. Samples are analyzed using the traditional jet-in-air technology, and events can be sorted at high speeds while maintaining sensitivity and high-purity. -
Page 4: Suggestion For "Materials And Methods
ProSort software, version 1.6, and analyzed using the Cytospec software from Purdue University Cytometry Laboratories. Bacillus subtilis cells were sorted as alive GFP and dead GFP cells using a Bio-Rad S3e Cell Sorter operated by the ProSort software, version 1.6. -
Page 5: Features And Specifications
Features and Specifications • Double-Laser System: 488 nm and 561 nm lasers of 100 mW for cell and particle interrogation • 4 Fluorescence Detectors, photomultiplier tube (PMT) -based • Forward scatter (FSC) detector, photomultiplier tube (PMT) -based • Side scatter (SSC) detector, photomultiplier tube (PMT) -based •... -
Page 6: Lasers/Filter-Sets
Lasers/Filter-Sets Fluorophore Emission Fluorophore or Fluorophore Laser Filter Filter Excitation Maximum Emission Maximum EGFP/GFP FITC BP 525/30 Alexa Fluor 488 EYFP/YFP 496, 565 BP 586/25 BP 615/25 PE-Texas Red 496, 565 PE-Cy5 496, 565 655/LP PE-Cy5.5 490, 565 PE-Cy7 496, 565 496, 565 tdTomato BP 586/25... -
Page 7: Additional Equipment
Additional Equipment Computer • Type: Desktop • Brand: Dell Inc. • Model: OptiPlex 3020 • Features: Intel I5 4590 up to 3.7 GHz (quad-core); 4GB RAM; 500 GB HDD • OS: Windows 7 Professional • Available Software: ProSort Monitor • Brand: Asus •... -
Page 8: Warnings And Advice
WARNINGS and Advice • Before you get started for the first time on this cell sorter consult the responsible people for proper training • For the moment, bacterial pathogens, cell lines or any other agent of Biosafety level 2 or higher are not allowed, as well as radioactively labelled or flammable samples •... -
Page 9: Available Techniques
• Operate quickly when performing the “hot swap” procedure, as time is limited to three minutes for the operation. Bring containers of water or sheath fluid in advance. • The maximum total volumes for a 5 and 1.5 ml collection tubes are 4 and 1 ml, respectively. -
Page 10: Initial Set Up: Start-Up And Fluidics Procedure (≈ 20 Minutes)
Initial Set Up: Start-up and Fluidics Procedure (≈ 20 minutes) In case you are not the first user of the current day, please confirm with the previous user whether a low-pressure cleaning final set up has been performed. If so, skip both start-up and quality control procedures. - Page 11 5. Refill, change or empty the container 6. Carefully place the cap assembly into the container and tighten the cap 7. Place the container into position 8. Attach the quick disconnect to the cap assembly (you should hear a click) 9.
-
Page 12: Initial Set Up: Quality Control (≈ 10 Minutes)
Initial Set Up: Quality Control (≈ 10 minutes) In case you are not the first user of the current day, please confirm with the previous user whether a low-pressure cleaning final set up has been performed. If so, skip both start-up and quality control procedures. - Page 13 5. Once the drop delay calculation has been completed, click in the checkmark button to accept the drop delay. The QC procedure estimates the optimal drop delay and performs the side and forward-scatter detectors calibration 6. A QC report window will appear showing the QC test results. If all parameters have passed the QC test, click in the checkmark button to close the window 7.
-
Page 14: Final Set Up: Low-Pressure Cleaning
Final Set Up: Low-Pressure Cleaning The low-pressure cleaning procedure should only be performed between uses. If you are the last user, please perform the shutdown procedure. See Final Set Up: Shut Down to do so. 1. Fill a 5 ml tube with a minimum of 3 ml of cleaning solution (70% ethanol) 2. -
Page 15: Final Set Up: Shut Down
9. Empty the waste and refill the fluidics containers using the “Hot Swap” procedure (See Swapping Fluidics During Sorting: “Hot Swap” Final Set Up: Shut Down The shutdown procedure is only recommended for the end of day’s use. If you are not the last user, please perform a low-pressure cleaning procedure. - Page 16 8. When the cleaning protocol is complete, the prompt “Please put Loading Stage into the Wash Position” will appear in the Clean System process window. Move the loading stage into the wash position to close such window 9. Click in the Shutdown button in the Setup and Maintenance tab 10.
- Page 17 13. Yet in this window, select the Yes option for the Run Clean Procedure question and click in the checkmark button 14. When the prompt “Please Load Cleaning Solution” appears in the Clean and Shutdown window, load a tube of water MiliQ and move the loading stage into the run position 15.
-
Page 18: Acquisition
Acquisition 1. Go to File -> New Protocol or Open Protocol (see Protocols and Workspace) 2. Create at least one histogram and dot plot by clicking in the Histogram and Density buttons of the Home tab 3. Load the sample into the sample input station and move the loading stage into the run position 4. - Page 19 6. Define the target event rate, trigger parameter and threshold value EVENT RATE 7. In the Instrument Control Panel window, click in the Start button to begin sample acquisition 8. Adjust photomultiplier tube (PTM) voltages to place populations 9. Adjust the target event rate, trigger parameter and threshold value...
- Page 20 10. Stop sample acquisition by clicking the Stop button 11. Box and define the event limit. Gate Limit can be chosen, and Cycle Mode can be unboxed at this time. You can enable the Auto Save option to automatically save the file after the event limit is reached Cycle Mode can be enabled, or the refresh button can be used to refresh the data as adjustments are being made...
-
Page 21: Sorting
15. Run a single stained compensation control for each parameter 16. Set the event limit high enough to visualize a positive population, then collect and save the file 17. Use the Auto Compensation wizard to set compensation for multi-coloured samples (see Auto Compensation Wizard) Sorting 1. - Page 22 4. Acquire a small amount of the sample to be sorted 5. Set sorting regions and gates (in the Set Up and Maintenance tab) on plots with the populations of interest Hint: Create a signal intensity versus time dot plot. The signal intensity and time should be displayed on the y and x axes, respectively.
- Page 23 6. Once all regions are set, right click in the desired region to be sorted and select the sort direction 7. Repeat with a second region if two-way sorting is desired Click in the Sort Logic button and select a collection vessel in the Sort Logic dropdown menu...
- Page 24 9. Set the parameters in the Sort Logic window by selecting the sort mode (Purity, Enrich or Single) and event limit for each collection position The Enrich sort mode stands for sorting positive-match events, although there may be contamination with negative-match events (advised for low concentrations) The Purity sort mode stands for sorting only positive-match events, although there may be double or more events sorted at once The Single sort mode stands for sorting only single positive-match events...
- Page 25 11. Place the sort collection tubes in the sort collection device at the previously selected positions 12. Make sure the 5 ml tubes (if it is the case) have at least 0.5 ml of buffer to cushion the sorted cells 13.
- Page 26 14. The Sort Statistics window will appear, and sorting will be initiated. This window can be reopened by clicking the Sort Statistics button in the toolbar...
-
Page 27: Other Guidelines
Other Guidelines Swapping Fluidics During Sorting: “Hot Swap” New containers or bottles should be prepared before clicking the Swap Fluidics button, as the swap time is limited to only 3 minutes before the system starting to shut down due to low fluid levels. Read carefully all procedure before starting the “Hot Swap”... - Page 28 2. Click in the Play button of the Swap Fluidics window After clicking the Play button, a countdown timer will start in the bottom of the Swap Fluidics window Operate quickly and carefully from now on 3. Open the fluidics door located on the left side of the sorter 4.
-
Page 29: Auto Compensation Wizard
Auto Compensation Wizard The compensation wizard assists with establishing the proper compensation matrix coefficient for each parameter. Single controls for each parameter and the associated FCS files must be saved prior to compensation. 1. Run single controls for each parameter and your multi-stained sample. 2. - Page 30 9. Adjust the scatter, negative, and positive regions as necessary. Note that the positive and negative population gates must not overlap 10. Click the blue forward arrow to go to the next control 11. Repeat steps 9 and 10 for remaining controls...
- Page 31 12. After all controls are adjusted, click the checkmark button. This will complete the automatic compensation calculation 13. Check the compensation box on the axis of the desired histogram or density plot to display either the compensated, acquired or sort data 14.
-
Page 32: Protocols And Workspace
Protocols and Workspace Create a New Protocol 1. Go to File -> New Protocol 2. A new protocol will open as a new tab in the workspace 3. From the Home tab, you can add a histogram or density plot to your workspace Opening Protocols You can open a protocol from either a protocol format file or FCS format file 1. -
Page 33: Further Protocols, Tutorials And Guidelines
Opening FCS Files You can open a FCS file into two different ways: embedding the data into the currently open protocol; opening the data into the protocol in which it was saved a) To embed the data into the currently open protocol, go to File -> Open FCS Data Only b) To open the data into its corresponding protocol, go to File ->...
Need help?
Do you have a question about the S3e and is the answer not in the manual?
Questions and answers