
Related Manuals for BIO RAD Gel Doc EZ


Summary of Contents for BIO RAD Gel Doc EZ
- Page 1 ™ Gel Doc EZ Imaging System ™ with Image Lab Software Instrument Guide Version 6.0...
- Page 3 ™ Gel Doc EZ Imaging System ™ with Image Lab Software Instrument Guide Version 6.0...
- Page 4 Bio-Rad Technical Support Department The Bio-Rad Technical Support department in the United States is open Monday through Friday, 5:00 AM to 5:00 PM, Pacific time. Go to consult.bio-rad.com worldwide technical support. Phone: 1-800-424-6723, option 2 Web: consult.bio-rad.com Email: Support@Bio-Rad.com (United States/Canada only) For technical assistance outside the United States and Canada, contact your local technical support office.
-
Page 5: Table Of Contents
For More Information ..........14 Chapter 2 Setting Up Gel Doc EZ......15 Configuring the Imager . - Page 6 Glossary ..........53 iv | Gel Doc EZ Imaging System with Image Lab Software...
-
Page 7: Safety And Regulatory Compliance
Safety Use Specifications and Compliance The Gel Doc EZ imager is designed and certified to meet EN61010, the internationally accepted electrical safety standard, and EN61326 Class A EMC regulations. Certified products are safe to use when operated in accordance with the instruction manual. - Page 8 Fig. 1. Gel Doc EZ imager certification label. For easy customer access, the serial number appears in two locations on your instrument: on the back panel and inside the front door. 6 | Gel Doc EZ Imaging System with Image Lab Software...
-
Page 9: Alert Icons
Alert Icons Alert Icons Alert icons call attention to caution and warning paragraphs. The icon indicates the type of hazard addressed. Table 1. How alert icons are used in this user guide Icon Explanation General Indicates a potential hazard requiring special attention. This icon is used when the hazard or condition is of a general nature. -
Page 10: Warnings
Caution: Disconnect the AC power cord before removing the instrument cover. Warning! This instrument must be connected to an appropriate AC voltage outlet that is properly grounded. 8 | Gel Doc EZ Imaging System with Image Lab Software... -
Page 11: Notice
Notice Notice The Gel Doc EZ imaging system is meant for use by specialized personnel who know the health risks associated with reagents normally used in electrophoresis. Bio-Rad Laboratories, Inc. is not responsible for any injury or damage caused by use of this instrument for purposes other than those for which it is intended, or for instrument modifications not performed by Bio-Rad Laboratories, Inc. - Page 12 Safety and Regulatory Compliance 10 | Gel Doc EZ Imaging System with Image Lab Software...
-
Page 13: Chapter 1 Introduction
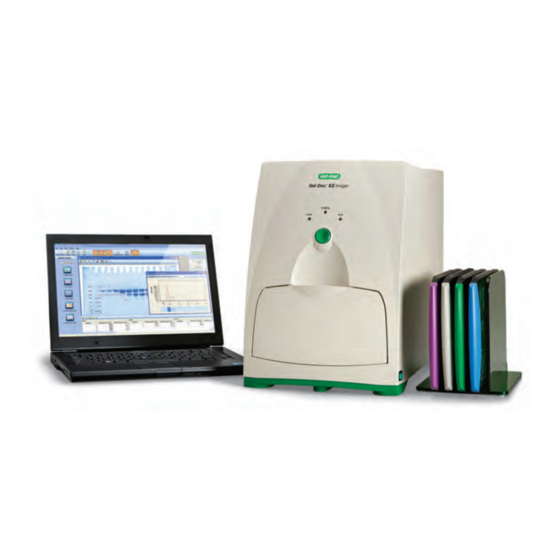
Introduction The Gel Doc™ EZ imaging system consists of the Gel Doc EZ imager and Image Lab™ software. The imager connects to a separate computer running Image Lab. This combination creates an automated system for imaging and analyzing gels and blots. Data can be viewed, modified, and reported using Image Lab software. - Page 14 1 | Introduction Four sample trays are available for the Gel Doc EZ imager. Each tray supports applications requiring a different set of stains and detection reagents, as shown in Table 3. Table 3. Sample Tray Types and Detection Reagents...
-
Page 15: Technical Specifications
100–240 VAC Input frequency range 50–60 Hz Power 40 W The Gel Doc EZ imager is for indoor laboratory use only. Automation Capabilities Workflow automated Controlled by a protocol via setup for gel activation, image execution capture, analysis, and reporting... -
Page 16: Image Lab Software Capabilities
Gel electrophoresis is a common way to separate, identify, and purify proteins or nucleic acids. The Gel Doc EZ system enables you to image and print gel and blot images for documentation in laboratory notebooks and to export images for publication or presentation. -
Page 17: Chapter 2 Setting Up Gel Doc Ez
To configure the imager Verify that the Gel Doc EZ is connected to the computer running Image Lab software. If a tray is in the imager, remove it and close the door. - Page 18 The first page of the setup wizard indicates that a new instrument has been found and displays the instrument serial number. Click Next. | Gel Doc EZ Imaging System with Image Lab Software...
- Page 19 Configuring the Imager The Dark Image Correction page appears. Click Acquire Dark Image. A progress bar monitors the acquisition of the dark image. When the dark image has been acquired, the wizard prompts you to initialize the UV tray. If you do not have a UV tray, click Skip and go to Step Make sure the UV tray is clean.
- Page 20 Make sure the white tray is clean. Then insert the tray into the imager and close the door. Click Next to initialize the white tray. A progress bar monitors the initialization of the tray. | Gel Doc EZ Imaging System with Image Lab Software...
- Page 21 Configuring the Imager When the tray has been initialized, the next screen lists the applications you can run with the tray. Remove the white tray from the imager. Click Next. The wizard prompts you to initialize the blue tray. If you do not have a blue tray, click Skip and go to Step Make sure the blue tray is clean.
- Page 22 Make sure the stain-free tray is clean. Then insert the tray into the imager and close the door. Click Next to initialize the stain-free tray. A progress bar monitors the initialization. | Gel Doc EZ Imaging System with Image Lab Software...
- Page 23 Configuring the Imager When the tray has been initialized, the next page confirms this and lists the applications you can run with the tray. Click Next. A tray summary page lists all the trays and their status. Trays you initialized appear as ready to use.
-
Page 24: Initializing An Additional Tray
Complete the steps in the wizard. The wizard identifies the new tray and asks whether you want to initialize it. Click Next. The wizard begins initializing the tray. A progress bar monitors the initialization. | Gel Doc EZ Imaging System with Image Lab Software... -
Page 25: Recalibrating Flat Field And Dark Image
Recalibrating Flat Field and Dark Image When the tray has been initialized, the wizard displays a list of the applications you can run using the tray. Click Next. The wizard displays the Tray Summary, which shows the highlighted, initialized new trays. Do one of the following: ... - Page 26 Insert a white tray, click Reset under Instrument Calibration and click OK. To recalibrate Dark Image Insert any type of tray, click Reset under Dark Image Correction and click OK. | Gel Doc EZ Imaging System with Image Lab Software...
-
Page 27: Chapter 3 Acquiring Images
When you select an application, the screen displays the tray designed to work best with the application. Gel Doc EZ Imaging System on page 11 for a table of tray types and the applications they support. -
Page 28: Creating A Protocol
Main steps appear as headings in the left pane of each screen. Numbered steps appear under these headings. To choose options for a protocol step, select the checkbox for the numbered step. To disable a numbered step, clear its checkbox. 26 | Gel Doc EZ Imaging System with Image Lab Software... - Page 29 To set up a default protocol Verify that Gel Doc EZ appears on the status bar with a green check mark. The green check mark indicates that the imager is connected to the computer running Image Lab software and is communicating with Image Lab.
- Page 30 The Protocol Setup Gel Imaging screen appears. To set up any other protocol Verify that Gel Doc EZ appears on the status bar with a green check mark. The green check mark indicates that the instrument is connected to the computer running Image Lab software and is communicating with Image Lab.
-
Page 31: Configuring Acquisition Settings
Creating a Protocol The Protocol Setup screen appears with Gel Imaging selected in the left pane. The title bar displays the protocol name. You can change this name when you save the protocol. Note: The left pane of the default protocol is green. The left pane of all other protocols is blue. - Page 32 Under Image Exposure, select one of the following options: Auto Exposure — estimates an optimal exposure time and ensures the best use of the dynamic range. Intense Bands — optimizes exposure for all bands 30 | Gel Doc EZ Imaging System with Image Lab Software...
- Page 33 Creating a Protocol Faint Bands — uses a longer exposure time, making faint bands more visible, but more prominent bands might be overexposed Tip: After imaging a sample optimized for automatic exposure, the previous exposure time appears. You can use it as a reference point when you set a manual exposure time.
-
Page 34: Configuring Analysis Settings
Note: You cannot print a report on a thermal printer. When you display a report, a scrollable report screen opens in which you can view the image, acquisition settings, and analysis data. 32 | Gel Doc EZ Imaging System with Image Lab Software... -
Page 35: Running A Default Protocol
Running a Default Protocol To specify protocol output Select Specify Output in the left pane of the Protocol Setup screen. Output options appear in the right pane. In the right pane, choose one of the following: Automatically print the image ... - Page 36 After the protocol runs, the acquired image appears with the protocol window 0open behind it. The application name appears in the status bar below the gel preview window. 34 | Gel Doc EZ Imaging System with Image Lab Software...
- Page 37 Running a Default Protocol To run a default protocol for several samples Place a sample on the appropriate tray and insert it into the imager until the magnet grabs the tray. Close the door. Press the green Run button on the front of the imager. The Default Protocol screen opens and the default protocol runs automatically.
-
Page 38: Running A Protocol
Ensure that the sample imaging application and tray type match the Protocol acquisition settings. Click Run Protocol in the left pane of the Protocol Summary screen. The protocol runs automatically. 36 | Gel Doc EZ Imaging System with Image Lab Software... - Page 39 Running a Protocol After the protocol runs, the acquired image appears with the Protocol screen open behind it. Instrument Guide | 37...
-
Page 40: Creating A Custom Application
Select a tray type. Note: Selecting the tray type conveys important information to the instrument about the dye or stain, such as the recommended excitation wavelength. This ensures proper image acquisition. 38 | Gel Doc EZ Imaging System with Image Lab Software... -
Page 41: Editing A Protocol
Editing a Protocol Select a display color. Tip: Viewing the image with a different color scheme can make all elements more visible. For more information about color choices, see the Image Lab Software User Guide. Click OK. Note: If you are not sure how to configure the custom application for a dye or stain, contact Bio-Rad Technical Support. - Page 42 3 | Acquiring Images 40 | Gel Doc EZ Imaging System with Image Lab Software...
-
Page 43: Appendix A Maintenance And Specifications
Maintenance and Specifications Cleaning the Sample Trays Clean the sample trays with a standard laboratory detergent or mild solvent such as EtOH or MeOH. Use lint-free tissue to wipe the trays dry. Dust particles or lint on a sample tray can glow under UV illumination. UV-B Fluorescent Lamp Replacement The UV lamps provide service under normal usage for 4–5 years. - Page 44 If the lamp assembly is not fully seated, the following error message appears the next time it communicates with Image Lab software: Light tray not detected. 42 | Gel Doc EZ Imaging System with Image Lab Software...
-
Page 45: Error Messages
Error Messages Error Messages Sample tray not detected The sample tray has a magnet that senses when the sample tray is inserted. If this message appears when you attempt to image, the sample tray might not be pushed in all the way. Press the tray in until the magnet grabs the tray. Light tray not detected This error message appears when the lamp assembly is not fully seated in the imager. - Page 46 A | Maintenance and Specifications 44 | Gel Doc EZ Imaging System with Image Lab Software...
-
Page 47: Appendix B Troubleshooting
Troubleshooting Problem Possible Cause Solution Green LED on front The AC power cord is Connect an AC power cord to the panel is off not connected. imager and an appropriate wall socket. The power is off. Turn the power switch on. Front panel LEDs The firmware is not Call Bio-Rad Technical Support for help. - Page 48 B | Troubleshooting 46 | Gel Doc EZ Imaging System with Image Lab Software...
-
Page 49: Appendix C Accessories
Table 4. Ordering information Catalog # Description 1708270 Gel Doc EZ imaging system with Image Lab software, compatible with PC or Mac, includes darkroom, camera, cables, Image Lab software; stain-free sample tray # 170-8274; other sample trays available separately Image Lab Software... - Page 50 C | Accessories 48 | Gel Doc EZ Imaging System with Image Lab Software...
-
Page 51: Appendix D Using Bio-Rad Stain-Free Technology
Stain-free gels include unique trihalo compounds that allow rapid fluorescent detection of proteins with the Gel Doc™ EZ imager without staining. When using Image Lab™ software, the Gel Doc EZ imager is stain-free enabled to image the following gels: ... -
Page 52: Stain-Free Workflow
Mini-PROTEAN® Precast Gels Instruction Manual and Application Guide (bulletin #1658100). Prepare buffers Prepare gels and assemble electrophoresis cell Prepare and load samples Perform electrophoresis Activate/image gels Analyze the separation 50 | Gel Doc EZ Imaging System with Image Lab Software... -
Page 53: Electrophoresis With Stain-Free Gels
Electrophoresis with Stain-Free Gels Electrophoresis with Stain-Free Gels Stain-free gels are made and packaged without sodium dodecyl sulfate (SDS), allowing them to be used for both SDS and native polyacrylamide gel electrophoresis (PAGE) applications. To perform electrophoresis with stain-free gels Prepare the sample and running buffers. -
Page 54: Imaging Blots
PVDF can result in high background or low sensitivity with the imager. To assess transfer efficiency, be sure to activate and visualize the gel using the imager before transfer. 52 | Gel Doc EZ Imaging System with Image Lab Software... -
Page 55: Glossary
Glossary Aspect ratio The ratio of the width to the height of an image. (Charge-coupled device) A light-sensitive silicon chip used as a photodetector in Gel Doc EZ camera systems. Colormaps Different color representations of a gel image. Electrophoresis A technique for separating molecules based on the differential movement of charged particles through a matrix when subjected to an electric field. - Page 56 Glossary 54 | Gel Doc EZ Imaging System with Image Lab Software...
- Page 58 Bio-Rad Laboratories, Inc. Life Science Web site bio-rad.com USA 1 800 424 6723 Australia 61 2 9914 2800 Austria 43 1 877 89 01 177 Belgium 32 (0)3 710 53 00 Brazil 55 11 3065 7550 Canada 1 905 364 3435 China 86 21 6169 8500 Czech Republic 420 241 430 532 Denmark 45 44 52 10 00 Finland 358 09 804 22 00 Group France 33 01 47 95 69 65 Germany 49 89 31 884 0 Hong Kong 852 2789 3300 Hungary 36 1 459 6100 India 91 124 4029300 Israel 972 03 963 6050 Italy 39 02 216091 Japan 81 3 6361 7000 Korea 82 2 3473 4460 Mexico 52 555 488 7670 The Netherlands 31 (0)318 540 666...
Need help?
Do you have a question about the Gel Doc EZ and is the answer not in the manual?
Questions and answers