Table of Contents
Advertisement
Quick Links
Advertisement
Table of Contents

Related Manuals for BIO RAD S3


Summary of Contents for BIO RAD S3
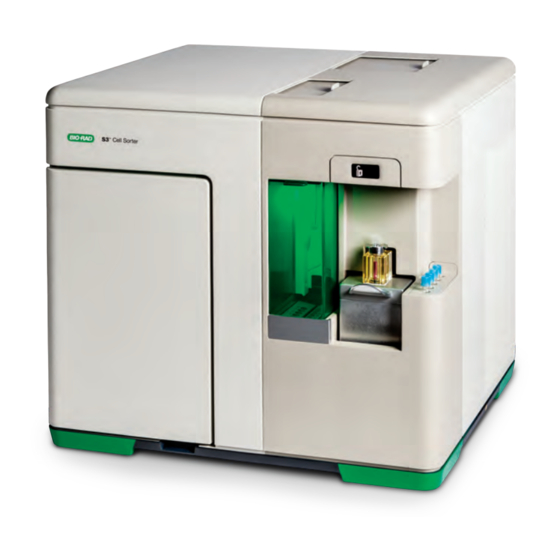
- Page 1 Cell Sorter ™ Instruction Manual Catalog #145-1001 #145-1002...
- Page 3 Although prepared to ensure accuracy, Bio-Rad assumes no liability for errors, or for any damages resulting from the application or use of this information. Copyright © 2014 by Bio-Rad Laboratories, Inc. All rights reserved. S3 Cell Sorter Instruction Manual...
- Page 4 X > Y Instruction to select X and then select Y from a toolbar, menu, or software window Highlights area of interest on a screenshot IMPORTANT! Provides important information about necessary actions or common mistakes S3 Cell Sorter Instruction Manual...
- Page 5 CAUTION: Biohazard! This symbol identifies components that may become contaminated with biohazardous material Instrument Warning Labels The warning labels shown in Table 4 are displayed on the instrument and refer directly to the safe use of the S3 cell sorter system. Table 4. Instrument safety warning labels.
- Page 6 Hazards The S3 cell sorter system is designed to operate safely when used in the manner prescribed by the manufacturer. If the S3 system or any of its associated components are used in a manner other than prescribed, or if modifications to the instrument are not performed by a Bio-Rad or other authorized agent, then the warranty on the system will be voided.
- Page 7 The S3 system includes a waste container that may potentially contain hazardous chemical materials depending on the sample used. Explosive or Flammability Hazards The S3 system poses no uncommon hazard related to flammability or explosion when used in a proper manner as specified by Bio-Rad Laboratories.
- Page 8 S3 Cell Sorter Instruction Manual...
-
Page 9: Table Of Contents
10.6 Disinfectants 5.3 Checking or Swapping Fluidics 10.7 Decontamination 5.4 Optical Filters Troubleshooting Chapter 6: Sorting 6.1 Sort Setup References 6.2 Sort Modes 6.3 Sort Statistics S3 Cell Sorter Specifications 6.4 Sort Plots Ordering Information S3 Cell Sorter Instruction Manual... - Page 10 S3 Cell Sorter Instruction Manual...
-
Page 11: Chapter 1: Introduction
As a benchtop cell sorter, the S3 system is equipped with one or two lasers and up to four fluorescent detectors, plus forward and side scatters. Samples are analyzed using the traditional jet-in-air technology, and events can be sorted at high speeds while maintaining sensitivity and high purity. -
Page 12: System Components
If any items are missing or damaged, contact your local Bio-Rad office for assistance. Before the S3 cell sorter can be installed by a service engineer, a site must be chosen. The instrument should be located on a sturdy bench or table top, away from any other instruments that may interfere electrically or mechanically by causing vibration. -
Page 13: Chapter 2: Hardware Description
This chapter describes the hardware of the S3 system. Understanding the system’s hardware is essential for proper operation. 2.1 System Overview The S3 system consists of fluidics, optics, electronics, and software. It can be broken down into several subsystems (Figure 1). Access to filters... - Page 14 2.1.2 Aerosol Evacuation Port The S3 system also includes an aerosol evacuation port used to directly evacuate the sort collection chamber when connected to a biosafety system. This port can be covered when not in use.
-
Page 15: Fluidics System
2.2.1 Bulk Fluidics The S3 system includes two empty containers as part of the bulk fluidics. Table 6 describes the function of each container. Table 6. Containers and their functions. - Page 16 The washing station is used during startup, shutdown, and in between samples. This will help to reduce carryover since the sample line is cleared and the outside of the line is washed. The loading stage is locked in position while washing and sampling. S3 Cell Sorter Instruction Manual...
- Page 17 Note: It is recommended that resuspended adherent samples are mixed at the high speed to prevent clumping. IMPORTANT! It is highly recommended that samples are filtered prior to running. This will minimize clogs in the sample tube and nozzle tip. S3 Cell Sorter Instruction Manual...
- Page 18 Sorted samples can be collected into three collection vessels listed below. 1.5 ml tubes 8-well strips 5 ml tubes, 12 x 75 mm Microscope glass slides S3 Cell Sorter Instruction Manual...
-
Page 19: Optics
2.3.1 Laser The S3 system is installed with a 488 nm, 100 mW laser for cell and particle interrogation that passes through the system in the sample core. The laser power and shutter can be controlled through the software interface. - Page 20 2.3.8 Cameras The S3 system contains several cameras for system alignment and calibration. The function of each of these cameras is detailed below. Note: Cameras do not require adjustments by users.
-
Page 21: Electronics
2.4.1 Interlocks To prevent exposure to laser light and shock hazards, the S3 system is equipped with safety interlocks (Figure 10). On the instrument control panel of the software, the instrument status box will show visual indicators if these interlocks have been disengaged. - Page 22 S3 Cell Sorter Instruction Manual...
-
Page 23: Chapter 3: Prosort Software
This chapter describes the features of the ProSort software. The software is the main interface for the S3 cell sorter system, giving overall status and providing control. To start the software, double click the ProSort icon (Figure 11) on the desktop. -
Page 24: Main Software Window
Features available in the main software window for user mode are shown in Figure 13. Title bar File menu and tabs Instrument control Workspace PMT control Instrument status Status bar Fig. 13. Main software window for user mode. S3 Cell Sorter Instruction Manual... - Page 25 Recent Protocols protocols for the user that is logged in. List of recent FCS Lists the recent FCS files used by the logged-in user Recent FCS Files files for the user that is logged in. S3 Cell Sorter Instruction Manual...
- Page 26 Adds a polygon region to the selected density plot. If a density plot is not selected, this region will be grayed out Select each desired point and move the mouse cursor outside the density plot to complete. The region can be moved, resized, and/or deleted continues S3 Cell Sorter Instruction Manual...
- Page 27 %, efficiency, etc. Sort Statistics can be added to the print window for reporting. This window will open automatically when a sort is started Help Opens a PDF file of the user manual as a reference S3 Cell Sorter Instruction Manual...
- Page 28 These reports may be saved and/or printed QC Report This button shows and allows saving and/or printing of the daily QC report. This report includes date, user, CV/PMT/droplet info, etc S3 Cell Sorter Instruction Manual...
- Page 29 Allows the currently logged-in user to change password System Log Opens window for system log. Displays date, time, error, error details. This option is helpful when working with technical support and service engineers for troubleshooting S3 Cell Sorter Instruction Manual...
-
Page 30: Control Panel
Temperature inside the system Trigger channel Threshold value Alter PMT voltages Assign values for detection channels Instrument status box Indicator of actions required or needing attention Fig. 16. Overview of instrument and PMT control panel. S3 Cell Sorter Instruction Manual... - Page 31 Indicates the status of the biosafety system and gives information on filter life. System Status If the biosafety system loses connection, cannot connect, or if the filter life is at 0% an error will occur and not allow the user to sort or acquire. continues S3 Cell Sorter Instruction Manual...
-
Page 32: Administrator Tab Toolbar
IMPORTANT! Adjusting any of these settings will impact the overall performance of the system. Only knowledgeable users should make any changes to these settings. All changes made here will apply globally to the system. Fig. 17. Administrator tab toolbar. S3 Cell Sorter Instruction Manual... - Page 33 (Figure 18). When receiving a new lot of ProLine calibration beads: 1. Download the bead lot file from the S3 cell sorter website, www.bio-rad.com/cellsorter. 2. Click the green plus button (Figure 18). 3. Navigate to the new bead lot file.
- Page 34 Enable Test Pattern box (Figure 20). CAUTION! Optimal side stream settings are calculated automatically after performing a quality control procedure. Adjusting any of these values will change the settings and will affect the side streams and sort. S3 Cell Sorter Instruction Manual...
- Page 35 Calibrate droplets Recalculate drop delay Verify drop delay Close window Fig. 19. Droplet Controls window with drop settings highlighted. Fig. 20. Streams Control window with Enable Test Pattern highlighted. S3 Cell Sorter Instruction Manual...
- Page 36 To display a user’s usage information, select the date range of interest and click Update (Figure 22). Fig. 22. User Report window with date range highlighted. S3 Cell Sorter Instruction Manual...
- Page 37 2. Modify user information in the Edit User window (Figure 24). 3. Click Save. Note: In the event that all administrator passwords are lost or forgotten, call your local technical support team to receive a temporary password. Fig. 24. Edit User window. S3 Cell Sorter Instruction Manual...
- Page 38 The system will automatically begin the calibration process (Figure 26). Once complete the system offset pressure has been calibrated. Fig. 25. Sample Calibration Warning dialog box. Fig. 26. Calibration Sample Offset window. S3 Cell Sorter Instruction Manual...
- Page 39 The system has the ability to shut down automatically and start the shutdown procedure after sitting idle for a designated time period. The system has a default setting of 2 hours. This option helps to preserve laser lifetime and prevent the system from running overnight. S3 Cell Sorter Instruction Manual...
- Page 40 Compensation sliders can be selected to be displayed or hidden on the density plot axes when the compensate box is checked. Compensation bars can also be used to make compensation adjustments, however proper gating and match medians must be used to compensate correctly S3 Cell Sorter Instruction Manual...
- Page 41 File > About window. This will let all users of the instrument know what person within the lab or institution to contact for any emergency help with the S3 system. Fig. 28. About window displaying emergency contact information. S3 Cell Sorter Instruction Manual...
- Page 42 S3 Cell Sorter Instruction Manual...
-
Page 43: Chapter 4: Getting Started
Getting Started After system installation by a Bio-Rad certified service engineer, the S3 system should not be turned off via the main power switch. The system is safe in standby mode after performing a software shutdown of the system. This will help facilitate quick or automated startup. -
Page 44: Logging In
Treat all waste as bio-hazardous for safety 4.2 Logging In To use the S3 system, the ProSort software is required. The software is preinstalled on the computer that came with the instrument. 1. Double click the ProSort software icon located on the desktop. -
Page 45: Daily Startup
The Startup Status window will display the status of the startup process (Figure 33). The startup process includes initializing the system, filling the fluidics lines, and warming up the lasers. Fig. 33. Startup Process windows. S3 Cell Sorter Instruction Manual... -
Page 46: Quality Control
5. Click Run QC on the Setup and Maintenance tab. 6. Choose the correct bead lot from the dropdown menu in the Event Based Alignment Settings Fig. 35. Event Based Alignment window (Figure 35). Settings window. S3 Cell Sorter Instruction Manual... - Page 47 (Figure 37). Users with administrator privileges may access and modify these settings in the administrator tab. For more information, refer to Section 3.3, Administrator Tab Toolbar. S3 Cell Sorter Instruction Manual...
- Page 48 Adjusting any of these values will change the optimal settings and will affect the side streams and sort. Fig. 38. View Streams window with charge phase and defanning slider bars highlighted. S3 Cell Sorter Instruction Manual...
- Page 49 ProLine calibration beads used for the alignment. ProDrop technology accurately calculates the drop delay on the S3 system by analyzing the waste stream while running calibration particles. Events are detected normally at the nozzle and then again in the waste stream below.
- Page 50 To verify that the drop delay is being maintained, use the Droplet Monitor button on the tool bar. This window will note if the system is maintaining (Figure 41). Fig. 41. Droplet Monitor window with status and recalculate button highlighted. S3 Cell Sorter Instruction Manual...
- Page 51 (Figure 42). To view a previous QC Report, on the Setup and Maintenance tab select QC Report > Date. Print report Open FCS file Save data file Fig. 42. QC Report window with QC status highlighted. S3 Cell Sorter Instruction Manual...
-
Page 52: Protocols And Workspace
Windows prompt to locate and open the desired protocol. To the right of the file name field is a dropdown box for protocol or FCS file. By selecting the FCS file option, a protocol can be opened directly from a saved FCS file. S3 Cell Sorter Instruction Manual... - Page 53 To save a protocol (Figure 44), click File > Save Protocol. Refer to Section 3.3.8, Global Preferences, for information on how to assign default folders for saving both protocols and FCS files. S3 Cell Sorter Instruction Manual...
- Page 54 Only option. The FCS file can also be opened into the original protocol in which it was acquired by using the Open FCS with Protocol option. The existing gates and plots associated with that protocol will be recalled to the workspace. Fig. 46. Opening and saving FCS files. S3 Cell Sorter Instruction Manual...
- Page 55 When plots are added to the workspace they are tiled automatically based on the size of the screen. To resize histograms or density plots: 1. Hover over the desired plot. 2. Hold down the handle in the lower right corner and drag the plot to the desired size. S3 Cell Sorter Instruction Manual...
- Page 56 To change the parameters displayed in a plot, click the dropdown arrow and select a parameter (Figure 49). If a log or compensated parameter is desired, check the appropriate box. Fig. 49. Density plot with parameters displayed. S3 Cell Sorter Instruction Manual...
- Page 57 3. Check Apply to all to apply to all plots in the protocol. To reorder statistic headings: 1. Click the statistic name in the Statistics title bar. 2. Drag and drop to the desired location. S3 Cell Sorter Instruction Manual...
- Page 58 2. Right click within the plot and choose a region type (Figure 51). The selected region will appear in the desired plot. Region buttons will be grayed out if the incorrect plot is selected. Fig. 51. Right-click option for creating regions. S3 Cell Sorter Instruction Manual...
- Page 59 The regions on the gated plot will appear in the title bar of the plot. To ungate a plot, right click in the gated plot and select Clear Gate. Fig. 53. Density plot with Apply Gate selected. S3 Cell Sorter Instruction Manual...
- Page 60 S3 Cell Sorter Instruction Manual...
-
Page 61: Chapter 5: Acquisition
Optional: AutoSave can be enabled to automatically prompt to save file after event limit is reached. 11. Re-collect sample and save FCS file if AutoSave is not enabled. 12. Unlock and remove sample tube. Move the loading stage into the wash position before the next sample is run. S3 Cell Sorter Instruction Manual... - Page 62 The button for preset sample event rate can also be used. The sample pressure is preset for low/med/high rates. The sample rate will be dependent upon the concentration of the sample. Fig. 54. Target event rate. S3 Cell Sorter Instruction Manual...
- Page 63 Fig. 56. Target event rate and threshold level. S3 Cell Sorter Instruction Manual...
- Page 64 An auto save option is available as a check box on the instrument control panel. If this box is checked (Figure 58), a prompt will appear to name and save the FCS file after an acquisition or sort is completed. Fig. 58. Checked auto save box. S3 Cell Sorter Instruction Manual...
-
Page 65: Compensation
FL2 scale than the negative population, though it has no FL2 fluorescence. When compensation has been applied, the positive FL1 population has the same median value as the FL1 negative population in the FL2 parameter. S3 Cell Sorter Instruction Manual... - Page 66 Fig. 60. Same data plots showing incorrectly compensated file (left) and correctly compensated file (right). As compensation is adjusted, the compensation matrix will be updated. At any time the compensation matrix can be viewed using the button on the toolbar (Figure 61). S3 Cell Sorter Instruction Manual...
- Page 67 4. Select the parameters for compensation (Figure 62). 5. Click the file icon for each selected parameter (Figure 62). Fig. 62. Use the auto compensation wizard to select individual parameter FCS files and adjust regions. S3 Cell Sorter Instruction Manual...
- Page 68 This allows better visualization of compensated data. Note: The area parameter is grayed out and cannot be changed because compensate is checked. Compensation can only be applied to area or height depending on which selection was chosen during auto compensation. S3 Cell Sorter Instruction Manual...
- Page 69 (Figure 64). When the value in the matrix is changed, the populations will move. Alter until the median values are correct and matched. Fig. 65. Compensation matrix. S3 Cell Sorter Instruction Manual...
-
Page 70: Checking Or Swapping Fluidics
If the fluidic containers need to be swapped after startup or during a run, the S3 cell sorter is designed to easily allow this without the need to shut down the system. This is considered as a hot swap of the fluidics. - Page 71 8. Empty the waste container following lab procedures for liquid biohazardous and chemical waste removal. 9. Place the waste cap assembly into a new designated waste container or recap emptied waste container. 10. Proceed to step 11. S3 Cell Sorter Instruction Manual...
-
Page 72: Optical Filters
5.4 Optical Filters The optical filters separate and direct the fluorescent light to the PMTs for detection. These filters are located behind a sliding panel on the top and toward the rear of the S3 system. 5.4.1 Standard Filter Configuration The standard filter configurations for the S3 systems are shown in Figure 68. - Page 73 In front of each PMT is a holder for a neutral density filter or bandpass filter. Each filter holder contains a screw-in retaining ring that can be removed or replaced with the provided red S3 spanner wrench. 5.4.2 Optical Filter Blocks The S3 system includes two preset filter blocks.
- Page 74 S3 Cell Sorter Instruction Manual...
-
Page 75: Chapter 6: Sorting
13. Place sort collection vessel in the sort collection device at positions 1, 2, etc. Note: 5 ml tubes should have at least 0.5 ml media and 1.5 ml tubes should have at least 0.1 ml filtered media to collect and cushion the sorted cells. S3 Cell Sorter Instruction Manual... - Page 76 16. If no limits have been set, click the same sort button to stop the sort when desired. 17. Return loading stage to the washing position. 18. Open sort chamber door and remove sorted cells. Fig. 71. Sort Statistics window. S3 Cell Sorter Instruction Manual...
- Page 77 6.1.1 Sort Collection The S3 system offers four types of sort collection vessel options: 5 ml tubes 1.5 ml tubes 8-well strips Microscope glass slides Each sort direction has the capability of sorting into 5 ml tubes and 1.5 ml tubes up to a quantity of 5 tubes in each direction.
- Page 78 If there is overlap between the logic of the two streams, the left sort direction will take priority unless changed. The numbers shown in this window represent the numbers in the sort output area. S3 Cell Sorter Instruction Manual...
-
Page 79: Sort Modes
1. File > Open FCS File with Protocol. 2. Click on the Home tab and click Sort Statistics. 3. Check the Show Aggregate Statistics box to view statistics from all sorted events. Fig. 75. Sort Statistics window. S3 Cell Sorter Instruction Manual... - Page 80 This information can be saved as a tab-delimited file using the save button located in the lower right corner of the window. This information is automatically stored in the FCS file. Fig. 76. Sort Statistics window expanded to reveal additional information. S3 Cell Sorter Instruction Manual...
-
Page 81: Sort Plots
The numbers 1–10 are the sort position designations as assigned in the Sort Logic window (Figure 74). Regions can be applied to the sort plot. These regions can be applied to other histograms or density plots. Fig. 77. Sort Plot window. S3 Cell Sorter Instruction Manual... - Page 82 S3 Cell Sorter Instruction Manual...
-
Page 83: Chapter 7: Additional Software Features
Use the Unclog button on the Setup and Maintenance tab toolbar as a first-line action. The S3 system has the ability to backflush the nozzle, potentially releasing the clog and flushing it into the waste. -
Page 84: Clean System
5. Select the cleaning mode to run (Figure 79). 6. Click Yes to proceed with mode (Figure 80). 7. Move the loading stage into wash position (Figure 81). Fig. 79. Clean System modes. Fig. 80. Warning for high pressure cleaning protocol. S3 Cell Sorter Instruction Manual... -
Page 85: Instrument Status Box
Fig. 82. Status bar with the status indicators numbered. Table 27. Description of each status indicator. Number Description Software connectivity to instrument Current date Temperature control status Event rate (events per second) Total event number Acquisition time elapsed Sort time elapsed Current user S3 Cell Sorter Instruction Manual... -
Page 86: Printing
Fig. 83. Printing options available. 7.8 Quality Control Reports Two different reports are available to track the daily performance of the S3 system. One is the daily QC report which will show pass/fail and droplet information for the selected day (Figure 84). -
Page 87: User Reports
(Figure 86). These reports can be printed for reference and will include the session notes entered when users were logged into the software. Fig. 86. User report. S3 Cell Sorter Instruction Manual... -
Page 88: Biosafety System
Should the biosafety system be turned off when the S3 cell sorter power is on inside, there could be risk of overheating and it may become a fire hazard. If any of the following occur, the S3 cell sorter will stop sample acquisition or sort and alert the user:... -
Page 89: Chapter 8: Shutdown
Shutdown 8.1 Daily Shutdown The S3 system should be shut down at the end of the day. This will turn off all droplet formation and charging, lasers, and streams. A flush will be completed with the DI water container to rinse the system. - Page 90 (Figure 90). 5. If using the automatic startup option, select Yes and set the restart date and time. Fig. 90. Automatic Restart window with shutdown icon highlighted. S3 Cell Sorter Instruction Manual...
- Page 91 8. The system will automatically run through the cleaning procedure, which takes approximately 2 min, while displaying status windows (Figure 92). 9. Put the Loading Stage into the wash position. Fig. 92. Cleaning status windows. S3 Cell Sorter Instruction Manual...
- Page 92 Once the shutdown procedure is completed the software will return to the opening login screen. At this time the system is fully shut down and can be left in standby mode till the next use. S3 Cell Sorter Instruction Manual...
-
Page 93: Chapter 9: Automatic Startup
1. Using the Startup button (provided no scheduled startup has been set). Please refer to Section 4.3, Daily Startup. 2. During the shutdown procedure. Please refer to Section 8.1, Daily Shutdown. 3. During the decontamination procedure. Please refer to Section 10.7, Decontamination. Fig. 94. Startup settings. S3 Cell Sorter Instruction Manual... -
Page 94: Previously Scheduled Automatic Startups
(Figure 97). This countdown indicates how much time is left before the startup procedure will begin. Note: The software must be opened to the login screen for the auto startup to occur. Fig. 97. User login window with auto startup countdown. S3 Cell Sorter Instruction Manual... - Page 95 Allow auto startup Keeps scheduled automatic startup time but allows the user to start up the system and run experiments in the meantime. The user can also alter the startup time S3 Cell Sorter Instruction Manual...
- Page 96 S3 Cell Sorter Instruction Manual...
-
Page 97: Chapter 10: Maintenance
10.1.3 Yearly It is recommended to purchase the annual preventative maintenance (PM) plan offered with the S3 cell sorter. The PM includes but is not limited to an annual onsite visit by a service engineer to: Replace the inline sheath filter... -
Page 98: Dealing With Clogs
If a clog does occur, use the Unclog button on the Setup and Maintenance tab toolbar as a first-line action. The S3 system has the ability to backflush the nozzle, potentially releasing the clog and flushing it into the waste. - Page 99 If sonication is desired or necessary: 10. Place the tip into a tube containing DI water. 11. Cap the tube. 12. Place the tube into a sonicator for several minutes. 13. Proceed to step 14. S3 Cell Sorter Instruction Manual...
- Page 100 17. Remove the lint-free cloth from nozzle chamber. Fig. 100. Nozzle swap wizard window. 18. Press the stage back down and tighten the thumb screw. 19. Click the blue forward arrow. Fig. 101. Nozzle swap wizard window. S3 Cell Sorter Instruction Manual...
- Page 101 Note: The upper right gimbal moves the nozzle right to left. The bottom right gimbal moves the nozzle foward and back. 22. Fine movements can be made using the gimbals and a hex wrench provided in the accessory kit. Fig. 103. Nozzle swap wizard window. Fig. 104. Nozzle swap wizard window. S3 Cell Sorter Instruction Manual...
- Page 102 The S3 system uses the micromotors to align the stream to the pinhole and to the lasers. Three camera views — pinhole, droplet, and stream — will appear during the alignment. The micromotors will bring the stream into focus. Fig. 105. Nozzle swap wizard window.
- Page 103 26. Lower or raise the nozzle, using the three gimballs, until the orange line and the yellow line meet and turn green. The S3 system will again use the micromotors to align the stream to the pinhole and the lasers. The three camera views will be shown again. The micromotors will bring the stream into focus again.
-
Page 104: Optical Filter Cleaning
10.5 Optical Filter Cleaning The optical filters in the S3 system will lose performance when dirt, dust, or fingerprints are present on the glass surface. Inspection of these optical components and regular cleaning will help maintain the high performance of the system. Always remember that these coated pieces of glass are delicate and should be handled with care. -
Page 105: Decontamination
3. Choose whether the system should be shut down after decontamination has completed (Figure 111). 4. Click the checkmark button to proceed. 5. Select whether or not an automatic startup should be scheduled (Figure 111). Fig. 111. Automatic shutdown and automatic startup option in the decontamination procedure. S3 Cell Sorter Instruction Manual... - Page 106 The system will directly prime the fluidics with the decontamination fluid (Figure 114). Fig. 113. Decontamination window Fig. 114. Decontamination window while while draining internal system. priming system. Fig. 115. Decontamination window while priming rinse filter and nozzle path. S3 Cell Sorter Instruction Manual...
- Page 107 After decontamination the system should be ready for running samples. Any high background should be eliminated. Fig. 117. Decontamination window prompting to replace fluidics. Fig. 118. Decontamination window when system is draining sheath reservoir and filter. S3 Cell Sorter Instruction Manual...
- Page 108 Fig. 120. Decontamination window while soaking system in proper fluidics and warming up. After decontamination the system should be ready for running samples. Any high background should be eliminated. Fig. 121. Startup process at end of decontamination. S3 Cell Sorter Instruction Manual...
-
Page 109: Troubleshooting
Check filter configuration against with fluorophores be incorrect fluorophore combination Laser turned off Check that both lasers are powered Cannot see rare events Total events displayed is Increase cycle mode value to display too low more events continues S3 Cell Sorter Instruction Manual... - Page 110 Change the trigger parameter to FSC or SSC Stream not centered in Use the electronic micromotors (Agillis) laser beam positioner while acquiring to maximize event signal — access within the system log file No beads in sample Check sample tube, vortex continues S3 Cell Sorter Instruction Manual...
- Page 111 Sometimes massaging the pinched area in the line Usually 2 ml of 70% ethanol (if visible) may resolve the issue. Contact Bio-Rad takes approx. 2 min Technical Support S3 Cell Sorter Instruction Manual...
- Page 112 S3 Cell Sorter Instruction Manual...
-
Page 113: References
Cytometry: Part A; Journal of the International Society for the Advancement of Cytometry. Wiley. http://onlinelibrary.wiley.com/journal/10.1002/%28ISSN%291552-4930 Purdue University Cytometry Laboratories: cytometry and confocal microscopy education and research material, cytometry email archive, and links to cytometry web sites and suppliers worldwide. http://www.cyto.purdue.edu/ S3 Cell Sorter Instruction Manual... - Page 114 S3 Cell Sorter Instruction Manual...
-
Page 115: S3 Cell Sorter Specifications
S3 Cell Sorter Specifications The specifications for the S3 system are shown in Table 30. Table 30. S3 cell sorter specifications. Performance Acquisition rate 100,000 events per sec Sorting rate 30,000 events per sec Sorting purity >99% pure Sensitivity <125 MESF for FITC and PE Temperature control Sample and collection temperature control from 4–37°C... - Page 116 S3 Cell Sorter Instruction Manual...
-
Page 117: Ordering Information
145-1002 S3 Cell Sorter 488/561-2L4D 145-1078 S3 Biosafety System Class I 145-1021 S3 Cell Sorter 488 1L2D, with S3 biosafety system Class I 145-1022 S3 Cell Sorter 488/561 2L4D, with S3 biosafety system Class I Consumables 145-1081 ProLine Calibration Beads, 3 x 5 ml... - Page 120 Bio-Rad Laboratories, Inc. Web site www.bio-rad.com USA 800 424 6723 Australia 61 2 9914 2800 Austria 01 877 89 01 Belgium 09 385 55 11 Brazil 55 11 3065 7550 Life Science Canada 905 364 3435 China 86 21 6169 8500 Czech Republic 420 241 430 532 Denmark 44 52 10 00 Finland 09 804 22 00 Group France 01 47 95 69 65 Germany 089 31 884 0 Greece 30 210 9532 220 Hong Kong 852 2789 3300 Hungary 36 1 459 6100 India 91 124 4029300 Israel 03 963 6050 Italy 39 02 216091 Japan 81 3 6361 7000 Korea 82 2 3473 4460 Mexico 52 555 488 7670 The Netherlands 0318 540666...
Need help?
Do you have a question about the S3 and is the answer not in the manual?
Questions and answers