
Related Manuals for JessEm Mite-R-Excel II


Summary of Contents for JessEm Mite-R-Excel II
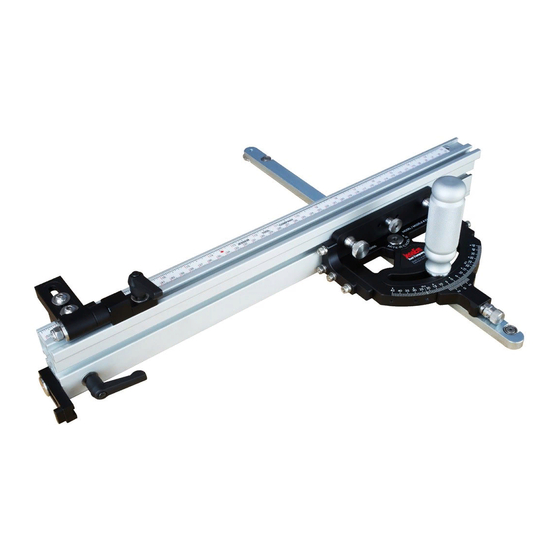
- Page 1 MITE R EXCEL II™ Owners Manual Model #07150 61 Forest Plain Road Oro-Medonte, Ontario, Canada, L3V 0R4 Toll Free: 1-800-436-6799 Local: 705-726-8233 Email: jessem@jessem.com Web: www.jessem.com...
- Page 2 • Abuse, misuse or neglect. Message to our Customer Thank you for choosing the Mite-R-Excel II™ from JessEm Tool Company. We appreciate your support and hope that our product serves you well. This product is designed to provide many years of reliable service, provided it is used as intended and taken care of.
- Page 3 Mite-R-Excel II™ protection reduces personal injuries when used for appropriate conditions. If devices and tools allow for dust...
-
Page 4: Tools Required For Assembly
Contents of Packaging QUANTITY AND CONTENTS OF PACKAGING TOOLS REQUIRED FOR ASSEMBLY (1) - Mite-R-Excel II Gauge and Bar Assembly (1) - 5/32" Hex Key (included) (1) - Mite-R-Excel II Fence (1) - 1/8" Hex Key (included) (1) - Fence Stop and Mounting Hardware (1) - 3/32"... - Page 5 Assembly Instructions The following instructions are for assembling the Mite-R-Excel II™. Please note that the Mite-R-Excel II™ is factory set and only assembly is required. Step 1: Assembly of the Flip Stop a. Using the 5/32" hex key, attach the flip stop upper (Part #20) and the flip stop lower (Part #13) using (1) ¼-20 x ½"...
- Page 6 If after following our directions below, you notice a tight spot on the miter slot, you can either file or stone off the high spot on the Miter Slot in your table saw or reset the Mite-R-Excel II™ in that area.
- Page 7 (Part #3) Repeat this step at each of the three snugger locations. Place paper in front of snugger, then slide gauge over paper Figure 4 Test to make sure the Mite-R-Excel II™ moves smoothly. Refer to the note above in order to fix any possible tight spots on the miter slot.
- Page 8 Step 5: Attaching the Fence Extrusion to the Mite-R-Excel II™ Assembly **NOTE ** The Fence Locating Pin Knob was designed to always allow for the user to keep their fence properly referenced from the blade when the gauge is set to 0 degrees.
- Page 9 How To Set or Reset the Fence Locating Nut Inside the Fence Ensure your table saw is OFF and UNPLUGGED before resetting the fence locating nut. Using the directions above, use the fence locating pin knob to find the preset locating nut inside the fence.
- Page 10 Using the 3/32" Hex Key provided, attach the hex key extension (Part #63) to the Hex Key Figure 9A and insert the hex key into each of the two holes next to the Fence Locating Pin Knob and loosen the #10-32 x 3/16" Flat Point Set Screws (Part #37). See Figure 9 Add a 3"...
- Page 11 Loosen off (4) Four #10-32 x 7/8” Socket Head Screw on both sides of the gauge (Part #9.3 & 9.4) as shown in Figure 11. Figure 11 Make sure the (2) ¼-28 x 5/16” Flat Point Set Screw (Part # 39) are loose before moving on to step (d).
- Page 12 Vertically Squaring the Mite-R-Excel II™ Slide your Fence Extrusion (Part #33) back onto the Mite-R-Excel II™ (See Figure 14) and tighten it in position using the Fence Knobs (Part # 45) Figure 14 Loosen off screws 9.1 & 9.2 on both sides of the fence using the 5/32” Hex Key (Part # 59) provided.
- Page 13 NOTE: Steps (b) thru (e) do not have to be done on the saw. Using a machine/combination square, align the base against the guide bar (Part #56) and the ruler/straight edge against the Fence Mount (Part # 44) See Figure 15. Right Gap Left Gap Figure 15...
- Page 14 Using the Mite-R-Excel II ™ After making any adjustments to the Mite-R-Excel II™, ensure the fence is clear of the table saw blade and the clamping handle is tight before making any cuts. Engaging and Disengaging the Indexing Pin Knob DISENGAGED INDEXING PIN KNOB Disengaged indexing pin knob.
- Page 15 How to Adjust the Mite-R-Excel II™ The Mite-R-Excel II™ is machined with pre-determined detents in the gauge for 0°,15°, 22.5°, 30°, and 45°. The pre-determined detents are laser marked with a diamond on the gauge. Figure 18 The example used below is setting the gauge to 45°. See Figure 19 Loosen the Handle (Part #10).
- Page 16 How to Adjust the Mite-R-Excel II™ to Non Predetermined Detents The Mite-R-Excel II™ can be set to non-predetermined detents on both the left and right sides of 0°. When setting at non-predetermined settings only lock the Handle (Part #10), leaving the Indexing Pin Knob disengaged.
- Page 17 How to Set the Vernier Scale The Mite-R-Excel II™ can be used not only with whole numbers, but is also designed to move 1/10th degrees on the lower Vernier Scale. To use this Vernier Scale on the Mite-R-Excel II™ follow these directions.
- Page 18 Mounting A Sacrificial Fence Making a Sacrificial Fence JessEm provides the hardware to mount a sacrificial fence. You will need a ¾" thick piece of stock, cut down to 2-1/2" high and anywhere from 22 - 25" wide. (See Figure 21) Measure and mark the first hole 4”...
- Page 19 T-Slot on the fence extrusion. See Figure 22 ** The Flip Stop on the Mite-R-Excel II™ was designed to adjust up to ¾". Be sure to adjust the Flip Stop so that you can still use the stop with the sacrificial fence.
- Page 20 MITE-R-EXCEL II™ PARTS EXPLODED VIEW...
- Page 21 MITE-R-EXCEL II™ PARTS LIST Item No. Part No. Part Description F0416 #008 Buna-N O-Ring S0062-19 Guide Bar Snugger S0065-7 Snugger Mounting Screw F0411 #8-32 X 1/8" Cup Point Set Screw S0061-13 Indexing Pin Knob E0300-1 Gauge Body E0296-2 LH Fence Mount Bracket...
- Page 22 JESSEM TOOL LIMITED WARRANTY Warranty Limitations This warranty does not cover: All JessEm products are warranted to be free from ● Repairs or alterations made or attempted by defects in material and workmanship. JessEm will anyone other than JessEm Tool Company or an repair or replace any product which upon inspection authorized JessEm service professional.
- Page 23 Find Out More About Our High Performance Tools At www.jessem.com Tools That Make A Difference! FOLLOW US ON:...
Need help?
Do you have a question about the Mite-R-Excel II and is the answer not in the manual?
Questions and answers