Advertisement
USER MANUAL
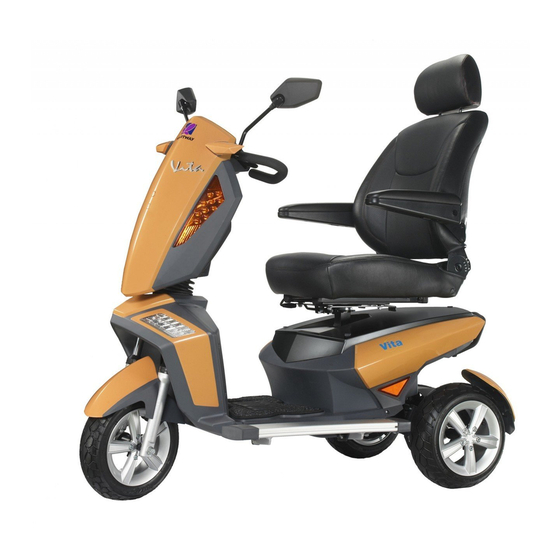
S12
S12T
S12S
S12X
!
PUBLISHED: SEP.6TH, 2012
VERSION: 1
PART NO.: 70030175
CONTENTS
.
1. SAFETY INSTRUCTION............................................................................................3
2. ELECTOMAGNETIC INTERFERENCE(EMI).......................................................7
3. SPECIFICATIONS.............................................................................................8
4. PRODUCT DIMENSION...................................................................................9
5. COMFORT ADJUSTMENT................................................................................10
! 1
Advertisement

Related Manuals for Heartway Medical Products S12S


Summary of Contents for Heartway Medical Products S12S
- Page 1 USER MANUAL S12T S12S S12X PUBLISHED: SEP.6TH, 2012 VERSION: 1 PART NO.: 70030175 CONTENTS 1. SAFETY INSTRUCTION…………………………………...……………........…3 2. ELECTOMAGNETIC INTERFERENCE(EMI)…………….…………………………………7 3. SPECIFICATIONS………………………….…………………..…………….…………………..8 4. PRODUCT DIMENSION…………………………………..……………………...……………9 5. COMFORT ADJUSTMENT……………………….…………………………..………………..10...
-
Page 2: Table Of Contents
6. OPERATION OF CONTROL PANEL…………………………………………………………12 7. CHARGING INSTRUCTION….……………………………..………….……………………..22 8. BATTERY INSTRUCTION & MAINTENANCE……………...……………………….…..…24 9. SCOOTER MAINTENANCE & REPAIR…..…………...………………….………..……..…25 10. TROUBLESHOOTING & FAULT REPAIR……….………..………………………………… 11. CIRCUIT DIAGRAM…….………..…….……..………………………..………………………28 12. HEARTWAY’S PATENT-SUSPENSION SYSTEM…….……………………………….…….28 13. BOM LIST DRAWING………………....…………………….………….………………… WARRANTY DECLARATION…………………………………………………………………30 Warning! Do not, under any circumstance, climb a slope greater than the maximum climbing angle (10 degree) with this power scooter. Any a@empt to climb a slope steeper/greater than 10 degree may put your power scooter in an unstable posiBon and cause it to Bp. When on any sort of an incline or decline slope, never place the power scooter in freewheel mode SAFETY INSTRUCTION ◆... - Page 3 Make sure that there are no obstacles behind you Never use electronic radio transmitters such as while reserving your scooter. walkie-talkies, or cellular phones. Do not make a sharp turn or a sudden stop while Do not ride your scooter in traffic. riding your scooter.
- Page 4 Do not allow unsupervised children to play near Do not ride your scooter during snow in order to this equipment while the batteries are charging. avoid accident on slippery road. Be aware of the obstacle height Be aware of the safety slop (Maximum Climbing Angle 10 Degree) ◆...
- Page 5 Please do not sit on your scooter while it is in a moving vehicle. Keep your hands away from the wheels (tires) while driving scooters. Be aware that loose fitting clothing can become caught in the drive tires. 10. Consult your physician if you are taking prescribed medication or if you have any certain physical limitations.
- Page 6 In extreme high temperatures, it may operate at slower speeds due to a safety feature of the controller that prevents damage to the motors and other electrical components. ELECTROMAGNETIC INTERFERENCE (EMI) The rapid development of electronics, especially in the area of communica6ons, has saturated our environment with electromagne6c (EM) radio waves that are emi=ed by television, radio and communica6on signals. These EM wave are invisible and their strength increases as one approach the source. All electrical conductors act as antennas to the EM signals and, to varying degrees, all power wheelchairs and scooters are suscep6ble to electromagne6c interference (EMI). The interference could result in abnormal, uninten6onal movement and/or erra6c control of the vehicle. The United States Food and drug Administra6on (FDA) suggests that the following statement be incorporated to the user’s manual for all power scooters like the S12, S12T, S12S, S12X. Power scooters may as suscep6ble to electromagne6c interference (EMI), which is interfering electromagne6c energy emi=ed from sources such as radio sta6ons, TV sta6ons, amateur radio (HAN) transmi=er, two-way radios, cellular phones and alarm systems of shops. The interference (from radio wave sources) can cause the power scooter to release its brakes, move by itself or move in unintended direc6ons. It can also permanently damage the powered scooter’s control system. The intensity of the EM energy can be measured in volts per meter (V/m).Each powered scooter can resist EMI up to a certain intensity. This is called “immunity level”. The higher the immunity level the greater the protec6on. At this 6me, current technology is capable of providing at least 20 V/m of immunity level, which would provide useful protec6on against common sources of radiated EMI.
- Page 7 TURN OFF YOUR POWERED SCOOTER AS SOON AS POSSIBLE WHEN EXPERIENCING THE FOLLOWING: ➢ Uninten6onal scooter movements ➢ Unintended or uncontrollable direc6on. ➢ Unexpected brake release The FDA has wri=en to the manufacturers of power scooters asking them to test new products to be sure they provide a reasonable degree of immunity against EMI. The FDA requires that a powered wheelchair should have an immunity level at least 20 V/m, which provides a reasonable degree of protec6on against more common sources of EMI. The higher the immunity level the greater the protec6on. Your powered scooter has an immunity level of 20 V/m which should protect against common sources of EMI. Warning: The scooter itself can disturb the performance of the electromagne6c fields such as emi=ed by alarm systems of shops. S12/S12S/S12X - TECHNICAL SPECIFICATIONS MODEL WEIGHT CAPACITY 160kgs(350 lbs) SEAT: TYPE/SIZE 20" A2 DRIVE WHEEL 330mmx100mm(13"x5"") FRONT CASTER (WHEEL) 330mmx100mm(13"x4") REAR CASTER (ANTI-TIPPER) None MAX SPEED 15 KM/H BATTERY SPECIFICATIONS 12V 80Ah x 2pcs BATTERY RANGE 50km CHARGER TYPE 8Amp,Off Board120/240 Volt,50/60Hz CONTROLLER TYPE S-Drive 120 AMP MOTOR TYPE 4-Pole 700W...
- Page 8 WHEEL BASE 1025mm GROUND CLEARANCE 80mm Maximum Climbing Angle 10 Degree LEG ROOM 320mm S12T MODEL WEIGHT CAPACITY 160kgs(350 lbs) SEAT: TYPE/SIZE 20" A2 DRIVE WHEEL 330mmx100mm(13"x5") FRONT CASTER (WHEEL) 330mmx100mm(13"x4") REAR CASTER (ANTI-TIPPER) None MAX SPEED 14 KM/H BATTERY SPECIFICATIONS 80 AH BATTERIES (LEAD-ACID BATTERIES) BATTERY RANGE 45 KM CHARGER TYPE 8 AMP CHARGER (OFF BOARD) CONTROLLER TYPE S-Drive 120 AMP MOTOR TYPE 5500rpm 700W WEIGHT: W/ BATTERY 133kgs(293 lbs) WEIGHT: W/O BATTERY 93kgs(205 lbs) TURNING RADIUS 1150mm SUSPENSION FULL LENGTH 1400 mm WIDTH...
- Page 9 SEAT DEPTH 480mm BACK HEIGHT 750mm WHEEL BASE 980mm GROUND CLEARANCE 80mm Maximum Climbing Angle 10 Degree LEG ROOM 340mm MODEL S12X WEIGHT CAPACITY 160kgs(350 lbs) SEAT: TYPE/SIZE 20” A2 DRIVE WHEEL 380mmx160mm(15”x6.3”) FRONT CASTER (WHEEL) 330mmx120mm(13”x4.8”) REAR CASTER (ANTI-TIPPER) None MAX SPEED 15 KM/H (Standard)/ 18 KM/H (OpBonal) BATTERY SPECIFICATIONS 12V 80Ah x 2pcs BATTERY RANGE 25km/45km CHARGER TYPE 8Amp,Off Board120/240 Volt,50/60Hz CONTROLLER TYPE S-DRIVE 200Amp MOTOR TYPE 4-Pole 900W WEIGHT: W/ BATTERY 150kgs(330 lbs) WEIGHT: W/O BATTERY 100kgs(220 lbs) TURNING RADIUS 1350mm SUSPENSION...
- Page 10 WIDE 790mm HEIGHT 1360mm SEAT WIDTH 510mm SEAT HEIGHT 460mm SEAT DEPTH 480mm BACK HEIGHT 750mm WHEEL BASE 1075mm GROUND CLEARANCE 100mm Maximum Climbing Angle 10 Degree LEG ROOM 320mm S12/S12S - DIMENSION ! 10...
- Page 11 COMFORT ADJUSTMENT Adjustments for Seating Comfort: ! 11...
- Page 12 Press the bottom to adjust the height of the headrest. The flip-up armrest height can be adjusted by turning the adjustment dial. Adjust the seat back lever for seating back angle. ● Turn the swivel lever downwards to rotate the seat. ●...
-
Page 13: Operation Of Control Panel
Tiller Positioning Press down the lever and move it to your preferred position. The adjustment of rear suspension system: The softness of the rear suspension system is adjustable. There are altogether 5-level of adjustments. It is applicable with around 120kg and each level can bear up to 13.5 kg. Tooling bar OPERATION OF CONTROL PANEL LCD(Liquid Crystal Display)Power Scooter Control Panel, TN Type... - Page 14 LCD(Liquid Crystal Display) Model Functions Power Indicator:Battery remaining capacity and charging indicator (6 squares + Battery Icon) Clock:Hour / Minute / Second display and setting. Speed Sensor:7 Segment display (2.5 digits +1 decimal) + “km/h / mph” symbol High/Low/ Indicated as “H” and “L” symbols Odometer:ODO(99999km max)、TRIP(99.9 max) Headlight:“Power-saving”...
- Page 15 Usage Condition ITEM SPECIFICATION Voltage DC24 V Operation Voltage DC 16 ~32 V Storage TEMP. -40℃ ~ 65℃ Operation TEMP. -25℃ ~ 50℃ Meter Angle at 30° of elevation while scooter assembly (LCD orientate to six o’clock) Handle Cover 2、General Characteristic Performance Test (20 ± 5℃) 2.1、Headware Circuit: ITEM SPECIFICATION...
- Page 16 Operation Features (1) Switch High / Low speed by pressing button! once. (TRN as control signals) Press one time: High-speed <<--->> Low-speed (2) Take exterior turn-switch as determinant signal (TRN as control signals). Symbols on LCD "H"symbol means “High Speed” "L"symbol means “Low Speed”:...
- Page 17 3、Power Indication ITEM SPECIFICATION Remaining Capacity (%) Voltage (V) Scale Bar > 25.42 ≦ 25.42 ≦ 25.12 Battery Remaining Capacity ≦ 24.78 ≦ 24.42 ≦ 23.88 and ! Flashing Low-power Warning Warning LED Flashing F l i c k e r 2 sec.
- Page 18 ITEM SPECIFICATION Remaining Capacity (%) Voltage (V) Scale Bar < 25.44 > 25.44 > 26.18 Charge Indication > 26.92 > 28.5 I n c r e a s e 0.5 sec. Frequency (1) Scale status only decrease, won’t increase. O p e r a t i o n (2) Take the PIN3(CH3) of charger as determinant signal, enter「Charging Mode」when CH3 Character grounding (L), not only “KEY ON”...
- Page 19 4、Clock Meter ITEM SPECIFICATION Tolerance (per day) ± 2 sec Initial Setting Value 『Hour:Min』mode :『AM 12:00』 『Hour : Min』 Display range : AM12:00 ~ PM11:59 Setting (12-Hour format) When『Hour』is between 1 and 9 o’clock, displayed at 1~9. 5、Odometer ITEM SPECIFICATION Operation Features Odometer detected by the signal of Opto Coupler then converts into distance.
- Page 20 6、Headlight Control ITEM SPECIFICATION Take exterior headlight switch as determinant signal. Operation Feature (1) Switch on/off the head light by pressing button! once, then LED! will turn on/off simultaneously. (2) LCD backlights turn on / turn off with head light. When motor stop, the modulation down to 30% (Headlight) Power Saving Mode When motor act, 100% output power (Headlight)
- Page 21 ITEM SPECIFICATION (1) 2.2V>WIP>2.8V ( 50% Half-power ) (2) 2.2V<WIP>2.8V ( 100% Full-power ) Determinant Condition (3) Full / Half power switch at real time. (4) The determination of “Reversing Mode” need to consider the motor direction and panel setting. (1) Loop Load : 24V/50W max Remarks (2) With “short circuit”...
- Page 22 11、Power on Self-Test ITEM SPECIFICATION When scooter power on, the control panel will go through a self-test routine; the backlight Initial Status and all LCD segments will be tuned on for 3 seconds, then switch automatically to the general operation mode (ODO). 12、Temperature Sensor ITEM SPECIFICATION...
- Page 23 14.Buttons ITEM SPECIFICATION Button “MODE” switch Function set General Display Mode Press SET for 3 seconds to reset TRIP at “00.0”. (TRIP) Press MODE and SET simultaneously for more than 2 seconds. to enter “Setting Mode”, then 『Hour:MIN』start flashing. (1) When『Hour』flashing: Press SET to increase of number, then press MODE to enter “Setting Mode”...
-
Page 24: Charging Instruction
CHARGING INTRUCTIONS Battery Charger Instruction 1. APPEARANCE ①Power Cord ②Output Plug to Battery ③Indicator: ③ Green Flash: Power On ① Orange Flash: Pre Charge Orange: Charging Green & Orange Flash: Charged 80% Green: Full Charged ② Red Flash:Defected 2. SPECIFICATION Item BATTERY CHARGER (SWITCHING MODE) Model... - Page 25 Color Blue ! 25...
- Page 26 3. OPERATING INSTRUCTION (1)Make sure the ba=ery charger output voltage is the same as the connec6ng ba=ery. (2)Plug in the power cord. LED indicates green flash when AC power on. (3)Connect the ba=ery charger to the ba=ery. Start charging; please refer to LED INDICATION 4. LED INDICATION (1)Green Flash:Power on (2)Orange:Charging (3)Orange Flash:Pre charge (4)Green & Orange Flash:Charged 80%。 (5)Green:Full charged(Floa6ng charge)。 (6)Red Flash:Defect 5. TROUBLE SHOOTING (1) If green indicator is off: ․Check AC input. If it works func6onally, the ba=ery charger may be defec6ve. (2) If green indicator keeps flashing and cannot turn to charging indica6on: ․Check if the ba=ery connector is connected successfully. ․Check if there is any short circuit on the output connec6on. ․The ba=ery charger may be defec6ve if the ba=ery connec6on works func6onally. (3) If red indicator keeps flashing: ․Check if the ba=ery connec6on is reversed. ․Check if there is any short circuit on the output connec6on. ․Check if the environment temperature is too low (0 ․The ba=ery charger may be defec6ve if the red indicator s6ll keeps flashing. (4) Charging indicator (orange) cannot turn to green: ․The ba=ery might be defec6ve, please stop charging and have the ba=ery be repaired. (5) If the charging indicator (orange) turns to green (fully charged) immediately: ․The ba=ery may be in well-charged condi6on. ․The ba=ery may be defec6ve if the ba=ery is not fully charged. 6. CAUTION (1) Before using the ba=ery charger, read all instruc6ons and cau6onary markings. (2) Use the ba=ery charger in a well-ven6lated area (3) To avoid the risk of injury, charge only lead-acid or gel cell type rechargeable ba=eries. ! 26...
-
Page 27: Battery Instruction & Maintenance
(4) Please turn off the power arer charging Charging Port Important! ● Always charge your batteries in well ventilated areas. ● The charger is intended for indoor use only. Please protect it from the moisture. ● For maximum performance, it is recommended that you replace both batteries at the same time if the batteries are weak. -
Page 28: Scooter Maintenance & Repair
SCOOTER MAINTENANCE & REPAIR Your power scooter is designed for minimal maintenance. However, like any motorized vehicle it requires rou6ne maintenance. To keep your Vita Scooter for years of trouble-free opera6on, we recommend you follow the following maintenance checks as scheduled. DAILY CHECKS 1. Visual check on the condi6ons of 6res. 2. Inspect the ba=ery condi6on meter on the controller to determine if ba=eries need to be charged. WEEKLY CHECKS 1. Your power scooter comes with standard pneuma6c 6res. If your power scooter comes with op6onal air 6res, make sure to maintain the pressure of the 6res between 30-35 psi. MONTHLY CHECKS 1. Visually inspect the controller harnesses. Make sure that they are not frayed, cut or have any exposed wires. SEMI-ANNUAL CHECKS 1. Check the motor brushes. We recommended that your authorized dealer inspect the brushes every six months or sooner if your power scooter is not opera6ng smoothly. If inspec6on determines excessive wear on the brushes, they must be replaced or motor damage will result. Warning! Failure to maintain the brushes could void the power scooter warranty. To inspect or replace the motor brushes: 1. Unscrew the motor brush caps. 2. - Page 29 All upholstery can be washed with warm water and mild soap. Occasionally check the seat and ● back for sagging, cuts and tears. Replace if necessary. Do not store your scooter in damp or humid conditions as this will lead to mildew and rapid deterioration of the upholstery parts. All moving mechanism will benefit from simple lubrication and inspection.
-
Page 30: Troubleshooting & Fault Repair
TROUBLESHOOTING & FAULT REPAIR S-Drive controller: Your scooter is fi=ed with S-Drive controller, which con6nuously monitors the opera6ng condi6ons of your scooter. If it detects a problem it will indicate with error message by flashing light on the power ON/ OFF light. You must count the number of the flash, and see the list to check what kind of error has happened according to the number. If you experience any technical problems, it is recommended that you check with your local dealer before a=emp6ng to troubleshoot on your own. The following symptoms could indicate a serious problem with your power scooter. Contact your local dealer if any of the following arises: 1.Motor noise 2.Frayed harnesses 3.Cracked or broken connectors 4.Uneven wear on any of tires 5.Jerky motion 6.Pulling to one side... -
Page 31: Circuit Diagram
CIRCUIT DIAGRAM HEARTWAY’S PATENT A brand new double-A arms suspension system. S12 - BOM LIST DRAWING ! 31... - Page 32 ! 32...
-
Page 33: Warranty Declaration
Any damage or defect of any nature occurring from the misuse, abuse of the product, improper operation or improper storage is not to be covered. The warranty is to start from the date of arrival of our products. HEARTWAY MEDICAL PRODUCTS CO., LTD. NO. 6, ROAD 25, TAICHUNG INDUSTRIAL PARK, TAICHUNG. TAIWAN R.O.C.408...