
Related Manuals for Derby cycle Pedelec Groove Next


Summary of Contents for Derby cycle Pedelec Groove Next
- Page 1 Pedelec Groove Next EPAC Electrically power assisted cycle Original User Guide | US Version 1 26.03.2018...
- Page 2 DERBY CYCLE WERKE GMBH Siemensstraße 1-3 49661 Cloppenburg, Germany + 49 (4471) 966-0 info@derby-cycle.com www.derby-cycle.com © Copyright, reprinting, reproduction and distribution, even in part, only with the permission of Derby Cycle Werke GmbH. Subject to misprints, errors and technical alterations.
- Page 3 First name: Street: Frame number: Zip code, Town/city: Color: Gearset: Purchase date: Date/signature 4. Owner Last name: First name: Street: Zip code, Town/city: Stamp and signature of the dealer Date/signature Original User Guide | Pedelec Groove Next Version 1 US-3...
-
Page 4: Table Of Contents
3.9 Attaching the reflectors US-26 3.18.3 Lockout system US-40 1.1.3 Night rides US-16 3.10 Switching the lights on 3.18.4 Air system US-41 1.1.4 Bright, visible clothing US-17 and off US-26 *dependent on model US-4 Original User Guide | Pedelec Groove Next Version 1... - Page 5 US-49 Technical details US-63 Overview US-63 6.1 Technical requirements US-49 8.3.1 US-63 Connecting the Smartphone Functions US-64 with the Pedelec US-49 8.4.1 Charging a battery US-64 Disconnecting Smartphone from Pedelec US-49 *dependent on model Original User Guide | Pedelec Groove Next Version 1 US-5...
-
Page 6: Introduction
If that happens while you are riding the bike you could be severely injured or killed. If you observe worn, damaged or bent components do not use the bike again until the components are repaired or replaced. US-6 Original User Guide | Pedelec Groove Next Version 1... -
Page 7: Explanation Of The I.ii Groove Next
Explanation of the safety information symbols I.II Groove Next Your Pedelec Groove Next is an Electrically Power Assisted Cycle (EPAC). When the assist mode is switched on, the electric motor provides WARNING assistance as long as you are pedaling. You can control the degree of assistance, which is adjusted using various assist modes ... -
Page 8: Dealer
Check local laws/ordinances for laws regarding use of children trailers and cycletrailers on pedelecs. Discuss with a dealer whether trailers may be attached to your bike model. Never ride your bike while under the influence of alcohol or drugs. US-8 Original User Guide | Pedelec Groove Next Version 1... -
Page 9: Reflectors
Front and rear surfaces of the pedal The lowest point of the illuminating surface must not be lower than 9.75 inches above the road surface. A standlight function is also permitted Original User Guide | Pedelec Groove Next Version 1 US-9... -
Page 10: Replacement Bulbs
Hand them in at the designated place (e.g. recycling center, bike dealer). Electronic devices contain valuable materials that can be reused, protecting natural resources. Bring your batteries to a drop-off location (www.call2recycle.org). US-10 Original User Guide | Pedelec Groove Next Version 1... -
Page 11: The Maximum
244 lbs is below the allowed total weight of 265 lbs and is therefore permissible. Bike type Maximum permissible total weight Weight of rider** Pedelec Groove Next 265 lbs 219 lbs ** with a 46 lbs pedelec. Original User Guide | Pedelec Groove Next Version 1 US-11... -
Page 12: Pedelec Groove Next
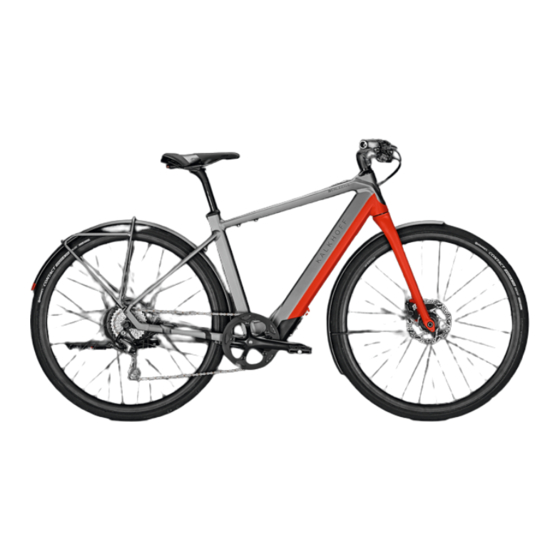
Down tube with integrated battery Fork Battery charger Disc brake, front wheel Front wheel hub incl. dynamo Front wheel Wheel rim Clamping bolt for removing the battery Pedal *dependent on model US-12 Original User Guide | Pedelec Groove Next Version 1... -
Page 13: Warranty
Repairs carried out with used parts or damage that occurs as a consequence of this. » Damage resulting from competitive use. » Special equipment, accessories or non-standard equipment; in particular technical modifications. Original User Guide | Pedelec Groove Next Version 1 US-13... -
Page 14: General Safety Information
Only use the bike for its intended purpose V. Intended purpose, Page US-10, otherwise it can lead to component failure. If this happens while you are riding the bike you could be severely injured or killed. US-14 Original User Guide | Pedelec Groove Next Version 1... - Page 15 V.III The maximum permissible total weight Page US-11. If this dealer. happens while you are riding the bike, it can lead to severe falls – with fatal consequences. Original User Guide | Pedelec Groove Next Version 1 US-15...
-
Page 16: Tips
As a parent, you should read this manual, as well as review its warnings and the bike’s functions and operating procedures with your child, before letting your child ride the bike. US-16 Original User Guide | Pedelec Groove Next Version 1... -
Page 17: Bright, Visible Clothing
• Be alert. Ride defensively and expect the unexpected. » If you plan to ride in traffic often, ask your dealer about traffic safety classes or a good book on bike traffic safety. Original User Guide | Pedelec Groove Next Version 1 US-17... -
Page 18: Protection From Theft, Manipulation And Loss
10. Torque settings, Page US-67, which must be strictly followed. Alternatively, the quick-release levers can be replaced by an anti-theft device. For questions about this please contact your dealer. US-18 Original User Guide | Pedelec Groove Next Version 1... -
Page 19: Toe Overlap
– if that happens while you are riding the bike you could fall off. 3. Tighten both pedals towards the front wheel with a torque setting of 40 Nm [29.5 ft·lb]. Original User Guide | Pedelec Groove Next Version 1 US-19... -
Page 20: Adjusting The Saddle Height
Mark on the seat post » Before you ride the bike, first check that the seat post is securely clamped. US-20 Original User Guide | Pedelec Groove Next Version 1... -
Page 21: Adjusting The Saddle Height: Saddle Clamp Bolt(S
"CLOSE" on the outside of the lever. specified torque setting. Screws that have not been tightened properly with a torque wrench are at risk of breaking, which could lead to For 3. Quick-release skewer closed severe falls. *dependent on model Original User Guide | Pedelec Groove Next Version 1 US-21... -
Page 22: Shifting And Tilting The Saddle
If that happens while you are riding the bike, components may come off and you could have a severe crash. If screws are overtightened, other components can also be damaged. US-22 Original User Guide | Pedelec Groove Next Version 1... -
Page 23: Screw Supports: Shifting And Tilting The Saddle
2. Shift the saddle forwards or backwards as desired. For 1. Loosen clamping nut 3. Tilt the bike saddle to the desired angle. Clamping screw Fig. 1 Fig. 2 Original User Guide | Pedelec Groove Next Version 1 US-23... -
Page 24: Suspension Seatpost
If you can twist the stem in relation to the front wheel, turn the handlebars in relation to the stem, or turn the bar end extensions in relation to the handlebar, the bolts are insufficiently tightened. *dependent on model US-24 Original User Guide | Pedelec Groove Next Version 1... -
Page 25: Fitting The Smartphone Holder
The For 2. Assemble the front light and lower Smartphone holder handlebar should swing it easily until the stop. Original User Guide | Pedelec Groove Next Version 1 US-25... -
Page 26: Attaching The Reflectors
Your Pedelec comes supplied with two reflectors. Mount the white reflector ground and the height marking. on the handlebar, the red reflector on the seatpost and the remaining reflectors on the wheel. US-26 Original User Guide | Pedelec Groove Next Version 1... -
Page 27: Replacing The Tail Light
When doing so, make sure that the light cable does not break. The light cable for the rear light passes through the seat post into the 9. Position the tail light mounting on the seat stays. down tube. Original User Guide | Pedelec Groove Next Version 1 US-27... - Page 28 If screws are overtightened, components can also be damaged. If no value is shown on the component, use the torque settings from Section 10. Torque settings Page US-67 US-28 Original User Guide | Pedelec Groove Next Version 1...
-
Page 29: Brakes
This is called a coaster brake. after intensive use of the brakes: they can become very hot. Touching them may cause contact burn injuries. Disc brake Disc brakes Rim brakes Coaster brakes Original User Guide | Pedelec Groove Next Version 1 US-29... -
Page 30: Braking
Two keys to effective speed control and reach may be adjustable; or you may need a different brake lever safe stopping are controlling wheel lockup and weight transfer. design. US-30 Original User Guide | Pedelec Groove Next Version 1... - Page 31 This weight transfer is even more pronounced if your bike has a front suspension fork. Front suspension “dips” under braking, increasing the weight transfer. Original User Guide | Pedelec Groove Next Version 1 US-31...
-
Page 32: Understanding The Chain
35 – 40 Nm [25.8 - 29.5 ft·lb]. Make sure the wheel is reinstalled When you are cleaning the belt, make sure that no water gets into the straight. motor. Water ingress can damage the motor. US-32 Original User Guide | Pedelec Groove Next Version 1... -
Page 33: Checking For Chain Wear
The derailleur may be out of pinions and chain. adjustment and the chain could jam, causing you to lose control and fall. Original User Guide | Pedelec Groove Next Version 1 US-33... -
Page 34: Wheel
4. Tighten the axle nuts using a 0.59 inches spanner, turning clockwise. remove your wheels safely. Make sure that your wheel is correctly centered. » Understand and apply the correct technique for clamping your 5. Reinsert the battery. wheel in place. US-34 Original User Guide | Pedelec Groove Next Version 1... -
Page 35: Quick-Release Wheels
If not, it can open and loosen the saddle, slightly anticlockwise. which could result in you falling off the bike. *dependent on model Original User Guide | Pedelec Groove Next Version 1 US-35... -
Page 36: Quick-Release Axle
3. Hook the quick-release lever into the slot and turn it anticlockwise until the quick-release axle protrudes from the axle hole about 0.39 inches. *dependent on model US-36 Original User Guide | Pedelec Groove Next Version 1... -
Page 37: Rims
4. Undo the axle nuts (M12) using an 0,708661" spanner turning Make sure the rims are clean and anticlockwise. undamaged at the tire bead and, if you 5. Take off the chain. have rim brakes, along the braking surface. Original User Guide | Pedelec Groove Next Version 1 US-37... -
Page 38: Replacing The Front Wheel
2. Insert a 0.236" Allen key into the threaded axle and turn anticlockwise until it releases. 3. Remove the threaded axle. 4. Remove the front wheel. Drive cable For 3. Exploded view of drive mounting 4. Reinsert the Pedelec battery. US-38 Original User Guide | Pedelec Groove Next Version 1... -
Page 39: Rims
Replace a patched tube as soon as possible. 1. Remove the Pedelec battery. 2. Brush the rims with a hand brush. Heavier soiling can be removed with a soft, damp cloth. Original User Guide | Pedelec Groove Next Version 1 US-39... -
Page 40: Suspension Fork
(= greater spring expansion speed) or to the closed position (= lower spring expansion speed). US-40 Original User Guide | Pedelec Groove Next Version 1... -
Page 41: Air System
Inspect your pedelec before every trip, and after each time it has been Luggage Check it is attached securely. transported anywhere or has been left unattended. Use the following checklist to help you. Original User Guide | Pedelec Groove Next Version 1 US-41... -
Page 42: If Your Bike Sustains An Impact
Use in competitive events, trick riding, ramp riding, jumping, aggressive riding, riding on severe US-42 Original User Guide | Pedelec Groove Next Version 1... -
Page 43: Technical Details
Permissible ambient temperature in 14 °F to 104 °F operation Storage temperature 14 °F to 122 °F Recommended storage temperature 64.4 °F to 73.4 °F Protection class IP 54 Weight 7,4957 lb Original User Guide | Pedelec Groove Next Version 1 US-43... -
Page 44: Overview And Basic Functions
Change assistance mode 3. You will receive support for the selected support mode once you step c) Show assistance mode on the pedals. US-44 Original User Guide | Pedelec Groove Next Version 1... -
Page 45: Switching Off The Pedelec
0 – 10 % 5.3.4 Display of the assistance mode 1. To change the support mode, press the button briefly. 2. Keep pressing the button until the desired support mode is displayed. Original User Guide | Pedelec Groove Next Version 1 US-45... -
Page 46: Tips
Pedelec with you. We recommend Weber (www.weber-products.de), Croozer (www.croozer.com) and Thule Chariot (www.thule.com) bike trailers and couplings. Ask your cycle dealer for advice. US-46 Original User Guide | Pedelec Groove Next Version 1... -
Page 47: Luggage Rack
If this happens while you are riding the bike, it can lead to severe falls – with fatal consequences V.III The maximum permissible total weight Page US-11. Original User Guide | Pedelec Groove Next Version 1 US-47... -
Page 48: Assembly
64.4 °F to 73.4 °F. CAUTION Do not clean the drive when it is warm (e.g. straight after a ride). You may burn yourself otherwise. Wait until the drive unit has cooled down. US-48 Original User Guide | Pedelec Groove Next Version 1... -
Page 49: Kalkhoff Display App
1. To disconnect the Smartphone and Pedelec press “Connect” on the “Connect My Bike” display. Alternatively you can press the “Connect” button on another Pedelec that you want to connect. Original User Guide | Pedelec Groove Next Version 1 US-49... -
Page 50: Menu
Battery charge level 7.3.1.1 Battery charge level Page US-56 System support Speed Assistance mode 5.3.4 Display of the assistance mode Page US-45 Maximise or minimise display field Display panel US-50 Original User Guide | Pedelec Groove Next Version 1... -
Page 51: Navigation
1. Open Navigation menu item. displayed. 2. Enter a location or tap on the map. 3. Tap on For 7. Use the app For 7. The route is displayed Original User Guide | Pedelec Groove Next Version 1 US-51... -
Page 52: Ride Profiles
Service reminder To help you remember to maintain your bike, you can set the total kilo- metres or a date after which you will be reminded. US-52 Original User Guide | Pedelec Groove Next Version 1... -
Page 53: Service
Always remove the battery before starting to work on the Pedelec. Accidental activation of the button can result in serious injuries. Perform an update Original User Guide | Pedelec Groove Next Version 1 US-53... - Page 54 But you need not to be afraid of the battery exploding under you when you ride the cycle under the rain. The battery is sealed to prevent moisture and spray water from entering. US-54 Original User Guide | Pedelec Groove Next Version 1...
-
Page 55: Technical Details
14 °F to 104 °F and labelling must be observed. Please contact your cycle in operation dealer if you have any questions about transportation. Recommended storage temperature 64.4 °F to 73.4 °F Original User Guide | Pedelec Groove Next Version 1 US-55... -
Page 56: Overview And Basic Functions
Winter cover: You can purchase a neoprene winter cover (KD170618502) from your cycle dealer to protect the clip lock of the battery from moisture and dust in any weather. US-56 Original User Guide | Pedelec Groove Next Version 1... -
Page 57: Capacity
The battery may need to be replaced when the capacity is Display Description below 60 %. Discuss how to proceed with your cycle dealer. The first and fourth LEDs flash twice. The battery is now in Sleep mode. Original User Guide | Pedelec Groove Next Version 1 US-57... -
Page 58: Removing The Battery
For 2. Push the axle lever upwards pedal cranks do not cover the battery lock. NOTICE Hold the battery tight so it does not fall. It can be damaged if it drops. US-58 Original User Guide | Pedelec Groove Next Version 1... -
Page 59: Tips
“ECO” assistance level is the right choice. If you often cycle at greater speed (such as to work), the “Power” setting can inject the necessary pace. Original User Guide | Pedelec Groove Next Version 1 US-59... -
Page 60: Storage
Insert the battery just before starting off with your Pedelec. This way you prevent low temperatures shortening the range. US-60 Original User Guide | Pedelec Groove Next Version 1... -
Page 61: Cleaning
Do not use any alcohol- or solvent-based, or abrasive cleaners while cleaning. No coarse sponges or brushes may be used either. They leave scratches and cause the surface to become dull. Clean the battery with a soft, damp cloth. Original User Guide | Pedelec Groove Next Version 1 US-61... -
Page 62: Battery Charger
Further consequences can include cables and plugs also increase the risk of electric shock. malfunctions and a reduced service life. Ensure there is an adequate ventilation while charging. US-62 Original User Guide | Pedelec Groove Next Version 1... -
Page 63: Technical Details
Charging fault Storage temperature 14 °F to 122 °F Recommended storage tem- LED lights up green Battery is fully charged 64.4 °F to 73.4 °F perature Weight 706 g (charger) Original User Guide | Pedelec Groove Next Version 1 US-63... -
Page 64: Functions
No coarse sponges or brushes may be used either. They leave The second LED flashes. scratches and cause the surface to become dull. Clean the charger with a soft, damp cloth. US-64 Original User Guide | Pedelec Groove Next Version 1... -
Page 65: Storage
5.3.1 Switching on the Pedelec Page US-44. Groove Next switches itself off after 10 minutes if there is no call for power from the drive (e.g. because the Pedelec is stationary). Original User Guide | Pedelec Groove Next Version 1 US-65... -
Page 66: App
Damaged battery. cycle dealer. The battery may have to be replaced. c) Battery charger faulty. c) Have your charger checked out by your cycle dealer; it may have to be replaced. US-66 Original User Guide | Pedelec Groove Next Version 1... -
Page 67: Battery Charger
If screws are overtightened, components can also be damaged. Tighten all screws and bolts that are relevant for safety with a torque wrench. This indicates the corresponding torque in newton metres (Nm). Original User Guide | Pedelec Groove Next Version 1 US-67... -
Page 68: Spare Parts
Spare parts set (2 + 3 + 4) KD170418601 BG 2 Spare parts set (7 + 8 + 9 + 10) KD170418602 BG 3 Spare parts set (3 + 4 + 6 + 11) KD170418603 US-68 Original User Guide | Pedelec Groove Next Version 1... -
Page 69: Service Intervals
Safety components checked and normal service intervals. changed, if necessary Test ride completed Software version Parts replaced: Parts replaced: Date Stamp and signature of the dealer Date Stamp and signature of the dealer Original User Guide | Pedelec Groove Next Version 1 US-69... - Page 70 Software version Software version Parts replaced: Parts replaced: Parts replaced: Date Stamp and signature of the dealer Date Stamp and signature of the dealer Date Stamp and signature of the dealer US-70 Original User Guide | Pedelec Groove Next Version 1...
- Page 71 Software version Software version Parts replaced: Parts replaced: Parts replaced: Date Stamp and signature of the dealer Date Stamp and signature of the dealer Date Stamp and signature of the dealer Original User Guide | Pedelec Groove Next Version 1 US-71...
- Page 72 Software version Software version Parts replaced: Parts replaced: Parts replaced: Date Stamp and signature of the dealer Date Stamp and signature of the dealer Date Stamp and signature of the dealer US-72 Original User Guide | Pedelec Groove Next Version 1...
- Page 73 Handlebar unit checked Headset checked and adjusted Tires checked Safety components checked and changed, if necessary Test ride completed Software version Parts replaced: Date Stamp and signature of the dealer Original User Guide | Pedelec Groove Next Version 1 US-73...
- Page 74 Notes...
- Page 75 Notes...
Need help?
Do you have a question about the Pedelec Groove Next and is the answer not in the manual?
Questions and answers