
Subscribe to Our Youtube Channel
Related Manuals for Derby cycle Pedelec


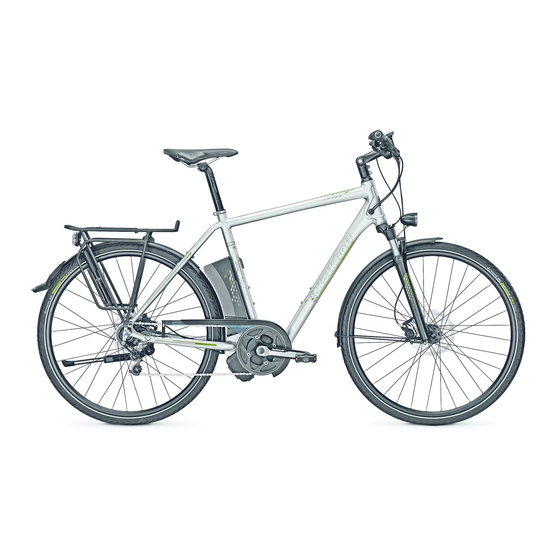
Summary of Contents for Derby cycle Pedelec
- Page 1 ORIGINAL OPERATING INSTRUCTIONS – GENERAL BICYCLE | PEDELEC (25 KM/H) EPAC: ELECTRICALLY POWER ASSISTED CYCLE | S-PEDELEC (45 KM/H) EN | ORIGINAL OPERATING INSTRUCTIONS – GENERAL Version 1 | 28/06/2021 EN 15194:2017...
- Page 2 Company: Contact person: Street: Date, signature Date, signature Postal code, town: Telephone: E-mail: 10.3 Bicycle (motorless)/S-Pedelec: serial and product number Page EN-16 10.4 Pedelec: type plate Page EN-16 1 See 10.1 Frame number Page EN-16 2 See...
-
Page 3: Table Of Contents
10.5 S-Pedelec: manufacturer's type plate EN-17 the seating position EN-27 24.1 Adjusting the position of the control elements EN-37 10.6 Bicycle (without motor)/Pedelec: intended use EN-17 18.4 Cleaning and care EN-28 24.2 Adjust the shift cable tension EN-38 Bicycle weight... - Page 4 EN-41 Tyres and tubes EN-53 Cleaning the bicycle and its components EN-62 24.3.2.1 Shimano Ultegra Di2 gear lever EN-41 28.1 Checking tyre pressure EN-54 Pedelec/S-Pedelec: storage EN-62 24.3.2.2 Shimano Ultegra Di2: charger and USB cable EN-41 28.2 Tubeless tyres EN-54 Disposal EN-62 24.3.2.3 Sram Eagle AXS gear lever EN-42 28.3...
- Page 5 Trekking E-Bike Front stem Handlebar grip Bell Handlebars Headset Head tube Spotlight Mudguard Fork Tyre Brake disc Front wheel hub Rims Spokes Front brake Wheels Motor Pedals Crank Chain Sprocket Rear wheel hub Stand Rear light Reflector Luggage rack Saddle Seat post Saddle clamp Seat tube...
- Page 6 E-Mountain Bike Headset Front stem Handlebar grip Handlebars Head tube Fork Tyre Front wheel hub Wheels Rims Brake disc Front brake Motor Crank Chain Sprocket Rear wheel hub Rear brake Saddle Seat post Saddle clamp Seat tube Crossbar Dampers Down tube Battery This is a sample illustration of our bicycles.
- Page 7 Trekking Bike Front stem Handlebar grip Bell Handlebars Headset Head tube Spotlight Mudguard Fork Tyre Brake disc Front wheel hub Rims Spokes Front brake Wheels Pedals Crank Belt Sprocket Rear wheel hub Stand Rear light Reflector Luggage rack Saddle Seat post Saddle clamp Seat tube Crossbar...
- Page 8 Racing bike Headset Front stem Handlebars Brake lever Head tube Handlebar grip Fork Front brake Tyre Front wheel hub Wheels Rims Crank Chain Sprocket Rear wheel hub Saddle Seat post Rear brake Saddle clamp Seat tube Crossbar Down tube Pedals This is a sample illustration of our bicycles.
-
Page 9: These Operating Instructions And All Further Documentation
Serious injury and/or equipment damage caused by a If your bicycle has not been handed over to you completely failure to observe the operating instructions. assembled and adjusted, please contact your dealer for any Bicycle Pedelec S-Pedelec adjustments. ▪ Read these operating instructions carefully before (motorless) using your bike for the first time. -
Page 10: Original Operating Instructions - General
Fulcrum Wheels fulcrumwheels.com the use and maintenance of the parts of your bike. Often refers either to a bicycle (motorless), a Pedelec or an they also provide information on any warranties. An Gates Belt gatescarbondrive.com S-Pedelec. If no differentiation is made, all three types... -
Page 11: Safety
Warning sign and signal word sure that the helmet fits properly. Schürmann Rims schuermann-rims.com Possible consequence and the cause of the hazard. ▪ S-Pedelec: You are legally required to wear a helmet Schwalbe Tyres schwalbe.com when riding an S-Pedelec 7.2.2 Rules of conduct ▪... - Page 12 Serious falls and accidents caused by insufficient ▪ Never ride "hands free". You may suffer a serious lighting. frame of your Pedelec if necessary. This will affect fall, and will also be committing a misdemeanour, as the shutdown speed. Changes in wheel size should ▪ Do not ride in unfavourable lighting conditions...
-
Page 13: Carbon: General Safety Information
▪ Always ride on the proper side So, you don’t need a driving licence, or insurance for of the road. However, if a cycle your Pedelec. While there is no legal obligation to wear a Warnings path is only available on the... -
Page 14: Operating Regulations
7.2.2 Rules of conduct Germany Switzerland Straßenverkehrszulassungsordnung If you travel on public roads with your S-Pedelec, you must Verordnung über die (StVZO) also comply with certain rules as a rider. In addition to technischen Anforderungen an specific national requirements, ... -
Page 15: Pedelec/S-Pedelec: Range
Contact your specialist workshop (e.g., in winter) you should insert the battery just before about this. Also observe the notices on battery use in the starting off with your Pedelec. system operating instructions 4.2 Pedelec/S-Pedelec: ▪... -
Page 16: Description Of Your Bicycle
Fig. 7 Possible position of the labels 9.3 S-Pedelec 10.4 Pedelec: type plate From a legal standpoint, the S-Pedelec is a Class L1e moped. It may not travel at over 20 km/h using motor The type plate contains various information which assistance only. -
Page 17: S-Pedelec: Manufacturer's Type Plate
The image for intended use is close to the serial and Manufacturer’s address and telephone product number number Manufacturer Type: 10.3 Bicycle (motorless)/S-Pedelec: serial and product XXXXXXXXXXXXXXXXXXX number Page EN-16 and/or the type plate Year of manufacture L1e-B 20XX ... - Page 18 Intended Bicycle type Recommended Intended average Image Intended use height of Description (example) driving skills speed range drops/jumps City and Commuting and leisure No particular < 15 cm 15 to 25 km/h Bicycles and Pedelecs that are used on normal, paved surfaces, on which the urban rides involving moderate driving skills...
-
Page 19: Tightening Torques For Threaded Connections
The 1 Pedelec: The permitted total weight of your Pedelec is given on the tightening torques are type plate 10.4 Pedelec: type plate Page EN-16. ▪ Do not exceed the total permissible weight of the... -
Page 20: Before Your First Ride
14. Before your first ride Threaded connection Thread Tightening torque Information 14.1 Attaching the pedals Handlebar grip, screw-on M4 | M5 3 Nm | 5 Nm ▪ Screws and nuts are tightened or locked clockwise You can install loose pedals as follows: Freewheel fastening screw 40 Nm (so, by rotating them to the right). -
Page 21: Clipless Pedals
18. Adjusting the position and angle of the saddle Page requirement. Please also note the Warning EN-26 explanations in 4.2 Pedelec/S- Fig. 14 High beam ▪ Change the position and height of the handlebars Pedelec: Original operating Serious accidents caused by lack of lighting. -
Page 22: Checklist
Lights Check that the light system is adjusted secure fastening and in working order 14.2 Lights ▪ Pedelec/S-Pedelec: If your Pedelec/S-Pedelec 17. Seat height Page EN-24, Page EN-21. switches off while you are riding, stop the ride and ... -
Page 23: Bicycle Frame
16.1 Aluminium and steel frames: rollers Components Inspection Information Use with Pedelecs and S-Pedelecs is not approved. Rollers Luggage Check it is attached securely. The dealer should have adjusted the suspension for with rear-wheel axle clamping can be used with motorless Observe the maximum loading and you during delivery. -
Page 24: Seat Height
17. Seat height 17.1 Setting the height of the seat If the seat post clamp screw(s) is (are) covered with a designer cover, you will need to first lift this up slightly before starting with the adjustment. Warning Warnings Undo the saddle clamp screw(s) by turning it/them Serious falls due to a bent or broken seat post. -
Page 25: Lowerable Seat Post
17.2 Lowerable seat post Open the tensioning lever by folding it by 180˚. If your bicycle is fitted with a lowerable seat post, you can OPEN must now be visible. adjust the height of the seat post while riding. This is done using the control element on the handlebars. -
Page 26: Suspension Adjustment Screw
17.3.1 Suspension adjustment screw 18. Adjusting the position and angle of 18.1 Single-screw seat post: adjusting the seating position the saddle If the suspension adjustment screw protrudes from the seat post, it is important to correct this: Warnings The adjustment screw Suspension Serious falls due to incorrect adjustments. -
Page 27: Dual-Screw Seat Post I: Adjusting The Seating Position
18.2 Dual-screw seat post I: adjusting the 18.3 Dual-screw seat post II: adjusting the Tighten the front and rear clamping screws clockwise 13. seating position to the specified torque using a torque wrench seating position Tightening torques for threaded connections Page EN-19. -
Page 28: Cleaning And Care
Ensure that the newly-tightened saddle does not tip; You can adjust the position of the handlebar by turning the adjustable test it by pressing down on the front and back alter- handlebars. The procedure is almost identical for all front nately. -
Page 29: Adjusting The Height Of The Handlebars
19.3.1 Straight front stems: adjusting the To secure the front stem again, tighten the front stem Screw Screw height of the handlebars spindle clockwise to the specified torque using a torque wrench 13. Tightening torques for threaded connections Page EN-19. -
Page 30: Adjusting A Screw Handlebar Grip
21. Checking and adjusting bearing play Warning Front stem spindle ▪ Serious falls due to lack of bicycle control. Riding with a loose headset can damage the ball Lock nut sockets or fork. If the headset is too tight, the Spacer bicycle will be difficult to steer, and the ball sockets Fig. -
Page 31: Checking The Bearing Play
21.1 Checking the bearing play 21.3 Adjusting Ahead headsets Then, push the clamping ring towards the head tube. Align the clamping and threaded rings on the front 21.3.1 Ahead headset I Proceed as follows to check whether the headset is too stem. -
Page 32: Suspension Fork
22.1 Suspension fork appropriate direction (e.g. marked ‘Lock’, ). To activate Warnings the suspension again, move the control/remote switch to OPEN. Warning Serious falls and accidents caused by insufficient bicycle control. 22.1.4 Adjusting the air pressure Serious falls due to lack of control. ▪ If you notice that the braking force is too high or too On some suspension forks it is possible to alter the air ▪... -
Page 33: Coaster Brakes
Brake disc on the pedals to brake. Coaster brakes are activated to a Pedelec/S-Pedelec: Your Pedelec/S-Pedelec does not varying degree depending on the position of your feet and/ have an emergency stop button. You must activate or the pedal arms. -
Page 34: Disc Brakes
23.3 Disc brakes Brake disc Bremsscheibe Bremssattel Brake calliper Warnings Serious falls and accidents caused by reduced braking Brake lining Bremsbelag power. ▪ Avoid using disc brakes continuously on long downhill stretches. It is better to brake in interrupted cycles. ▪... -
Page 35: Adjusting The Position Of The Brake Levers
23.4.3 Changing the pressure point Lever width adjustment screw Fastening screw The pressure point marks the moment at which the lever locks when the manual brake is actuated, i.e., when the Lock nut brake pads contact the rim (rim brakes) or the brake disc Brake lever (disc brakes) and the bicycle brakes. -
Page 36: Cable Brakes: Adjusting The Brake Cable Tension
23.5 Cable brakes: adjusting the brake cable Brake disc tension Lock nut Warnings Serious falls and accidents caused by reduced braking power. ▪ Brake cables are wear parts. Check these for wear Adjustment screw and tear regularly, and replace the brake cables if necessary. -
Page 37: Cleaning And Care
24. Bicycle shifter 24.1 Adjusting the position of the control away. It therefore makes sense to perform regular visual checks of the state of wear. You can recognise the state of elements wear with a marking, e.g., grooves in the brake lining. On Warning Shimano brake shoes, a wear line is visible on the brake Information... -
Page 38: Adjust The Shift Cable Tension
24.3 Derailleur control element to make a rough preselection, e.g., the smallest chainring for an uphill climb, and then use the right-hand control element – depending on the incline – to Warnings select the appropriate sprocket. Use the smallest chainring for climbs, and the largest for level and downhill rides. -
Page 39: Mechanical Derailleur: Control Elements
24.3.1 Mechanical derailleur: control 24.3.1.2 Shimano standard gear lever: elements version 2 24.3.1.1 Shimano standard gear lever: version 1 Chainring size Information Do not move levers A and B at the same time. If the levers are moved at the same time, you will not be able Left: front derailleur Right: rear derailleur to shift gears. -
Page 40: Shimano Dual Control Lever
24.3.1.3 Shimano dual control lever Shifting to a lower gear Lever B on the right: To shift from a low gear to the next higher gear, push lever B once. When shifting, the 10. Step on the pedals as you shift gears. chain will be lifted to a smaller sprocket. Lever B then Information 11. -
Page 41: Electronic Derailleur: Control Elements
24.3.2 Electronic derailleur: control elements Button A on the right: To shift from a high gear to the next lower gear, push button A. When shifting, the 24.3.2.1 Shimano Ultegra Di2 gear lever chain will be lifted to a larger sprocket. Brake lever Chainring size Left: front derailleur Right: rear derailleur Fig. -
Page 42: Sram Eagle Axs Gear Lever
24.3.2.4 Sram eTap AXS gear lever System connector Display module Power jack CHARGE indicator Error indicator Fig. 74 Charger ©Shimano Fig. 77 Charging the battery ©Shimano Micro USB plug USB plug 24.3.2.3 Sram Eagle AXS gear lever Fig. 79 Sram eTap AXS gear lever ©Sram Fig. 76 USB cable ©Shimano Shifting to a higher gear CHARGE indicator: When the battery is charging, the Step on the pedals as you shift gears. -
Page 43: Sram Axs: Charging Station And Usb Cable
24.3.2.5 Sram AXS: charging station and 24.3.3 Adjusting the rear and front derailleurs Insert the completely charged battery into the rear/ USB cable front derailleur and close the battery holder. If the 24.3.3.1 Mechanical derailleur battery is properly inserted, the latch will click into place. -
Page 44: Shimano Ultegra Di2 Electronic Derailleur
11. If the chain can only be moved with difficulty to the Front derailleur: setting the upper stop Front derailleur: setting the upper stop next larger cog, you will need to increase the tensile Shift the chain to the smallest chainring and the To set the upper limit, turn the upper screw (H). -
Page 45: Sram Eagle Axs Electronic Derailleur
24.3.3.3 Sram Eagle AXS electronic Push the button on the display module until the LED Shift to the individual gears and check that there is no lights up to switch from Gearshift mode to Setting noise in any gear position. derailleur mode. -
Page 46: Sram Etap Axs Electronic Derailleur
24.3.3.4 Sram eTap AXS electronic derailleur Setting the rear derailleur Align the upper shift pulley with the middle of the second largest sprocket by holding the AXS button on the rear derailleur in the pressed position while pushing the gear lever inward. The left-hand gear lever adjusts the rear derailleur inward, and the right-hand gear lever outward. -
Page 47: Hub Gear
To shift to a lower gear, turn the twist grip step by step Information away from you. The number on the display will become smaller. In rare cases, the internal gears and the pawls in the hub can make a noise when shifting. These noises are normally harmless. -
Page 48: Adjusting Gears
Use influence the shifting quality, as well as the lifespan of the the lines that are easiest to see. Pedelec/S-Pedelec: serious bruising due to accidental shift cables. actuation of the On button. -
Page 49: Measuring And Adjusting The Chain Tension
Remove the battery before cleaning the chain on an 25.1.2 Hub gear: measuring the chain tension S-Pedelec or Pedelec. Then, roughly brush the bicycle Pedelec: Remove the battery. chain and chain tensioner with a soft brush. You can then remove the old chain oil with a dry cloth. -
Page 50: Adjusting The Belt Tension
Pedelec/S-Pedelec: The Carbon Drive app works best in a quiet Notice Remove the battery. environment. Pedelec/S-Pedelec: Remove the battery. Undo the bolts from Load the app on to your smartphone. the drop-out by turning these anticlockwise. Do Start the app. -
Page 51: Drop-Out Ii: Adjusting The Belt Tension
26.2.2 Drop-out II: adjusting the belt tension 26.3 Checking the belt for wear Please remove the battery before cleaning the belt on a Pedelec or S-Pedelec. Then, clean the belt with a soft, damp Pedelec/S-Pedelec: Remove the battery. Pedelec/S-Pedelec: Remove the battery. -
Page 52: Attaching Wheels With Through-Axles
27.2 Attaching wheels with through-axles 27.2.1 Mounting a R.A.T. through-axle Springs Clamping Tighten Insert the R.A.T. axle with the lever in the open Warning position through the frame/fork and wheel, until the T-piece at the end of the R.A.T. axle penetrates the Serious falls due to loose components. -
Page 53: Rims
Warning Many rims have a milled ring or a single small hole, the so- S-Pedelec or Pedelec. Then, brush the rims with a soft called wear indicator. If this can no longer be seen or felt, brush. Heavier soiling can be removed with a soft, damp Serious falls and accidents caused by broken rims. -
Page 54: Checking Tyre Pressure
28.1 Checking tyre pressure 28.2 Tubeless tyres Warning Warnings Serious falls due to lack of bicycle control. Overinflated Serious falls due to bursting tyres. tyres can burst or come off the rim. The tyre can burst ▪ Only use tubeless tyres on rims designed for this and cause an immediate loss of control. If the tyre purpose. These are identified accordingly with the pressure is too low, the tyre can come off the rim. -
Page 55: Dunlop Or Blitz Valves And Schrader Or Car Valves
If your bicycle is fitted with axle nuts, loosen these nuts is shown here as an example. Remove the battery before fixing a flat tyre on a Pedelec/ counterclockwise using a suitable wrench. S-Pedelec. Then, open or remove the brakes. The way in... -
Page 56: Dismantling The Tyre And Tube
Loosen and remove the screw on the brake arm. Notice Loosen the wheel nuts and set them aside. Remove the lock washers from the wheel axle. If it is difficult to draw the cable sleeve out of the Pull the rear wheel out of the drop-out slots. holder in the gearshift unit, insert a 2 mm Allen key or -8 S a #14 spoke in the hole in the ratchet wheel and rotate... -
Page 57: Mounting The Tyre And Tube
29.5 Mounting the tyre and tube 29.6.1.1 Axle nut: inserting the front wheel 29.6.1.3 Inserting the front wheel through- axle Make sure that the rim tape covers the spoke nipples Insert the wheel into the fork drop-out. and is undamaged. Moisten the through-axle with a thin layer of grease. - Page 58 II. Fitting the shift cable for hub gears Information Locking washer (left side) Attach the cable to the ratchet wheel so that the cable When fitting the brake arm clamp, hold the clamp nut securing nut faces outward against the drop-out. Slide in position with a 10 mm wrench when tightening the Shift arm the straight side of the spacer into the open side of the...
-
Page 59: Luggage Rack
the gearshift unit and push the end of the cable sleeve Notice firmly into the cable sleeve holder. Abrasion due to bag mountings. ▪ Please protect all contact points on the luggage rack from abrasion due to attaching bags. You can for CJ-8S20 CJ-8S20 example use a protective film or abrasion protection. -
Page 60: Child Seats And Trailers
31.2 Child seats and trailers 31.2.1 Child seats Warnings ▪ S-Pedelec: Attaching a child seat to an S-Pedelec is not Serious falls and accidents caused by component Warnings allowed. failure. ▪ Carbon: Attaching a child seat to carbon components is Serious falls and accidents caused by component ▪... -
Page 61: Transporting The Bicycle
▪ Pedelec/S-Pedelec: Do not leave the key in. To be on ▪ As Pedelecs/S-Pedelecs are heavier than motorless seat tube, fork blades, fork steerer tube, chain the safe side, you can also remove the battery. -
Page 62: Ordering Another Key
Remove and store the battery separately. The Pedelec/S- Round cell • Specialist dealers de and follow the instructions. If you cannot reorder a Pedelec should preferably be kept in a dry, not excessively batteries key because of a missing key number, ask your dealer to warm room. -
Page 63: Warranty Conditions
▪ Battery configuration ▪ The damage is due to improper or inadequate care (e.g., caused by cleaning the electronic components with high- powered water jets, transporting the Pedelec on the rear luggage rack of a car with no rain protection) Originalbetriebsanleitung Allgemein... -
Page 64: Handover
38.1 Handover inspection and settings Ask your dealer to perform the following inspections and to adjust the bicycle for you. Please ask your dealer to tick off the items that have been completed. General Pedelec/S-Pedelec Inspection and settings Inspection and settings Frame / forks General functional check (e.g., push assistance, support modes,... -
Page 65: Handover Talk
Date, signature and stamp of the dealer les, are designed for a specific period of use. Once Bringing the Pedelec/S-Pedelec to a rapid this is exceeded, there is a considerable risk that stop in a dangerous situation components will fail. - Page 66 At the latest after 2000 km or one year after the date of At the latest after 4000 km or two years after the date of purchase. purchase. purchase. General Pedelec | S-Pedelec General Pedelec | S-Pedelec General Pedelec | S-Pedelec Maintenance...
- Page 67 At the latest after 8000 km or four years after the date of At the latest after 10,000 km or five years after the date of purchase. purchase. purchase. General Pedelec | S-Pedelec General Pedelec | S-Pedelec General Pedelec | S-Pedelec Maintenance...
- Page 68 At the latest after 14,000 km or seven years after the date At the latest after 14,000 km or seven years after the date purchase. of purchase. of purchase. General Pedelec | S-Pedelec General Pedelec | S-Pedelec Warnings Maintenance Maintenance...
- Page 69 At the latest after 18,000 km or nine years after the date At the latest after 20,000 km or 10 years after the date of of purchase. of purchase. purchase. General Pedelec | S-Pedelec General Pedelec | S-Pedelec General Pedelec | S-Pedelec Maintenance...
- Page 70 Derby Cycle Werke GmbH Siemensstraße 1-3 49661 Cloppenburg, Germany + 49 (4471) 966-0 info@derby-cycle.com www.derby-cycle.com 1973K0023013...
Need help?
Do you have a question about the Pedelec and is the answer not in the manual?
Questions and answers