
Subscribe to Our Youtube Channel
Related Manuals for Derby cycle IMPULSE 2.0


Summary of Contents for Derby cycle IMPULSE 2.0
- Page 1 BICYCLE OWNER’S MANUAL | 11th Edition, 2015 ORIGINAL USER MANUAL PEDELEC IMPULSE 2.0 | Version 2 | 04.2015 SERVICE BOOKLET | 04.2015 English Item no. 1973K0015026...
- Page 2 Bicycle Owner’s Manual 11th Edition, 2015 This manual meets ISO-4210, 16 CFR 1512 and EN 14764, 14766 and 14781 Standards IMPORTANT: This manual contains important safety, performance and service information. Read it completely before you take the first ride on your new bicycle, and keep it for reference. Additional safety, performance and service information for specific components such as suspension or pedals on your bicycle, or for accessories such as helmets or lights that you...
-
Page 3: Table Of Contents
Contents GENERAL WARNING p. 4 A special note to parents p. 5 1. First A. Bike fit p. 6 B. Safety first p. 6 C. Mechanical Safety Check p. 6 D. First ride p. 7 2. Safety A. The Basics p. -
Page 4: General Warning
GENERAL WARNING: Like any sport, bicycling involves risk of injury and damage. By choosing to ride a bicycle, you assume the responsibility for that risk, so you need to know — and to practice — the rules of safe and responsible riding and of proper use and maintenance. -
Page 5: A Special Note For Parents
A special note for parents: WARNING: This manual does not cover children's bikes, Juvenile or BMX bicycles. As a parent or guardian, you are responsible for the activities and safety of your minor child, and that includes making sure that the bicycle is properly fitted to the child; that it is in good repair and safe operating condition;... -
Page 6: First
1. First 4.F. Suspension can change the way a bicycle performs. Follow the suspension manufacturer’s instructions for use, adjustment and care. NOTE: We strongly urge you to read this manual in its entirety before your first ride. At the very least, read and C. -
Page 7: First Ride
▸ Handlebar ends: Make sure the handlebar grips are it looks when you know the tires are correctly inflated; and adjust if necessary. secure and in good condition, with no cuts, tears, or worn ▸ Tires in good shape? Spin each wheel slowly and look out areas. -
Page 8: Safety
2. Safety jump, do stunt riding or race with your bike, read and understand Section 2.F. 7. Ride at a speed appropriate for conditions. Higher A. The Basics speed means higher risk. WARNING: The area in which you ride may require B. -
Page 9: Off Road Safety
may surprise people with whom you are sharing the road. Under wet conditions, the stopping power of your 14. Observe and yield the right of way. brakes (as well as the brakes of other vehicles sharing the 15. Never ride your bicycle while under the influence of road) is dramatically reduced and your tires don’t grip alcohol or drugs. -
Page 10: Extreme, Stunt Or Competition Riding
be familiar with course conditions. If you choose to ride under conditions of poor visibility, check and be sure you comply with all local laws about night riding, and take the following strongly recommended WARNING: Although many catalogs, advertisements and articles about bicycling depict riders engaged additional precautions: •... -
Page 11: Fit
WARNING: Failure to confirm compatibility, properly 2. Step-through frame bicycles install, operate and maintain any component or Standover height does not apply to bicycles with accessory can result in serious injury or death. step-through frames. Instead, the limiting dimension is determined by saddle height range. - Page 12 NOTE: Some bicycles have a sight hole in the seat tube, WARNING: When making saddle angle adjustments the purpose of which is to make it easy to see whether with a single bolt saddle clamp, always check to the seat post is inserted in the seat tube far enough to be make sure that the serrations on the mating surfaces of the clamp are not worn.
-
Page 13: Handlebar Height And Angle
C. Handlebar height and angle relation to the stem, or turn the bar end extensions in Your bike is equipped either with a “threadless” stem, relation to the handlebar, the bolts are insufficiently which clamps on to the outside of the fork shaft, or with a tightened. -
Page 14: Secondary Retention Devices
If you have a mountain or road bike equipped with through axle front or rear wheels, make sure that your dealer has given you the manufacturer’s instructions, and follow those when installing or removing a through axle wheel. If you don’t know what a through axle is, ask your dealer. -
Page 15: Wheels With Cam Action Systems
2. Wheels with cam action systems (2) If your bike has cam action front wheel retention, There are currently two types of over-center cam wheel move the cam lever from the locked or CLOSED position retention mechanisms: the traditional over-center cam to the OPEN position (figs. - Page 16 should leave a clear imprint in the palm of your hand. remove it from the rear dropouts. (b) With a through-bolt or bolt-on system, tighten the fasteners to the torque specifications in Appendix D or the d. Installing a disk brake or rim brake Rear Wheel hub manufacturer’s instructions.
-
Page 17: Seat Post Cam Action Clamp
fastener do not emboss the surfaces of the dropouts, the WARNING: If you can fully close the cam lever tension is insufficient. Open the lever; turn the tension without wrapping your fingers around the seat post adjusting nut clockwise a quarter turn; then try again. or a frame tube for leverage, and the lever does not leave a clear imprint in the palm of your hand, the tension (8) If you disengaged the brake quick-release... -
Page 18: Shifting Gears
1. Brake controls and features lever, progressively increasing the braking force. If you It’s very important to your safety feel the wheel begin to lock up, release pressure just a that you learn and remember little to keep the wheel rotating just short of lockup. It’s which brake lever controls which important to develop a feel for the amount of brake lever brake on your bike. - Page 19 a. Shifting Gears d. Which gear should I be in? There are several different types and styles of shifting The combination of largest rear and smallest front controls: levers, twist grips, triggers, combination shift/ gears (fig. 16) is for the steepest hills. The smallest rear brake controls and push-buttons.
-
Page 20: Pedals
matter of moving the shifter to the indicated position for rider’s shoe and the pedal. If your bicycle has this type of the desired gear ratio. After you have moved the shifter high-performance pedal, you must take extra care to avoid to the gear position of your choice, ease the pressure on serious injury from the pedals’... -
Page 21: Bicycle Suspension
WARNING: Not all bicycles can be safely retrofitted Practice is required to learn to engage and disengage the foot safely. Until engaging and disengaging the with some types of suspension systems. Before foot becomes a reflex action, the technique requires retrofitting a bicycle with any suspension, check with the bicycle’s manufacturer to make sure that what concentration which can distract your attention and... -
Page 22: Service
The best and safest way to inflate a bicycle tire to the on a car tire. To inflate a Schraeder valve tire, remove the correct pressure is with a bicycle pump which has a built- valve cap and clamp the pump fitting onto the end of the in pressure gauge. -
Page 23: Service Intervals
1. Ask your dealer for copies of the manufacturer’s hours of riding: installation and service instructions for the components • Squeeze the front brake and rock the bike forward and on your bike, or contact the component manufacturer. back. Everything feel solid? If you feel a clunk with each 2. -
Page 24: If Your Bicycle Sustains An Impact
All frames that are very light need frequent inspection. These frames are likely to be damaged or broken in a crash. They are not designed to take abuse or be a rugged workhorse. See also Appendix B. Original User Manual | Pedelec Impulse 2.0... - Page 25 Mountain bikes are heavier and harder to ride uphill than (e.g., hilly with small obstacles like roots, rocks, loose surfaces and hard pack and depressions). Cross-country Original User Manual | Pedelec Impulse 2.0...
- Page 26 Read Section 2. F, p. 10. TRADE OFF Freeride bikes are more rugged than All- Mountain bikes, for riding more difficult terrain. Freeride bikes are heavier and harder to ride uphill than All- Original User Manual | Pedelec Impulse 2.0...
- Page 27 NOT INTENDED Road tandem should not be taken off- road or used as a mountain tandem. MAXIMUM WEIGHT LIMIT RIDER LUGGAGE TOTAL lbs / kg lbs / kg lbs / kg 500 / 227 75 / 34 575 / 261 Original User Manual | Pedelec Impulse 2.0...
-
Page 28: Appendix B: Lifespan Of Your Bike And Its Components
Follow the Mechanical Metals are subject to fatigue. With enough cycles of Safety Check in Section 1.C of this Manual before use, at high enough loads, metals will eventually develop every ride. Original User Manual | Pedelec Impulse 2.0... - Page 29 cracks that lead to failure. It is very important that you Common sense tells us that nothing that is used lasts read The basics of metal fatigue below. forever. The more you use something, and the harder you Let’s say you hit a curb, ditch, rock, car, another cyclist use it, and the worse the conditions you use it in, the or other object.
- Page 30 In most cases a fatigue crack is not a defect. It is a Carbon fiber composites are typically a strong, light sign that the part has been worn out, a sign the part has fiber in a matrix of plastic, molded to form a shape. reached the end of its useful life.
- Page 31 components is irrelevant to what happens to your body. quiet and free of creaks and squeaks. Investigate and What should you expect from your carbon frame? It find the source of any noise. It may not be a crack or depends on many complex factors.
-
Page 32: Appendix C: Coaster Brakes
Appendix C Coaster Brake 1. How the coaster brake works The coaster brake is a sealed mechanism which is a part of the bicycle’s rear wheel hub. The brake is activated by reversing the rotation of the pedal cranks (see fig. 5). Start with the pedal cranks in a nearly horizontal position, with the front pedal in about the 4 o’clock position, and apply downward foot pressure on the pedal that is to the... -
Page 33: Appendix D: Fastener Torque Specifications
Appendix D Fastener Torque Specifications Correct tightening torque of threaded fasteners is very important to your safety. Always tighten fasteners to the correct torque. In case of a conflict between the instructions in this manual and information provided by a component manufacturer, consult with your dealer or the manufacturer’s customer service representative for clarification. - Page 34 ORIGINAL USER MANUAL PEDELEC IMPULSE 2.0 | Version 2 | 04.2015 English...
- Page 35 6 Charger 7 Control panel and display Control panel 7.1.1 Switching on/off 7.1.2 Push assist 7.1.3 buttons Display small 7.2.1 Assistance indicator 7.2.2 Battery charge state indicator 7.2.3 Units Display 7.3.1 Assistance indicator Original User Manual | Pedelec Impulse 2.0...
- Page 37 The purpose of this User Manual is to help you get the 5. Select “Open User Manual from CD” or “Check for new most out of your Pedelec Impulse 2.0 and use it correctly. version of User Manual online”. Structure of the User Manual To call up the files, you need the program Adobe Reader.
-
Page 38: Safety
Observe the maximum permitted gross weight of your Pedelec, as this could otherwise lead to • You do not legally have to have a driving licence. Original User Manual | Pedelec Impulse 2.0... -
Page 39: Battery
“Technical data” of the “Original User Manual | Use the battery solely for your Pedelec. General” (CD). The Impulse 2.0 mountain bike is an exception. Bike trailers may not be used on this Ideally, take the battery out of your Pedelec when bike. -
Page 40: Charger
50 °F and 86 °F. A battery that displays a fault may not be charged anymore. Original User Manual | Pedelec Impulse 2.0... -
Page 41: Motor
“Original User Manual | General” (CD) detailing the tightening torques which must always be adhered to. Original User Manual | Pedelec Impulse 2.0... -
Page 42: Composition Of The Vehicle
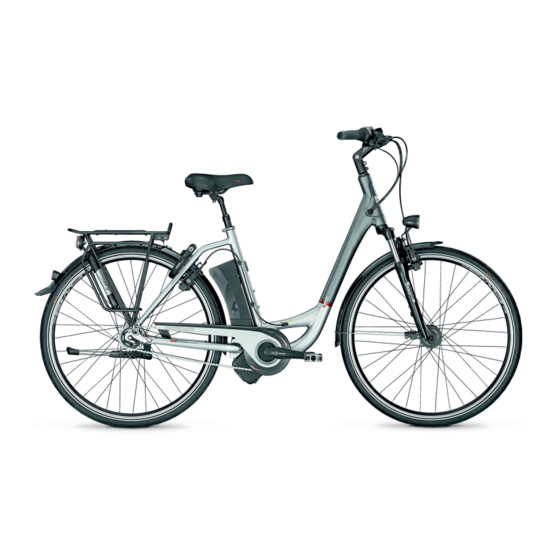
1. Display 2. Display small Seatpost clamp Battery (with quick-release (on down tube or seat tube) lever or screw) Frame 1. Seat tube Handlebar 2. Down tube Saddle Seatpost Motor Pedal Fork Wheel Original User Manual | Pedelec Impulse 2.0... -
Page 43: First Steps
For opening, the quick-release lever must be folded back through 180° – you will see the lettering “OPEN”. For clos- ing, fold the quick-release lever back in through 180° – you will see the lettering “CLOSE”. Original User Manual | Pedelec Impulse 2.0... -
Page 44: Quick Start
/ buttons to select the At the same time, the key must be in the lock and must level of assistance: ECO (low), SPORT (medium), be turned anticlockwise. Press the battery down into Original User Manual | Pedelec Impulse 2.0... -
Page 45: Battery
If your bicycle is an Impulse 2.0 Offroad, wait five seconds after switching on before turning the pedals. If you do not wait, you may not get full The battery can be charged at temperatures between 32 °F... -
Page 46: Removing The Battery
Charging the battery 3. a) Down tube battery: The charging process begins. If your charger has an LED, this lights up red. The bat- tery is charged in five stages. When charging of one Original User Manual | Pedelec Impulse 2.0... -
Page 47: Installing The Battery
In this case, you should only fit the battery onto your bike just before using it. Original User Manual | Pedelec Impulse 2.0... -
Page 48: Battery Information System
67–51% 2 LEDs light up 50–34% •• • 1 LED lights up 33–17% 1 LED flashes 16–0% ¡ 5 LEDs flash quickly 0% or overloaded * 1st LED flashes Charging fault ** quickly Original User Manual | Pedelec Impulse 2.0... -
Page 49: Battery Management
If you cannot prevent exposure to heat, button for eight seconds. Release the push button please ensure that the battery is not charged dur- as soon as the second LED lights up. ing this period. Original User Manual | Pedelec Impulse 2.0... -
Page 50: Storage
Do not ship batteries! A battery is a hazardous article which can overheat and catch fire in certain You can charge your Pedelec Impulse 2.0 directly via a conditions. charging socket in the battery. The battery can remain on the Pedelec whilst the charging operation is in progress. -
Page 51: Control Panel And Display
To activate the pushing assistance, press the button for three seconds. The Pedelec Impulse 2.0 can be controlled via two ele- ments. The control panel can be found on the handlebar grip; the display is located in the middle of the handlebar. -
Page 52: Display Small
(POWER, SPORT or ECO). No assistance. Battery indicator still lights up. Use the buttons to switch between the individual power-assist modes. Original User Manual | Pedelec Impulse 2.0... -
Page 53: Units
You can select the menu sub-items using the buttons • The display of kilometres / miles covered dur- on the control panel. You can confirm your selection by ing the day and overall. Original User Manual | Pedelec Impulse 2.0... -
Page 54: Drive Data
“Yes” or “No”. Select the desired item using the button. The selection is highlighted in bold. Confirm your selection by tapping the button. You are taken back to the menu sub-items. Original User Manual | Pedelec Impulse 2.0... -
Page 55: Drive
The higher the value you set, the more dynamic the system becomes, but beware a yo-yo effect. Confirm your selection by tapping the button. You are taken back to the menu sub-item display. Original User Manual | Pedelec Impulse 2.0... -
Page 56: Miscellaneous
7.4.6 Target cost desired text from the following options: Via the menu sub-item “Target cost”, you can access the sub-items: • Fuel price • Fuel consumption Ø • Fuel type • Power cost • Back Original User Manual | Pedelec Impulse 2.0... - Page 57 0 and 99 cents by using the buttons on the control panel to move in 1 cent steps. Pressing the button confirms your selection and then takes you back to the menu sub-item display. Original User Manual | Pedelec Impulse 2.0...
-
Page 58: The Motor
15.53 mph, irrespective of cells can discharge at temperatures of 5 °F to 140 the gear you are in. Depending on the power-assist °F. mode you are riding in, the transition between rid- Original User Manual | Pedelec Impulse 2.0... -
Page 59: Riding Your Pedelec Efficiently
Due to the greater force acting on these components, wear is more pronounced. Original User Manual | Pedelec Impulse 2.0... -
Page 60: Troubleshooting
In this case, the charging Disconnect the battery from the charger and present) is flashing red. current is too high consult your specialist cycle shop. Have the staff there check the battery and charger. Original User Manual | Pedelec Impulse 2.0... -
Page 61: Cleaning
Running water such as that from a hose pipe or even a high-pressure cleaner must not be used for cleaning. The ingress of water can destroy the motor. Therefore, ensure that neither fluids nor moisture enter the motor at any time during cleaning. Original User Manual | Pedelec Impulse 2.0... -
Page 62: Technical Data
IMPULSE LI-ION SEAT TUBE BATTERY Voltage 36 V 36 V Capacity 11 Ah 15 Ah Energy content 396 Wh 540 Wh Weight 6.28 lbs 6.50 lbs Charging time 4 hours 5 hours Cell 2.25 Ah 3.1 Ah Original User Manual | Pedelec Impulse 2.0... - Page 63 Service Booklet Contents 1 Terms and conditions of the warranty 2 Handover document 3 Service intervals 4 Bike passport 5 Change of ownership 6 Notes/other Bicycle Owner’s Manual I Service...
-
Page 64: Terms And Conditions Of The Warranty
Terms and conditions of the warranty Congratulations on purchasing a quality bicycle from your specialist cycle shop The following are considered wear parts You can be sure that your bike is up to the state of the under the statutory warranty: art of technology and meets the conditions for safe and carefree biking. -
Page 65: Handover Document
Handover Document / Service intervals 2. Handover document Please get your dealer to fill out the handover document and sign it yourself. Ask the dealer to make a copy of the document – which he then keeps. Customer Dealer Customer number: Company: Surname: Street:... -
Page 66: Service Intervals
Service intervals 3. Service intervals To ensure continued enjoyment of your bike, please adhere to the service intervals. This is also important for the following reasons: • Regular checks are worth it for the sake of your own safety. • Higher resale value, because the bike had been regularly serviced. - Page 67 Service intervals Service interval 3 Service interval 4 After no more than 620 miles or one year. After no more than 1250 miles or two years. Screws tightened Screws tightened Wheel bearings checked and adjusted Wheel bearings checked and adjusted Bottom bracket checked Bottom bracket checked Wheel checked and centred...
- Page 68 Service intervals Service interval 7 Service interval 8 After no more than 3100 miles or five years. After no more than 3750 miles or six years. Screws tightened Screws tightened Wheel bearings checked and adjusted Wheel bearings checked and adjusted Bottom bracket checked Bottom bracket checked Wheel checked and centred...
-
Page 69: Bike Passport
Service intervals I Bike passport / Change of holder Service interval 11 Service interval 12 After no more than 5600 miles or nine years. After no more than 6200 miles or ten years. Screws tightened Screws tightened Wheel bearings checked and adjusted Wheel bearings checked and adjusted Bottom bracket checked Bottom bracket checked... -
Page 70: Change Of Ownership
Change of holder 3. Owner 5. Change of holder / 2. Owner Surname: Surname: First name: First name: Street: Street: Postcode, Town/city: Postcode, Town/city: Date/signature Date/signature 4. Owner 5. Owner Surname: Surname: First name: First name: Street: Street: Postcode, Town/city: Postcode, Town/city: Date/signature Date/signature... -
Page 71: Notes/Other
Notes / others Notes Bicycle Owner’s Manual I Service... - Page 72 We hope you thoroughly enjoy using your new bike! Copyright ©2015 Derby Cycle Werke GmbH Reproduction in whole or in part is not permitted without the consent of Derby Cycle Werke GmbH. Subject to misprints, errors and modifications. Art. No.: 1973K0015026...
Need help?
Do you have a question about the IMPULSE 2.0 and is the answer not in the manual?
Questions and answers