
Related Manuals for Pfeiffer Vacuum FullRange PKR 251


Summary of Contents for Pfeiffer Vacuum FullRange PKR 251
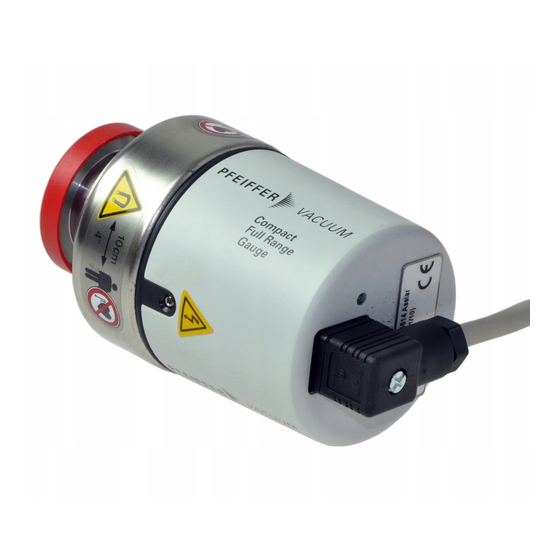
- Page 1 Operating Instructions Compact FullRange™ Gauge FPM sealed PKR 251 BG 805 155 BE / C (2008-04)
-
Page 2: Table Of Contents
3 Installation 3.1 Installation 3.1.1 Removing the Magnet Unit (Only for Gauges With CF Flanges) 3.2 Electrical Connection 3.2.1 Use With a Pfeiffer Vacuum Measurement Unit 3.2.2 Use With Another Evaluation Unit 4 Operation 4.1 Measurement Principle, Measuring Behavior 5 Maintenance 5.1 Adjusting the Gauge... -
Page 3: Product Identification
The PKR 251 Compact FullRange™ Gauge has been designed for vacuum measurement in the pressure range of 5×10 … 1000 mbar. The PKR 251 can be used with a Pfeiffer Vacuum measurement unit for Compact Gauges or with another evaluation unit. Functional Principle Over the whole measurement range, the measuring signal is output as a logarithm of the pressure. -
Page 4: Safety
1 Safety 1.1 Symbols Used DANGER Information on preventing any kind of physical injury. WARNING Information on preventing extensive equipment and environmental damage. Caution Information on correct handling or use. Disregard can lead to malfunctions or minor equipment damage. 1.2 Personnel Qualifications Skilled personnel All work described in this document may only be carried out by persons who have suitable technical training and the necessary experience or who have been... -
Page 5: Liability And Warranty
Pfeiffer Vacuum assumes no liability and the warranty becomes null and void if the 1.4 Liability and Warranty custodian or third parties • disregard the information in this document • use the product in a non-conforming manner • make any kind of changes (modifications, alterations etc.) to the product •... -
Page 6: Technical Data
5 poles plus screening Maximum cable length 75 m (0.25 mm² conductor) 100 m (0.34 mm² conductor) 300 m (1.0 mm² conductor) Pfeiffer Vacuum measurement and control units for Compact Gauges fulfill these requirements. BG 805 155 BE / C (2008-04) PKR 251... - Page 7 Operating voltage ≤3.3 kV (in the measuring chamber) Operating current ≤500 µA (in the measuring chamber) Output signal (measuring signal) ≈0 V … ≈+10.5 V Voltage range Relationship voltage-pressure logarithmic, increase 0.6 V / decade (→ Appendix A) Error signals <0.5 V (no supply) >9.5 V (Pirani measurement element defective;...
- Page 8 PT R26 000 (DN 25 ISO-KF) Materials exposed to the vacuum Flange stainless steel (1.4104) Measuring chamber stainless steel (1.4104) Feedthrough isolation ceramic (Al ), glass Internal seals FPM75 Anode Ignition aid stainless steel (1.4310/AISI 301) Pirani measuring tube Ni, Au Pirani filament ≈...
-
Page 9: Installation
3 Installation 3.1 Installation Caution Caution: vacuum component Dirt and damages impair the function of the vacuum component. When handling vacuum components, take appropriate measures to ensure cleanliness and prevent damages. The gauge can be mounted in any orientation. However, it should be mounted so that any particles present cannot penetrate into the measuring chamber (→... -
Page 10: Removing The Magnet Unit (Only For Gauges With Cf Flanges)
WARNING WARNING: electric arcing Helium may cause electric arcing with detrimental effects on the electronics of the product. Before performing any tightness tests put the product out of operation and remove the electronics unit. 3.1.1 Removing the Magnet Unit (Only for Gauges With CF Flanges) Tools required •... -
Page 11: Electrical Connection
3.2 Electrical Connection 3.2.1 Use With a If the gauge is used with a Pfeiffer Vacuum measurement Pfeiffer Vacuum unit for Compact Gauges, a Measurement Unit corresponding connection cable is required (→ 22). • Secure the connector on the gauge with the screw. - Page 12 WARNING The supply common (pin 5) and the screen (pin 6) must be connected to the supply unit with protective ground. Incorrect connection, incorrect polarity, or inadmissible supply voltages can damage the gauge. Reassemble the connector. Plug in the connector. Secure the connector on the gauge with the screw.
-
Page 13: Operation
, dry air and CO. They can be mathematically converted for other gases (→ Appendix B). If you are using a Pfeiffer Vacuum measurement unit for Compact Gauges, you can enter a calibration factor to correct the measurement value displayed (→... - Page 14 As long as the cold cathode measurement circuit has not yet ignited, the measure- ment value of the Pirani is output as measuring signal ("Pirani underrange" is displayed for pressures <5×10 mbar). The identification output (pin 1) indicates the Pirani-only mode. Caution If the gauge is activated at a pressure p <...
-
Page 15: Maintenance
5 Maintenance Gauge failures due to contamination, as well as expendable parts (filament), are not covered by the warranty. DANGER DANGER: contaminated parts Contaminated parts can be detrimental to health and enviroment. Before you begin to work, find out whether any parts are contami- nated. -
Page 16: Cleaning The Gauge / Replacing Parts
Vent with air or nitrogen to atmospheric pressure and then wait 10 minutes. Turn the nameplate clockwise until the mechanical stop is reached. Adjust the <ATM> potentiometer ..to 1×10 mbar ... to 8.6 V Turn the nameplate back to its original position (it will catch). 5.2 Cleaning the Gauge / DANGER Replacing Parts... -
Page 17: Disassembling The Gauge
5.2.1 Disassembling the Gauge Figure 2 Procedure Remove the gauge from the vacuum system (→ Fehler! Textmarke nicht definiert.). Unfasten the socket head set screw (1) on the side of the electronics unit (2) (→ Figure Fehler! Verweisquelle konnte nicht gefunden werden.). Remove the electronics unit without twisting it. -
Page 18: Cleaning The Gauge
Carefully remove the following parts in this order (without exerting stress on the Pirani element (13)): pressure piece (9), complete anode (10), FPM seal (11) incl. support ring (12), Pirani element (13) incl. FPM seal (13a). The parts can now be cleaned or replaced individually. 5.2.2 Cleaning the Gauge Procedure Cleaning the measuring chamber and the polarity insert:... -
Page 19: Reassembling The Gauge
Dry the tube (e.g. with a blow dryer <150°C). Slide a new FPM seal over the Pirani element and insert it into the corre- sponding groove. Remount the Pirani element (→ section 5.2.3). Replacing the Pirani measurement element: (If it is severely contaminated or defective) Slide a new FPM seal (13a) over the Pirani element (13) and insert it into the corresponding groove. -
Page 20: What To Do In Case Of Problems
If possible perform a leak test (leak rate <10 mbar l/s). WARNING WARNING: electric arcing Helium may cause electric arcing with detrimental effects on the electronics of the product. Before performing any tightness tests put the product out of operation and remove the electronics unit. Mount the magnet unit (4) and lock it with the screw (3). -
Page 21: Removing The Gauge From The Vacuum System
6 Removing the Gauge From the Vacuum System DANGER DANGER: contaminated parts Contaminated parts can be detrimental to health and enviroment. Before you begin to work, find out whether any parts are contami- nated. Adhere to the relevant regulations and take the necessary precautions when handling contaminated parts. -
Page 22: Returning The Product
7 Returning the Product WARNING WARNING: forwarding contaminated products Products returned to Pfeiffer Vacuum for service or repair should, if possible, be free of harmful substances (e.g. radioactive, toxic, caustic or microbiological). Otherwise, the type of contamination must be declared. -
Page 23: Spare Parts
DN 40 ISO-KF flange BN 846 470-T DN 40 CF-F flange BN 846 471-T Exchange gauge (return defective gauge to Pfeiffer Vacuum) DN 25 ISO-KF flange PT R26 000-A DN 40 ISO-KF flange PT R26 001-A DN 40 CF-F flange... -
Page 24: Disposal
10 Disposal WARNING WARNING: substances detrimental to the environment Products, operating materials etc. may have to be specially disposed For environmentally compatible disposal, please contact your nearest Pfeiffer Vacuum Service Center. BG 805 155 BE / C (2008-04) PKR 251... -
Page 25: Appendix
Appendix Measuring Signal vs. Pressure Conversion formulae 1.667×U-d ⇔ p = 10 U = c + 0.6×log [mbar] 11.33 [µbar] 8.333 [Torr] 6.875 11.46 [mTorr] 5.075 8.458 [micron] 5.075 8.458 [Pa] 9.333 [kPa] 12.33 valid in the range 5×10 where measuring signal mbar <... - Page 26 Conversion table Measuring Pressure p signal U [V] [mbar] [Torr] [Pa] < 0.5 Sensor error 0.5 ... 1.82 Underrange 1.82 5.0×10 3.8×10 5.0×10 1.0×10 7.5×10 1.0×10 1.0×10 7.5×10 1.0×10 1.0×10 7.5×10 1.0×10 1.0×10 7.5×10 1.0×10 1.0×10 7.5×10 1.0×10 1.0×10 7.5×10 1.0×10 7.5×10 7.5×10...
-
Page 27: B: Gas Type Dependence
Gas Type Dependence Indication range above Pressure indicated (gauge calibrated for air) mbar (Pirani only mode) Indication range Pressure indicated (gauge calibrated for air) ... 0.1 mbar BG 805 155 BE / C (2008-04) PKR 251... - Page 28 In the range below 10 mbar, the pressure indication is linear. For gases other Indication range below than air, the pressure can be determined by means of a simple conversion formula: 4×10 mbar = K × pressure indicated where gas type air (N , CO) These conversion factors are average values.
-
Page 29: Declaration Of Contamination
Declaration of Contamination The service, repair, and/or disposal of vacuum equipment and components will only be carried out if a correctly completed declaration has been submitted. Non-completion will result in delay. This declaration may only be completed (in block letters) and signed by authorized and qualified staff. Description of product Reason for return Type... - Page 30 Notes BG 805 155 BE / C (2008-04) PKR 251...
- Page 31 Notes BG 805 155 BE / C (2008-04) PKR 251...
- Page 32 Berliner Strasse 43 D–35614 Asslar Deutschland Tel +49 (0) 6441 802-0 Fax +49 (0) 6441 802-202 info@pfeiffer-vacuum.de Original: German BG 805 155 BD / C (2008-04) www.pfeiffer-vacuum.net bg805155be/ c...
Need help?
Do you have a question about the FullRange PKR 251 and is the answer not in the manual?
Questions and answers