
Related Manuals for Mount-It! MI-4200


Summary of Contents for Mount-It! MI-4200
- Page 1 INSTALLATION MANUAL Under-cabinet/Ceiling Mount CAUTION:DO NOT EXCEED RATED LISTED WEIGHT.SERIOUS INJURY OR PROPERTY DAMAGE MAY OCCUR! MI-4200 50x50 23" 75x75 100x100 (17.6lbs) RATED...
- Page 2 NOTE: Read the entire instruction manual before you start installation and assembly. WARNING Do not begin the installation until you have read and understood all the instructions • and warnings contained in this installation sheet. If you have any questions regarding any of the instructions or warnings, please contact your local distributor.
- Page 3 Component Checklist IMPORTANT: Ensure that you have received all parts according to the component checklist prior to installation. If any parts are missing or faulty, telephone your local distributor for a replacement. (1) ceiling mount Package (4)M4x14-A (4)M5 washer-A (4)M5x14-A (1)Wrench-C (6)concrete anchor-B (6)ST5.5x50-B...
- Page 4 3a.For Wooden Ceiling Mounting Wooden ceiling 50mm(2") 5/32") 1.Find and mark the exact location of mounting holes. 2.Drill pilot holes 3.Screw the screws into the ceiling Tighten the screws leaving a 3mm space to ceiling...
- Page 5 Align the both holes of ceiling plate to the screws in ceiling and move the ceiling plate until the both screws are seated in small area of tear-drop mounting holes. Fix the ceiling plate using four screws and then tighten all screws. WARNING •...
- Page 6 3b.For Solid Brick and Concrete Mounting Solid Brick 55mm(2.2") 5/16") 1.Find and mark the exact location of mounting holes. 2.Drill pilot holes 3.Screw the screws into the ceiling Tighten the screws leaving a 3mm space to ceiling...
- Page 7 Align the both holes of ceiling plate to the screws in ceiling and move the ceiling plate until the both screws are seated in small area of tear-drop mounting holes. Fix the ceiling plate using four screws and then tighten all screws. WARNING Installers must verify that the supporting surface will safely support the combined weight of the equipment and all attached hardware and components.
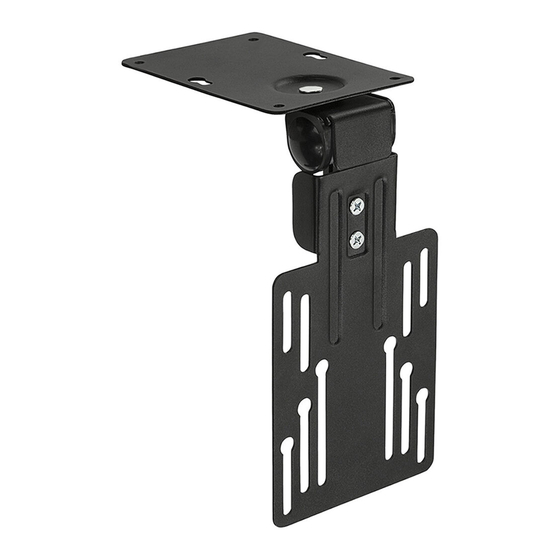
- Page 8 4.Attaching the Display to the VESA Plate 5.Adjustment 360° 0°---110° Please tighten the screw if the ceiling mount can't be stayed in the desired position during use. Adjust to the desired position. For saving the space, you can fold the display by pushing the display back until it fits in place. Maintenance •...
Need help?
Do you have a question about the MI-4200 and is the answer not in the manual?
Questions and answers