Table of Contents
Advertisement
Quick Links
IMPORTANT:
THESE INSTRUCTIONS ARE TO REMAIN
WITH THE HOMEOWNER
These instructions are supplementary to the Installation and
Operating Instructions supplied with the fireplace and should
be kept together. Refer to the Installation and Operating
Instructions for proper gas supply, safety requirements and
operating instructions.
Visit www. townandcountryfireplaces.net for the most recent version of this manual
310317-20
VERTICAL
POWER VENT KIT
TCVT.PVCV
INSTALLATION AND
OPERATING
INSTRUCTIONS
TCVT.PVCV
5056.42665-A
Advertisement
Table of Contents

Related Manuals for Town & Country Fireplaces TCVT.PVCV


Summary of Contents for Town & Country Fireplaces TCVT.PVCV
- Page 1 Refer to the Installation and Operating Instructions for proper gas supply, safety requirements and operating instructions. VERTICAL POWER VENT KIT TCVT.PVCV INSTALLATION AND OPERATING INSTRUCTIONS Visit www. townandcountryfireplaces.net for the most recent version of this manual 5056.42665-A 310317-20 TCVT.PVCV...
-
Page 2: Power Vent Installation
The vent can be installed with any combination of rise and run between the g- ures including up to 3 ft below the unit. Ensure vent pipe is properly supported. Figure 1: Power vent con gurations. 5056.42665-A 310317-20 TCVT.PVCV... -
Page 3: Minimum Clearances To Combustibles
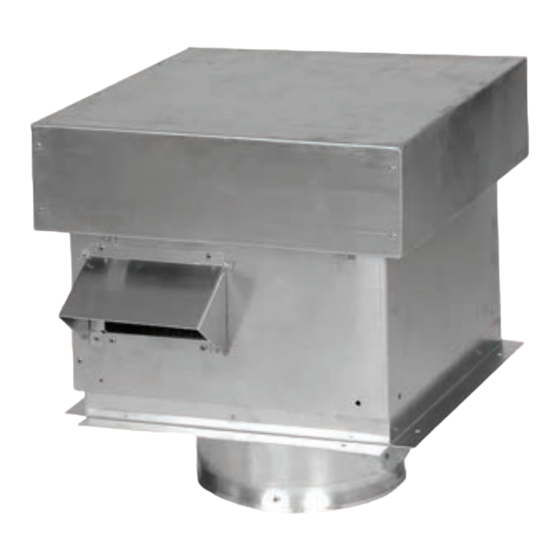
6. Seal the connection of the rst length of pipe at the terminal and any other pipe to pipe joint by both screwing and taping the outside joint using high temperature foil tape. 7. Remove the junction box cover. 8. Remove and discard the exhaust outlet. 310317-20 TCVT.PVCV 5056.42665-A... - Page 4 Secure with 3 screws and Upper pressure Must be installed seal with aluminum tape tap, marked at the unit “LOW” Figure 2: Power vent adapter. Lower pressure tap, marked “HIGH” Power vent adapter not required on models TCWS.54DST and TCWS.54STOK. 5056.42665-A 310317-20 TCVT.PVCV...
- Page 5 Junction box cover 14-2 Wire w/ Ground #8 x 1-1/2" S.S. (8 Required) Vertical Standoff TCVT-8075 Silicone all connecting faces Flashing 8082.001 18” 11” 18” 11” Site Fabricated Chase Final Installation Height: 21" Figure 3: Power vent components. 310317-20 TCVT.PVCV 5056.42665-A...
-
Page 6: Control System Connection
(Figure 7). The module acts as a switch to turn on the power vent blower. (Also see wiring diagram on Pg.14) Access panel Spade connector in black wire loop Figure 4: Access panel. Figure 5: Locating black wire spade connector. 5056.42665-A 310317-20 TCVT.PVCV... - Page 7 Orange wire from module to valve Figure 6: Locating orange wire. Supplied wires to connect Hot wire to black wire on module from blower Hot wire from 120V supply Figure 7: Control module wiring. 5056.42665-A 310317-20 TCVT.PVCV...
- Page 8 (Figure 10). Figure 10: Proper orientation of pressure switch. Figure 11: Securing pressure switch. 5056.42665-A 310317-20 TCVT.PVCV...
- Page 9 WARNING: This switch must be installed in a vertical position and will not function if installed otherwise (Figure 10). Figure 12: Pressure switch on at bracket. Pressure switch Orange wire Figure 13: Pressure switch and orange wire. 310317-20 TCVT.PVCV 5056.42665-A...
- Page 10 4. Secure the pressure switch in the control box using the screw provided (Figure 16). 5. Continue with installation and reassemble all of the parts previously removed. Figure 16: Securing the pressure switch. Figure 15: Correct orientation of pressure switch. 5056.42665-A 310317-20 TCVT.PVCV...
- Page 11 (Figure 18 and Figure 19). 2 Nuetral wire - Wires Vent Blower wire - Blue Power In wire - Black Firebox access panel Figure 17: Firebox access panel. Figure 18: Wiring to power vent at replace junction box. 5056.42665-A 310317-20 TCVT.PVCV...
- Page 12 (not shown), and the other end to the interface board (Figure 19) 7. If not already installed, install the burner using the instructions supplied with the burner kit. 8. Turn on the gas supply and check that all connections are tight and leak free. 5056.42665-A 310317-20 TCVT.PVCV...
- Page 13 Figure 21: Power vent selection switch. Important Note: When switching between NV and PV, both the electrical power supply to the fi replace must be turned off and the backup batteries removed to properly re-set the module. 310317-20 TCVT.PVCV 5056.42665-A...
- Page 14 Series C Wiring Diagram 5056.42665-A 310317-20 TCVT.PVCV...
- Page 15 Series D Wiring Diagram 310317-20 TCVT.PVCV 5056.42665-A...
-
Page 16: Replacement Parts
13 7/16” 13 7/16” 13 7/16” 13 7/16” 13 7/16” 3 3/8” 3 3/8” 3 3/8” 3 3/8” 3 3/8” 3 3/8” 3 3/8” 3 3/8” 3 3/8” 3 3/8” 3 3/8” 3 3/8” 3 3/8” 3 3/8” 5056.42665-A 310317-20 TCVT.PVCV... -
Page 17: Venting Components
Cathedral ceiling support box (blk) TM-OS Offset Support 1605500 Firestop spacer TM-SR Roof Support 1605460B Wall thimble (blk) TM-WS Adjustable Wall Support 1605430 Wall support band TM-5WT Insulated Wall Thimble TM-5TR Trim Ring, Black TM-5AS Attic Radiation Shield / Firestop 5056.42665-A 310317-20 TCVT.PVCV... - Page 18 5056.42665-A 310317-20 TCVT.PVCV...
- Page 19 310317-20 TCVT.PVCV 5056.42665-A...
- Page 20 © 2017 Copyright Paci c Energy Fireplace Products LTD Reproduction, adaptation, or translation without prior written permission is prohibited, except as allowed under the copyright laws. For Technical Support, please contact your retailer. www.townandcountry replaces.net 2975 Allenby Rd., Duncan, BC V9L 6V8 Printed in Canada...
Need help?
Do you have a question about the TCVT.PVCV and is the answer not in the manual?
Questions and answers