Town & Country Fireplaces TC30 Black Diamond Instructions For Use Manual
For tc30 series c
Hide thumbs
Also See for TC30 Black Diamond:
- Installation and operating instructions manual (48 pages) ,
- Installation manual (44 pages) ,
- Instructions manual (24 pages)
Table of Contents
Advertisement
Quick Links
IMPORTANT:
THESE INSTRUCTIONS ARE TO REMAIN
WITH THE HOMEOWNER
These instructions are supplementary to the Installation
and Operating Instructions supplied with the fi replace
and should be kept together. Refer to the Installation
and Operating Instructions for proper gas supply, safety
requirements and operating instructions.
080411-20
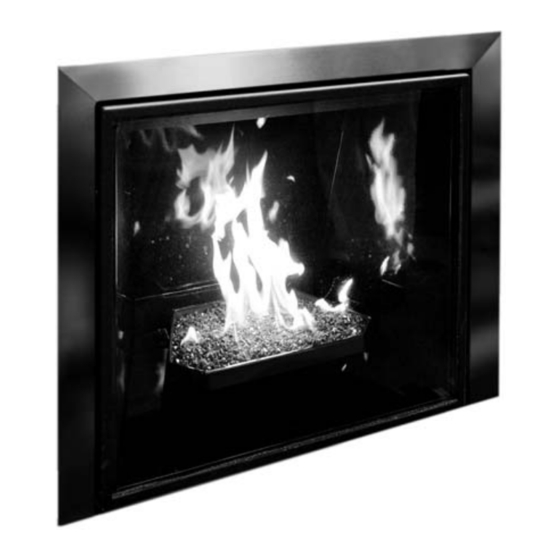
TC30
BLACK DIAMOND
BURNER KIT
INSTRUCTIONS
PART#
TC30.NG03C
For TC30 Series C
TC30.NG03C
5056.42903
Advertisement
Table of Contents

Related Manuals for Town & Country Fireplaces TC30 Black Diamond

Summary of Contents for Town & Country Fireplaces TC30 Black Diamond
- Page 1 IMPORTANT: THESE INSTRUCTIONS ARE TO REMAIN WITH THE HOMEOWNER These instructions are supplementary to the Installation and Operating Instructions supplied with the fi replace and should be kept together. Refer to the Installation and Operating Instructions for proper gas supply, safety requirements and operating instructions.
-
Page 2: Contents Of Package
Contents of Package NOTE: MUST BE USED WITH PORCELAIN PANEL SET PART# TC30.PNLPBKB MANIFOLD ASSEMBLY (including supply tube) BURNER TUBE BURNER SHIELD MEDIA SPACER, Center MEDIA SPACER, Front MEDIA SPACER, Rear HARDWARE PACKAGE 5 lbs. GLASS MEDIA BURNER TRAY PILOT SHIELD (including pilot and pilot supply tube) TC30.NGO3C 100308-20... - Page 3 Black Diamond Burner Installation A porcelain panel set must be used Fig #1 in conjunction with the installation of the burner assembly. See Installation and Operating Instructions manual for details. NOTE: Plug the 4 vacant holes in the bottom of the fi rebox with 1/2” screws, as they are not required to attach this style of burner.
- Page 4 2 SCREWS 3. Secure the electrical bulkhead plate and Fig #3 gasket to the fi rebox. (2 screws) Attach the ignition and sensor wires to the module. Red end to the connector marked by the red dot, white end to the connector marked by the white dot(Fig.
- Page 5 4. Install burner shield by tipping the shield Fig #5 into the fi rebox. Route pilot up through the opening in the burner shield. (Fig. #5) PILOT Fig #6 5. Attach the burner tray to the burner shield using two screws at the back of the tray. (Fig.
- Page 6 6. Attach pilot shield to burner tray with two Fig #7 screws. (Fig. #7) Fig #8 Front and rear media spacers are now installed. (Fig. #8 & 9) TC30.NGO3C 100308-20...
- Page 7 Fig #9 Fig #10 8. Install burner by tilting burner inlet through tray. Ensure that the orifi ce has entered the inlet tube. (Fig#10). Set the air shutter to fully open for Propane or fully closed for Natural gas. TC30.NGO3C 100308-20...
- Page 8 9. Install the center media spacer and secure Fig #11 to the tray with two 1 1/2” screws. (Fig. #11 & 12) Three holes must line up to set each screw. Fig #12 TC30.NGO3C 100308-20...
- Page 9 10. Apply just enough glass media to cover Fig #13 the burner assembly. (Fig #13 & 14) NOTE: Too much glass media over the burner will cause sooting with the use of propane gas. Fig #14 TC30.NGO3C 100308-20...
-
Page 10: Propane Conversion
Propane Conversion TC30 For use with model: MINIMUM RATE SCREW (5005.011) WARNING Series C Pour utilise avec du modèle: Date: ______________________ This conversion kit By / Par: ___________________ shall be installed by a This appliance was converted LP GAS/ to PROPANE GAS with this kit qualifi ed service agency on this date by the organiza- DU GAZ LP... - Page 11 Slide the pilot adjustment band over and Fig #17 ensure that the hole in the orifi ce band is showing. (Fig. #17 indicates NG position, Fig. #18 indicates LP position) Fig #18 Remove access panel, 10 screws, and set aside. (Fig. #23) HOLE TC30.NGO3C 100308-20...
- Page 12 8. Remove the minimum rate screw located Fig #19 in the valve. (Fig. #19) 9. Replace the minimum rate screw with the one provided in the propane conversion kit supplied with this burner. Ensure that Minimum the screw is fully installed. (Fig. #20) rate screw The minimum rate screw is sealed with an o-ring.
- Page 13 10) Pull off the aluminum cap from the top Fig #21 of the pressure regulator. (Fig. #21) 11) Press down on the center post and rotate 90°. The center post should stay down. (Fig. #22). Replace the aluminum cap. Fig #22 TC30.NGO3C 100308-20...
- Page 14 12) Fill in the date and the name of the TC30 For use with model: person who performed the conversion in the white area on the conversion Series C Pour utilise avec du modèle: label. Peel off the protective backing and apply the conversion label directly over Date: ______________________ the gas specifi cations on the rating label.
-
Page 15: Gas Pressure Check
Gas Pressure Check Note: To test the gas pressure, turn off the gas supply before removing the plug from Fig #25a the supply pressure test port or manifold pressure test port. Verify gas pressures with the fi replace lit and on the highest setting. SUPPLY PRESSURE MANIFOLD... -
Page 16: Burner Flame Adjustment
Burner Flame Adjustment The air shutter on the burner tube controls the primary combustion air to the gas burner and is preset at the factory for natural gas fuel. Some adjustment may be necessary to obtain desired fl ame and to eliminate carbon deposits. Evaluate fl ame appearance after the fi replace has reached operating temperature. -
Page 17: Replacement Parts
Replacement Parts (WHEN ORDERING, INCLUDE PART NUMBER WITH DESCRIPTION) ITEM .... DESCRIPTION ..............PART NO. #1....TC30 BLACK DIAMOND BURNER KIT ......TC30.NG03C2 #2....BURNER TUBE ..............TC36. 5011835 #3....PILOT ASSEMBLY, CONVERTIBLE ........TCRP.5005025 #4....PILOT SUPPLY TUBE ............5019.225 #5.... - Page 18 TC30.NGO3C 100308-20...
- Page 19 TC30.NGO3C 100308-20...
- Page 20 Technical support: 1-250-748-1184 Web site: www.townandcountryfi replaces.net 2975 Allenby Rd., Duncan, BC V9L 6V8 Printed in Canada...
Need help?
Do you have a question about the TC30 Black Diamond and is the answer not in the manual?
Questions and answers