
Related Manuals for ViewZ VZ-MV802


Summary of Contents for ViewZ VZ-MV802
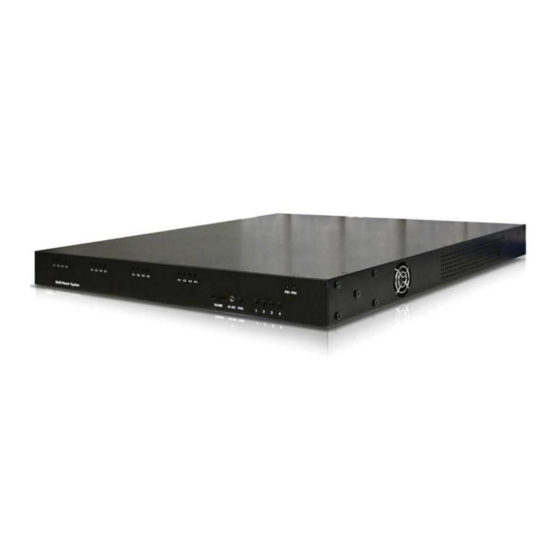
- Page 1 Driving Visual Innovation VZ-MV802 (8CH INPUTS / 2CH OUTPUTS) VZ-MV1604 (16CH INPUTS / 4CH OUTPUTS) MULTIVIEWER SYSTEM VZ COMMANDER SOFTWARE...
-
Page 2: Table Of Contents
Table of Contents --- Chapters --- • 1: Getting Started ………………………………………………………………………………………… 3 Running VZ Commander Online Mode Changing IP Address Offline Mode VZ Commander Overview • 2: System Design ………………………………………………………………………………………….. 10 Introduction Output Manager Display Overview Workspace Working with Objects • 3: Windows …………………………………………………………………………………………..……. - Page 3 VIEWZ website (www.viewzusa.com) and place it in an appropriate location on your HDD. Now you can run the VZ Commander by double clicking on the ViewZ VZ Commander icon. Note: A firewall exception may appear, if it does be sure to give the VZ Commander permission to access the network.
- Page 4 Once the VZ Commander is running, you will have to choose to run it in Online or Offline mode. If you want to configure your ViewZ VZ-MV802 series Multiviewer and see the changes being made in real time, you will want to select Online. If you don’t want to directly affect the Multiviewer because it is in use or you are waiting for it to arrive, select Offline.
- Page 5 Figure 4: Add IP Address Figure 5: Input the IP address for the multiviewer 3) Manually enter IP address in a .ini file • Create a .ini file in the same VZ Commandery as the VZ Commander’s executable called “ViewZ_Ctrl_IP_Address.ini” • Add the IP address(es) of your multiviewers in the file, one per line, in the order you would like to connect to them.
- Page 6 Figure 7: After having successfully connected to a multiviewer(s) click “OK” Now you are ready to edit your multiviewer layout! Figure 8: The VZ Commander running with a default layout, click “OK” to finish ...
- Page 7 Changing the Multiviewer’s IP Address If you wish to change your multiviewer’s IP address from the default, you must first connect to it as seen in Figure 7, then right-click on the multiviewer’s icon, and select “Change IP Address”. Figure 9: Right‐Click on the multiviewer and select Change IP Address Then edit the IP Address/Gateway to your preference. Figure 10: Edit the IP Address Field and click "OK" ...
-
Page 8: Offline Mode
Next click“Insert Module” to create a dummy multiviewer that will simulate an actual multiviewer. You will then be prompted to insert a predefined ViewZ VZ-MV802 series multiviewer. Choose the one that is identical to your multiviewer. Each multiviewer will be created with the ViewZ default IP address, 192.168.1.151, unless you change it. - Page 9 Using the VZ Commander Layout Editor Overview The VZ Commander Layout Editor contains 3 zones, 3 menus, and a tool bar. Figure 1: Zones of the Layout Editor Zones: • Workspace This represents the output display of the multiviewer. Its shape and size changes according to the output video resolution. It can be viewed in normal or "1:1" zoom mode. Zoom mode panning is performed with the arrow keys. The Workspace contains a grid. When the "snap to grid" option is set, moving or sizing objects adjust to the nearest grid square. • Display Bin A listing of all output displays of all connected multiviewers. Which display is shown in the workspace is selected by clicking here. The number of displays is set within the "Output Manager", and their names are set in the "Display Overview". • Object Bin Contains the additional stand‐alone objects that can be dragged and dropped onto the display workspace. Menus: • Top Level Menu ( In the standard Windows location. ) • Context Sensitive Menus Right‐click any object in the workspace for its context menu. • Output Level Menu Right‐click the workspace or the gray area around it, for the Output Level Menu. ...
-
Page 10: 2: System Design
System Design Introduction Understanding how to configure the ViewZ VZ-MV802 line of multiviewers begins with understanding how they function and some of the terms we use. Inputs, Outputs, Windows and Displays The VZ-MV802 multiviewer's basic unit is the video processing module (VPM). The VPM accepts four video inputs and produces one multiviewer output. Each VPM can do this independently or it can cascade its inputs to the next VPM within the unit. The inputs of a single VPM cannot be split between different outputs (i.e. A VZ-MV1604 sending 11 inputs to one screen and 5 to another is not possible.) Each VPM video input is mapped to its own window on the multiviewer Display. Note that the VZ Commander software numbers the displays from the last VPM backwards. The last VPM will always produce an output since it has no further VPM to cascade to. Figure 1: VZ-MV1604 Multiviewer Example With the cascading function of the VPM's the multiviewer can be set in a variety of configurations. The following table illustrates the configurations of a 16 input VZ-MV1604. Configurations for ViewZ's from 4 to 32 inputs can be extrapolated from this example. Some physical configurations are logically the same. (i.e. This table has 3 configurations which produce 4, 4, and 8 window displays.) Possible Multiviewer Multiviewer Multiviewer Multiviewer Configurations Output 1 Output 2 Output 3 Output 4 4 windows 4 windows 4 windows... - Page 11 Inputs 1 ‐ 4 Inputs 5 ‐ 8 Inputs 9 ‐ 12 Inputs 13 ‐ 16 8 windows 4 windows 4 windows carry over ‐‐> Inputs 1 ‐ 8 Inputs 9 ‐ 12 Inputs 13 ‐ 16 4 windows 8 windows 4 windows Inputs 1 ‐ 4 carry over ‐‐> Inputs 5 ‐ 12 Inputs 13 ‐ 16 12 windows 4 windows carry over ‐‐> carry over ‐‐>...
-
Page 12: Output Manager
OUTPUT MANAGER The Output Manager dialog can be reached by going to the Top Level Menu and selecting “System”, “Output manager”. Figure 2: VZ-MV1604 Output Manager example Here in the Output Manager you will see a listing of all the VZ-MV1604 units you're currently connected to and configuring, identified by their IP address and basic model name. Under each unit is a list of the multiviewer outputs of that unit. Ignore the first number on the lines and note the output number. This is the physical VPM output on the rear of the unit. Each output can be set to be ON or OFF. The number of multiviewer displays you'll be configuring is set by this. The number of windows listed for that output/display includes the inputs from previous VPM's whose outputs are OFF. "1,OUTPUT 4:ON (Display: 1)‐(12 Windows)‐(1024x768) 60Hz" In this example, VPM's 2 and 3 cascade into output 4 to create Display 1 with 12 windows (inputs 5 thru 16), while VPM 1 uses only its own inputs to create Display 2 with 4 windows (inputs 1 thru 4). Output Switch Click on the output line in the list to choose that output. In the Output Switch section below choose ON or OFF. As you do this the Displays and number of Windows per display in the list will update. This can also be set within a context menu, right‐click the output line in the list for this menu. Auto Set Output The Auto Set Output section is a shortcut method for setting displays on or off. To quickly setup one of the default schemes, choose an option and click the Set Button. RESOLUTION The resolution of each multiviewer display driven is also set within the Output Manager. The pull‐down list at the top labeled "Output Resolution Selection" will change ALLoutputs/displays. To set each display individually, right‐click the output line in the list to obtain a context menu and ... -
Page 13: Display Overview
choose "Set Output Resolution". The context menu also provides for turning the outputs ON and OFF. The refresh rate should also be set along with the resolution. Figure 3: VZ-MV1604 Output Manager – Resolution Cat 5 output pre‐emphasis If you monitor is showing signs of signal degradation enabling pre‐emphasis may help. First select an output from the list by clicking it to insure it is highlighted, mark the "Enable" checkbox, choose a level of pre‐emphasis, and then click the Apply button. Note: (only for cables longer than 15ft/5m, MAY DAMAGE EQUIPMENT IF MISSUSED) SDI‐OUT This setting only applies if your multiviewer is equipped with the SDI‐Out option. You'll remember from a previous section that each VPM can cascade its output to the next VPM. The last VPM's cascade signal is brought back to the control module where it is converted to SDI and provided to the SDI‐Out port. This means that the SDI‐Out is a duplicate of the final display (Display 1). No scaling is performed. The resolution of the SDI‐Out will match the resolution of Display 1 for that multiviewer. However, its format may be chosen here in the Output Manager window. • First select Display 1 in the output list. • Set the display's resolution to a resolution compatible with SD, HD (720), or HD (1080). • Now select a video format for the SDI output from the SDI‐Out selection pull‐down list. DISPLAY OVERVIEW Select Workspace in the menu and choose "Set Display Overview…" ... - Page 14 Figure 4: Display Overview Setup The Display Overview is for reference only within the VZ Commander software and does not configure the VZ-MV802 unit. It can be useful when configuring a large system with a multiple monitor display wall. The Zoom control on the left and the scroll bars will help you navigate the overview area. At first the displays may be a large distance apart and show very small. Right‐click the background area and click the "Default Arrangement" menu item. This will return all displays to the center of the area and place them side by side. Select a display to edit by clicking on it (it will highlight in grey). Choose the display ratio, and the Inch‐ size of the monitor. These both affect only this overview display as the display workspace of the main screen of VZ Commander is set by the output resolution. The display can be named by entering a short name and clicking the Next button. Setting the name is useful because it shows in the display bin section on the left of the main screen. Clicking OK saves your overview. The "Apply to all" button applies the Display Ratio and Inch (size) settings to all displays. More than one display can be selected by using the Ctrl key and clicking the mouse. When more than one display is selected the "Align Top" button aligns the selected displays. Using the Display Overview Opening the Display Overview is performed with the toolbar button. The display currently being configured will be highlighted in yellow. ...
- Page 15 Double‐clicking on a display will choose that display to configure and return you to the normal Workspace configuration screen. Figure 5: Display Overview screen ...
- Page 16 The Workspace Menus: Snap to Grid When checked, sizing and moving actions are followed by the object being sized or positioned to the nearest equal or smaller grid coordinate. GUI SIZE This menu sets the size of the VZ Commander's program window. (Do to programming constraints the window is held to set sizes rather than variable) GUI MODE, 1:1 This menu item zooms the display workspace to a one‐to‐one pixel magnification. This can also be toggled using the ZOOM toolbar button. Within the ZOOM mode, panning around the display is performed with the keyboard arrow keys. GUI MODE, Lock all objects This locks the size and position of all objects on the display workspace. Show Window Source Numbers This menu item toggles the window identification numbers on or off. These numbers are only shown within VZ Commander and are not part of the multiviewer output. Set Display Overview… This opens the Display Overview setup window. Opening the Display Overview is performed with the toolbar button. Details of this setup window were covered in a previous section. ...
-
Page 17: Working With Objects
Working with Objects Objects in the Workspace There are many different objects in the workspace, most of which are limited in number by the hardware of your multiviewer. To determine the maximum number of objects that can be used by the VZ Commander, see the Hardware section of the manual. The VZ Commander will not allow you to use more objects then your multiviewer can accommodate. Figure 1: Window Objects... - Page 18 Figure 2: Additional Stand‐alone objects Selecting Objects Selected with left‐click (object will become outlined with a green border). Select multiple objects by holding down ctrl and left‐click (object will become outlined with a border). Select multiple objects by left‐clicking and dragging a selection box around the objects. Deleting Objects Deleted or Removed by selecting them and then pressing the <Delete> key. Deleted or Removed by right‐click and selecting “Close” in the Context Sensitive Menu. Recovering Deleted Objects For windows, open the Windows Manager from the output level menu and mark the checkbox for the deleted window. For window objects, right‐click the window and select: Set Objects, Set Audio Meters, etc. For stand‐alone objects, deleted objects are returned to the objects bin. Simply drag back onto the display. Moving Objects Click and drag on the object to move it. Or select it and use the arrow keys to move it. Objects move freely about the Workspace. All objects related to a single window move with the window. Audio meters can be made "stand‐alone" to NOT move with their window. Sizing Objects ...
- Page 19 When an object is selected it will be highlighted by a green border containing adjusting handles. Clicking and dragging the adjustment handles resizes the object. Some objects have only horizontal adjusting handles. Vertical size may be controlled by the font size of the object. Some objects require size to be set through the context menus. The Logo and Analog Clock objects sizes are preset by their image size in pixels. Copy and Paste The VZ Commander’s copy and paste functions copies the properties of one object so that those properties can be pasted onto another object of the same type. To Copy either, • Right‐click the object and select “Copy” • Select the object and click on the button in the tool bar • Select the object and use Ctrl + C To Paste either, • Right‐click the object and select “Paste” • Select the object and click on the button in the tool bar • Select the object and use Ctrl + V Undo Undo will undo the placement, movement, or sizing of any object(s), up to at least the last 10 actions. Undo is not linked to Ctrl + Z. To Undo, press the button in the tool bar. ...
-
Page 20: 3: Windows
Windows WINDOW MANAGER The window manager allows you to turn the windows within each multiviewer display output ON or OFF depending on whether your system will be using that input or not. In the main screen of VZ Commander right‐click the white grid background of the display to access the display's context menu. If the display is completely filled with windows and none of the white grid shows right‐click in the gray area outside the display grid area. Choose Window Manager… in the context menu. Figure 1: Accessing the display context menu Figure 2: Window Manager The Window Manager will list all the Input‐Windows displayed to the multiviewer output display you're currently editing. Unchecking the window in the list will remove it from the display. A window can also be removed from a display without going into the window manager by selecting the window in the display workspace and pressing the Delete key of the keyboard. ... -
Page 21: Window Layout
WINDOW LAYOUT Individual Window Layout Size and position of windows can also be performed individually by first selecting a window by clicking it, and then clicking and dragging its highlighted borders. Figure 3: Window Highlighted Whole Display Layout In the same context menu as Window Manager you'll find "Layout". Layout allows you to quickly configure the size and position of all the windows within the display you're editing. The options include basic grid layouts and also Picture‐By‐Picture (PBP) ‐A and –B (horizontal and vertical). Picture by Picture uses only the first and third windows, all other are turned off and not displayed. Figure 3: Layout menu Figure 4: Quick 2x2 Layout result ... - Page 22 Global Layout The Global menu within the System menu also includes a Display Layout command. This sets the window layout of all displays within the system your configuring. Multiple Selected Windows Layout More than one object can be selected by either holding the Ctrl key and clicking on the objects, or by clicking and drawing a selection box around the objects (click and hold left mouse button). When more than one window is selected they can be moved in unison, or right‐click to get the following context menus. ...
- Page 23 Set Objects… Performs the same functions as for a single window. See the section on Window Configuration. Swap Available only when two windows are selected. Swaps the size, postion, and properties of the two windows. Align The Align menu repositions all the selected windows. Top aligns the top of each window to the top of the highest positioned window. Left repositions to the left side of the left‐most window. Right and bottom work similarly. Center repositions the windows horizontally to the center of the display. Auto Arrange Auto arrange will reposition all the selected windows horizontally (side by side), or vertically (top to bottom). The space in‐between the windows can be set with the "Object Space" pixel setting in the confirmation window. The windows will be arranged in order according to their current x,y position. ...
-
Page 25: Window Configuration
Window Object Configuration Right‐clicking a window object opens its context menu. Return Objects to Default Position Returns alarm, label, and tally objects back to their default position relative to the window border. Return Meters to Default Position This command returns audio meter objects back to their default position, relative to the window border. This command does not affect "stand‐alone" audio meters. Fullscreen This command is a shortcut to reconfiguring the entire display. It is not a single command but a sub‐routine of commands. It closes all other objects and sizes and positions the selected window to full‐screen dimensions. When completed, this menu item is toggled to the "Resume To Previous Layout" command. ... - Page 26 Set Objects… Check the boxes to enable and display these objects. Tally 1 (Left Tally LED), Tally 2 (Right Tally LED), and UMD Label (Under Monitor Display) are Enabled by default. The alarm objects will appear in the VZ Commander Workspace but may or may not show on the actual multiviewer display depending on their properties or alarm state. Set Border… This window allows the setting of the border width and color of the standard border, or the selection of a border "skin". Border skins are images used in place of the standard border object. Setting the size to "0" effectively deletes or turns the border off. For more on border skins see the section on "Additional Objects". Set Audio Meters… Adds and configures audio meter objects. See the manual section on Audio. Set Video Ratio Auto‐detect… ...
- Page 27 By default the video image fills the area within the border. If the border is a different aspect ratio then the image may appear distorted. This window provides the option of detecting and adjusting the video aspect ratio rather than filling the border area. Mark the "Enable" checkbox. Select the method of detection. Set the ratios the video will be displayed as. Note: this option does not detect all possible ratios but merely detect Standard‐Definition or High‐Definition. Set Video Frozen Configuration… Set Video Black Configuration… Set Video CC Configuration… See the manual section on "Alarms" for details. Select Input Source… This configuration depends on the model of multiviewer. Τhis menu item configures what type of video source is connected to this window's input; CVBS, COMP, VGA, DVI, SDI. The DVI selection is for both DVI and HDMI sources. The SDI selection is for DE multiviewers with optional SDI inputs. Clicking the OK button sets the selection for the currently selected window. Clicking "Apply to all" applies the selection to all windows within the display being configured. ...
- Page 28 Set Window Size… Sets the shape (aspect ratio) and size of a window. To maintain an aspect ratio check the "Lock Ratio" box. The window height will then be readjusted whenever the window is resized. Size options in this window are related to the full display size. Set Position / Size… This provides an alternative to positioning and sizing by mouse or other commands. Numbers are in Pixels and relate to the resolution of the output video. ...
- Page 29 Set Tally… By default tally input signals trigger the left and right Tally LED's, but in addition to the LED's the border and UMD label can be set to highlight also. Mark the checkboxes to add these effects to the border and UMD label. Select which tally signal will supply the trigger. See the manual section on "Labels and Tallies" for complete information. Set Window Special Name… This command allows you to name the particular window as a reminder of its function within your design layout. This only appears within VZ Commander software and does not affect the multiviewer display. ...
-
Page 30: 4: Labels And Tallies
Labels and Tallies Labels Each window includes an Under Monitor Display (UMD) label and an On Monitor Display (OMD) label. These labels can be turned on and off by using the "Set Objects…" menu command in the window's context menu. Additional labels can be dragged from the Objects Bin and placed as stand‐alone labels anywhere on the display. There are two types; a 16 character UMD‐16 label and a 32 character UMD‐32 label. Object handling provides for one of each of these for each window within the display. Selecting and right‐clicking yields the labels context menu. The two items of importance are: Set Label Properties and Set Position and Size. ... - Page 31 Position and Size • Resize the width of the Label by selecting it and then clicking and dragging on the green markers • Resize the height by changing the Font size (see below) • Resize both by right‐clicking and selecting “Set Position / Size” Set Label Properties… MODE and Font Type ETF ASCII Font: uses the built in fonts which can then be selected by the pull‐down in the Font Type area. The selections are Font 1 through Font 4. Unicode: allows you to use the PC Font button in the Font Type area to select a font from your computer. Color and Transparency Font Color and Background Color can be set from this window. The Transparency properties of the color is set by the pull‐down at the bottom (100% being solid, non‐transparent, color) Name This sets the text of this particular label. The text can also be changed other ways. Skin Marking the Enable checkbox and selecting a skin option replaces the background solid color with a "skin" image. There are six skin elements. ...
- Page 32 Other ways of changing label text: Double‐clicking any label opens the text for editing. From the main menu select System then "Set all window labels. This window will show the UMD labels of all displays. Click the label in the list, then change the text in the "Set Label" box and click the Apply button. Pressing the Enter key after changing the text will apply the change and increment to the next label in the list. Click OK to close the window. Export / Import Label text can be saved or recalled from a ".txt" file on your computer. Using the export function first will allow you to see the format required for your system. The .txt file can be edited with any ASCII text editor such as NotePad. Dynamic UMD Labels All window UMD names can be Static (fixed names entered by the user as shown above) or Dynamic. Factory default configuration uses static names. ...
- Page 33 Configuring Tally Lights The VZ-MV802 Multiviewer's display includes the UMD label and two Tally lights per video window. Here the standard window display shows the Green and Red tallies on either side of the UMD label. Tally inputs can activate five objects within ViewZ's window: the Red and Green "LED" tallies, the Border of the window, the UMD label text color, and the UMD label background color. Standard Multiviewer Window Enabling the Tally LED's. Right‐click the video window for its context menu and choose "Set Objects…" Here you can enable or disable the Tally lights along with other video window objects. Enabling Other Tally Controlled Objects: Right‐click the video window for its context menu and choose "Set Tally…" Here you can enable the Border and UMD Text and Background to react to tally signals. ...
- Page 34 Mark the Check‐boxes for the additional objects and then select which tally GPI will control it. Configuring the Tally Light Objects (LED's): Right‐click the Tally Object for its context menu. Tally Skin The default LED object is a dark colored rectangle which turns bright upon being triggered by the tally signal. Selecting a Tally Skin will show the skin image when triggered and hide it when not triggered.
- Page 35 Adjust SIZE Clicking on "Adjust Size" will give the standard LED tally object adjusting handles to resize the object in the same manner as other objects. (Tally Skin size is set by its image size). Copy / Paste Copies the attributes of the LED and Pastes them to other tally objects. This can also be done by window copy and paste. Close This will disable and hide the tally object. Use "Set Objects..." as shown above to enable the objects again. Triggering Tally Lights (see "Tally Interfacing" section) The ViewZ's Tally lights can be triggered by: • Hard‐wired GPI input via the GPI/Audio connector of each VPM. • TSL communication via RS232 • TSL communication via TCP/IP Note: Tally control by GPI input is the DEFAULT configuration. No changes by VZ Commander software are necessary. Note: TSL communication also provides for changes to UMD label text. ...
- Page 36 ViewZ “How To” Article: HT_Tally_GPI VZ-MV802 Multiviewer Tally indicator control by GPI Inputs INTRODUCTION The VZ-MV802 Multiviewer's display includes; input video, UMD labels, video alarms, and Tally lights. The VZ0-MV802's Tally lights can be triggered by RS232 TSL communication, by IP Ethernet control, and by simple GPI input. This article explains tally control by GPI. Tally control by GPI input is the DEFAULT configuration. No changes by VZ Commander software are necessary. Tally GPI is provided by a SCSI connector to the Video Processing Modules. Do not confuse with the Control Module's GPI provided through an RJ‐50 connector. STARTING THE VZ COMMANDER SOFTWARE Install the VZ Commander software by copying the "VZ Commander.exe" file and its companion data folder "eModuleSave" from the CD to a folder on your computer. Connect your computer and the VZ-MV802 to a mutual Ethernet LAN, or connect directly to the VZ‐ MV802 with a standard Ethernet cable (no cross‐over cable is necessary). Open/Run the VZ Commander program file. The program opens first to an Initialization window. Connect the VZ Commander software to the VZ-MV802 multiviewer by identifying its IP address and connecting using the Initialization window. The Retrieve option copies the configuration from the VZ‐ MV802 to your computer and opens it for configuration. These are abbreviated directions for running VZ Commander and connecting the VZ-MV802, more detailed instructions and information on troubleshooting connection problems can be found in other documents.
- Page 37 THE VZ-MV1604'S STANDARD TALLY SETUP The VZ-MV802 multiviewer's basic unit is the video processing module (VPM). The VPM accepts four video inputs and produces one multiviewer output. Each VPM can do this independently or it can cascade its inputs to the next VPM within the VZ-MV802. Figure 1: VZ-MV1604 Multiviewer Scheme. Each VPM provides a SCSI connector which includes eight Tally GPI (general purpose interface) connections. (This connector also provides discrete audio inputs.) These eight inputs allow two tally inputs per video window (though they can be re‐assigned as desired). Figure 2: Tally GPI control input. Shown here is the SCSI to DB‐9 breakout cable, and the DB‐9 to breakout terminal board. In the standard tally setup, shorting any of the eight GPI inputs to the ground pin (pin 1) triggers the tally input.
- Page 38 WINDOW TALLY INDICATORS Here the standard window display shows the Green and Red tallies on either side of the UMD label. Tally inputs can activate five objects within ViewZ's window: the Red and Green "LED" tallies, the Border of the window, the UMD label text color, and the UMD label background color. Figure 3: Standard Multiviewer Window WINDOW – SET TALLY From the main window of VZ Commander, right‐click an input window to get the context menu, and choose "Set Tally…" Figure 4: Window Context Menu ...
- Page 39 Figure 5: Set Tally window Here you see the five objects tally inputs can affect for this window. The LED tallies are standard, checking the boxes for the other objects activates them for that window. Each of the five objects can be triggered by any of that VPM modules eight GPI Inputs. In the default configuration, the GPI inputs to window objects are preset as shown in this table. ( If only the tally Red and Green LED indicators are desired it is not necessary to set anything in the "Set Tally…" menu or window. ) Table 1: Video Processor Module GPI to Window Tally Object. VPM GPI Tally Name Multiviewer Window input input Object GPI: 1 (Tally: 1) LED 1 GPI: 2 (Tally: 2) LED 2 GPI: 3 (Tally: 1) LED 1 GPI: 4 (Tally: 2) LED 2 GPI: 5 (Tally: 1) LED 1 GPI: 6 (Tally: 2) LED 2 GPI: 7 (Tally: 1) LED 1 GPI: 8 (Tally: 2) LED 2 GPI: 1 (Tally: 1) LED 1 GPI: 2...
- Page 40 ENABLING GPI CONTROL OF TALLIES Select System in the main menu and choose "Set TSL Address…" Figure 6: Disable TSL for GPI control Tallies are controlled by either TSL control (by RS232 or Ethernet) or by GPI input. As stated earlier, the default configuration allows for GPI control of tallies, no setup is necessary. However, if the configuration has been altered to "Enable TSL", then you will need to change this. To control by GPI you must disable the TSL control. Uncheck the box labeled "Enable TSL" in the above window and then click the "Apply to all" button. When the update completes, click the "OK" button. ...
-
Page 41: 5: Audio Meters
Audio Meters Multiviewer Audio Basics Audio Inputs Audio enters the ViewZ Multiviewer either by being embedded in the SDI video signal or by discrete audio input via the GPI/Audio connectors. The GPI/Audio connector provides 8 digital AES stereo audio inputs, and 16 AA analog audio channel inputs. ViewZ offers a line of accessories for interfacing audio sources to our GPI/ Audio connector. The basic building block of the ViewZ Multiviewer is the video processing module (VPM). Each VPM handles four video inputs and includes a GPI/Audio connector. Each VPM configures the display of four video windows and their associated audio meters. The audio source of each audio meter can be individually set, and can be set to any of the audio sources within that VPM. In example; window 4.4 can have audio meters responding to the audio of input 4.2, but window 3.4 can not display audio from 4.2 because 3.4 and 4.2 are different VPM's. The same holds true for the discrete audio through the GPI/Audio connector. Meters of windows 3.1 thru 3.4 can not display audio connected to the GPI/Audio connector of the VPM handling 4.1 thru 4.4. However, audio meters can be made "stand‐alone" and be placed anywhere on the display. ... - Page 42 Audio Meters Right‐click a video window for its context menu and choose "Set Audio Meters". The areas of primary interest in this configuration window are the enabling checkboxes, the source list, and the audio source section. Enable Audio Meters ...
- Page 43 To enable and display the audio meters mark the checkbox under each meter. Check the meters from left to right. Selecting a Meter The currently selected meter will have a box drawn around the meter and will be highlighted in the Source List. Clicking on either the meter or in the source list will select an individual meter for configuration. Source List This list shows the audio sources that each of the 16 meters is configured to respond to. It shows all 16 meters whether they are enabled or not. Unless you have altered the configuration the list will show the default configuration. For most VZ-MV802 multiviewers the default will be the SDI embedded audio channels for the video input of the window you are configuring. Note: The Source List indicates the current assignment of audio sources to these meters (the current configuration). It is NOT the list of available audio sources. Audio Source This section allows you to set the audio source of the selected audio meter. The source can be any audio source with the Video Processing Module (VPM) regardless of whether it is related to the video of the window you are configuring. • Select the audio meter. • Select the type of audio source (first pulldown). • Select the specific audio channel (second pulldown). • Click the SET button to set this audio meter. Or • Click the Auto Set button to set this audio meter and increment the pull‐down list to the next channel and the selected audio meter. When the Source List reflects the configuration you desire, click the OK button to close the configuration window. NOTE: The audio source allows the selection of any audio channel within the VPM. This makes it possible to have a video window with audio meters that are not related to that video source. ...
- Page 44 Explaining Audio Sources SDI Sources include three numbers; "SDI: 1", "Group: 1", and "CH: 1". The SDI number refers to the physical video input. This number will be 1, 2, 3, or 4, because there are four video inputs within a VPM. Number "1" can therefore refer to video input "1.1", "2.1", 3.1", etc, depending on which video window you're configuring. The Group and Channel (CH) numbers select the individual audio channel embedded within the SDI video signal. There are four groups with four channels in each group for a total of 16 individual channels embedded within a single SDI video signal. AES and AA sources are not de‐encoded from the video signal but come from optional discrete inputs. There are 16 individual channels for each AES and AA, but they are numbered in pairs with the addition of either Left Channel or Right Channel. ...
-
Page 45: Advanced Configuration
Advanced Configuration of Audio Meters Right‐click a video window for its context menu and choose "Set Audio Meters". Meter selection, Source List, and Audio Source were discussed in Audio Meter Basics. Monitor Audio is discussed in the next section. Alarm Range: This section relates to the Audio Status alarm object. It allows the setting of the lower and upper thresholds for triggering the alarm object. Clicking SET applies the thresholds to the currently selected audio meter only. ... - Page 46 Clicking "Apply to all" opens first a confirmation box then the following dialog box. The "Apply to all" will apply the alarm thresholds to all audio meters within each of the displays that are checked. The display you are currently configuring is notated by "(Now Select)". See the Alarms section on "Lost Audio" for more on configuring this alarm. SKIN: Skins will add a background image adjacent to the selected audio meter. The skin images are images of meter scales. It's important to recognize that these are only images and their scales are only made relevant by adjusting the size of the audio meter to correspond to the skin image. There are six audio meter skins, three left side, and three right side images. Depicted here is how the skins appear in the VZ Commander software and on the actual multiviewer output. The vertical size (height) of the meter can be adjusted by selecting the meter and then dragging the top or bottom adjusting handle. 0 VU:...
- Page 47 The audio meter displays green, yellow, and red level areas. Setting the 0 VU sets the audio level of the green to yellow transition. A setting of +4 is industry standard: ( ‐20dBFS = 0 VU = +4dBu ). Meter Paired: n/a Meter Width This sets the horizontal size, in pixels, of the audio meter object. Click its associated SET button to apply your selection. Stand Alone: By default audio meter positions are relative to the video window. Moving the video window moves the meters with it. Setting Stand Alone to ON will make the meter's positioning independent. Current Software Features (peculiarities); There are 16 meters available per video window. They are divided in two groups of 8. Each group shares the same vertical size and vertical position data. Resizing and positioning one meter affects the other 7 meters of that group. If part of a group is made stand‐alone and part is enabled and moves relative to the window, you will have difficulty positioning the stand‐alone meters. If you would like both stand‐alone and normal meters, use one group of 8 for normal and the other group of 8 as stand‐alone. Size and Position: The width is controlled as stated above, but the height and position is adjusted like any other object. Select a meter and drag and drop to a new position, or adjust the vertical size with the top or bottom adjusting handle. Each set of 8 meters share a common vertical size and position (see the explanation in Stand Alone section above). Meters may be positioned over the video image or outside the border of the video image. Size and Position of audio meters is included when copying and pasting video window properties from one window to another. Default positioning: Right‐click a video window for its context menu and choose "Return Meters to Default Position". This command does not affect stand‐alone meters. Default positioning is to evenly distribute the audio meters on the left and right sides of the video window. The meters remain in order from left to right. The left and right channel of the assigned audio source does not determine its position. ...
- Page 48 Global Setting: From the main menu, select "System", then "Global", then "Window Meter Settings…". The configuration within this window will apply to all video windows of all displays. Copy and Paste: The copy and paste of video window properties from one window to another will include the configuration of audio meters, with the exception of audio source assignments. ...
- Page 49 Individual Audio Meter Context Menu: If you select a single audio meter and right‐click you get a context menu which includes "set properties…". This will open the following window. The "0 VU" and the "Meter Width" can be applied to an individual meter from this window. The other settings are applied individually from the standard Set Audio Meters window without the necessity of opening this window. ...
- Page 50 Audio Monitoring on the Multiviewer (option) A selected audio channel pair can be monitored from the front or rear panel of the VZ-MV802 multiviewer. The front panel includes headset volume control. The rear panel has both AES digital audio via a BNC connector and line‐level analog audio via a standard 3.5mm stereo audio jack. Which audio pair is monitored is set within the configuration of the multiviewer. The audio pair can be selected by either 1) loading a different configuration by preset selection, or 2) by modifying the currently running configuration. The current configuration can be modified by using ViewZ's VZ Commander software or by ViewZ eXchange Protocol (AXP) commands. AXP commands can be sent to the multiviewer via the RS232 port or by TCP/IP. ...
-
Page 51: Audio Monitoring
AUDIO MONITORING BY PRESETS This method has the sole advantage of being able to change the audio monitor source by using the preset buttons on the front panel of the VZ-MV802. However reloading a preset configuration each time you want to monitor different audio requires time and causes the multiviewer displays to blank momentarily. It also uses configuration preset memory storage of essentially identical configurations whose only difference is which audio source is directed to the monitor out. To do this method, follow the procedures of the next section, then save the configuration as a preset file by choosing "Preset…" and "Save…" under the File menu. Assigned the preset buttons using "Front Panel Definitions…" under the System menu. Save all to the VZ-MV802 flash when exiting the VZ Commander software. AUDIO MONITORING BY VZ COMMANDER CONTROL, METHOD 1 First select the Display you desire then right click on the window associated with the input source you desire to open the windows context menu. Choose "Set Audio Meters…" In the section titled "Monitor Audio", near the bottom, choose the audio pair of this source to send to the monitor out from the pull‐down list and click the "Monitor" button. Then click OK. ... - Page 52 AUDIO MONITORING BY VZ COMMANDER CONTROL, METHOD 2 With Audio meters displayed, double‐clicking on any audio meter object will assign its stereo pair to the audio monitor out, and highlight that set of meters in red. The highlighting only occurs within VZ Commander, the multiviewer display does not reflect this selection.
-
Page 53: Video Format
Alarms Alarm and Status Display Right‐Click a video window and choose "Set Objects…". This configuration window includes enabling the five Alarm objects. Video Format Video Frozen Video Black Video WSS/AFD Format Audio Status Video Format Video Format identifies and displays the input video signal. This object is both an alarm and an information message. The "No Video" message is the alarm condition. The type of video signal is displayed in the normal (no alarm) state. Display Configuration: Right‐Click the Video Format alarm object for its context menu and choose "Set Properties…" Note: For Alarm Message Text configuration see the section below on "Signal Status Tag Settings". ... - Page 54 Font Type: This is the same as for labels. Changing the font will change the height of the object. The width is adjusted using the mouse and clicking and dragging on the green markers. Window Border Flash: Marking this checkbox will cause the video window border to flash on and off in addition to displaying the alarm object when the alarm condition occurs. Border Flash Color Change: Marking this checkbox will cause the video window border to change to the chosen color when the alarm condition occurs. (If the Window Border Flash is also checked, the border will flash from normal color to the chosen color.) Alarm to Control Board GPO: Sets whether this alarm should trigger an output on the control board's GPI/O port. Choose which bit (pin) of the port is triggered. This setting is more conveniently set from the System menu (see below). Error Reaction Time: length of time the change in status must be present before the alarm condition is triggered. Error Status Time: length of time the "No Video" alarm message is displayed. Default is "Forever". The "No Video" alarm will be displayed continuously until a video signal is detected. Normal Status Duration: length of time the video format message is displayed. Default is "30 Seconds". When a video signal is detected, the format is displayed for 30 seconds and then the message is hidden. Apply to System: applies reaction time settings to all video format alarms within the multiviewer.
-
Page 55: Video Frozen
Video Frozen This alarm detects when the video signal becomes frozen or static. Display Configuration: Right‐Click the Video Frozen alarm object for its context menu and choose "Set Properties…" Note: For Alarm Message Text configuration see the section below on "Signal Status Tag Settings". This is the same as for the Video Format alarm (see above), with the exception that there is no "Normal Status Duration". Alarm Configuration: To set the Video Frozen alarm, right‐click on the desired Window and select “Set Video Frozen Configuration”in the Context Sensitive Menu. ... -
Page 56: Video Black
Video Information: changes the type of video being inputted. Sample Line: On the right half of the screen there are four vertical slider bars that control the placement of the lines that sample the video, checking for movement. By adjusting these lines, you can place emphasis on certain parts of the screen for motion detection. For example if movement in the center of the screen is the most important, you can move all the sampling lines there. Motion Sensitivity: adjusts how sensitive the alarm is ( 5 being extremely sensitive, 255 being not sensitive) Frozen Percentage: adjusts the threshold percentage that must be frozen to activate the alarm ( 1% for low threshold, 100% for high threshold ). Draw Sample Line: causes the sampling lines to be drawn over the video of the actual multiviewer output display for comparison purposes. Default: returns the configuration settings back to default values. Apply to All: will apply the current Video Frozen Configuration to all Windows. Video Black This alarm detects when the video becomes excessively dark or black. Display Configuration: Right‐Click the Video Frozen alarm object for its context menu and choose "Set Properties…" Note: For Alarm Message Text configuration see the section below on "Signal Status Tag Settings". ... - Page 57 This is the same as for the Video Frozen alarm (see above). ...
-
Page 58: Wss Afd
Alarm Configuration: To set the Video Black alarm, right‐click on the desired Window and select “Set Video Black Configuration” in the Context Sensitive Menu. Black Level: Adjusting the“Black Level” slider will change how dark something must be to be considered black. ( 0 to 255 ) Black Percentage: Adjusting the “Black Percentage” slider changes how much of the screen must be black, as defined by the Black Level, in order to be considered a black screen. ( 0% to 100% ) Apply to All: will apply the current Video Black Configuration to all Windows. WSS/AFD Format Wide‐Screen Signaling (WSS) and Active Format Description (AFD) Video Format status display. Example: For the LE model this includes 35 different formats. ... - Page 59 Display Configuration: Right‐Click the Video Frozen alarm object for its context menu and choose "Set Properties…" Note: For Alarm Message Text configuration see the section below on "Signal Status Tag Settings". This is the same as for the Video Frozen alarm (see above). ...
- Page 61 Display Configuration: Right‐Click the Video Frozen alarm object for its context menu and choose "Set Properties…" Note: For Alarm Message Text configuration see the section below on "Signal Status Tag Settings". This is the same as for the Video Frozen alarm (see above). Alarm Configuration: To set the Audio alarm, right‐click on the desired Window and select “Set Audio Meters…” in the Context Sensitive Menu. ...
- Page 62 Alarm Range: sets the high and low volume alarm thresholds. Apply to All: will apply the configuration to all meters. Signal Status Tag Settings From the main menu, click System and choose " Signal Status Tag Settings…". This configuration window provides for setting the text and colors of all the possible alarm messages. ...
-
Page 63: Alarm Output
Alarm Output via Control Board GPI/O Alarms can trigger external equipment via the control board's GPI/O port. Model SDI example ... - Page 64 Port Setup: From the main menu, click System and choose "Control Board Settings…". GPI Mode: Input / Output: The port can act as either inputs or outputs, but not a mix of both. Choose "Output" for alarms to trigger external equipment. (See the hardware manual for GPI/O specifications). Alarm Trigger: For outputs this can be either Alarm Trigger or Free Trigger. Choose "Alarm Trigger". ...
- Page 65 Alarm to Port Output Configuration: From the main menu, click System and choose "Set all windows Alarm to GPO…". Select an alarm in the list on the left by clicking on it. Mark the checkbox on the right to connect that Alarm to the Control Board GPO, and then select which GPO output bit (pin) the alarm should trigger. Repeat for all desired alarms. ...
- Page 66 Safe Areas Markers and , Closed Captioning Safe Area Lines The VZ-MV802 Multiviewers include the feature of superimposing two Safe Area lines over the video, and the additional feature of shading the area outside the safe area in order to emphasis the safe area video image. Hint: To keep appearances correct, first set and lock the Aspect Ratio of your video Window. ...
- Page 67 Set Safe Area… on the desired Video Window and select “Set Safe Area” in the Context Sensitive Menu. Right‐click Reference Size Section: Once configured the Safe‐Area lines will remain proportional to the window whatever its size or aspect ratio. However, for design reference the dimensions of your video can be selected here. When changed, you will see the pixel sizes in the adjustment's section change. Sample By If the sampling is done by Video Source or by Window Size by using the “Sample By” drop down menu to select your preference. Video Information What video type the source is using through the Video Information drop down menu. ...
- Page 68 Window Ratio: n/a Enable Lines Section: Either or both lines can be enabled. Set Safe Area 1 Set Safe Area 2 Select either Safe Area 1 or Safe Area 2 to customize by clicking on the radio button next to their name. Draw the safe area border lines on the multiviewer output by checking the “Enable Line” box. Customize the Safe Area color by clicking the “Line Color” button. Safe Area Adjustments Section: First select Safe Area 1 or 2 in the Enable Lines Section. Configuration in this section pertains to which Safe Area is currently selected in the Enable Lines section. Percentage Quick adjust the safe areas to a percentage of the whole screen by using the “Percentage” slider, the ratio of the Safe Area can be set using the “Ratio Fix” buttons. Percentage adjustments center the area both vertically and horizontally. Ratio Fix Sets left and right lines to the aspect ratio based on the positions of the top and bottom lines. Left and right lines are centered horizontally. (Top and bottom lines remain unchanged.) Line Adjustments (Left, Right, Top, Bottom) Freely adjust the Safe Area boxes by dragging on the arrows along the outside of the preview screen to create any rectangular Safe Area Apply Button Save the Safe Areas by clicking the “Apply” button to apply the settings and then return to this screen or by clicking the “OK” button to save the settings and exit the screen. Video Shading Control: This control applies to the area outside the Safe Area 1 lines. Reduce Y/C Make the area outside of the safe zones more or less opaque, adjust the “Reduce Y/C” bar (0% is completely transparent, 100% is completely opaque). Apply / OK : Save the Safe Areas by clicking the “Apply” button to apply the settings and then return to this screen or by clicking the “OK” button to save the settings and exit the screen. ...
- Page 69 Closed Captioning (CC) To set Closed Captioning properties, right‐click on the desired Window and select “Set Video CC Configuration” in the Context Sensitive Menu. •Enable CC by checking the “ON” box •Choose either 708 or 608 type CC 21 Line can be selected when Type 608 is chosen. •Change the Service Number •Change the CC offset ( Vertical positioning of the CC text as a percentage of the window from the top. ) ...
-
Page 70: 8: Additional Objects
Additional Objects Analog and Digital Clocks Each Video Processing Module (VPM) of the multiviewer includes a limited number of additional objects including one Analog Clock and one Digital Clock. Enabling / Disabling To enable the clocks, drag them from the object bin onto the workspace. To remove the clock, select it and press the delete key, or right‐click for a context menu and choose close. Size / Position The size of the analog clock is fixed by the clock‐face image (its "skin"). To resize the analog clock the skin must be customized. See the section on Analog Clock Skins. The size of the digital clock is set in the same way as other label objects, where the width is sized by mouse but the height is determined by the font size. Positioning is the same as other objects. ... - Page 71 Set Properties… Right‐click a clock object and choose Set Properties from the clock's context menu. Preview This area displays a preview of the digital clock. Not applicable to Analog Clocks. Option This section provides options for the digital clock. Mark the checkboxes as desired to enable the options. Not applicable to Analog Clocks. Name This text will be shown at the beginning of the digital clock's complete text. To place it above or below a digital clock use an independent label object. Not applicable to Analog Clocks. Font Color / Background Color Click the set buttons to open a color dialog window for selecting colors. Not applicable to Analog Clocks. Font Type Select from the four built in fonts to vary the size of the digital clock. Not applicable to Analog Clocks. Mode ...
- Page 72 Select whether the object displays the time of day or acts as a count‐down or count‐up timer. Not applicable to Analog Clocks. Time Sync. By This selects the source for synchronizing the clock to the correct time. None: this option is set when the clock mode is set to "Counter". Internal: this option utilizes the multiviewer's internal CPU clock for reference. LTC: this option utilizes an externally provided Timecode generator connected via the "LTC" BNC connector on the rear panel of the multiviewer. NTP: this options synchronizes the clock to a Network Time Protocol. Change NTP Server IP This window configures the TCP/IP parameters for the NTP server of your choice. IP addresses can be provided by your I.T. department or can be found by searching the internet. Internet NTP servers are provided by both private companies and government agencies. Within the United States the National Institute of Standards and Technology (NIST) maintains a number of NTP servers. (www.NIST.gov) The port number should be set to 123. Note: The Subnet Mask and Gateway are not part of setting the NTP, but are part of setting the multiviewer's network interface. See the section on "Changing IP Address" in the Getting Started chapter. Sync. with NTP Server Manually executes a synchronization of the clock with the configured NTP server. This is useful for testing the TCP/IP connection to the NTP server. To observe the correction by NTP synchronization, first go to Set Control and adjust the clock to an incorrect time. Note: The clock will synchronize with the NTP server on a periodic schedule. See "NTP Sync Schedule" section below. Time Zone and Daylight Saving Use this pull‐down to select your appropriate time zone. Mark the "Daylight Saving" checkbox to adjust the time by one hour. The adjustment for Daylight Saving must be changed manually upon the day of the year it changes. This is not automatic due to the many differences in laws and customs. Note: selecting a time zone alters the number in the Time Offset. Time Offset ...
- Page 73 Selecting a time zone will automatically set this number. You can alter this number to adjust your clock to a non‐ standard time. I.E. you can have the clock be 5 seconds ahead of time. Set Control… (analog clocks) Right‐click a clock object and choose Set Control from the clock's context menu. Hour‐Hand Set Minute‐Hand Set Second‐Hand Set Color: opens a color dialog box for choosing the color of the clock hand object. Length: sets the length of the clock hand object. Values range from 0 to 999 and are relative to the distance from the center to the edge of the clock face. (i.e. 500 would be 50% of the distance from center to edge). Skin This selects one of three clock face background images. See the section on Analog Clock Skins. Adjust Time To adjust the clock time manually enter the time in Hours, Minutes, and Seconds, and then click the SET button. Use the "Sync. PC GMT Time" button to set the clock to the same time as your computer's operating system clock.
- Page 74 Set Control… (digital clocks) Right‐click a clock object and choose Set Control from the clock's context menu. Adjust Day To adjust the clock date manually enter the date by Year, Month, and Day, and then click the Apply button. Adjust Time To adjust the clock time manually enter the time in Hours, Minutes, and Seconds, and then click the Apply button. Use the "Sync. PC GMT Time" button to set the clock to the same time as your computer's operating system clock. Count Control See the separate section on Timers.
- Page 75 NTP Sync Schedule From the top level menu click System and choose "Control Board Settings…" Here you will find a section for "NTP Sync". This sets the amount of time between consecutive NTP synchronizations. The three pull‐downs represent "Hours", "Minutes", and "Seconds" (greyed out, not applicable). ...
-
Page 76: Clocks Timers
Clock Timers Digital Clock objects can be converted into count‐up or count‐down timers. Set Properties… Right‐click a clock object and choose Set Properties from the clock's context menu. Mode Select whether the object displays the time of day or acts as a count‐down or count‐up timer. Not applicable to Analog Clocks. Time Sync. By Automatically set to "None" when the clock mode is set to "Counter". ... - Page 77 Set Control… Right‐click a clock object and choose Set Control from the clock's context menu. Count Control Section Count Down / Count UP Choose whether the timer clock will count down to zero, or count up. Timer Settings and SET button This will set the current value of the timer in Hours, Minutes, and Seconds. After adjusting the pull‐down values, click the SET button. The Timer object on the multiviewer display will show the changes immediately. START / STOP Starts or Stops the currently selected clock timer.
- Page 78 Set System GPI This button opens the following window where you can set the timer to be controlled by discrete GPI inputs to the multiviewer. The GPI/Audio connector of each Video Processing Module (VPM) provides 8 GPI inputs which are normally used for the Tally‐1 and Tally‐2 control of the 4 associated video windows. The Tally‐2 inputs can instead be used to control the digital clock timer of that VPM. Bits 0, 2, 4, and 6 are reserved for tallies. Because the bits start at 0, the 1st GPI input corresponds to bit 0, the 2nd GPI bit 1, and so on. The VPM is shown in the upper left corner. The GPI inputs can be changed as shown above to "Count UP", "Count Down", "Pause", and "Load next preset time". ...
- Page 79 The GPI input to "Load next preset time" will set the timer to the Counter Presets set on the right side of this window. Each time the GPI is triggered the timer is set to the next preset, progressing continuously through the list of presets. If you intend to use only one preset time you must set all presets to that same time. Automatic Mode Setup This button opens the following windows where the timer can be configured to set itself and start at pre‐determined times of the day. First confirm the time zone the timer should be referenced to. Count Direction Select either Up or Down. Duration Sets the time to count down from, or the time that count up ends. (Count down direction counts to zero and stops. Count up direction counts from zero to the duration time and stops.) Target Times The time of day at which to execute. Mark the checkbox to enable, then set the time of day in Hour, Minute, and Seconds. Up to four execution times can be configured.
- Page 80 Custom Skins for Multiviewer Analog Clocks What is a skin? The analog clock is composed of 4 separate objects; the three hands of the clock, and the clock face. The clock face is merely a background image that the moving hands are displayed over. This background image is the "Skin". How many clock skins are available? Multiviewers, and the VZ Commander software that configure them, store and work with three clock skins. How do you choose a clock skin? They are chosen in the Set Control options of the clock object and are referred to as: Type 1, Type 2, and Type 3. Within VZ Commander drag the analog clock icon from the elements box on the left onto your display area. This will place the clock on your display. Now right‐click the clock and choose 'Set Control' in the context menu. Select from the three Types in the skin pull down and click OK What type of file is the clock skin image? VZ Commander works with a ".OMP" file type. VZ Commander software references the three skin Type ...
- Page 81 How do you customize a skin? Customizing a clock skin involves replacing the image of one of the three built‐in skin Types with your own image, and then selecting that Type within the clock's options within VZ Commander. Within VZ Commander choose "Theme Elements Manager…"in the System menu. Scroll the list and choose one of the "Analog Clock Skin" elements in the list. Click the 'Load File' button and select your OMP image file of your custom clock. But what's an OMP file and how do I make my image into one? No problem. It's not necessary to find an OMP editor, or to edit an image within the OMP format. We can supply a program which will convert any standard Windows Bitmap file (.bmp) into our OMP format. e_Picture2OMP_Converter.exe Start the program. Click the 'Converter' button, choose your bitmap file and the program will convert it. When it's finished it will display the result. Click Quit. The OMP file will be in the same VZ Commandery as your bitmap file. What are the bitmap image requirements? There is a file size limit that VZ Commander can load into the skin type (3 mb). The file size varies ...
- Page 82 How do I save my work? When you Load your OMD file into VZ Commander's Theme Elements Manager, VZ Commander replaces one of its three clock skin files within its eModuleSave folder. To insure your new skin is copied into the Multiviewer, check the "Save Theme elements to Flash" checkbox upon exiting VZ Commander. ...
- Page 83 Logo Objects (custom images) Each Video Processing Module (VPM) of the multiviewer provides for one Logo object. Enabling / Disabling To enable and import a custom image drag and drop the“Logo” icon from the Object Bin onto the Workspace and a dialog will appear to help you locate the image. The VZ Commander will accept either .omp files or .bmp. Select your file and click “Open”. The VZ Commander will now import your image. The VZ Commander will not be able to import large images. To remove the Logo, select it and right‐click for a context menu and choose close. Selecting an Image File Enabling a Logo object immediately brings up the File‐Open window. The "file type" can be changed from (*.omp) to (*.bmp) in order to select a standard MS‐Windows BMP image file. Shown in the red rectangle below. If you select and open a BMP image file, the file will then be converted to the LOGO.omp file. The following two windows will be shown. ...
- Page 84 Size / Position The size of the Logo is fixed by the object's image file. To resize the Logo the image must be altered and then reloaded. Positioning is the same as other objects. Hint: use a video window to get an idea of the pixel size your image will need to be. Resize a video window to the size you would like your logo to be (ignore the UMD and tallies, use the video border as reference). Then right‐ click and choose "size and position" to see the width and height in pixels. Use any image editor to resize you BMP logo image to that pixel size, and then enable and load the logo within VZ Commander. Saving The logo.omp image file will automatically be saved within your configuration VZ Commander on your computer. To insure your new logo is copied into the Multiviewer, check the "Save Theme elements to Flash" checkbox upon exiting VZ Commander. ...
- Page 85 Temperature Alarm object This object monitors the internal temperature of the ViewZ VZ-MV802 Multiviewer, and appears on the multiviewer display when alarm limits are exceeded. Each multiviewer output / display can have one Temperature Alarm object. Enabling / Disabling To enable the temperature alarm object drag and drop the “Temperature” icon from the Object Bin onto the Workspace. To remove the object, select it and press the delete key or right‐click for a context menu and choose close. Size / Position The size of the Temperature Alarm object is set in the same way as other label objects, where the width is sized by mouse but the height is determined by the font size. Positioning is the same as other objects.
- Page 86 Preview Visual preview of the font selection. Font Type This allows selecting a font from the four built‐in fonts. This determines the vertical size of the object. Readjust the horizontal size after setting the font to insure the entire alarm text will be displayed when the alarm is triggered. Alarm High Set • High: Enter the temperature at which the alarm will trigger and show the Temperature Alarm object on the multiviewer display. Temperatures are entered in Celsius. • Text Color / Background Color: Click the color box to open a color selection window. • Name: Enter the text message to display when the alarm is triggered. (16 character limit) Alarm Low Set • Low: Enter the temperature at which the alarm will trigger and show the Temperature Alarm object on the multiviewer display. Temperatures are entered in Celsius. • Text Color / Background Color: Click the color box to open a color selection window. • Name: Enter the text message to display when the alarm is triggered. (16 character limit)
- Page 87 Saving Configurations Saving and Loading Configurations The configuration of your multiviewer displays can be saved as "Preset" files. These files are saved both on your computer and internally to the multiviewer. Presets can be recalled (loaded) by the multiviewer without using the VZ Commander software either by using the front panel buttons, by GPI/O, or by sending the unit an ASCII command. VZ Commander can both save and load presets so that you can modify them. The Current Configuration: In addition, the current configuration of the multiviewer can be saved internally so that if the unit is rebooted (power cycled) its configuration is restored. This internal file is known as the "lastlayout" preset. Whenever another stored preset file is loaded on the multiviewer the "lastlayout" is over‐written with this configuration. Note: The "lastlayout" file is a temporary file. (It cannot be loaded like a Preset file.) Each time a Preset is loaded, it is over‐written. If you want your edited changes to be permanently saved, save the configuration as a named Preset file also. Preset Files: Preset configurations can be stored in two ways, either as an individual display's configuration, or as a global configuration. Global presets load and configure all the displays of all the multiviewers you're currently editing. Global Presets receive a file suffix of ".all", individual Display Presets receive a file suffix which notates its display number ( ".pt1" for display 1, ".pt2" for display 2 ). When starting the VZ Commander Software . . . . . . please note the Retrieve Options. Checking the "ON" option will retrieve the current configuration of the multiviewer onto your computer for editing. Checking the "Preset" option will retrieve all the saved Preset files on the multiviewer and copy them to your computer for available editing. If you leave the "ON" option un‐checked the last configuration in edit on the computer will be loaded into the multiviewer and will replace the multiviewer's current configuration. ...
- Page 88 When exiting the VZ Commander Software . . . . . . please note the Save Checkboxes. When running the VZ Commander Software "Online" you are actively changing the current configuration of the multiviewer and your changes are reflected in real‐time on its outputs. However, unless you save these changes to the multiviewer's flash memory they will be lost when the unit is rebooted. Checking the "Save configurations to flash" stores the current configuration into the "lastlayout" file. Checking the "Save them elements to flash" stores any changes you've made to skins, and other custom elements. The "File" Menu: ...
- Page 89 File / Preset / Load… You can load a preset for modification by selecting from the Top Level Menu, “File”, “Preset”, “Load”. A dialog will then appear and allow you to select the preset you want to load. After selecting the file, click the“Load” button. To load a preset for display 1, you must be have selected display 1 within VZ Commander. The Load command will only load those presets pertaining to the display you're currently editing. Load Select a file from the list and click the Load button. Delete Any Presets you no longer want can be deleted from this dialog window. Select the preset you want to delete as if you were going to load it, but instead press the “Delete” button. Delete All Files This will delete the entire list of presets. Quit Use the Quit button to exit without loading a preset.
- Page 90 File / Preset / Save… You can save your current preset to your computer’s HDD if you’re offline, or to the module and the HDD if you are online, by selecting from the Top Level Menu, “File”, “Preset”, “Save”. A dialog will then appear that will allow you to choose the name of the file. Click the “Save” button to save it. Save Select a file from the list to use that name and over‐write the file, or type a new file name into the text‐ box below the list. Then click the Save button. The file extension is automatically provided. Do not enter it in the text‐box if typing a new name. All other buttons are the same as the Load dialog. File / Preset / Restore Presets to Modules … This command will erase all the preset files stored on the multiviewer and will replace them with the presets that are stored on your computer. This should only be necessary in special circumstances. File / Global Preset / Load… The Global Preset Load and Save dialog windows function in the same manner as the individual presets. The "All Display Files" listing is shown in addition to the file list to show the organization of the files. The pull‐ down below it aids in sorting and filtering your file list for easier reference. Since they deal with all displays, it is not necessary to be editing any particular display to load or save these presets. ...
- Page 91 Load Select a file from the list and click the Load button. Delete File Any Presets you no longer want can be deleted from this dialog window. Select the preset you want to delete as if you were going to load it, but instead press the “Delete” button. Delete All Presets This will delete the entire list of presets. Cancel Use the Cancel button to exit without loading a preset. File / Global Preset / Save… ...
- Page 92 Save Select a file from the list to use that name and over‐write the file, or type a new file name into the text‐ box below the list. Then click the Save button. The file extension is automatically provided. Do not enter it in the text‐box if typing a new name. All other buttons are the same as the Load dialog. File / Module Your configuration and themes can be flashed onto the multiviewer so that whenever the multiviewer restarts, it will automatically load the flashed setup. These commands perform the same functions as the checkboxes that occur during exiting the VZ Commander software. File / Module / Save Configuration to Flash … This allows you to save your current configuration to flash by selecting from the Top Level Menu, “File”, “Module”, “Save configurations to flash”. This will only work if the VZ Commander is in online mode. File / Module / Save Theme Elements to Flash … This allows you to save your current themes, such as custom fonts and skins you may have imported, to flash by selecting from the Top Level Menu, “File”, “Module”, “Save themes to flash”. This will only work if the VZ Commander is in online mode. You also must have already loaded the themes onto the multiviewer. ...
- Page 93 Recalling Presets Presets can be recalled (loaded) by the multiviewer without using the VZ Commander software. They can be recalled by: • The front panel buttons • External hardware connected via the Control Module GPI/O • Sending the unit an ASCII command via RS232 or TCP/IP Front Panel Preset Recall Front Panel Configuration To set the Front Panel presets, using the Top Level Menu, select “System”, then “Front Panel Definition”. There you can set which saved preset should be set to which preset recall. Select which Multiviewer unit you want to configure from the top pull‐ down. GPI (list) This list shows the 30 preset button positions. File List This shows the Preset files that are saved either on the unit or on the computer. Procedure: • Select a position in the GPI list • Select a preset in the File List (the name appears in the textbox) • Click the SET button • Click OK to save and exit the window.
- Page 94 Front Panel Operation Procedure: • Press the "Paging Mode" button twice. ‐The "Signal Presence Status" LED's will all go off. ‐ One of the first eight "Signal Presence Status" LED's will blink green indicating the Page number. • Press the "Paging Mode" button to cycle through the eight pages to the desired page. • Press the desired "Preset Recall Button". ( numbered 1 – 4 ) ‐The Multiviewer will load the Preset as configured above. • After 30 seconds of button inactivity the front panel will return to normal mode. Page as indicated by Preset Recall Preset Recall Preset Recall Preset Recall blinking green LED Button Button Button Button 1 2 3 4 Page 1 Preset ‐ 1 Preset ‐ 2 Preset ‐ 3 Preset ‐ 4 Page 2 Preset ‐ 5 Preset ‐ 6 Preset ‐ 7 Preset ‐ 8 Page 3 Preset ‐ 9 Preset ‐ 10 ...
- Page 95 Control Module GPI/O Preset Recall Control Module Configuration To configure the GPI/O; using the Top Level Menu, select “System”, then “Control Board Settings…”. Procedure: • Set the GPI Mode to "Input" and "Load Preset" as shown. • Select a GPI input pin in the "GPI to load file" list. • Select a preset in the File List. (the name appears in the textbox) • Click the SET button. • Repeat for all the desired GPI inputs. • Click OK to save and exit the window. Hardware Setup GPI control of the VZ-MV802 Multiviewer is performed through the RJ50 GPI connector of the Control Module circuit board. Connect to the GPI by using the RJ‐50 to DB9 conversion cable included in the VZ-MV802 accessories. Note: The RJ‐50 has a 10 wire connector. Do not confuse with the RJ‐45 to DB9 cable used for the RS232 port. ...
- Page 96 VZ-MV802 Multiviewer accessories also include DB9 Breakout interfaces. Momentarily shorting any of the eight GPI pins to the Ground pin triggers the Control Board GPI event. ASCII Command Preset Recall The ViewZ eXchange Protocol (OXP) command syntax for loading presets is: Load [FILE_NAME] Parameters Values Description [file_name] The preset file name. *The file name must be bracketed with “| |”. Examples: Load |MyFirstPreset.pt1| Loads the preset file named "MyFirstPreset.pt1". The enclosing brackets are the "vertical bar" character. For more information on ASCII control of the VZ-MV802 Multiviewer see the appendix on ASCII Control.
Need help?
Do you have a question about the VZ-MV802 and is the answer not in the manual?
Questions and answers