Auriol AFW 2 A1 Operating Instructions Manual
Radio-controlled weather station
Hide thumbs
Also See for AFW 2 A1:
- Quick start manual (4 pages) ,
- Operating instructions manual (253 pages) ,
- Operating instructions manual (111 pages)

Subscribe to Our Youtube Channel
Related Manuals for Auriol AFW 2 A1


Summary of Contents for Auriol AFW 2 A1
- Page 1 RADIO-CONTROLLED WEATHER STATION AFW 2 A1 RADIO-CONTROLLED WEATHER STATION Operating instructions FUNK-WETTERSTATION Bedienungsanleitung IAN 311588...
- Page 2 Before reading, unfold both pages containing illustrations and familiarise yourself with all functions of the device. Klappen Sie vor dem Lesen die beiden Seiten mit den Abbildungen aus und machen Sie sich anschließend mit allen Funktionen des Gerätes vertraut. GB / IE / NI Operating instructions Page DE / AT / CH...
- Page 4 – −...
-
Page 5: Table Of Contents
Battery display . . . . . . . . . . . . . . . . . . . . . . . . . . . . . . . . . . . . . 22 GB │ IE │ NI │ 1 ■ AFW 2 A1... - Page 6 Importer . . . . . . . . . . . . . . . . . . . . . . . . . . . . . . . . . . . . . . . . . . 34 │ GB │ IE │ NI ■ 2 AFW 2 A1...
-
Page 7: Introduction
. The risk shall be borne solely by the user . GB │ IE │ NI │ 3 ■ AFW 2 A1... -
Page 8: Warning Notices
Follow the instructions in this warning notice to prevent material damage . NOTE ► A note provides additional information that makes hand- ling the device easier for you . │ GB │ IE │ NI ■ 4 AFW 2 A1... -
Page 9: Safety
. Do not allow children to use the device as a toy . Cleaning and user maintenance tasks must not be carried out by children unless they are supervised . GB │ IE │ NI │ 5 ■ AFW 2 A1... - Page 10 The mains power socket that is used must ■ be easily accessible at all times so that the mains adapter can be quickly removed from the mains power socket in the event of an emergency . │ GB │ IE │ NI ■ 6 AFW 2 A1...
-
Page 11: Safety Information For Batteries
If a battery has been swallowed, seek ► medical assistance immediately . Batteries must never be short-circuited, ► taken apart, deformed or thrown into a fire . Never try to charge non-rechargeable ► batteries . GB │ IE │ NI │ 7 ■ AFW 2 A1... - Page 12 . Remove the batteries if you do not intend ► to use the device for a long time . Always remove discharged batteries from ► the device immediately . │ GB │ IE │ NI ■ 8 AFW 2 A1...
-
Page 13: Package Contents
The packaging materials have been selected for their environmental friendliness and ease of disposal and are therefore recyclable . Dispose of packaging materials that are no longer needed in accordance with applicable local regulations . GB │ IE │ NI │ 9 ■ AFW 2 A1... -
Page 14: Description Of Components
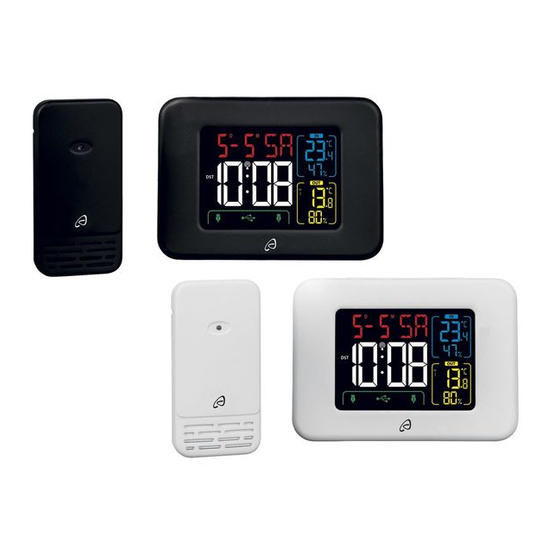
9 SNOOZE/LIGHT button 0 MODE button q NAP button w Battery compartment e Battery compartment cover r Connector socket for mains adapter t USB socket (Type A) z Mains adapter │ GB │ IE │ NI ■ 10 AFW 2 A1... -
Page 15: Use
Fit the outdoor sensor at a maximum distance of 100 m from the weather station . Ensure that there are no disruptive obstacles between the outdoor sensor and the weather station . Otherwise, transmission can be disrupted . GB │ IE │ NI │ 11 ■ AFW 2 A1... -
Page 16: Operating The Outdoor Sensor
. ♦ Insert two type AAA batteries into the battery compartment w as shown . ♦ Close the battery compartment w again . │ GB │ IE │ NI ■ 12 AFW 2 A1... - Page 17 MSF signal is too weak and the time cannot be synchronised . Try to find a set-up location in which the reception symbol flashes completely ( ) on the display . GB │ IE │ NI │ 13 ■ AFW 2 A1...
- Page 18 (e .g . other electronic devices) . If necessary, you should change the location of the weather station (e .g . put it by a window) if reception problems continue . │ GB │ IE │ NI ■ 14 AFW 2 A1...
-
Page 19: Displays In Basic Mode
12 noon and 11 .59 at night . During the sum- mer period, (daylight saving time) is displayed . This display is only shown if the MSF signal is being received . GB │ IE │ NI │ 15 ■ AFW 2 A1... - Page 20 The USB connection panel If you charge mobile devices using the USB connection t, the battery symbol will flash next to the appropriate USB connection symbol / . │ GB │ IE │ NI ■ 16 AFW 2 A1...
-
Page 21: Handling And Use
Press the – /CH button 6 or the +/MEM button 7 to set ♦ the required value . Press the MODE button 0 to confirm your entry . ♦ The minute display flashes on the time panel 5 . GB │ IE │ NI │ 17 ■ AFW 2 A1... - Page 22 Press the – /CH button 6 or the +/MEM button 7 to set ♦ the required value . Press the MODE button 0 to confirm your entry . ♦ The display will now change back to basic mode . │ GB │ IE │ NI ■ 18 AFW 2 A1...
-
Page 23: Setting The Alarm Time And Alarm Day
5 to indicate that the alarm function is active . In addition, the display for the alarm day ( ) flashes on the date panel 1 . GB │ IE │ NI │ 19 ■ AFW 2 A1... -
Page 24: Activate/Deactivate Alarm Function
SNOOZE/LIGHT button 9 to switch the alarm signal off . You do not have to reactivate the alarm function . The alarm signal will automatically sound again at the set time . │ GB │ IE │ NI ■ 20 AFW 2 A1... -
Page 25: Snooze Function
In basic mode, press the +/MEM button 7 once . symbol is shown next to the humidity display on both temperature panels, and the highest measured value for indoors and outdoors is displayed . GB │ IE │ NI │ 21 ■ AFW 2 A1... -
Page 26: Background Lighting
3 the batteries in the outdoor sensor should be replaced as soon as possible (see also section Operating the outdoor sensor) . │ GB │ IE │ NI ■ 22 AFW 2 A1... -
Page 27: Changing The Radio Channel
Press the – /CH button 6 repeatedly to switch between the ♦ displays CH1 (only display channel 1), CH2 (only display channel 2), CH3 (only display channel 3) and (display all channels alternately in a loop) . GB │ IE │ NI │ 23 ■ AFW 2 A1... -
Page 28: Charging Usb Devices
The battery symbol flashes on the USB connection panel 4 and indicates that your USB device is being charged . ♦ Disconnect your USB device from the USB socket once it has completely charged . │ GB │ IE │ NI ■ 24 AFW 2 A1... -
Page 29: Troubleshooting
. ■ The batteries in the weather station or the outdoor sensor are dead . Replace the batteries . GB │ IE │ NI │ 25 ■ AFW 2 A1... -
Page 30: Cleaning
If you do not intend to use the product for an extended period of time, disconnect it from the power supply or remove the batteries and store it in a clean, dry place without exposure to direct sunlight . │ GB │ IE │ NI ■ 26 AFW 2 A1... -
Page 31: Disposal
1–7: plastics, 20–22: paper and card- board, 80–98: composites Your local community or municipal authorities can provide information on how to dispose of the worn- out product . GB │ IE │ NI │ 27 ■ AFW 2 A1... -
Page 32: Appendix
2 .1 A (total)* * If you are using both USB sockets t simultaneously, the total power consumption of the connected USB devices may not exceed 2 .1 A! │ GB │ IE │ NI ■ 28 AFW 2 A1... - Page 33 Polarity (positive inside, negative outside) Protection class II / (double insulation) Protection type IP20 Efficiency class Switched-mode power supply Short-circuit proof safety transformer Nominal ambient 40 °C temperature (ta) GB │ IE │ NI │ 29 ■ AFW 2 A1...
-
Page 34: Simplified Eu Declaration Of Conformity
Kompernaß Handels GmbH hereby declares that the radio system radio-controlled weather station AFW 2 A1 complies with the essential require- ments and other relevant regulations of the RE Directive 2014/53/EU, the Low Voltage Directive 2014/35/EU, the ERP Directive 2009/125/EC and the RoHS Directive 2011/65/EU . -
Page 35: Kompernass Handels Gmbh Warranty
. Any damage and defects present at the time of purchase must be reported immediately after unpacking . Repairs carried out after expiry of the warranty period shall be subject to a fee . GB │ IE │ NI │ 31 ■ AFW 2 A1... - Page 36 . The warranty shall be deemed void in cases of misuse or improper handling, use of force and modifications / re- pairs which have not been carried out by one of our authorised Service centres . │ GB │ IE │ NI ■ 32 AFW 2 A1...
- Page 37 . You can download these instructions along with many other manuals, product videos and software on www .lidl-service .com . GB │ IE │ NI │ 33 ■ AFW 2 A1...
-
Page 38: Service
Please note that the following address is not the service address . Please use the service address provided in the operating instruc- tions . KOMPERNASS HANDELS GMBH BURGSTRASSE 21 DE - 44867 BOCHUM GERMANY www .kompernass .com │ GB │ IE │ NI ■ 34 AFW 2 A1... - Page 39 Batterieanzeige . . . . . . . . . . . . . . . . . . . . . . . . . . . . . . . . . . . . 58 DE │ AT │ CH │ 35 ■ AFW 2 A1...
- Page 40 Importeur . . . . . . . . . . . . . . . . . . . . . . . . . . . . . . . . . . . . . . . . . 70 │ DE │ AT │ CH ■ 36 AFW 2 A1...
-
Page 41: Einführung
. Ansprüche jeglicher Art wegen Schäden aus nicht be- stimmungsgemäßer Verwendung, unsachgemäßen Reparaturen, unerlaubt vorgenommenen Veränderungen oder Verwendung nicht zugelassener Ersatzteile sind ausgeschlossen . Das Risiko trägt allein der Benutzer . DE │ AT │ CH │ 37 ■ AFW 2 A1... -
Page 42: Verwendete Warnhinweise
. ► Die Anweisungen in diesem Warnhinweis befolgen, um Sachschäden zu vermeiden . HINWEIS ► Ein Hinweis kennzeichnet zusätzliche Informationen, die den Umgang mit dem Gerät erleichtern . │ DE │ AT │ CH ■ 38 AFW 2 A1... -
Page 43: Sicherheit
Gefahren verstehen . Kinder dürfen nicht mit dem Gerät spielen . Reinigung und Benut- zerwartung dürfen nicht von Kindern ohne Beaufsichtigung durchgeführt werden . DE │ AT │ CH │ 39 ■ AFW 2 A1... - Page 44 Betriebsspannung des Netzadapters übereinstimmt . Die verwendete Steckdose muss immer ■ leicht zugänglich sein, damit in einer Ge- fahrensituation der Netzadapter schnell aus der Steckdose entfernt werden kann . │ DE │ AT │ CH ■ 40 AFW 2 A1...
-
Page 45: Sicherheitshinweise Für Batterien
Batterien gehören nicht in Kinderhände . ► Bewahren Sie Batterien für Kinder uner- reichbar auf . Wurde eine Batterie verschluckt, muss ► sofort medizinische Hilfe in Anspruch genommen werden . DE │ AT │ CH │ 41 ■ AFW 2 A1... - Page 46 Arzt aufsuchen . Verwenden Sie nur Batterien des glei- ► chen Typs! Mischen Sie alte Batterien nicht mit neuen! Verwenden Sie ausschließlich den ange- ► gebenen Batterietyp . │ DE │ AT │ CH ■ 42 AFW 2 A1...
-
Page 47: Lieferumfang
Der Lieferumfang besteht aus folgenden Komponenten: 1 Wetterstation 1 Außensensor 2 Batterien Typ AA 2 Batterien Typ AAA 1 Netzadapter 1 Dübel (Ø 5 mm) 1 Schraube 1 Bedienungsanleitung 1 Quick Start Guide DE │ AT │ CH │ 43 ■ AFW 2 A1... -
Page 48: Teilebeschreibung
Entsorgen Sie nicht mehr benötigte Verpackungsma- terialien gemäß den örtlich geltenden Vorschriften . Teilebeschreibung Abbildungen siehe Ausklappseiten Abbildung A Display 1 Datumsfeld 2 Temperaturfeld innen 3 Temperaturfeld außen 4 USB-Anschlussfeld 5 Uhrzeitfeld │ DE │ AT │ CH ■ 44 AFW 2 A1... - Page 49 Anschlussbuchse für den Netzadapter t USB-Buchsen (Typ A) z Netzadapter Abbildung B Außensensor u Kontroll-LED i Aufhängeöse o TX-Taste p Kanal-Wahlschalter a Batteriefach s Batteriefachdeckel d Standfuß (ausklappbar) DE │ AT │ CH │ 45 ■ AFW 2 A1...
-
Page 50: Inbetriebnahme
Öffnen Sie das Batteriefach a auf der Geräterückseite, in- dem Sie den Batteriefachdeckel s in Pfeilrichtung schieben . ♦ Legen Sie zwei Batterien vom Typ AA, wie im Batteriefach a gekennzeichnet, in das Gerät ein . │ DE │ AT │ CH ■ 46 AFW 2 A1... -
Page 51: Wetterstation In Betrieb Nehmen
Nachdem die Spannungsversorgung hergestellt wurde, leuchtet das Display auf und prüft kurz alle Anzeigeelemente . Die Wetterstation versucht nun eine Verbindung zum Außen- sensor herzustellen . Im Temperaturfeld außen 3 blinkt das Empfangssymbol DE │ AT │ CH │ 47 ■ AFW 2 A1... - Page 52 Bei erfolgreichem Empfang des MSF-Signals wird im Uhrzeit- feld 5 die gegenwärtige koordinierte Weltzeit (UTC) und im Datumsfeld 1 das Datum und der Wochentag angezeigt . Zusätzlich wird das Empfangssymbol dauerhaft im Uhrzeit- feld 5 angezeigt . │ DE │ AT │ CH ■ 48 AFW 2 A1...
- Page 53 Störquellen (z . B . andere elektrische Geräte) erheblich einge- schränkt werden . Verändern Sie gegebenenfalls den Standort der Wetterstation (z . B . in die Nähe eines Fensters), falls es zu Problemen beim Empfang kommt . DE │ AT │ CH │ 49 ■ AFW 2 A1...
-
Page 54: Anzeigen Im Basismodus
„Post Meridiem“ = nachmittags) vor der Uhrzeit . Während der Sommerzeit erscheint (engl für Daylight Saving Time = Sommerzeit) . Diese Anzeige steht nur zur Verfügung, wenn das MSF-Signal empfangen wird . │ DE │ AT │ CH ■ 50 AFW 2 A1... - Page 55 Luftfeuchtigkeit in % angezeigt, welcher der Außensensor ausgesetzt ist . Das USB-Anschlussfeld Wenn Sie Mobilgeräte über die USB-Anschlüsse t aufladen, blinkt das Batteriesymbol neben dem entsprechenden USB-Anschlusssymbol / . DE │ AT │ CH │ 51 ■ AFW 2 A1...
-
Page 56: Bedienung Und Betrieb
Drücken Sie die – /CH - Taste 6 oder die +/MEM - Taste 7, ♦ um den gewünschten Wert einzustellen . ♦ Drücken Sie die MODE - Taste 0, um Ihre Eingabe zu bestätigen . Im Uhrzeitfeld 5 blinkt die Minutenanzeige . │ DE │ AT │ CH ■ 52 AFW 2 A1... - Page 57 ♦ um den gewünschten Wert einzustellen . ♦ Drücken Sie die MODE - Taste 0, um Ihre Eingabe zu be- stätigen . Das Display wechselt wieder in den Basismodus . DE │ AT │ CH │ 53 ■ AFW 2 A1...
-
Page 58: Weckzeit Und Wecktage Einstellen
. Im Uhrzeitfeld 5 erscheint das Weckersymbol und zeigt an, dass die Weckfunktion aktiviert ist . Zusätzlich blinkt im Datumsfeld 1 die Anzeige für die Wecktage ( ) . │ DE │ AT │ CH ■ 54 AFW 2 A1... -
Page 59: Weckfunktion Aktivieren/Deaktivieren
SNOOZE/LIGHT - Taste 9, um das Wecksignal auszu- schalten . Die Weckfunktion muss nicht wieder aktiviert werden . Das Weck- signal schaltet sich zur eingestellten Zeit automatisch wieder ein . DE │ AT │ CH │ 55 ■ AFW 2 A1... -
Page 60: Schlummer-Funktion
. Sobald die Zeit heruntergezählt ist, ertönt für ca . 2 Minuten das Wecksignal . ♦ Drücken Sie eine beliebige Taste, um den Kurzschlaftimer zu deaktivieren . │ DE │ AT │ CH ■ 56 AFW 2 A1... -
Page 61: Maximale / Minimale Temperatur / Luftfeuchtigkeit Anzeigen
Im Netzbetrieb ist die Hintergrundbeleuchtung des Displays dauerhaft eingeschaltet . ♦ Drücken Sie wiederholt die SNOOZE/LIGHT - Taste 9, um die Helligkeit der Hintergrundbeleuchtung in vier Stufen (Hoch, Mittel, Niedrig, Aus) einzustellen . DE │ AT │ CH │ 57 ■ AFW 2 A1... -
Page 62: Batterieanzeige
Außensensors manuell auszulösen . Nach erfolgreichem Empfang werden im Temperaturfeld außen 3 die Tempera- tur und Luftfeuchtigkeit auf dem neuen Funkkanal angezeigt . ♦ Schließen Sie wieder das Batteriefach a . │ DE │ AT │ CH ■ 58 AFW 2 A1... - Page 63 Es werden nur die Werte von Außensensoren angezeigt, die auch mit der Wetterstation verbunden sind . ► Wenn Sie mehrere Außensensoren verwenden, wählen Sie für jeden Außensensor einen anderen Funkkanal . DE │ AT │ CH │ 59 ■ AFW 2 A1...
-
Page 64: Usb-Geräte Aufladen
Keine Steckverbindung zum USB-Gerät . Überprüfen Sie die Steckverbindung . ■ Die Stromaufnahme des angeschlossenen USB-Gerätes ist zu groß (> 2,1 A) . Das Gerät kann nicht über die Wetterstation geladen werden . │ DE │ AT │ CH ■ 60 AFW 2 A1... - Page 65 Verändern Sie den Aufstellort (z . B . in die Nähe eines Fensters) und versuchen Sie es erneut . ■ Batterien der Wetterstation sind verbraucht . Erneuern Sie die Batterien . DE │ AT │ CH │ 61 ■ AFW 2 A1...
-
Page 66: Reinigung
Sollten Sie das Produkt längere Zeit nicht benutzen, trennen Sie es von der Spannungsversorgung bzw . entnehmen Sie die Batterien und lagern Sie es an einem sauberen, trockenen Ort ohne direkte Sonneneinstrahlung . │ DE │ AT │ CH ■ 62 AFW 2 A1... -
Page 67: Entsorgung
Abkürzungen (a) und Ziffern (b) mit folgender Bedeutung: 1–7: Kunststoffe, 20–22: Papier und Pappe, 80–98: Verbundstoffe Möglichkeiten zur Entsorgung des ausgedienten Produkts erfahren Sie bei Ihrer Gemeinde- oder Stadtverwaltung . DE │ AT │ CH │ 63 ■ AFW 2 A1... -
Page 68: Anhang
± 5 % Auflösung Luftfeuchtigkeit Funkuhrsignal MSF (60 kHz) USB-Buchsen 5 V (Gleichstrom) / 2,1 A (Total)* * Bei gleichzeitiger Nutzung beider USB-Buchsen t darf die Gesamtstromaufnahme der angeschlossenen USB-Geräte 2,1 A nicht überschreiten! │ DE │ AT │ CH ■ 64 AFW 2 A1... - Page 69 50/60 Hz, max . 0,5 A Ausgang 5 V (Gleichstrom) / 2500 mA Polarität (Plus innen, Minus außen) II / Schutzklasse (Doppelisolierung) Schutzart IP20 Effizienzklasse Schaltnetzteil kurzschlussfester Sicherheits transformator Nenn- Umgebungs- 40 °C temperatur (ta) DE │ AT │ CH │ 65 ■ AFW 2 A1...
-
Page 70: Hinweise Zur Eu-Konformitätserklärung
Vorschriften der RE-Richtlinie 2014/53/EU, der Niederspannungsrichtlinie 2014/35/EU, der ERP-Richtlinie 2009/125/EC und der RoHS-Richtlinie 2011/65/EU entspricht . Die vollständige EU-Konformitätserklärung ist unter folgender Internetadresse verfügbar: www .kompernass .com/support/311588_DOC .pdf . │ DE │ AT │ CH ■ 66 AFW 2 A1... -
Page 71: Garantie Der Kompernaß Handels Gmbh
Dies gilt auch für ersetzte und reparierte Teile . Eventuell schon beim Kauf vorhandene Schäden und Mängel müssen sofort nach dem Auspacken gemeldet werden . Nach Ablauf der Garantie- zeit anfallende Reparaturen sind kostenpflichtig . DE │ AT │ CH │ 67 ■ AFW 2 A1... - Page 72 Das Produkt ist nur für den privaten und nicht für den gewerbli- chen Gebrauch bestimmt . Bei missbräuchlicher und unsachgemä- ßer Behandlung, Gewaltanwendung und bei Eingriffen, die nicht von unserer autorisierten Service-Niederlassung vorgenommen wurden, erlischt die Garantie . │ DE │ AT │ CH ■ 68 AFW 2 A1...
- Page 73 Mangel besteht und wann er aufgetreten ist, für Sie por- tofrei an die Ihnen mitgeteilte Serviceanschrift übersenden . Auf www .lidl-service .com können Sie diese und viele weitere Handbücher, Produktvideos und Software herunterladen . DE │ AT │ CH │ 69 ■ AFW 2 A1...
-
Page 74: Service
Bitte beachten Sie, dass die folgende Anschrift keine Servicean- schrift ist . Kontaktieren Sie zunächst die benannte Servicestelle . KOMPERNASS HANDELS GMBH BURGSTRASSE 21 DE - 44867 BOCHUM DEUTSCHLAND www .kompernass .com │ DE │ AT │ CH ■ 70 AFW 2 A1... - Page 75 KOMPERNASS HANDELS GMBH BURGSTRASSE 21 DE - 44867 BOCHUM GERMANY www.kompernass.com Last Information Update · Stand der Informationen: 01 / 2019 · Ident.-No.: AFW2A1-112018-2 IAN 311588...
Need help?
Do you have a question about the AFW 2 A1 and is the answer not in the manual?
Questions and answers