Renishaw RMP40 Quick Start Manual
Hide thumbs
Also See for RMP40:
- Quick start manual (214 pages) ,
- Installation manual (48 pages) ,
- Quick start manual (48 pages)
Table of Contents
Advertisement
Quick Links
Download this manual
See also:
Quick Start Manual
Advertisement
Table of Contents

Subscribe to Our Youtube Channel
Related Manuals for Renishaw RMP40


Summary of Contents for Renishaw RMP40
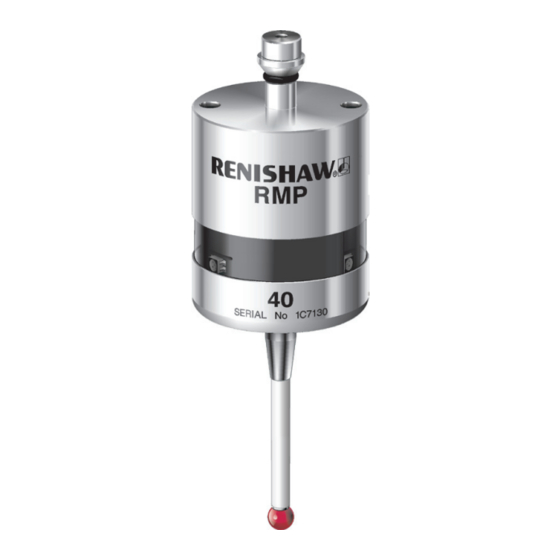
- Page 1 Quick-start guide H-5480-8500-01-A RMP40...
- Page 2 Trademarks This document may not be copied or reproduced in whole or in part, or transferred RENISHAW® and the probe emblem used in the to any other media or language, by any means, RENISHAW logo are registered trademarks of without the prior written permission of Renishaw Renishaw plc in the UK and other countries.
- Page 3 Batteries Batteries : 1/2 AA (3.6 V) Lithium Thionyl Chloride × 2 Ecocel: Dubilier: EB 1425, EB1426 SB-AA02 Saft: LS 14250 C, LS 14250 Maxell: ER3S Sonnenschein: SL-750 Sanyo: CR 14250 SE Xeno: Sonnenschein: XL-050F SL-350, SL-550 Tadiran: TL-4902 TL-5902, TL-2150, TL-5101 Varta: CR 1/2 AA...
-
Page 4: Fitting The Stylus
Fitting the stylus M-5000-3707... -
Page 5: Installing The Batteries
Installing the batteries Take care not to short the battery contacts as this may be a fire hazard. Ensure the contact strips are located securely. - Page 6 Reviewing the probe settings > 5 s Key to the symbols LED short flash LED check LED long flash Switch on method Radio on Spin on (omitted if multiple probe mode was selected)
- Page 7 Reviewing the probe settings Switch off method Radio off or Short time out Medium time out Long time out Spin off 12 s 33 s 134 s Multiple probe mode (omitted for radio-on) (see ‘Multiple probe mode settings’ to view all 16 choices) Mode off Mode on Machine 1...
- Page 8 Multiple probe mode settings Deflect Multiple probe mode stylus Mode off Mode on < 4 sec Machine 1 Machine 2 Machine 4 Machine 3 to cycle to next setting Machine 5 Machine 6 Machine 7 Machine 8 Machine 9 Machine 10 Machine 12 Machine 11 Machine 13...
- Page 9 Placing the probe in configuration mode LED check > 5 s Deflect the stylus and hold deflected until the battery status has been displayed at Key to the symbols the end of the review sequence LED short flash LED long flash Battery status Deflect the stylus <...
-
Page 10: Changing The Probe Settings
33 s 134 s Acquisition mode Note: After the RMI has been acquired, the RMP40 will only show Acquisition mode off. Cease triggering here, unless the multiple probe mode is required in See RMP40 - RMI which case deflect stylus > 4 seconds partnership. - Page 11 4 seconds will return the probe settings to ‘To change switch-on method’ Acquisition mode Return to ‘To change switch-on method’ Note: After the RMI has been acquired, the New settings RMP40 will only show Acquisition mode off. complete See RMP40 - RMI partnership.
-
Page 12: Signal Led
RMP40 - RMI partnership Acquisition mode Note: Unless the RMP40 is in ‘Multiple probe’ mode, it will be necessary to partner it with the RMI before use. Note: In configuration mode, Continuously deflect configure settings as required stylus whilst switching and then enter the ‘Acquisition... - Page 13 RMP40 - RMI partnership Release and deflect the stylus to select ‘Acquisition mode on’. SIGNAL LED New partner RMP acquired Probe in standby and system ready for use > 20 s...
-
Page 14: Mounting The Probe On A Shank
Mounting the probe on a shank 4 mm AF 2.5 mm AF 2.5 mm AF 2 Nm - 3 Nm × 2 × 4 × 2... - Page 15 Stylus on-centre adjustment 2,5 mm AF 1 Nm × 4 +10 µm -10 µm...
- Page 16 Stylus on-centre adjustment 4 mm AF 6 Nm - 8 Nm × 2 +10 µm -10 µm...
-
Page 17: Stylus On-Centre Adjustment
Stylus on-centre adjustment 2.5 mm AF 1,5 Nm - 3,5 Nm × 4 +2.5 µm -2.5 µm... - Page 18 Cleaning Use clean cloth...
- Page 19 RMI visual diagnostics Low battery/start LED Signal LED Signal Battery low excellent M code start/stop in Signal good progress Signal poor Battery low and M code start/stop No signal in progress In acquisition Battery is OK and no mode M code start/stop in progress New partner RMP acquired...
-
Page 20: Ec Declaration Of Conformity
Declarations of conformity and compliance EC DECLARATION OF CONFORMITY FCC DECLARATION (USA) FCC Section 15.19 Renishaw plc declares that the product:- This device complies with Part 15 of the FCC Name: RMP40 rules. Operation is subject to the following Description:... -
Page 21: Patent Notice
Patent notice PATENT NOTICE Features of the RMP40 probe and features of similar probes are the subject of one or more of the following patents and/or patent applications: CN CN1732488A EP 1734426 TW 200720626 EP 0390342 EP 1804020 US 2004-0178771... - Page 22 Renishaw plc +44 (0)1453 524524 +44 (0)1453 524901 New Mills, Wotton-under-Edge, uk@renishaw.com Gloucestershire, GL12 8JR United Kingdom www.renishaw.com For worldwide contact details, please visit our main website at www.renishaw.com/contact *H-5480-8500-01*...
Need help?
Do you have a question about the RMP40 and is the answer not in the manual?
Questions and answers