Table of Contents
Advertisement
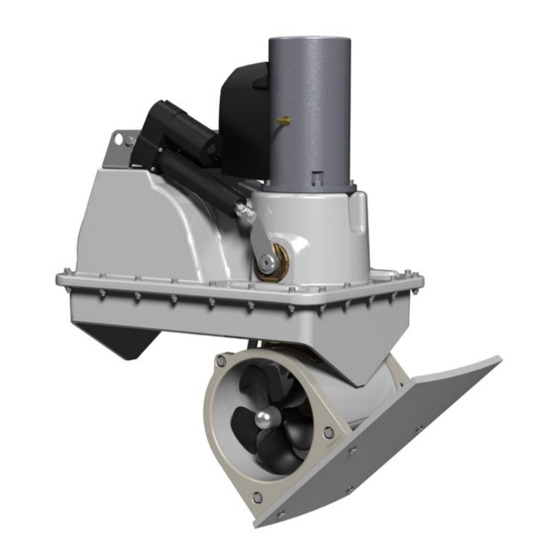
SIDE-POWER
Thruster Systems
Installation & User Guide
EN
SLEIPNER MOTOR AS
P.O. Box 519
N-1612 Fredrikstad
Norway
Tel:
Fax:
+47 69 30 00 60
+47 69 30 00 70
SRV(L)(P) 130/250 T
SRV(L)(P) 170/250 TC
SRV(P) 210/250 TC
w w w . s i d e - p o w e r . c o m
s i d e p o w e r @ s l e i p n e r. n o
Patent nr/EP2548797
© Sleipner Motor AS 2017
Advertisement
Table of Contents

Subscribe to Our Youtube Channel
Related Manuals for SLEIPNER MOTOR AS SRVP 130/250 T


Summary of Contents for SLEIPNER MOTOR AS SRVP 130/250 T
- Page 1 . s i d e - p o w e r . c o m Fax: +47 69 30 00 70 s i d e p o w e r @ s l e i p n e r. n o © Sleipner Motor AS 2017...
-
Page 2: Table Of Contents
Technical & visual wiring diagrams, SRVP/SRLP models ..22 Spareparts lists & drawings ..........33 Check and calibrate drive shaft alignment........23 Maintenance ................24 DECLARATION OF CONFORMITY We, Sleipner Motor AS P.O. Box 519 N-1612 Fredrikstad, Norway declare that this product with accompanying standard remote control systems complies with... -
Page 3: Measurements, Thruster
Max V-angle for SR130T/170TC/210TC Measurements, thruster Målskisse, truster Max V-angle for SR130T/170TC/210TC Measurements, thruster Measurements, thruster Målskisse, truster 532,00 T/170TC/210TC 532,00 T/170TC/210TC T/170TC/210TC 604mm 687,50 687,50 Designed by Checked by Approved by Date Date olekr 12.08.2014 Edition Sheet 1 / 1 Height: Height: Height:... - Page 4 Measurements, thruster Lenght: SRL(P)130/250T: 957mm SRL(P)170/250TC: 972mm SRL(P)170: 315 Designed by Elvira H. Copyright All rights reserved SL E IP N E R M SRV(P)130_170_210 1.1.8 - 2017...
-
Page 5: Planning And Important Precautions
These instructions are only general instruction. If you are not skilled to do this work, please contact professional installers for assistance. NB! Faulty installation of the tunnel/case, thruster or panel will render all warranty given by Sleipner Motor AS void. -
Page 6: Technical Specifications
Fig. 1 Present issues: 1. Aproximately 5mm of the tunnel end covers have been cut, due to adjustments. This causes incorrect angel and alignment. 2. Actuator support brackets have been moved to adjust. This also causes incorrect angel and alignment. WATERLINE Actions to be done: 3. -
Page 7: Thruster Installation Step By Step Installation
Step by step - Thruster installation The thruster must be mounted in the direction shown on Fig. 1/1b, both if mounted in bow and stern (the hatch must open torwards the direction of travel). If the unit is to be used as a bow thruster, find the position furthest forward where the unit will fit - allowing for 10cm space around all sides of the unit for moulding, but not so far forward that the propeller will not go deep enough in the water. - Page 8 Step by step - Thruster installation - Positioning 2. To find correct installation height/SRF flange adjust- Fig. 3 ment, place the thruster in center of marked position with tunnel rings sitting parallell to hull. Fig. 3 Red installation part is sitting inside of upper case and will ensure the installation height will be cor- rect.
- Page 9 Step by step - Thruster installation - Hatch cutting 6. The hatch can be cutted out either from outside or Fig. 7 inside the boat. If cutting from outside, it will be practical to drill 4xØ3mm holes in each corner, so it will be easy to make the cutting/reference lines from outside.
- Page 10 Step by step - Thruster installation - Moulding 8. Before moulding process ensure to go through Fig. 9 the positioning check points in Appendix 3. - Inside and outside moulding surfaces must be grinded to remove coating and material in order to get correct adhesion preparations for moulding in the SRF flange to hull.
- Page 11 Hight control points SRV130-210 thrusters Designed by Material Type Date Drawing nr Tole tore SM-123024 15.09.2016 Copyright All rights reserved Title SRV130/170/240TC (Control dimensions for hatch installat SLEIPNER MOTOR AS Part nr Weight Size Scale Edit 6,25 SRV(P)130_170_210 1.1.8 - 2017...
- Page 12 Drawing nr Tolerance NS-I gille 01-06-080-121 Generic 27.06.2014 Copyright All rights reserved Title Bunnflens SRV80/100T REINFORCEMENT of SRF185-GRP SLEIPNER MOTOR AS Part nr Weight Size Scale Edition SRF-185-GRP 1 : 4 2,259 kg (SM-101775 Reinforcement) Layers of fiberglass cloth General Moulding process Start the laminating with a strong attachment point in each corner between the hull and the outside of the lower unit.
- Page 13 Appendix 3. Hatch in conflict with hull Pivot point for rotation (Maintain reference height here) Lift aft end to rotate unit and make clearence for hatch Make sure hatch stops free of hull when fully deployed Positioning the thruster - Checkpoints before moulding - Assemble the upper part temporary to the lower part.
- Page 14 B-B ( 1 : 10 ) B-B ( 1 : 10 ) C-C ( 1 : 10 ) Fig. 10c Fig. 10d Appendix 4. D-D ( 1 : 10 ) C-C ( 1 : 10 ) Fig. 10e F-F ( 1 : 10 E ( 1 : 2 ) F-F ( 1 : 10 ) E ( 1 : 2 )
- Page 15 NS-ISO 2768-1 11/10/2016 olekr Steel, Mild DIN 913 - M5 x 20 Copyright All rights reserved Title SRV(P)130_170_210 Hexagon Socket Set Screw SLEIPNER MOTOR AS 1.1.8 - 2017 Weight Part nr Size Scale Edition Sheet 1 / 1 0.003 kg...
- Page 16 Step by step - Thruster installation - Upper thruster case and hatch fitting 16. When hole pattern is achieved, drill holes corre- Fig. 17 sponding the bolt dimensions. - Outside of hatch, holes must be countersink. Important! Drill the holes in 90 to the hatch sur- face.
- Page 17 Step by step - Thruster installation - Upper thruster case and hatch fitting 19. Unscrew and remove hatch to smoothen off exces- Fig. 20 sive material before coating the hatch. See Fig. 20. 20. Now re-install hatch in its correct position Fig.
-
Page 18: Fitting The Electromotor
Fig. 24 Fig. 11 Bolt tightening force (4x): 33 Nm (24 lb/ft) Fitting the electromotor Fitting the electromotor Montering av elektromotor 1. Remove the 4 bolts in the motor bracket. 1. Remove the 4 bolts in the motor bracket. 1. Fjern de 4 boltene i motorinnfestingen 2. -
Page 19: Electrical Installation
Fig. 26 Fig. 25 Models SRVP Models Battery & cable recommendations: Model Voltage Nominal Min. -
Page 20: 150000 Controller
Technical Specification 150000 Controller Supply Voltage 7-31 VDC, Powered at B+ & B- Power consumption Less than 1.5 Watt in standby Fuse @ 12V 40 Amp Fuse @ 24V 40 Amp Minimum Voltage at B+/B- for 11.7 Volt for 12 Volt thruster deployment 23.4 Volt for 24 Volt thruster Operating temperature... -
Page 21: Technical & Visual Wiring Diagrams, Srv/Srl Models
Technical wiring diagram ,SRV models ... -
Page 22: Technical & Visual Wiring Diagrams, Srvp/Srlp Models
Technical wiring diagram ,SRVP models ... -
Page 23: Check And Calibrate Drive Shaft Alignment
Fig. 28 Fig. 27 Align pointer on lever arm with red dot on bearing Check drive shaft alignment IMPORTANT! Before the thruster motor is run, the alignment of the drive shaft must be checked to be completely straight when it reaches its end posistion by op- eration form the control panel: •... -
Page 24: Maintenance
Check and relubricate Anode, with waterproof grease if gearleg neccessary DO NOT apply antifoul- Check for wear in this area ing or clean with any kind of chemicals in this area. Only clean with water. Part no. 140117 will be worn and must be Max. -
Page 25: S-Link System Overview
Example of wiring Wiring of S-link system Wiring of S-link system Explaining S-link Example Explaining S-link Example S-link is a ”CanBus” based control system S-link is a ”CanBus” based control system with full intelligent communication with full intelligent communication between all units in the system, much like between all units in the system, much like a computer network. - Page 26 Example of the control wiring with S-link system for boats with one control position and one retractable thruster. You need: 2 x 6 1327 End terminators 3 x 6 1326 T-connectors 1 x 6 1328 Power spur 2 x 6 1320-xxM Backbone cables 2 x 6 1321-xxM Spur cables BB2=___ BB1=___...
-
Page 27: Control Panels
Control panels PANEL ON: push both “ON” buttons simultaneously, thruster deploys. PANEL OFF: push “OFF” button, thruster retracts. For a detailed description of status and alarm messages shown, please refer to the manual included with the control panel. Status and alarms includes: Overtemperature, power supply, motor and solenoid, communication, retract mechanism SRV(P)130_170_210... -
Page 28: General Use
• Connector for external “buzzer”/loud audible alarms Speed control joystick for Holding function for auto- bow thuster running of bow and stern thrusters together in the Speed control joystick for direction of the arrows at stern thuster selected power Press “+” for more and “-” for less power. Information display, see next page for details. Press both “ON” buttons simultanously to activate control panel. Press to de-activate control panel or cancel or go back in menu system MENU Press to change Press to access menu between day and system and choose night light items in menus SIDE-POWER SIDE-POWER THRUSTER SYSTEMS THRUSTER SYSTEMS CONFIDENCE BY CONTRO User info, PJC-212 - 1/ How to use Side-Power thrusters How to use a bowthruster 1. -
Page 29: Installation Checklist
Checklist Propeller is fastened correctly to the shaft. Propeller turns freely in tunnel. The -anode holding screw is tightened well with thread glue. Anti-fouling have been applied to the gearhouse and propeller but NOT on the anode or the gearhouse lid where the propeller is fas- tened. -
Page 30: Important User Precautions
Important user precautions • Ensure that you know the location of the main battery switch that disconnects the thruster from all power sources (batteries) so that the thruster can be turned off in case of a malfunction. • Always turn the main power switch off before touching any part of the thruster, as an incidental start while touching moving parts can cause serious injuries. -
Page 31: Troubleshooting
Troubleshooting Before seeking assistance at the help desk of your Side-Power dealer/distributor please perform these tests and make notes of all measurements to ensure that they have as much information as possible to work on. Some error messages and alarms will be shown in the panel display. -
Page 32: Warranty Statement
Warranty statement 1. The equipment manufactured by Sleipner Motor AS (The “Warrantor”) is warranted to be free from defects in workmanship and materials under normal use and service. 2. This Warranty is in effect for of two years (Leisure Use) or one year (Commercial use) from the date of purchase by the user. Proof of purchase must be included, to establish that it is inside the warranty period. -
Page 33: Spareparts Lists & Drawings
Partslist - SRV130/250T SRV(P)130_170_210 1.1.8 - 2017... - Page 34 Partslist - SRV170/250TC SRV(P)130_170_210 1.1.8 - 2017...
- Page 35 SRV(P)130_170_210 1.1.8 - 2017...
- Page 36 Tel: +47 69 30 00 60 Fax:+47 69 30 00 70 www.side-power.com sidepower@sleipner.no The information given in the document was correct at the time it was published. However, Sleipner Motor AS can not accept liability for any inaccuracies or omissions it may contain.
Need help?
Do you have a question about the SRVP 130/250 T and is the answer not in the manual?
Questions and answers