Table of Contents
Advertisement
Quick Links
Advertisement
Table of Contents

Related Manuals for ISHIDA IP-AI


Summary of Contents for ISHIDA IP-AI
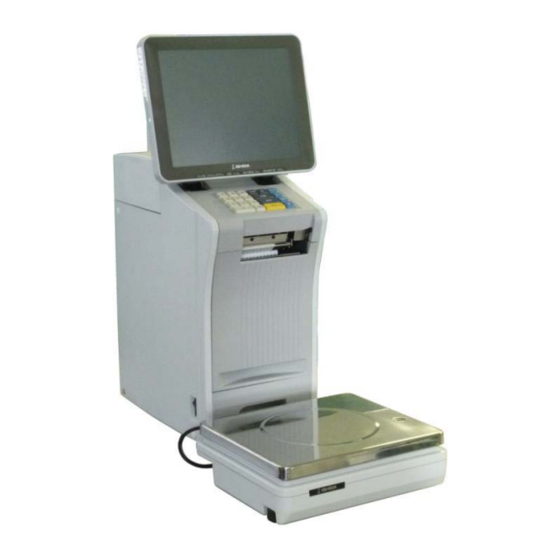
- Page 1 IP-AI Prepack Scale & Printer Operation Manual PN 177839...
- Page 2 An ISO 9001 registered company © Rice Lake Weighing Systems. All rights reserved. ® Rice Lake Weighing Systems is a registered trademark of Rice Lake Weighing Systems. All other brand or product names within this publication are trademarks or registered trademarks of their respective companies. All information contained within this publication is, to the best of our knowledge, complete and accurate at the time of publication.
- Page 3 ISHIDA is not liable for any damage, loss or injury that results from incorrect operation, insuffi cient caution, unauthorized modifi cations to the machine, or failure to follow the instructions contained in this manual.
- Page 4 SIGNAL WORDS (TYPES & MEANING) The signal words shown in this manual are separated into two stages depending on the level of danger or the seriousness of potential injury. Fully understand the meanings of the signal words shown below and follow the directions as shown in this manual and on the stickers placed about the machine.
- Page 5 PRECAUTIONS FOR USE For safe operation, the following safety considerations must be observed: • Be sure to install the printer unit and the weighing unit on level ground. Install the four rubber feet of the printer unit on the mount. Accurate weighing cannot be made if the weighing unit is not horizontally installed.
- Page 6 Continuing to use the machine with an abnormality could lead to fi re or failure. Discontinue use immediately and contact your ISHIDA dealer. • When transporting the machine, be sure to hold the bottom of the machine.
- Page 7 Do not spray water or detergent solution over the machine. • Entrust the installation of the machine to your ISHIDA dealer. • Perform a start-up inspection (weighing check) using a weight or the like once a day.
-
Page 8: Table Of Contents
Table of Contents CHAPTER 1 BEFORE USING THE MACHINE ..............1-1 PART NAMES AND FUNCTIONS ................1-2 1.1.1 EXTERNAL APPEARANCES ................1-2 1.1.2 STROKE KEYS ....................1-3 USABLE LABELS .....................1-3 PREPARATION BEFORE OPERATION ..............1-4 1.3.1 CHECK BEFORE OPERATION ...............1-4 1.3.2 MARKING A HORIZONTAL ADJUSTMENT .............1-4 1.3.3 COMFIRMING THE WEIGHING STATE ............1-5 1.3.4... - Page 9 4.2.2 PLU DETAIL (MSG.) REGISTRATION .............4-7 4.2.5 PLU DETAIL (DATE) REGISTRATION .............4-8 4.2.6 PLU DETAIL (CODE) REGISTRATION ............4-9 4.2.7 PLU DETAIL (WRAP) REGISTRATION ............4-11 CAMPAIGN REGISTRATION .................4-12 TRAY REGISTRATION ...................4-14 PRESET KEY REGISTRATION ................4-16 4.5.1 SETTING PRESET GROUPS AND PAGES ..........4-17 4.5.2 SETTING PRESET KEYS ................4-17 4.5.3...
- Page 10 CHAPTER 6 TOTAL DATA CORRECTION .................6-1 SWITCHING TO SUBTRACTION MODE ..............6-2 SUBTRACTION BY NUMERICAL ENTRY ...............6-3 ADDITION BY NUMERICAL ENTRY ................6-4 CHAPTER 7 SETTING MODE .....................7-1 Switching to Setting Mode ................7-2 Password Settings ...................7-3 Key Lock Settings ....................7-4 Total Addition Settings ..................7-5 Item Data Auto-update Settings ...............7-6 PLU Initial Data Settings ..................7-7 Item Data Batch Change Settings ..............7-8...
-
Page 11: Chapter 1 Before Using The Machine
CHAPTER 1 BEFORE USING THE MACHINE... -
Page 12: Part Names And Functions
Basic Operations PART NAMES AND FUNCTIONS This section provides a description of the name and function of each part of the machine. The names and functions of each part of the machine are explained below. In this manual, the following names for each part are used. 1.1.1 EXTERNAL APPEARANCES Front view Touch panel... -
Page 13: Stroke Keys
Basic Operations 1.1.2 STROKE KEYS Used to change the fixed price, or change the unit price item to the fixed price item. PRESET PRESET FEED Used for changes in the fixed price, or changes FIXED PRICE from a unit price item to a fixed price item. ZERO FIXED PRICE Used for changes in the unit price, or changes from... -
Page 14: Preparation Before Operation
Basic Operations PREPARATION BEFORE OPERATION This section describes the methods of confirming accessories, checking the machine before operation, and turning the machine on. 1.3.1 CHECK BEFORE OPERATION Be sure to check the following points before operation so the machine can be constantly kept in good condition. -
Page 15: Comfirming The Weighing State
If weighing is not performing normally, operation screen is being displayed. consult your ISHIDA dealer. 1.3.4 PROVIDING SUFFICIENT INSTALLATION SPACE Provide suffi cient space at the right side of the machine for label replacement. -
Page 16: Turning On The Power
Basic Operations 1.3.5 TURNING ON THE POWER 1. 1. Insert the power plug of the Electrical outlet power cable properly into the Avoid overloading from a single electrical outlet after making sure that outlet for power supply the machine’s power switch is Power Plug and other cables. -
Page 17: Turning Off The Power
Basic Operations 1.3.6 TURNING OFF THE POWER 1. 1. Press the power button. The power-off execution confi rmation screen is displayed. Power switch 2. 2. Touch [EXECUTE] on the power-off execution confi rmation screen. EXEC The printer unit automatically turns off. -
Page 18: Instlling A New Label Roll
Basic Operations INSTLLING A NEW LABEL ROLL This section describes the method of installing a new label roll when issuing peeled labels. 1. 1. Pull out the label set unit. Label set unit 2. 2. Put a new label roll on the roll Roll stopper holder and fasten it with the roll Ensure there is a... - Page 19 Basic Operations 5. 5. Adjust the width of the label The first label guide. Make the space Label backing between the label paper guide and the label Slide the label guide to fi t the width of backing paper as the label backing paper.
-
Page 20: Cleaning
Basic Operations CLEANING Perform cleaning once a week to maintain excellent printing clarity and successful label issuance. 1.5.1 CLEANING OF THERMAL HEAD, LABEL ROLLER, AND PEELING SENSOR 1. 1. Pull out the label set unit. INFORMATION If the bottom of the label set unit is dirty, wipe off and remove dirt with a cloth wrung... - Page 21 Basic Operations 5. 5. Push the label set unit into the main body until it clicks into Push the label set unit place. carefully so as not to get your fi ngers, etc. caught between the label set unit and the main body.
- Page 22 Basic Operations Memo 1-12...
-
Page 23: Chapter 2 Basic Operations
CHAPTER 2 BASIC OPERATIONS... -
Page 24: Explanation Of Production Mode Screen
Basic Operations EXPLANATION OF PRODUCTION MODE SCREEN 2.1.1 DISPLAY FIELDS ON THE INITIAL SCREEN SCREEN FOR WEIGHING ITEMS Weight Unit price IItem name Total price Internal clock Zero “ZERO” is displayed when the zero point adjustment of the weighing unit is Tare performed. -
Page 25: Touch Keys On The Initial Screen
Basic Operations 2.1.2 TOUCH KEYS ON THE INITIAL SCREEN SCREEN FOR WEIGHING ITEMS When touched, the production (item detail information) screen is displayed. (See page 3-14) The main menu screen is displayed. Displays the zero state of the weighing unit. Displays the memo preset item screen. -
Page 26: Weighing And Label Issuing
Basic Operations WEIGHING AND LABEL ISSUING 2.2.1 MANUAL LABELING [Example] Weigh the item “RIB STEAK” registered in Item No.1, and issue the label. 1. 1. Enter the item call-up number Gently press the from the initial screen state. touch panel with your fi... -
Page 27: Chapter 3 Useful Functions
CHAPTER 3 USEFUL FUNCTIONS... -
Page 28: Call Up The Item Data From The Displayed List
Basic Operations CALL UP THE ITEM DATA FROM THE DISPLAYED LIST If you do not clearly remember the item number but you remember that the item number is somewhere around item number “15” for example, you can select it from the display item name list showing item names before and after the selected item number. -
Page 29: Search For The Item And Call It Up
Basic Operations 3.1.1 SEARCH FOR THE ITEM AND CALL IT UP You can also call up the item name from among registered items by searching for the name with use of the character string included in the name as a key word. 1. -
Page 30: Calling Item Data With Memo Preset Keys
Basic Operations CALLING ITEM DATA WITH MEMO PRESET KEYS Item that are frequently called can be registered in the memo preset keys beforehand for smoother operations. Displays the production (memo preset) screen. Switch the Memo Preset List page. Previous page Next page Touch to display an item name that is too large to... -
Page 31: Call Up The Item By Using The Memo Preset Key
Basic Operations 3. 3. Touch the memo preset key located at the position that you When the preregistered memo want to register. preset key is touched, the data is overwritten. The memo preset key has been INFORMATION registered. The memo preset key can also be registered by pressing the memo preset key after... -
Page 32: Change And Addition Of Item Data
Basic Operations CHANGE AND ADDITION OF ITEM DATA Use the following procedure when you want to change part of the registered item data during work. This section describes the methods of unit price (fi xed price) change, tray change, addition, and discount. 3.3.1 CHANGE THE UNIT PRICE [Example] Change the unit price from $1.23 to $2.00. -
Page 33: Enter The Tray Number In The Tray Field Of The Price List
Basic Operations 3.3.2 ENTER THE TRAY NUMBER IN THE TRAY FIELD OF THE PRICE LIST Each tray is numbered and information such as tray name, size, and weight is managed for each number. Up to fi ve tray numbers can be registered in the price list. Because the tray is automatically recognized by using the data in the price list, every tray needs to be registered in advance. -
Page 34: Enter The Selling Price In The Price Field Of The Price List
Basic Operations 3.3.3 ENTER THE SELLING PRICE IN THE PRICE FIELD OF THE PRICE LIST By registering unit prices and fi xed prices in the price list in advance, the operation using two kinds of prices becomes possible. [Example] Enter "Fixed price $5.00" in the price list 3. 1. -
Page 35: Changing Trays On The Tray List Screen
Basic Operations 3.3.4 CHANGING TRAYS ON THE TRAY LIST SCREEN This section describes the method of changing the tray on the tray screen when you do not know the tray number you want to use. Closes the tray screen without selecting the tray. -
Page 36: Performing Discount Processing
Basic Operations 3.3.5 PERFORMING DISCOUNT PROCESSING A bargain price in addition to the unit price and fi xed price can be registered in adavance in the item data. There are six different bargain prices: markdown price, discount amount, discount rate, markdown unit price, discount unit price amount, and discount unit price rate.This section describes the method of performing discount processing. -
Page 37: Changing The Label Date And Time
For details, consult PACK DATE your ISHIDA dealer. Pack date PACK DATE Enter the pack date to be changed. Pack date printing Select to print the pack date. - Page 38 Basic Operations 3. PACK TIME SELECTION DESIGNAT Select to print the fixed date and time. CLOCK Select to print the current time. 4. SELL BY DATE Sell by date SELL BY DATE Used to change the set sell by date. Sell by date printing Select to print the sell by date.
-
Page 39: Checking Label Printing Contents
Basic Operations CHECKING LABEL PRINTING CONTENTS With using the label preview screen, it can be cheked whether the necessary items are printable or not. When touched, the production screen is displayed. When touched, the label preview screen is displayed. 1. 1. Touch the [Item Name] display fi... -
Page 40: Useful Features Of Function Keys
• Touching this button will changed the item to a fi xed price item. Note: For operation procedures, consult your ISHIDA dealer. • Touching this button will delete the results of an item that has been fed into the wrapping... - Page 41 • Touching this button will feed the label. • Touching this button will change the item to a unit price item. Note: For operation procedures, consult your ISHIDA dealer. • Touching this button will switch the mode between “BAR (YES)” and “BAR (NO)”.
- Page 42 INGR.+BAR NONE Note: The number of back label types can be increased by settings. For details, consult your ISHIDA dealer. UP PRN • Touching this button will switch the mode between “UP PRN (YES)” and “UP PRN (NO)”. DN PRN •...
- Page 43 Basic Operations Function Keys Functions and Usages FUNCTION •Touching this button will display the Popup Function Keys screen. DISP IMG LD. • Used to load images in the USB memory. PREV. PAGE • Used to switch the Popup Function Keys screen to the previous page. NEXT PAGE •...
- Page 44 Basic Operations Function Keys Functions and Usages • Touching this button after entering a numeric value will set the POP message. Stroke Key POP No. • Touching this button without entering a numeric value will display the POP Message screen. •...
- Page 45 • Touching the display item or entering a numeric value via numeric keys will set the for- mat. USA/W:56.00XH:59.00 • To release the setting, touch the display item after entering “0”. Note: For format settings, consult your ISHIDA dealer. • Touching this button after entering a numeric value will set the image. IMAGE IMAGE Stroke Key Image No.
- Page 46 Basic Operations Function Keys Functions and Usages • When touched after numerical entry, the free message can be set. FREE MSG. 1 FREE MSG. 1 Stroke Key Free Message No. • When touched without any numerical entry, the Free Message screen is displayed. FREE MSG1 •...
- Page 47 Basic Operations Function Keys Functions and Usages PRODUCT No. • Used to display the product number of the meat cutting test. • Touching this button after entering a numeric value will set the markdown price. M PRICE M PRICE Stroke Key SPECIAL:1.00 M PRICE Markdown Price...
-
Page 48: Chapter 4 Data Registration
CHAPTER 4 DATA REGISTRATION... -
Page 49: Program Menu
Data Registration PROGRAM MENU Displays the MENU screen. Switches the page. Registration Item Registration Content Used to register the commodity name or the unit price, fi xed price, tare, registration code, POP number attached to that commodity. Note: Register the data attached to the commodity before performing commodity registration. -
Page 50: Plu Registration
Data Registration PLU REGISTRATION The commodity item name and the data associated with the commodity item (unit price, fixed price, tare weight, register code, POP call-up number, etc.) can be registered. Register the commodity item data after selecting the commodity item field listed on the commodity item List screen. Follow the procedure below when registering the commodity item data. -
Page 51: Plu Detail (Sale 1) Registration
Data Registration 4.2.1 PLU DETAIL (SALE 1) REGISTRATION Switches to the commodity corresponding to the number after this number is set. Displays the screen for entering the commodity name. Saves the commodity data and returns to the PLU List screen. Switches the unit price number. -
Page 52: Plu Detail (Msg.) Registration
Data Registration UNIT TYPE Press the “UNIT TYPE” fi eld to display the “Fix Price Symbol” screen.Then, press a desired fi eld for selection. Enter the packed quantity and press this fi eld. %TARE Enter the tare percentage and press this fi eld. LOWER WEIGHT Enter the lower weight limit and press this fi... -
Page 53: Plu Detail (Image) Registration
Data Registration 4.2.3 PLU DETAIL (IMAGE) REGISTRATION Returns to the PLU List screen. ■REGISTRATION METHOD FOR EACH ITEM Touch the required registration item to select the content. ITEM DESCRIPTIONS IMAGE1,2,3 Press a desired fi eld for selection. SH.IMAGE The “Image” screen is displayed. Press a desired fi... -
Page 54: Plu Detail (Print) Registration
Data Registration 4.2.2 PLU DETAIL (MSG.) REGISTRATION 4.2.4 PLU DETAIL (PRINT) REGISTRATION Returns to the PLU List screen. ■REGISTRATION METHOD FOR EACH ITEM Select the required registration item and enter the details. ITEM DESCRIPTIONS 1ST LABEL ATTACH Press [<] or [>] to select whether or not to fi x front labeling. TYPE 0: Refer 1: Fixing... -
Page 55: Plu Detail (Date) Registration
Data Registration 4.2.5 PLU DETAIL (DATE) REGISTRATION Returns to the PLU List screen. ■REGISTRATION METHOD FOR EACH ITEM Select the required registration item and enter the details ITEM DESCRIPTIONS PACK DATE PRINT Press [YES] or [NO] in this fi eld to select whether or not to print the packed date. -
Page 56: Plu Detail (Code) Registration
Data Registration 4.2.6 PLU DETAIL (CODE) REGISTRATION Returns to the PLU List screen. ■REGISTRATION METHOD FOR EACH ITEM Select the required registration item and enter the details. ITEM DESCRIPTIONS ITEM CODE Enter an item code and press this fi eld. REG CODE Enter the register code and press this fi... - Page 57 Data Registration POS FORMAT (WGT) Press this fi eld to display the Barcode Format screen, and press a desired barcode format for selection. TRACE ENABLE Press [YES] or [NO] in this fi eld to select whether or not to enable a traceability function.
-
Page 58: Plu Detail (Wrap) Registration
Data Registration 4.2.7 PLU DETAIL (WRAP) REGISTRATION Returns to the PLU List screen. ■REGISTRATION METHOD FOR EACH ITEM Select the required registration item and enter the details. ITEM DESCRIPTIONS TRAY NO. Enter a desired format number and press this fi eld. WRAP MODE Press [<] or [>] to select WRAP MODE. -
Page 59: Campaign Registration
Data Registration CAMPAIGN REGISTRATION Here you can register campaign commodities and campaign prices. Displays the campaign screen. Returns to the MENU screen. 1. 1. Touch [CAMPAIGN] on the MENU screen. The CAMPAIGN List screen will be displayed. 2. 2. Enter the call-up number for the INFORMATION campaign. - Page 60 Data Registration Select the campaign commodity. Touch the [CALL] button to call out the PLU screen and touch the required commodity. CALL Select the campaign type. Touch the [MD MODE] fi eld to call out the CAMPAIGN MODE List screen and select the campaign.
-
Page 61: Tray Registration
Data Registration TRAY REGISTRATION Here you can register information such as the tray's size and weight and the fi lm's weight. Displays the tray screen. Returns to the MENU screen. 1. 1. Touch [TRAY] on the MENU screen. The TRAY List screen will be displayed. 2. - Page 62 Data Registration Enter the tray name. Touch the name fi eld to call out the text edit screen and enter the tray name. After completing entry, touch the Return button. < < 4. 4. Set required items. FILM WGT. ...
-
Page 63: Preset Key Registration
Data Registration PRESET KEY REGISTRATION Here you can register functions that are frequently used as preset keys. Displays the preset key screen. Returns to the MENU screen. 1. 1. Touch the [PRESET KEY] on the MENU screen. The PRESET KEY screen will be displayed. -
Page 64: Setting Preset Groups And
Data Registration 4.5.1 SETTING PRESET GROUPS AND PAGES Press [<] or [>] to select the group or page number. 2. 2. To create or delete the group or the page, press the [GROUP] or [PAGE] button, and then press a desired function button as shown below. -
Page 65: Changing Preset Key Sizes And Positions
Data Registration 3. 3. The selected preset key has been assigned. 4.5.3 CHANGING PRESET KEY SIZES AND POSITIONS 1. 1. Select the group and the page that the preset key you want to edit is located, and then press [KEY] key, desired preset key, and [SIZE] or [MOVE] key. -
Page 66: Editing Preset Keys
Data Registration 4.5.4 EDITING PRESET KEYS Select the group and the page that the preset key you want to edit is located. Then, press the [KEY] button, the preset key, and the [EDIT] button. EDIT 2. 2. To split the preset key display into two portions, enter the numeric values and touch the... - Page 67 Data Registration 5. 5. To assign a desired image to the preset key, press the [IMAGE No.] fi eld. The Preset Key / Image screen is displayed. Press a desired image for selection. IMAGE No. To change the color of the preset key, press the [COLOR] button.
-
Page 68: Deleting Preset Keys
Data Registration To change the preset key operation, press the “FUNC No.” fi eld. Available functions are listed on the screen. Press a desired function for selection. FUNC No. 9. 9. To change the PLU number called up by the preset key, press the “DATA”... -
Page 69: Schedule Registration
Data Registration SCHEDULE REGISTRATION Here you can register store names and addresses. Displays the scheduler screen. Returns to the MENU screen. 1. 1. Touch [SCHEDULE] on the MENU screen. The SCHEDULER screen will be displayed. 2. 2. Enter the call-up number for the schedule. - Page 70 Data Registration Select the schedule format. 0: DATE..Specify the start date and end date, the start time and end time. 1. DLY/WLY ..Specify the day of the week. 4. 4. Enter the required item. START DATE ...
-
Page 71: Store Registration
Press [STORE] on the MENU INFORMATION screen. To setup for multiple store operation, a change in settings is required. Consult your ISHIDA dealer. The STORE screen will be displayed. 2. 2. Enter the call-up number for the INFORMATION store. To edit the registered... - Page 72 Data Registration Enter the store name and address. Touch the “STORE NAME” or “ADDRESS” fi eld to call out the text edit screen and enter the store name or address. STORE NAME After completing entry, touch the Return button. Set the printer.
-
Page 73: Department Registration
Data Registration DEPARTMENT REGISTRATION Here you can register departments. Displays the store screen. Returns to the MENU screen. 1. 1. Touch [DEPARTMENT] on the MENU screen. The DEPARTMENT screen will be displayed. 2. 2. Enter the call-up number for the department. - Page 74 Data Registration Enter the DEPARTMENT name. After completing entry, touch the Return button. INFORMATION The same procedure is used for both GROUP and DEPARTMENT. 4-27...
-
Page 75: Cooking Instruction Registration
Data Registration COOKING INSTRUCTION REGISTRATION Here you can register the cooking method, the cooking time and the cooking amount. Returns to the MENU screen. Displays the cooking time screen. 1. 1. Touch [COOKING TIME] on the MENU screen. The COOKING TIME List screen will be displayed. - Page 76 Data Registration Enter the cooking method name. After completing entry, touch the Return button. Register the cooking time and cooking amount. BASE TIME (min) MIN/kg 4-29...
-
Page 77: Nutritional Registration
Data Registration 4.10 NUTRITIONAL REGISTRATION Here you can register the amount per unit and nutrition per unit-amount. Returns to the MENU screen. Displays the nutorition screen. 1. 1. Touch [NUTRITION] on the MENU screen. The NUTRITION List screen will be displayed. - Page 78 Data Registration Enter the serving size. Touch the [SERVING SIZE] and [SERVING SIZE 2] fi elds to call out the text edit screen and enter the serving size. After completing entry, touch the Return button. SERVING SIZE Enter the required item. TOTAL CALORIES ...
-
Page 79: Extra Message Registration
Data Registration 4.11 EXTRA MESSAGE REGISTRATION Here you can register the amount per unit and nutrition per unit-amount. Returns to the MENU screen. Displays the nutorition screen. 1. 1. Touch [EXTRA MSG. 1] on the MENU screen. The EXTRA MESSAGE List screen will be displayed. - Page 80 Data Registration Enter the message. After completing entry, touch the Return button. INFORMATION The same procedure is used for EXTRA MSG. 3, INGREDIENT, COUPON MSG., POP MSG., FREE MSG. 1-15 and EXTRA MSG. 1. 4-33...
-
Page 81: Scheme Table Registration
Data Registration 4.12 SCHEME TABLE REGISTRATION Here you can register scheme tables used for traceability. Returns to the MENU screen. Displays the nutorition screen. 1. 1. Touch [SCHEME TABLE] on the MENU screen. The SCHEME TABLE List screen will be displayed. - Page 82 Data Registration Enter the scheme table. Touch the name fi eld to call out the text edit screen, and enter the table name. After completing entry, touch the Return button. 4-35...
-
Page 83: Scheme Table / Detail (Control) Screen Registration
Data Registration 4.12.1 SCHEME TABLE / DETAIL (CONTROL) SCREEN REGISTRATION Returns to the PLU List screen. ■REGISTRATION METHOD FOR EACH ITEM Select the required item and enter the details. ITEM DESCRIPTIONS RETAIN LOT No. Press this fi eld to select whether or not to use this lot number. 0: No 1: Yes PASSPORT FORMAT... -
Page 84: Scheme Table / Detail (Basic) Registration
Data Registration 4.12.2 SCHEME TABLE / DETAIL (BASIC) REGISTRATION Returns to the PLU List screen. ■REGISTRATION METHOD FOR EACH ITEM Select the required item and enter the details. ITEM DESCRIPTIONS LOT/CARCASS Enter a numerical value and press the applicable data fi eld. GTIN Enter a numerical value and press the applicable data fi... -
Page 85: Scheme Table / Detail (Attrib.) Registration
Data Registration 4.12.3 SCHEME TABLE / DETAIL (ATTRIB.) REGISTRATION Returns to the PLU List screen. ■REGISTRATION METHOD FOR EACH ITEM Select the required item and enter the details. ITEM DESCRIPTIONS TITLE TEXT Touch the fi eld to call out the text edit screen, and enter the title. START Enter a numerical value and press this data fi... -
Page 86: Gen Table Registration
Data Registration 4.13 GEN TABLE REGISTRATION Here you can register GEN tables used for traceability. Displays the GEN table screen. Returns to the MENU screen. 1. 1. Touch [GEN TABLE] on the MENU screen. The GEN TABLE screen will be displayed. 2. - Page 87 Data Registration 3. 3. Enter the table name. After completing entry, touch the Return button. Enter the required item. START STOP ATTR ID 4-40...
-
Page 88: Lookup Table Registration
Data Registration 4.14 LOOKUP TABLE REGISTRATION Here you can register data that can be referred to upon commodity registration such as its place of origin. Displays the lookup table screen. Returns to the MENU screen. 1. 1. Touch [LOOKUP TABLE] on the MENU screen. - Page 89 Data Registration 3. 3. Enter the lookup table name. Touch the name fi eld to call out the text edit screen and enter the table name. After completing entry, touch the Return button. Enter the call-up number for the table data. INFORMATION To edit the registered lookup table data,...
- Page 90 Data Registration Enter the data name. After completing entry, touch the Return button. 4-43...
-
Page 91: Mince Trace Registration
Data Registration 4.15 MINCE TRACE REGISTRATION Here you can register information regarding the traceability of mincemeat. Displays the mince trace screen. Returns to the MENU screen. 1. 1. Touch [MINCE TRACE] on the MENU screen. The MINCE TRACE screen will be displayed. -
Page 92: Fixed Price Symbol Registration
Data Registration 4.16 FIXED PRICE SYMBOL REGISTRATION Here you can register the counting symbols for commodities. Displays the fix price symbol screen. Returns to the MENU screen. 1. 1. Touch [FIX PRICE SYMBOL] on the MENU screen. The FIX PRICE SYMBOL screen will be displayed. - Page 93 Data Registration 3. 3. Enter the counting symbol. After completing entry, touch the Return button. Enter the unit and its plural form separated by a space. CAUTION 4-46...
-
Page 94: Label Data Check
Data Registration 4.17 LABEL DATA CHECK Here you can check labels through actual printing. Displays the check label screen. Returns to the MENU screen. 1. 1. Touch [CHECK LABEL] on the MENU screen. The CHECK LABEL screen will be displayed. 2. -
Page 95: Nutrition Text Registration
Data Registration 4.18 NUTRITION TEXT REGISTRATION Here you can register data such as information on nutrition. Displays the nutrition text screen. Returns to the MENU screen. 1. 1. Touch [NUTRITION TEXT] on the MENU screen. The NUTRITION TEXT List screen will be displayed. - Page 96 Data Registration Enter the required item. Touch the required fi eld to call up the text edit screen and enter the contents. After completing entry, touch the Return button. 4-49...
-
Page 97: Character Entry Method
Data Registration 4.19 CHARACTER ENTRY METHOD This chapter describes character entry procedures, using the extra message function as an example. (Although the text registration screen is the same for each function, depending on its use, there may keys which cannot be used.) Upper-case mode Lower-case mode... - Page 98 Data Registration Used to move the cursor down. Used to specify an Italic character Also used to select characters for style. changing the style. Used to copy the original data to the Used to enter a space. current data. Used to erase the full text currently being called.
-
Page 99: Text Editing
Data Registration 4.19.1 TEXT EDITING 1. 1. Enter desired characters using alpha-numeric keys. Upper-case characters 2. 2. To begin a new line, press the [New Line] key. Enter desired characters. 3. 3. To register the editing, press the Return button. 4-52... -
Page 100: Font Style Selection
Data Registration 4.19.2 FONT STYLE SELECTION 1. 1. Press the following keys to select a desired font style. Note: The selected font style is displayed in the “STYLE” display fi eld. 2. 2. Enter desired characters using alpha-numeric keys. 3. 3. Press the Return key to register the editing. -
Page 101: Line Data Deletion
Data Registration 4.19.3 LINE DATA DELETION 1. 1. Press the [Line Delete] key to delete the line data. 2. 2. The line data has been deleted. Press the Return button to register the deletion. 3. 3. The confi rmation screen is displayed. -
Page 102: Data Erase
Data Registration 4.19.4 DATA ERASE Press the [ERASE] button to delete the full text currently being called. ERASE 2. 2. The confi rmation screen is displayed. Press [EXEC] to continue, or [STOP] to go back. EXEC 3. 3. The full text has been erased. -
Page 103: Data Copy
Data Registration 4.19.5 DATA COPY 1. 1. To call up a desired string of characters, press the INPUT fi eld at the bottom right of the screen to display the keypad. 2. 2. Then, enter a numerical value and press the [SET] key on the keypad. - Page 104 Data Registration The specifi ed text has been copied. 4-57...
- Page 105 Data Registration Memo 4-58...
-
Page 106: Chapter 5 Data Totalization
CHAPTER 5 DATA TOTALIZATION... -
Page 107: Change To Total Mode
Advanced Operations CHANGE TO TOTAL MODE The total menu screen is displayed. 1. 1. Touch the Return bottun the initial screen in Production Mode. The main menu screen is displayed. 2. 2. Touch [Total Mode] on the main menu screen. REFERENCE When the password is set to Total Mode, enter... -
Page 108: Totals
Advanced Operations TOTALS This section provides a brief explanation about various totals. PROD. DAILY TOTAL Total data on the production day is displayed. TOTAL Displays the total of production data on the day. Displays the total of production data of the day at the every time zone. HOUR DEPT. -
Page 109: Grand Total
The prod. daily total (total) screen is displayed. totals. For details, consult your ISHIDA dealer. 2. 2. Touch the [TOTAL] tab on the prod. daily total (total) screen. TOTAL The display changes to the prod. daily total (dept.) screen, and the quantity,... -
Page 110: Total Per Department
The prod. daily total (total) screen is displayed. totals. For details, consult your ISHIDA dealer. 2. 2. Touch the [DEPT.] tab on the prod. daily total (total) screen. DEPT. The display changes to the prod. daily total(dept.) screen, and the quantity,... -
Page 111: Designated Item Total
Advanced Operations DESIGNATED ITEM TOTAL The arbitrary item data is totalized. This section provides a brief explanation by taking an example of Prod. Daily Total (PLU) Item Total. The prod. daily total (total) screen is displayed. The display returns to the total menu screen. -
Page 112: Total Per Type
The No. : The total data is displayed and totalized by department. connection of an No. : The total data is displayed and totalized by group. external device is required to print out totals. For details, consult your ISHIDA dealer. - Page 113 Advanced Operations 3. 3. Select the analysis type. PLU No. : Displays and totalizes in item call number order. ABC PRICE : Displays and totalizes in descending order of gross prices. ABC WEIGHT : Displays and totalizes in descending order of gross weights. ABC PCS : Displays and totalizes in descending order of gross quantities.
-
Page 114: Total Per Hour
For details, consult 2. 2. Touch the [HOURLY] tab on the your ISHIDA dealer. work analysis (hourly) screen. HOURLY The display changes to the analysis (hourly) screen, and the quantity, weight, and price is displayed per hour. -
Page 115: Total Per Wrapping Mode
For output of the data, connection by an exterior device is required. The analysis (hourly) screen is displayed. For details, contact your ISHIDA service representative. 2. 2. Touch the [WRAP MODE] tab on the work analysis (hourly) screen. The analysis (wrap mode) screen is displayed. -
Page 116: Total Per Tray
The analysis (hourly) screen is displayed. required to print out totals. For details, consult 2. 2. Touch the [TRAY] tab on the your ISHIDA dealer. analysis (hourly) screen. TRAY The analysis (tray) screen is displayed. 5-11... -
Page 117: Total Clear
Advanced Operations 5.10 TOTAL CLEAR Accumulated total data can be cleared. Returns to the total menu screen. Displays the total clear screen. Deletes the total data. 1. 1. Touch [TOTAL CLEAR] on the total menu screen. The total clear screen is displayed. 2. -
Page 118: Chapter 6 Total Data Correction
CHAPTER 6 TOTAL DATA CORRECTION... -
Page 119: Switching To Subtraction Mode
Advanced Operations SWITCHING TO SUBTRACTION MODE The data of items that have been produced by mistake can be deleted from total. Furthermore, the shortage of production data can be added here. Touch to return to the production screen. The main menu screen is displayed. -
Page 120: Subtraction By Numerical Entry
Advanced Operations SUBTRACTION BY NUMERICAL ENTRY The data to which numerical value is entered can be subtracted from the total data. The total adjust (input num sub) screen is displayed. The display returns to the main menu screen. Execute the subtraction. -
Page 121: Addition By Numerical Entry
Advanced Operations ADDITION BY NUMERICAL ENTRY The data to which numerical value is entered can be added to the total data. The display returns to the main menu screen. Execute the addition. The subtraction (addition by numerical entry) screen is Enter the numerical value and touch the displayed. -
Page 122: Chapter 7 Setting Mode
CHAPTER 7 SETTING MODE... -
Page 123: Switching To Setting Mode
Advanced Operations SWITCHING TO SETTING MODE The setting menu screen is displayed. 1. 1. Touch the Return botton on the initial screen in Production Mode. The main menu screen is displayed. 2. 2. Touch [Setting Mode] on the main menu screen. The setting menu screen is displayed. -
Page 124: Password Settings
Advanced Operations PASSWORD SETTINGS This section describes the method of setting passwords for menu items in each mode. Displays the password (operate) screen. Retruns to the setting menu screen. Sets the entered 4 to 6 -digit password. Select the setting of each menu item. -
Page 125: Key Lock Settings
Advanced Operations KEY LOCK SETTINGS This section describes how to set key locks for the Display key, function key, and stroke key. Displays the key lock (display key) screen. Returns to the setting menu screen. Sets the entered 4 to 6 -digit password. -
Page 126: Total Addition Settings
Advanced Operations TOTAL ADDITION SETTINGS The data storage (total add.) screen is displayed. Returns to the setting menu screen. Touch [DATA STORAGE] on the setting menu screen. The total addition setting screen is displayed. 2. 2. Set necessary items. DAILY TOTAL When “Add”... -
Page 127: Item Data Auto-Update Settings
Advanced Operations ITEM DATA AUTO-UPDATE SETTINGS It is set to changed a temporary change in production mode to permanent. Displays the item data auto-uapdate screen. Returns to the setting menu screen. Switches the page. Sets whether or not to reflect the changed data in the Item Master when data is changed in the Production Mode Yes : The Item Master is updated. -
Page 128: Plu Initial Data Settings
Advanced Operations PLU INITIAL DATA SETTINGS Initial values of setting items can be set at the time of item registration. Displays the PLU Initial Data (SALE 1) screen. Returns to the setting menu screen. 1. 1. Touch [PLU INITIAL DATA] on the setting menu screen. The PLU initial data (SALE1) screen is displayed. -
Page 129: Item Data Batch Change Settings
Advanced Operations ITEM DATA BATCH CHANGE SETTINGS Item data that has already been registered can be changed or updated in a batch. The PLU update screen is displayed. 1. 1. Touch [PLU UPDATE] on the setting menu screen. INFORMATION Setting the substitution condition to “Yes”... -
Page 130: Chapter 8 Adjustment Mode
CHAPTER 8 ADJUSTMENT MODE... -
Page 131: Switch To The Adjustment Mode
Advanced Operations SWITCH TO THE ADJUSTMENT MODE The adjustment menu screen is displayed. 1. 1. Touch the Return botton on the initial screen in Production Mode. The main menu screen is displayed. 2. 2. Touch [ADJUST] on the main menu screen. The adjustment menu screen is displayed. -
Page 132: Date And Time Adjustment
Advanced Operations DATE AND TIME ADJUSTMENT Adjust the date, time and year of the internal clock of the machine. The clock setting screen is displayed. The display returns to the adjustment menu screen. Touch [DATE TIME] on the adjustment menu screen. The date time setting screen is displayed. -
Page 133: Touch Screen Adjustment
Advanced Operations TOUCH SCREEN ADJUSTMENT Adjust the touch location on the touch panel. The touch screen adjustment screen is displayed. The display returns to the adjustment menu screen. 1. 1. Touch [TOUCH SCREEN] on the adjustment screen. The touch screen adjustment screen is displayed. 2. -
Page 134: Screen Brightness Adjustment
Advanced Operations SCREEN BRIGHTNESS ADJUSTMENT The vertical and horizontal display screen brightnesses of the touch screen can be adjusted. The display check (vertical display) screen is displayed. The display returns to the adjustment mode menu screen. 1. 1. Touch [DISPLAY CHECK] on the adjustment menu screen. The display check (vertical display) screen is displayed. - Page 135 Advanced Operations Memo...
-
Page 136: Appendix Others
APPENDIX OTHERS... -
Page 137: A-1. Specifications
Appendix A-1. SPECIFICATIONS Model Name IP-AI Weigh Unit Weighing Capacity *1 0 - 3 kg x 0.001 kg / 3 - 6 kg x 0.002 kg 0 - 6 kg x 0,002 kg / 6 - 15 kg x 0.005 kg 0 - 15 lb x 0.005 lb /15 - 30 lb x 0.01 lb... - Page 139 © Rice Lake Weighing Systems Specifications subject to change without notice. Rice Lake Weighing Systems is an ISO 9001 registered company. 230 W. Coleman St. • Rice Lake, WI 54868 • USA U.S. 800-472-6703 • Canada/Mexico 800-321-6703 • International 715-234-9171 • Europe +31 (0)26 472 1319 www.ricelake.com November 1, 2016 PN 177839...
Need help?
Do you have a question about the IP-AI and is the answer not in the manual?
Questions and answers