
Subscribe to Our Youtube Channel
Related Manuals for Ikegami ML Series


Summary of Contents for Ikegami ML Series
- Page 1 Ikegami Tsushinki Co., Ltd. User Manual ML Serise LCD Monitor Model MLW-2424C /2624C...
- Page 2 Thank you for choosing this Ikegami HD Monitor. Please read this Instruction manual carefully to keep your Ikegami products at peak performance for a longer service period. All Ikegami products are designed and manufactured with utmost care and craftsmanship to provide long life and high quality performance, if it is properly used and maintained as outlined in this manual.
- Page 3 CAUTION RISK OF ELECTRIC SHOCK DO NOT OPEN SA 1965 SA 1966 CAUTION: TO REDUCE THE RISK OF ELECTRIC SHOCK, DO NOT REMOVE COVER (OR BACK). NO USER-SERVICEABLE PARTS INSIDE. REFER SERVICING TO QUALIFIED SERVICE PERSONNEL. The lightning flash with arrowhead inside a triangle is intended to warn the user that parts inside the product are dangerous and many cause electrical hazards.
- Page 4 Warning: This is a class A product. In a domestic environment this product may cause radio interference in which case the user may be required to take adequate measures.
- Page 5 2000m 2000m 2000m...
- Page 8 IMPORTANT SAFETY INSTRUCTIONS 1. General 1) Read all instructions provided. 2) Save these instructions for future use. 3) Follow all warnings and instructions marked on the monitor equipment. 4) Never insert objects of any kind into this monitor through cabinet slots as they may come in contact with dangerous voltage points or short out parts, resulting in fire or electrical hazards, Never spill liquid of any kind on the monitor.
- Page 9 3) Upon completion of any service or repairs to this monitor, ask the service technician to perform routine safety checks to determine that the Color LCD Display is in safe operating condition. 4) For repair service, contact Ikegami’s authorized sales representative or Ikegami service desk directly. OPERATING PRECAUTIONS 1) Never let this unit fall or subject it to strong shock.
-
Page 10: Table Of Contents
Contents 1. Precautions ......................1 2. General Description ....................4 2.1 Features ......................4 2.2 About Input Signals ..................4 2.3 Functions ....................... 5 3. Names of Parts ...................... 6 3.1 Names of Parts and Their Functions ............6 4. Remote Connection ....................8 4.1 RS-232C terminal .................. -
Page 11: Precautions
1. Precautions • When you open the cardboard box of the LCD monitor, please check that the indicated accessories and cables are present. It is recommended not to dispose of the packaging materials and to store them for later use if it becomes necessary to transport again for after-sales service, or maintenance purposes. - Page 12 1. Precautions Warning on power connection. The United States Canada Continental Europe NEMA 5-15P NEMA 5-15P CEE7 Plug Type HOSPITAL HOSPITAL EURO GRADE GRADE Rated Voltage & 10A/125V 10A/125V 10A/250V Current Safety Approval Plug Configuration Power Cord Type SJT Type SJT H05VV-F Use a proper power cord for your local power supply.
- Page 13 Powering On The Unit Connect the power supply to the DC input via the power plug. Plug in the AC adapter. Connect the video source to the display. The IKEGAMI logo is displayed, followed shortly by video. The power supply interception method Unplug a AC power cord.
-
Page 14: General Description
2. General Description 2.1 Features ● High-resolution image display A full high-definition panel with a resolution of 1920(H) x 1080(V)(24”:1920×1200) dots is employed for displaying extremely fine images. ● Higher brightness and wider view angle The view angle is as wide as 178° from all directions. No matter where the monitor is set up, images can be comfortably viewed from different angles. -
Page 15: Functions
2. General Description 2.3 Functions ● Color temperature switching function The color temperatures can be chosen from 6500K, 9300K and user settings to select a color rendering to your taste. ● Gamma level switching function The gamma level can be selected, compatible with DICOM14, from 1.8 to 2.6 (in 0.2 increments), ●... -
Page 16: Names Of Parts
3. Names of Parts 3.1 Names of Parts and Their Functions Front ① Power indicator : When the power is in "ON" mode ------------------- Illuminate in Green When the power is in "OFF" mode ------------------ Extinction When the power is in "Energy saving" mode ---- Illuminate in orange ②... - Page 17 Rear ① Power switch : The power to "on", "off". ② DC input socket : Connect the AC adapter. ③ Potential equalization terminal : Terminal to equalize the potentials of devices. ④ RS-232C terminal : Connected to the PC, and control the machine. ⑤ DC output terminal : DC5V / 1A is available.
-
Page 18: Remote Connection
4. Remote Connection 4.1 RS-232C terminal Remote control is possible with a remote control signal feed. D-SUB 9 pin connector on LCD Monitor back External PC/D-SUB 9 pin Connector 1. 1. 2.TXD 2.RXD 3.RXD 3.TXD 4. 4. 5.GND 5.GND 6. 6. ... -
Page 19: Operation
5. Operation 5.1 Front Key Operation There are ten front keys as shown below. Power display The keys have the following functions. INPUT1 : Switching of the input signal set to IN1. Switch to each press of the key. INPUT2 : Switching of the input signal set to IN2 Switch to each press of the key. -
Page 20: Settings And Key Operation
5. Operation : VGA, SVGA, XGA, SXGA,WUXGA, 480i, 575i, HD15 line 720P/50, 720P/60, 1080i/50, 1080i/60, 1080P/50, 1080P/60 : VGA, SVGA, XGA, SXGA, WUXGA, 480i, 575i, DVI line 720P/50, 720P/60, 1080i/50, 1080i/60, 1080P/50, 1080P/60 With no signal being input : No Sync 5.3 Settings and Key Operation The setting is applied to the selected input signal. -
Page 21: Configuration
6 Configuration 6.1 Operation screen This screen is used to display the current input signal information and the monitor settings. Screen display Displays the input signal that is selected and/or set status. ・ Video Frequency : Displays the frequency of the input signal. ・RGB/YpbPr HD15 : Displays the signal format (RGB or YpbPr) that is set to HD15. -
Page 22: Color Settings Screen
6. Configuration ・ BackLight : Used to change the backlight brightness of the LCD panel. The adjustable range is from 0 to 20. (26-inch up to 18) : Select function of the BackLight brightness. ・Select "Normal" is the standard mode, and "High" is the high-intensity mode. -
Page 23: Picture Settings Screen
6. Configuration : Abbreviation for Hyper Image Structure Enhancer. Adjusts specific ・HISE colors (different menu). Color : Select Preset 1, 2, 3, or 4 for the color adjustment as the adjustment matches the intended purpose. Edge : Select Preset 1, 2, 3, or 4 for the edge adjustment as the adjustment matches the intended purpose. -
Page 24: Input Settings Screen
6. Configuration : Used to adjust the horizontal and vertical sizes onscreen. ・H/V.Size Move toward the plus side to enlarge the screen. Move toward the minus side to reduce the screen. ・Dot Clock : Adjusts the number of sampling dots of the HD15 analog signal. The sampling frequency increases/decreases with "+"... -
Page 25: Setup Selection Screen
6. Configuration 6.6 Setup selection screen Function to return the user memory setting and adjustment value to the default value at the time of purchase. Screen display Operation Video Color Picture Mode Setup Input PinP Function Description of Memory Settings screen ・User Preset : Used to memorize up to eight different groups (1 to 8) of settings. -
Page 26: Input Sel. Selection Screen
6. Configuration ・ Factory Reset : Returns the setting to the default setting at the time of shipping from the factory. Executes by using "Reset Item Non / User / Display /Color/All Execute". 6.7 Input selection screen Function to allocate the signal input key. Display screen ・ ... -
Page 27: Function Selection Screen
6. Configuration 6.9 Function selection screen Function to set the multiple display. Display screen ・ A llocations of Non/Gamma/Color Temp./Disp Direction/Scaling/Hue/Chroma/Mono/ Swap/HICE/Backlight/DICE White/Dice Black/Capture are possible. Direct adjustment and setting become possible from the front function keys (F1 to F4) after the allocation. -
Page 28: Applicable Signals
7. Applicable Signals 7.1 Video Signals Input signal Name Video/S-Video DVI-D 480i/60 ○ ○ ○ ○ 575i/50 ○ ○ ○ ○ 480P/60 − − ○ − 575P/50 − − ○ − 1080i/60 − ○ ○ ○ − 1080i/50 ○ ○ ○ 720P/60 −... -
Page 29: Troubleshooting
8. Troubleshooting No image appears on the monitor screen. • Check to see if the AC power cord is tightly plugged in. • Check to see if the unit’s power switch is turned on. • Check the input signal. • Check to see if the input is selected as specified. •... - Page 30 8. Troubleshooting The screen size is wrong. • Check to see if the signal is listed in the applicable signals chart described under section 6. • On the Display Setting screen, set the AUTO. If the desired setting cannot be obtained, adjust H.Position, V.Position, H.Size, V.Size, and Clock.
-
Page 31: Specifications
Not suitable for use in the presence of flammable flammable anesthetics or oxygen anesthetics or oxygen. Mode of operation Continuous Manufacturers Ikegami Tsushinki Co., Ltd. AC adapter,AC power cord,Instructions for use, Accessories supplied Ferrite core. 9.2 AC Adapter for MLW-2424C-DC Model... -
Page 32: Mlw-2624C
Not suitable for use in the presence of flammable flammable anesthetics or oxygen anesthetics or oxygen. Mode of operation Continuous Manufacturers Ikegami Tsushinki Co., Ltd. AC adapter,AC power cord,Instructions for use, Accessories supplied Ferrite core. 9.4 AC Adapter for MLW-2624C-DC Model... -
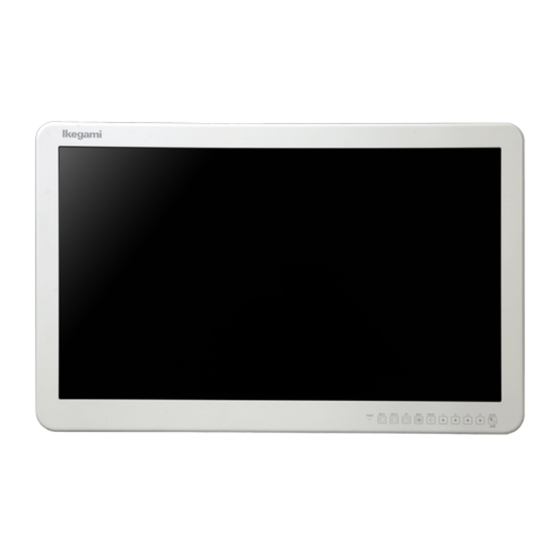
Page 33: Mlw-2424C Appearance View
9. Specifications 9.5 MLW-2424C-DC Appearance view <without stand type> 9.6 MLW-2624C-DC Appearance view <without stand type> Specifications and design are subject to change for product improvements without notice. -
Page 34: Use The Stand
10. Use the stand • Clean work area. To protect monitor screen : wipe off work area and place monitor (Screen-side down) on a soft cloth or towel before proceeding with installation. top of monitor screen • Attach stand to monitor. Start screws as far as possible by hand, the tighten with screwdriver. - Page 36 Ikegami Tsushinki Co., Ltd. 5-6-16, Ikegami, Ohta-ku, Tokyo, Japan 146-8567 Phone:03-5700-1111 Fax:03 -5700-1137 Ikegami Electronics (U.S.A.), Inc. 37 Brook Avenue, Maywood, New Jersey 07607 Phone:201-368-9171, Fax:201-569-1626 Ikegami Electronics (Europe) GmbH Ikegami Strasse 1, D-41460 Neuss, Germany Phone:02131-1230, Fax:02131-102820 Ikegami Electronics Asia Pacific Pte. Ltd.
Need help?
Do you have a question about the ML Series and is the answer not in the manual?
Questions and answers