Table of Contents
Advertisement
Available languages
Available languages
Quick Links
Advertisement
Chapters
Table of Contents

Related Manuals for ProLights RAZOR440 HYBRID BEAM


Summary of Contents for ProLights RAZOR440 HYBRID BEAM
- Page 1 RAZOR440 HYBRID BEAM MANUALE UTENTE USER MANUAL IT - EN...
- Page 2 Music & Lights S.r.l. si riserva ogni diritto di elaborazione in qualsiasi forma delle presenti istruzioni per l’uso. La riproduzione - anche parziale - per propri scopi commerciali è vietata. Al fine di migliorare la qualità dei prodotti, la Music&Lights S.r.l. si riserva la facoltà di modificare, in qualunque momento e senza preavviso, le specifiche menzionate nel presente manuale di istruzioni.
-
Page 3: Table Of Contents
RAZOR440 INDICE Sicurezza Avvertenze generali Attenzioni e precauzioni per l’installazione Informazioni generali 1 Introduzione 1. 1 Descrizione 1. 2 Specifiche tecniche 1. 3 Elementi di comando e di collegamento 2 Installazione 2. 1 Montaggio 3 Funzioni e impostazioni 3. 1 Funzionamento 3. -
Page 4: Sicurezza
RAZOR440 ATTENZIONE! Prima di effettuare qualsiasi operazione con l’unità, leggere con attenzione questo manuale e conservarlo accuratamente per riferimenti futuri. Contiene informazioni importanti riguardo l’installazione, l’uso e la manutenzione dell’unità. SICUREZZA Avvertenze generali • I prodotti a cui questo manuale si riferisce sono conformi alle Direttive della Comunità Europea e per- tanto recano la sigla . -
Page 5: Informazioni Generali
RAZOR440 INFORMAZIONI GENERALI Spedizioni e reclami Le merci sono vendute “franco nostra sede” e viaggiano sempre a rischio e pericolo del distributore/clien- te. Eventuali avarie e danni dovranno essere contestati al vettore. Ogni reclamo per imballi manomessi dovrà essere inoltrato entro 8 giorni dal ricevimento della merce. Garanzie e resi Il prodotto è... -
Page 6: Introduzione
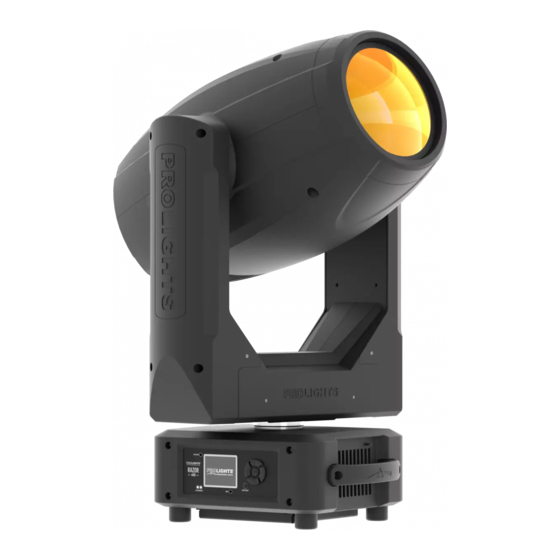
RAZOR440 - 1 - INTRODUZIONE 1.1 DESCRIZIONE RAZOR440 è un nuovo concept Ibrido, ingegnerizzato per offrire in un unico illuminatore avanzate fun- zionalità di Beam super-concentrato, Spot ad alta definizione e Washlight. RAZOR440 è equipaggiato di lampada a scarica Osram Sirius 440W, e mediante il nuovo sistema ottico riesce ad emettere una proiezio- ne uniforme su tutto l’ampio range di zoom lineare da 2 a 50°. - Page 7 RAZOR440 • Corpo: Struttura in alluminio con coperture in policarbonato ad alta resistenza • Colore: Nero CONTROLLO • Protocolli: DMX512, RDM, Art-Net • Canali DMX: 21/24/26ch • W-DMX: Integrato, ricevitore ad antenna (2.4 GHz) by Wireless Solution Sweden • RDM: RDM ready per controllo e impostazioni remote della fixture •...
- Page 8 RAZOR440 Disegno tecnico Fig.1...
-
Page 9: Elementi Di Comando E Di Collegamento
RAZOR440 1.3 ELEMENTI DI COMANDO E DI COLLEGAMENTO 1. TESTA MOBILE 2. BRACCIO GIREVOLE 3. BLOCCO E SBLOCCO MOVIMENTO TILT 4. BLOCCO E SBLOCCO MOVIMENTO 5. MANIGLIA PER TRASPORTO 6. INDICATORE LED "WDMX" 7. PANNELLO DI CONTROLLO con display LCD e 6 pulsanti per l'accesso e gestione delle diverse funzioni. -
Page 10: Installazione
RAZOR440 - 2 - INSTALLAZIONE 2.1 MONTAGGIO La testa mobile RAZOR440 può essere collocato su un piano solido. Inoltre, grazie ai fori di fissaggio, l’unità può essere montata anche a testa in giù, su una traversa (fig.3). Per il fissaggio occorrono dei supporti ro- busti per il montaggio. -
Page 11: Funzioni E Impostazioni
RAZOR440 - 3 - FUNZIONI E IMPOSTAZIONI 3.1 FUNZIONAMENTO Per accendere la testa mobile RAZOR440 inserire la spina del cavo di alimentazione in una presa di rete (100-240V~/50-60Hz). La testa mobile e tutti i motori di comando si mettono in una precisa posizione di partenza. -
Page 12: Struttura Menu
RAZOR440 3.3 STRUTTURA MENU MENU ð ð ð CONNECT Address Value (1-512) ð W-DMX Value (1-512) ð Artnet Value (1-512) ð ð DMX Mode Mode Bas/Std/Ext ð Edit User Max Channel/Control/Pan/Pan Fine/Tilt/... ð ð Wireless DMX Out ON/OFF ð Reset Connect YES/NO ð... - Page 13 RAZOR440 ð ð ADVANCED Reset Pan & Tilt Others ð ð Calibration Password 050 (unlocks the following settings) ð Value (-128-127) ð Tilt Value (-128-127) ð Dimmer Value (-128-127) ð Cyan Value (-128-127) ð Magenta Value (-128-127) ð Yellow Value (-128-127) Gobo1 Gobo2 Prism 1...
- Page 14 RAZOR440 ð ð Select Chase Chase Part 1 Chase 1 - Chase 8 Chase Part 2 Chase 1 - Chase 8 ð Chase Part 3 Chase 1 - Chase 8 ð ð Edit Chase Chase 1 Step 1 - 64 Chase 2 Step 1 - 64 ..
-
Page 15: Modalità Slave Receive
RAZOR440 3.4 MODALITÀ SLAVE RECEIVE Questa modalità consente di collegare in linea più unità senza un controller. La prima unità sarà impostata come Master e le altre funzioneranno come Slave con lo stesso effetto. Inoltre, un’unità Master RAZOR440 può inviare fino a 3 diversi gruppi di dati alle unità Slave, ossia può guidare 3 diverse unità... -
Page 16: Modalità Scenes Records
RAZOR440 Edit Chases La funzione Edit Chases permette di creare show automatici preprogrammati. I programmi automatici Chase Part1/2/3 sono suddivisi ognuno in Chase1-Chase8. Ogni Chase può essere com- posto da 1-64 step che possono essere configurati attraverso la seguente procedura: •... -
Page 17: Sensibilità Microfono
RAZOR440 perfettamente, aumentare il volume o ridurre la distanza fra sorgente audio e l’unità oppure alternativa- mente aumentare la sensibilità del microfono. • Premere il tasto ENTER per accedere al menu principale. • Premere il tasto UP/DOWN per scorrere nel menu, selezionare l’icona Program, quindi premere il tasto ENTER per accedere al menu successivo Play. -
Page 18: Indirizzamento Dmx
RAZOR440 • Premere il tasto UP/DOWN per scorrere nel menu, selezionare l’icona Set, quindi premere il tasto ENTER per accedere al menu successivo. • Premere il tasto UP/DOWN per selezionare Users e premere il tasto ENTER per accedere al menu succes- sivo User Mode. -
Page 19: Collegamenti Della Linea Dmx
RAZOR440 3.13 COLLEGAMENTI DELLA LINEA DMX La connessione DMX è realizzata con connettori standard XLR. Utilizzare cavi schermati, 2 poli ritorti, con impedenza 120Ω e bassa capacità. Per il collegamento fare riferimento allo schema di connessione riportato di seguito: DMX - INPUT DMX - OUTPUT Spina XLR Presa XLR... -
Page 20: Canali Dmx
RAZOR440 3.15 CANALI DMX FUNCTION Value 21 Ch 24 Ch 26Ch 0~100% 000 - 255 PAN 16bit 0~100% 000 - 255 TILT 0~100% 000 - 255 TILT 16bit 0~100% 000 - 255 P/T SPEED Fastest to slowest 000 - 250 Movement with blackout 251 - 255 SHUTTER... - Page 21 RAZOR440 FUNCTION Value 21 Ch 24 Ch 26Ch 1st COLOR WHEEL & CYAN Indexed CYAN 0~100% 000 - 127 2 - CYAN + CTB 128 - 132 3 - CTB 133 - 137 4 - CTB + AQUAMARINE 138 - 142 5 - AQUAMARINE 143 - 147 6 - AQUAMARINE + PINK...
- Page 22 RAZOR440 FUNCTION Value 21 Ch 24 Ch 26Ch 2st COLOR WHEEL & MAGENTA Indexed MAGENTA 000 - 127 0~100% 2 - MAGENTA + PALE ROSE 128 - 132 3 - PALE ROSE 133 - 137 4 - PALE ROSE + TAN 138 - 142 5 - TAN 143 - 147...
- Page 23 RAZOR440 FUNCTION Value 21 Ch 24 Ch 26Ch 3st COLOR WHEEL & YELLOW Indexed YELLOW 000 - 127 0~100% 2 - YELLOW + LIGHT GREEN 128 - 132 3 - LIGHT GREEN 133 - 137 4 - LIGHT GREEN + DARK GREEN 138 - 142 5 - DARK GREEN 143 - 147...
- Page 24 RAZOR440 FUNCTION Value 21 Ch 24 Ch 26Ch Forward & Reverse Wheel Spin 000 - 255 Stop to fastest Continuous Positioning 0°~360° 000 - 255 Continuous Positioning 0°~360° 000 - 255 ROTATING GOBO WHEEL Indexed Open 000 - 013 Gobo 1 014 - 027 Gobo 2 028 - 041...
- Page 25 RAZOR440 FUNCTION Value 21 Ch 24 Ch 26Ch FIXED GOBO SELECTION Indexed Open 000 - 012 Gobo 1 013 - 025 Gobo 2 026 - 038 Gobo 3 039 - 051 Gobo 4 052 - 064 Gobo 5 065 - 077 Gobo 6 078 - 090 Gobo 7...
- Page 26 RAZOR440 FUNCTION Value 21 Ch 24 Ch 26Ch 060 - 063 Gobo 15 Gobo 16 064 - 067 Gobo 17 068 - 071 Gobo 18 072 - 075 Indexed with Shake (from slow to speed) 076 - 083 Gobo 1 084 - 091 Gobo 2 092 - 099...
- Page 27 RAZOR440 FUNCTION Value 21 Ch 24 Ch 26Ch 15m Auto Focus 064 - 079 >20m Auto Focus 080 - 095 TBD (not used) 096 - 255 FOCUS Continuous Focus IN to Focus OUT 000 - 255 With Auto Focus Focus adjustment 000 - 255 ZOOM Small to big...
- Page 28 RAZOR440 Rotating gobos Ø 27 mm - image: Ø 21 mm - thickness: 1.1mm Fixed gobos Animation Wheel Color Wheel Aquamarine Pink Cobalt Blue Congo Open Cyan Pale Rose Orange Light Orange Dark Red Open Magenta Light Green Dark Green 2500K Lavander Grass Green...
-
Page 29: Impostazione Controllo Wireless
RAZOR440 3.16 IMPOSTAZIONE CONTROLLO WIRELESS Per abilitare la modalità di controllo wireless procedere nel seguente modo: • Premere il tasto ENTER per accedere al menu principale. • Premere il tasto UP/DOWN per scorrere nel menu, selezionare l’icona Connect, quindi premere il tasto ENTER per accedere al menu successivo. -
Page 30: Impostazioni Display
- Brand Show - Visualizzazione del brand. Questa funzione permette di scegliere se visualizzare o meno il brand “PROLIGHTS” sul display. Selezionare ON per attivare la funzione oppure OFF per disattivar- - Key lock - Blocco tasti. Con questa funzione è possibile bloccare i tasti del pannello di controllo, per evitare, ad esempio, manomissioni delle impostazioni. -
Page 31: Informazioni Sul Dispositivo
RAZOR440 3.20 INFORMAZIONI SUL DISPOSITIVO Per visualizzare tutte le informazioni sul dispositivo procedere nel seguente modo: • Premere il tasto ENTER per accedere al menu principale. • Premere il tasto UP/DOWN per selezionare l’icona Information, quindi premere il tasto ENTER per acce- dere al menu successivo. - Page 32 RAZOR440 • Premere il tasto UP/DOWN per scorrere nel menu, quindi selezionare No Signal e premere il tasto ENTER per confermare. • Premere il tasto UP/DOWN per selezionare la modalità di funzionamento preferita: Close/Hold/Auto/Music. • Premere il tasto ENTER per confermare la scelta. •...
- Page 33 RAZOR440 successivo. • Premere il tasto UP/DOWN per scorrere nel menu, quindi selezionare Password e premere il tasto ENTER per confermare. • Tramite i tasti direzionali inserire la password 050 e premere il tasto ENTER per confermare. • Una volta inserita la password è possibile impostare il PID Code, necessario per controllare l’unità con il protocollo RDM.
-
Page 34: Manutenzione
RAZOR440 - 4 - MANUTENZIONE 4.1 MANUTENZIONE E PULIZIA DEL SISTEMA OTTICO • Durante gli interventi, assicurarsi che l’area sotto il luogo di installazione sia libera da personale non qualificato. • Spegnere l’unità, scollegare il cavo di alimentazione ed aspettare finché l’unità non si sia raffreddata. •... -
Page 35: Risoluzione Dei Problemi
RAZOR440 4.3 RISOLUZIONE DEI PROBLEMI Anomalie Possibili cause Controlli e rimedi Mancanza di alimentazione di rete Verificare la presenza della tensione alimentazione • • Dimmer impostato a 0 Incrementare i valori del canale dimmer • • Tutti i colori impostati a 0 Incrementare i valori dei canali colori Il proiettore non illumina •... - Page 36 All rights reserved by Music & Lights S.r.l. No part of this instruction manual may be reproduced in any form or by any means for any commercial use. In order to improve the quality of products, Music&Lights S.r.l. reserves the right to modify the characteristics stated in this instruction manual at any time and without prior notice.
- Page 37 RAZOR440 TABLE OF CONTENTS Safety General instructions Warnings and installation precautions General information 1 Introduction 1. 1 Description 1. 2 Technical specifications 1. 3 Operating elements and connections 2 Installation 2. 1 Mounting 3 Functions and settings 3. 1 Operation 3.
-
Page 38: Safety
RAZOR440 WARNING! Before carrying out any operations with the unit, carefully read this instruction manual and keep it with cure for future reference. It contains important information about the installation, usage and maintenance of the unit. SAFETY General instruction • The products referred to in this manual conform to the European Community Directives and are there- fore marked with . -
Page 39: General Information
RAZOR440 GENERAL INFORMATION Shipments and claims The goods are sold “ex works” and always travel at the risk and danger of the distributor. Eventual dam- age will have to be claimed to the freight forwarder. Any claim for broken packs will have to be forwarded within 8 days from the reception of the goods. -
Page 40: Introduction
RAZOR440 - 1 - INTRODUCTION 1.1 DESCRIPTION RAZOR440 is a complete hybrid moving light, providing a sharp Beamlight, crisp Spot and even washlight all in one single luminaire. RAZOR440 harnesses the power of its high efficiency 440W discharge lamp with a custom optical design, using grouped lenses to delivery a flat field right through its exceptionally wide 2°... - Page 41 RAZOR440 • Body: Aluminium structure with hi-resistance polycarbonate cover • Body Color: Black CONTROL • Protocols: DMX512, RDM, Art-Net • Dmx Channels: 21/24/26 ch • W-DMX: Included, Wireless Solution receiver • RDM: RDM ready for fixture remote monitor and settings •...
- Page 42 RAZOR440 Technical drawing Fig.1...
-
Page 43: Operating Elements And Connections
RAZOR440 1.3 OPERATING ELEMENTS AND CONNECTIONS 1. MOVING HEAD 2. ROTARY ARM 3. TILT Mechanism Lock and Release 4. PAN Mechanism Lock and Release 5. HANDLE 6. LED INDICATOR "W-DMX" 7. CONTROL PANEL with LCD display and 5 button used to access the control panel functions and manage them. -
Page 44: Installation
RAZOR440 - 2 - INSTALLATION 2.1 MOUNTING The RAZOR440 may be set up on a solid and even surface. By means of the fixing facilities of the baseplate, the unit can also be mounted upside down to a cross arm. The base plate is shown in fig.3. For fixing, stable mounting clips are required. -
Page 45: Functions And Settings
RAZOR440 - 3 - FUNCTIONS AND SETTINGS 3.1 OPERATION Connect the supplied main cable to a socket (100-240V~/50-60Hz). The unit will run built-in program to reset all motors to their home position. Shortly after that the RAZOR440 is ready for operation. To switch off, disconnect the mains plug from the socket. -
Page 46: Menu Structure
RAZOR440 3.3 MENU STRUCTURE MENU ð ð ð CONNECT Address Value (1-512) ð W-DMX Value (1-512) ð Artnet Value (1-512) ð ð DMX Mode Mode Bas/Std/Ext ð Edit User Max Channel/Control/Pan/Pan Fine/Tilt/... ð ð Wireless DMX Out ON/OFF ð Reset Connect YES/NO ð... - Page 47 RAZOR440 ð ð ADVANCED Reset Pan & Tilt Others ð ð Calibration Password 050 (unlocks the following settings) ð Value (-128-127) ð Tilt Value (-128-127) ð Dimmer Value (-128-127) ð Cyan Value (-128-127) ð Magenta Value (-128-127) ð Yellow Value (-128-127) Gobo1 Gobo2 Prism 1...
- Page 48 RAZOR440 ð ð Select Chase Chase Part 1 Chase 1 - Chase 8 Chase Part 2 Chase 1 - Chase 8 ð Chase Part 3 Chase 1 - Chase 8 ð ð Edit Chase Chase 1 Step 1 - 64 Chase 2 Step 1 - 64 ..
-
Page 49: Slave Receive Mode
RAZOR440 3.4 SLAVE RECEIVE MODE This mode will allow you to link up the units together without a controller. Choose a unit to function as the Master. The unit must be the first unit in line; other units will work as slave with the same effect. A Master unit can send up to 3 different data groups to the Slave units, i.e. -
Page 50: Scenes Record Mode
RAZOR440 • Press the UP/DOWN button to scroll through the menu, then select Chase Part 1/Chase Part 2/Chase Part 3 and press ENTER to confirm. • Press the UP/DOWN button to select Chase1-Chase8, and press the ENTER button to confirm. •... -
Page 51: Music Mode
RAZOR440 3.7 MUSIC MODE In music mode, via its integrated microphone, the unit can be controlled by music with a clear rhythm in the bass range. If the music control should not work optimally, increase the volume or reduce the distance between the sound source and the light effect unit or alternatively increase the sensitivity of the micro- phone. -
Page 52: Dmx Configuration
RAZOR440 3.11 DMX CONFIGURATION The RAZOR440 has 3 DMX channel configurations which can be accessed from the control panel. • Press the ENTER button to access the main menu. • Press the UP/DOWN button to scroll the menu, select the Set icon, then press the ENTER button to enter the next menu. -
Page 53: Connection Of The Dmx Line
RAZOR440 3.13 CONNECTION OF THE DMX LINE DMX connection employs standard XLR connectors. Use shielded pair-twisted cables with 120Ω imped- ance and low capacity. The following diagram shows the connection mode: DMX - INPUT DMX - OUTPUT XLR plug XLR socket Pin1 : GND - Shield Pin2 : - Negative Pin3 : + Positive... - Page 54 RAZOR440 3.15 CANALI DMX FUNCTION Value 21 Ch 24 Ch 26Ch 0~100% 000 - 255 PAN 16bit 0~100% 000 - 255 TILT 0~100% 000 - 255 TILT 16bit 0~100% 000 - 255 P/T SPEED Fastest to slowest 000 - 250 Movement with blackout 251 - 255 SHUTTER...
- Page 55 RAZOR440 FUNCTION Value 21 Ch 24 Ch 26Ch 1st COLOR WHEEL & CYAN Indexed CYAN 000 - 127 0~100% 2 - CYAN + CTB 128 - 132 3 - CTB 133 - 137 4 - CTB + AQUAMARINE 138 - 142 5 - AQUAMARINE 143 - 147 6 - AQUAMARINE + PINK...
- Page 56 RAZOR440 FUNCTION Value 21 Ch 24 Ch 26Ch 2st COLOR WHEEL & MAGENTA Indexed MAGENTA 000 - 127 0~100% 2 - MAGENTA + PALE ROSE 128 - 132 3 - PALE ROSE 133 - 137 4 - PALE ROSE + TAN 138 - 142 5 - TAN 143 - 147...
- Page 57 RAZOR440 FUNCTION Value 21 Ch 24 Ch 26Ch 3st COLOR WHEEL & YELLOW Indexed YELLOW 000 - 127 0~100% 2 - YELLOW + LIGHT GREEN 128 - 132 3 - LIGHT GREEN 133 - 137 4 - LIGHT GREEN + DARK GREEN 138 - 142 5 - DARK GREEN 143 - 147...
- Page 58 RAZOR440 FUNCTION Value 21 Ch 24 Ch 26Ch Forward & Reverse Wheel Spin 000 - 255 Stop to fastest Continuous Positioning 0°~360° 000 - 255 Continuous Positioning 0°~360° 000 - 255 ROTATING GOBO WHEEL Indexed Open 000 - 013 Gobo 1 014 - 027 Gobo 2 028 - 041...
- Page 59 RAZOR440 FUNCTION Value 21 Ch 24 Ch 26Ch FIXED GOBO SELECTION Indexed Open 000 - 012 Gobo 1 013 - 025 Gobo 2 026 - 038 Gobo 3 039 - 051 Gobo 4 052 - 064 Gobo 5 065 - 077 Gobo 6 078 - 090 Gobo 7...
- Page 60 RAZOR440 FUNCTION Value 21 Ch 24 Ch 26Ch 060 - 063 Gobo 15 Gobo 16 064 - 067 Gobo 17 068 - 071 Gobo 18 072 - 075 Indexed with Shake (from slow to speed) 076 - 083 Gobo 1 084 - 091 Gobo 2 092 - 099...
- Page 61 RAZOR440 FUNCTION Value 21 Ch 24 Ch 26Ch 15m Auto Focus 064 - 079 >20m Auto Focus 080 - 095 TBD (not used) 096 - 255 FOCUS Continuous Focus IN to Focus OUT 000 - 255 With Auto Focus Focus adjustment 000 - 255 ZOOM Small to big...
- Page 62 RAZOR440 Rotating gobos Ø 27 mm - image: Ø 21 mm - thickness: 1.1mm Fixed gobos Animation Wheel Color Wheel Aquamarine Pink Cobalt Blue Congo Open Cyan Pale Rose Orange Light Orange Dark Red Open Magenta Light Green Dark Green 2500K Lavander Grass Green...
-
Page 63: Wireless Control Settings
RAZOR440 3.16 WIRELESS CONTROL SETTINGS To enable wireless control mode, proceed as follows: • Press the ENTER button to access the main menu. • Press the UP/DOWN button to scroll the menu, select the Connect icon, then press the ENTER button to enter the next menu. -
Page 64: Display Settings
- Bright Display - Backlight Brightness. Use the arrow buttons to select a value from 0-31. - Brand Show - Displaying the brand. This function allows you to show the brand “PROLIGHTS” on the display. Select ON to activate or OFF to disable. -
Page 65: Reset Functions
RAZOR440 • Press the UP/DOWN button to scroll through the menu, then select one of the following information and press the ENTER button to display it. - Time Information - Through the Time Information function you can display the operating time of the projector. - Page 66 RAZOR440 • Press the ENTER button to access the main menu. • Press the UP/DOWN button to scroll the menu, select the Set icon, then press the ENTER button to enter the next menu. • Press the UP/DOWN button to scroll through the menu, select UI Set, and press the ENTER button to enter the next menu.
- Page 67 RAZOR440 Calibration Select this function to calibrate and adjust the wheels of the effects in their correct positions: • Press the ENTER button to access the main menu. • Press the UP/DOWN button keys to scroll the menu, select the Set icon, then press the ENTER button to enter the next menu.
-
Page 68: Maintenance
RAZOR440 - 4 - MAINTENANCE 4.1 MAINTENANCE AND CLEANING THE UNIT • Make sure the area below the installation place is free from unwanted persons during setup. • Switch off the unit, unplug the main cable and wait until the unit has cooled down. •... -
Page 69: Troubleshooting
RAZOR440 4.3 TROUBLESHOOTING Problems Possible causes Checks and remedies No mains supply Check the power supply voltage • • Dimmer fader set to 0 Increase the value of the dimmer channels • • All color faders set to 0 Increase the value of the color channels •... - Page 70 Note...
- Page 71 Note...
- Page 72 MUSIC & LIGHTS S.r.l. Via Appia, km 136,200 - 04020 Itri (LT) - ITALY Phone +39 0771 72190 - Fax +39 0771 721955 www.musiclights.it - email: info@musiclights.it ISO 9001:2008 Certified Company...
Need help?
Do you have a question about the RAZOR440 HYBRID BEAM and is the answer not in the manual?
Questions and answers