
Related Manuals for Moore Industries SPA2


Summary of Contents for Moore Industries SPA2
- Page 1 No. 224-790-00K May 2018 D e m a n d M o o r e R e l i a b i l i t y Programmable Limit Alarm Trips User’s Manual All product names are registered trademarks of their respective companies.
-
Page 2: User's Manual
We perform a sequence of stringent quality assurance checks on every unit we ship. If any Moore Industries product fails to perform up to rated specifications, call us for help. Our highly skilled staff of trained technicians and engineers pride themselves on their ability to provide timely, accurate, and practical answers to your process instrumentation questions. -
Page 3: User's Manual
All Moore Industries instrumentation should only be used for the purpose and in the manner described in this manual. If you use this product in a manner other than that for which it was intended, unpredictable behavior could ensue with possible hazardous consequences. -
Page 4: Table Of Contents
Configuring the Analog Output (-AO Option) ................40 Scaling the Analog Output (-AO Option) ..................41 Trimming the Analog Output (-AO Option) ................. 42 Configuring the Alarm(s) ......................45 Password Configuration ......................57 - 4 - www.miinet.com Moore Industries-International, Inc. - Page 5 Custom Curve ..........................76 Section 6: Operation and Maintenance Operation ..........................78 Maintenance ..........................78 Section 7: Specifications HLPRG Specifications ...................... 80 TPRG Specifications ......................82 Section 8: Ordering Information Ordering Information ........................85 Warranty Disclaimer Moore Industries-International, Inc. www.miinet.com - 5 -...
-
Page 6: User's Manual
CONFG PASWD View or change password. System Information: View information such as serial number, Firmware Version, INFO Hardware Version, Input Model, and Output Model Exit Configuration Menu: CONFG EXIT Return to process display. - 6 - www.miinet.com Moore Industries-International, Inc. -
Page 7: User's Manual
CONFG PASS View or change password. System Information: View information such as serial number, Firmware Version, INFO Hardware Version, Input Model, and Output Model Exit Configuration Menu: CONFG EXIT Return to process display. Moore Industries-International, Inc. www.miinet.com - 7 -... -
Page 8: Section 1 - Introduction
9 Thermocouple types, Resistance and Potentiometer devices, and direct Millivolt sources. The SPA2 (TPRG) also has the capability of dual and triple sensor inputs. This is beneficial when you choose to use and view either a differential or averaging RTD input and process variable. -
Page 9: Power
The password security function of the SPA is controlled by a single jumper inside the unit housing. You will need to remove the left side panel in order to access the jumper (see Figure 4.0 in Section 4). Moore Industries-International, Inc. www.miinet.com - 9 -... -
Page 10: Alarm Terminology
Alarm Terminology Before setting up the SPA , or incorporating the unit in your application, Moore Industries suggests that all users take a few moments to become familiar with some of the terms associated with the use of process instrumentation alarms and relays. -
Page 11: User's Manual
Dead Band can also be set for this alarm type. Note: The Band Alarm is not available in firmware 3.3 or earlier. Figure 1.2. Band Alarms example High Trip Point Deviation Reset Midpoint Reset Deviation Lower Trip Point Change over Time Moore Industries-International, Inc. www.miinet.com - 11 -... -
Page 12: User's Manual
Note: The Stuck Input Alarm is not available in firmware 3.3 or earlier. Figure 1.4. Stuck Input Alarm Trip. > limit Trip Point Change over Time - 12 - www.miinet.com Moore Industries-International, Inc. -
Page 13: User's Manual
Sensor Lower Limit, and less than those set in Lower Range. When setting the Upper Point, the value must be less than the Sensor Upper Limit, and greater than those set in Upper Range. Moore Industries-International, Inc. www.miinet.com - 13 -... -
Page 14: Section 2 - Calibration And Bench Check
Calibration A true calibration of the SPA can only be performed at Moore Industries using specialized equipment. We recommend that you check the calibration every year and re-calibrate only when necessary. However, input trimming increases the measurement accuracy of your instrument by matching the reading of its actual input to its scaling. -
Page 15: Bench Check Procedure
Power Input: Connect the appropriate power source as shown in Figure 2.1. Figure 2.1. SPA (HLPRG) Bench Check VOLTAGE CURRENT SOURCE SOURCE 2-WIRE TRANSMITTER Universal Universal AC/DC AC/DC Power Power AC/DC AC/DC Supply Supply Moore Industries-International, Inc. www.miinet.com - 15 -... -
Page 16: User's Manual
Alarm Relays: By adjusting your input up and down you can confirm the operation of the Alarm Relays. Use your multimeter (set to ohms) to verify the state of the relay contacts. - 16 - Moore industries-International, Inc. www.miinet.com Moore Industries-International, Inc. -
Page 17: Units With The Analog Output Option (-Ao)
By example – a 5V reading across your 250 ohm resistor equates to a 20mA output. You have now confirmed that your SPA is operating correctly and can now be confidently installed into your application. Moore Industries-International, Inc. www.miinet.com - 17 -... -
Page 18: Section 3 - Installation And Wiring
Switches and Circuit Breakers For SPA2 AC powered units, a switch or circuit breaker must be wired in series with the AC power conductors. The switch or circuit breaker used must be located within three meters of the unit. The circuit breaker or switch will only remove power to the unit, hazardous voltages may still be connected to other terminals on the unit. -
Page 19: User's Manual
3. Your input power requirement (AC or DC / ACC or DCC) will COM = Analog Common NC = Normally Closed Vo = Voltage Output depend upon your unit’s power need. DPDT = Double-Pole/Double-Throw Sink = Current Sink GND = Ground Moore Industries-International, Inc. www.miinet.com - 19 -... -
Page 20: User's Manual
3. Your input power requirement (AC or DC / ACC or DCC) DPDT = Double-Pole/Double-Throw NO = Normally Open SPDT = Single-Pole/Double-Throw will depend upon your unit’s power need. GND = Ground NC = Normally Closed Vo = Voltage Output - 20 - www.miinet.com Moore Industries-International, Inc. -
Page 21: User's Manual
One 2-Wire Sensor and One 3-Wire Sensor Three 2-Wire Sensors Measurement 3 Measurement 1 Measurement 2 Measurement 1 Measurement 2 Measurement 1 Measurement 2 Figure 3.4. SPA Dimensions 56mm (2.2 in) 102mm (4.0 in) 144mm (5.7 in) Moore Industries-International, Inc. www.miinet.com - 21 -... -
Page 22: User's Manual
Products connected to the SPA Analog Output terminals should be designed to receive this type of input. Warning: If this unit is used in a manner not specified by Moore Industries, the protection provided by the equipment may be impaired. Protective Earth Conductor The Protective Earth Conductor shall be of equal or larger size wire than the other two power conduc- tors. -
Page 23: Ce Certification-Related Guidelines
May 2018 CE Certification-related Guidelines Installation of any Moore Industries’ products that carry the CE marking must adhere to the guidelines in the Recommended Ground Wiring Practices section in order to meet the EN 61326 requirements set forth in the applicable EMC directive. -
Page 24: Section 4: Configuration Front Panel Pushbuttons
IS ON. PASSWORD REQUIRED. Note: The password security function of the SPA2 is controlled by a single jumper inside the unit housing. The default (factory) setting is ‘Password required ‘ as shown above. ‘Full Access’ means that no password is required. -
Page 25: Main Menu/View Settings
The SPA² password security feature limits access to the front panel configuration. The password se- curity feature is intended only to prevent the casual user from upsetting the function of the SPA2 by inadvertently pressing the front panel push buttons. It is controlled by a single jumper inside the top of the unit housing. -
Page 26: User's Manual
Resistance Box Resistance Box Resistance Box – Dual 2-Wire Sensor One 2-Wire Sensor and One 3-Wire Sensor Three 2-Wire Sensors Measurement 3 Measurement 1 Measurement 2 Measurement 1 Measurement 2 Measurement 1 Measurement 2 - 26 - www.miinet.com Moore Industries-International, Inc. -
Page 27: User's Manual
CONFG AOUT ONLY AOUT menu SCALE SCALE AOUT AOUT menu TRIM TRIM AOUT AOUT menu CONFG CONFG ALARM ALARM menu CONFG PASSWORD PASWD menu SYS INFO INFO menu CONFG CONFG EXIT EXIT menu Moore Industries-International, Inc. www.miinet.com - 27 -... -
Page 28: User's Manual
• If no button is pressed for 10 seconds, the display returns to the Process Value reading PROCESS VALUE XXXXX DISPLAY ZERO (IF AOUT) XXXXX FULL (IF AOUT) *XXXXX *XXXXX If 2 alarms *XXXXX *XXXXX - 28 - www.miinet.com Moore Industries-International, Inc. -
Page 29: Configuring The Hlprg Input
Use the UP and Down buttons to cycle through the lists CONFG INPUT TOGGLE Current List: 50mA CURRENT/ INPUT 25mA VOLT TYPE 12.5mA 6.25mA Volt List: 2.5V 1.25V EXIT INPUT CONFG OPTNS menu Moore Industries-International, Inc. www.miinet.com - 29 -... -
Page 30: Configuring The Tprg Sensor
The next display is the menu for the selection of functional options, ”CONFG OPTNS”. To skip the rest of the configuration menus and return to the process variable display, press the UP button twice (to “CONFG EXIT”), and press SELECT. - 30 - www.miinet.com Moore Industries-International, Inc. -
Page 31: User's Manual
EXIT Potentiometer Range List: SENSR "4000, 2000, 1000, 500, 250, 125" TOGGLE PV AVG/ PV DIFF CONFG OPTNS menu Temperature Selection List: "DEG C", "DEG F", "KELVN", "DEG R" SEL (if Dual Sensor) Moore Industries-International, Inc. www.miinet.com - 31 -... -
Page 32: Configuring The Options
On TPRG unit this feature can only be turned on or off. Caution: Moore Industries does not recommend use of broken wire detection if using a voltage input on the SPA HLPRG version. -
Page 33: User's Manual
4-20mA signal to the SPA and you wish to view the input as 0-100% then this can be accomplished with the Scale Mode feature. “EXIT OPTNS” (Exit Options) appears. Press SELECT. Proceed to the “SCALE INPUT” menu. Moore Industries-International, Inc. www.miinet.com - 33 -... -
Page 34: User's Manual
XX.XXX 60 HZ 50 HZ FILTR FAST* *BWIRE LEVEL SEL if BWIRE TOGGLE *HLPRG units only BWIRE BWIRE ON/OFF SEL if BWIRE OFF SCALE MODE TOGGLE SCALE ON/OFF EXIT OPTNS SCALE INPUT menu - 34 - www.miinet.com Moore Industries-International, Inc. -
Page 35: Scaling The Input
Press SELECT. “EXIT SCALE” appears. If all scaling parameters have been set, press SELECT. The next menu selection to appear is “TRIM INPUT”. Moore Industries-International, Inc. www.miinet.com - 35 -... -
Page 36: User's Manual
APPLY INPUT menu is skipped and the TRIM INPUT menu appears. SCALE INPUT XXXXX INPUT ZERO INPUT XXXXX FULL If Scale Mode ON SCALE ZERO XXXXX SCALE FULL XXXXX EXIT SCALE TRIM INPUT menu - 36 - www.miinet.com Moore Industries-International, Inc. -
Page 37: Applying Input (Bench Scaling)
When this is flashed, press SELECT to capture. Press SELECT at “EXIT APPLY” and exit the menu. Figure 4.8. APPLY INPUT Menu APPLY INPUT APPLY XXXXX ZERO XXXXX APPLY FULL EXIT APPLY TRIM INPUT menu Moore Industries-International, Inc. www.miinet.com - 37 -... -
Page 38: Input Trimming
Note: Trim only the zero and full values entered in the “SCALE INPUT” menu through the front panel pushbuttons. To trim values other than those specified in the “SCALE INPUT” menu, you must use the PC Configuration Software program. - 38 - www.miinet.com Moore Industries-International, Inc. -
Page 39: User's Manual
2 PNT XXXXX TRIM XXXXX APPLY ZERO (ZERO) If USER 1PNT If USER 1PNT If USER 2PNT XXXXX TRIM XXXXX APPLY FULL FULL EXIT TRIM CONFG AOUT menu CONFG ALARM menu (If no AOUT) Moore Industries-International, Inc. www.miinet.com - 39 -... -
Page 40: Configuring The Analog Output (-Ao Option)
Figure 4.10. CONFG AOUT Menu CONFG AOUT TOGGLE VOLT/ AOUT CURRENT DAMP (XX = 0-30) FAIL LOW FAIL FAIL HIGH MODE HOLD LAST* HOLD GO-HI* HOLD GO-LO* *TPRG UNITS ONLY EXIT AOUT SCALE AOUT menu - 40 - www.miinet.com Moore Industries-International, Inc. -
Page 41: Scaling The Analog Output (-Ao Option)
3. Rearranging values nulls your trim value. 4. Implement "auto increment" when incrementing and decrementing zero and full counts. SCALE AOUT AOUT XXXXX ZERO MA/VOLT AOUT XXXXX FULL MA/VOLT EXIT SCALE TRIM AOUT menu Moore Industries-International, Inc. www.miinet.com - 41 -... -
Page 42: Trimming The Analog Output (-Ao Option)
SELECT at the “TEST AOUT” display. Use the UP and DOWN buttons to set your output test value (this figure must fall within your sensor configuration range value) and press SELECT. “EXIT TRIM” appears; press SELECT. - 42 - www.miinet.com Moore Industries-International, Inc. -
Page 43: User's Manual
Programmable Limit Alarm Trips May 2018 Figure 4.12. TRIM AOUT Menu TRIM AOUT TRIM XXXXX ZERO MA/VOLT TRIM XXXXX FULL MA/VOLT TOGGLE FCTRY TRIM TEST XXXXX AOUT MA/VOLT EXIT TRIM CONFG ALARM menu Moore Industries-International, Inc. www.miinet.com - 43 -... -
Page 44: User's Manual
AC/DC Power AC/DC Supply Supply HLPRG TPRG MULTIMETER MULTIMETER HOOK-UPS FOR OUTPUT TRIMMING EXTERNAL POWER SUPPLY – MULTIMETER MULTIMETER MULTIMETER + – + – – CURRENT OUTPUT SOURCE CURRENT OUTPUT SINK VOLTAGE OUTPUT - 44 - www.miinet.com Moore Industries-International, Inc. -
Page 45: Configuring The Alarm(S)
User’s Manual 224-790-00K Programmable Limit Alarm Trips May 2018 Configuring the Alarm(s) The SPA2 offers you up to four alarms which may be configured independently as the following alarm types: Trip Fault Rate of Change Stuck Input Band Copy (Duplicate) The instructions will explain the steps to follow in order to set each type of alarm. -
Page 46: User's Manual
If you have completed your alarm configurations, use the UP and DOWN buttons to bypass the alarm menu. To exit, press SELECT at the “ALARM EXIT” display. - 46 - www.miinet.com Moore Industries-International, Inc. -
Page 47: User's Manual
ALARM ALARM EXIT TOGGLE ON/OFF IF ON SEL EXIT IF OFF SEL ALRM X* *The alarm channel being programmed PASSWORD menu Proceed to ALARM EXIT if no more alarms are to be programmed Moore Industries-International, Inc. www.miinet.com - 47 -... -
Page 48: User's Manual
Press SELECT at “SET FSAFE” to enter the menu. Then use the UP and DOWN buttons to switch from “ALARM FSAFE” to “ALARM NONFS”. Make your selection and press SELECT. Refer to the “Trip Alarm Configuration” section for a description of fail safe and non fail safe alarms. - 48 - www.miinet.com Moore Industries-International, Inc. -
Page 49: User's Manual
PASSWORD menu *The alarm channel being programmed *ALARM X denotes the alarm (1, 2, 3 or 4) that you are currently configuring. Proceed to ALARM EXIT if no more alarms are to be programmed Moore Industries-International, Inc. www.miinet.com - 49 -... -
Page 50: User's Manual
DOWN buttons to set your lower point value, press SELECT. “UPPER POINT” appears, then use the UP and DOWN buttons to set your upper point value, press SELECT. “EXIT RANGE” appears. Press SELECT. “EXIT ALRM*” appears. If range alarm not enabled “EXIT ALRM*” appears. - 50 - www.miinet.com Moore Industries-International, Inc. -
Page 51: User's Manual
ALARM ON/OFF EXIT IF ON SEL EXIT IF OFF SEL EXIT RANGE ALRM X* PASSWORD menu *The alarm channel being programmed Proceed to ALARM EXIT if no more alarms are to be programmed Moore Industries-International, Inc. www.miinet.com - 51 -... -
Page 52: User's Manual
If you have completed your alarm configurations, use the UP and DOWN buttons to bypass the alarm menu. To exit, press SELECT at the “ALARM EXIT” display. - 52 - www.miinet.com Moore Industries-International, Inc. -
Page 53: User's Manual
FAULT Proceed to ALARM EXIT if TOGGLE no more alarms are to be programmed ON/OFF EXIT ALRM X* *ALARM X denotes the alarm (1, 2, 3 or 4) that you are currently configuring. Moore Industries-International, Inc. www.miinet.com - 53 -... -
Page 54: User's Manual
If you have completed your alarm configurations, use the UP and DOWN buttons to bypass the alarm menu. To exit, press SELECT at the “ALARM EXIT” display. - 54 - www.miinet.com Moore Industries-International, Inc. -
Page 55: User's Manual
ON/OFF IF ON SEL EXIT IF OFF SEL EXIT RANGE ALRM X* ALARM EXIT *The alarm channel being programmed PASSWORD menu Proceed to ALARM EXIT if no more alarms are to be programmed Moore Industries-International, Inc. www.miinet.com - 55 -... -
Page 56: User's Manual
MENU WILL ALARM X* LEAD TO FIRST PARAMETER OF CANCEL COPIED ALARM CONFG ALARM2 CONFG ALARM3 CONFG ALARM4 ALARM EXIT PASSWORD menu Proceed to ALARM EXIT if no more alarms are to be programmed - 56 - www.miinet.com Moore Industries-International, Inc. -
Page 57: Password Configuration
Figure 4.20. CONFG PASWD Menu CONFG PASWD PASS (Password 0-9999) CONFG EXIT Note: The password menu is only accessible when either the password is entered correctly or the password jumper is set to ‘Full Access’ (Figure 4.0). Moore Industries-International, Inc. www.miinet.com - 57 -... -
Page 58: System Information Menu
Figure 4.21. SYS INFO Menu INFO SERIAL SRIAL NUMBER NUMBR DISPLAYED FIRMWARE VERSN VERSION DISPLAYED HARDWARE VERSN VERSION DISPLAYED INPUT INPUT MODEL MODEL DISPLAYED OUTPUT OUTPUT MODEL MODEL DISPLAYED EXIT CONFIG INFO EXIT - 58 - www.miinet.com Moore Industries-International, Inc. -
Page 59: Section 5: Spa Pc Configuration Software
Installing the Configuration Software Refer to Table 5.1. for the equipment needed. Insert the Moore Industries Interface Solution PC Configuration Software CD into the CD drive of the PC. Access the CD and open the “SPA PC Configuration Software” folder. -
Page 60: Selecting Model Type
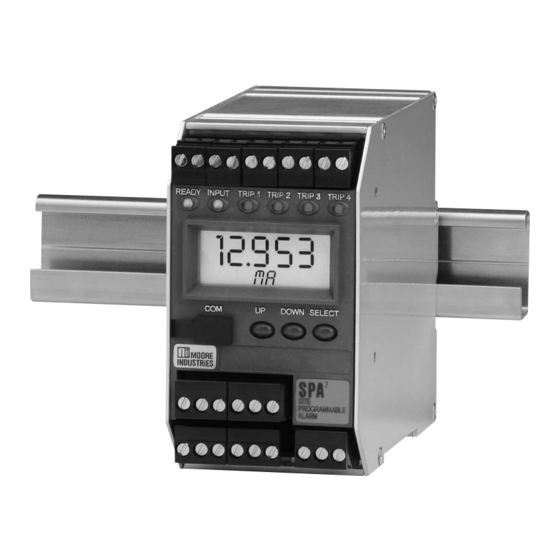
TRIP 2 TRIP 3 TRIP 4 DOWN SELECT SITE PROGRAMMABLE ALARM AC OR DC POWER SUPPLY HOOK-UPS FOR OUTPUT TRIMMING EXTERNAL POWER SUPPLY MULTIMETER MULTIMETER MULTIMETER CURRENT OUTPUT SINK CURRENT OUTPUT SOURCE VOLTAGE OUTPUT - 60 - www.miinet.com Moore Industries-International, Inc. - Page 61 Personal Computer Microsoft Windows XP, 7, or 10 1 (one) serial port or one available USB port Moore Industries PC Version 1.0 or greater, successfully installed to the hard drive Configuration Software Part# Communications Cable 803-053-26A, USB Cable Part# 804-030-26, or...
-
Page 62: Pc Configuration Software Summary
5. Identification Parameters– Use this parameter to place an identifying “Tag” (12 alphanumeric characters max.), “Descriptor” (16 alphanumeric characters max.) or “Message” (32 alphanumeric characters max.). Device Info– This “read-only” display indicates instrument configuration, device 6. SPA identification, hardware revision and software revision. - 62 - www.miinet.com Moore Industries-International, Inc. -
Page 63: Status And Tool Bar Legend
Select the PC Port (Com Port) that you will use Allows you to Monitor and Stop monitoring processes Provides functions specific to your Custom Curve table Displays the version of the SPA IS Configuration Program Moore Industries-International, Inc. www.miinet.com - 63 -... -
Page 64: Configuration Screens
In the “Level” textbox, enter the set value you choose as your limit. The value that you enter must be greater than zero and less than your “Lower Range” value (see Input Range). Broken Wire Detection (TPRG) - The SPA2 TPRG monitors your process variable. If the hardware - 64 - www.miinet.com... -
Page 65: User's Manual
You may also use the Quick Set feature to configure your Input parameters and download the settings. Configure your parameters and click the Quick Set button in the window. The settings you have chosen will be applied and downloaded to your unit. Moore Industries-International, Inc. www.miinet.com - 65 -... -
Page 66: User's Manual
You may also use the Quick Set feature to configure your Display parameters and download the settings. Configure your parameters and click the Quick Set button in the window. The settings you have chosen will be applied and downloaded to your unit. - 66 - www.miinet.com Moore Industries-International, Inc. -
Page 67: Alarms
Out of Range – When selected, you can specify the lower point and upper point in which you want to be notified when readings occur outside of upper or lower range points you have set. This is not applicable when using Band Alarm. Moore Industries-International, Inc. www.miinet.com - 67 -... -
Page 68: User's Manual
If choosing to use a dead band value, enter it into the “Dead Band” text box Note: Once you have configured all parameters, download to the unit by selecting “Download” in the Transfer dropdown menu located in the Status Bar. Or, click the button in the Tool Bar. - 68 - www.miinet.com Moore Industries-International, Inc. -
Page 69: User's Manual
Note: If two alarms have been set with one configured to trip in the case of a broken wire and the other to trip due to another selected parameter and an actual Broken Wire failure occurs, both the Out of Range and Broken Wire alarms may trip. Moore Industries-International, Inc. www.miinet.com - 69 -... -
Page 70: User's Manual
This allow you to select and copy settings from any other of the 3 alarms available. Note: After copying an alarm, changing either the settings in the alarm that was copied from or the alarm that was copied to will not affect the other alarm. - 70 - www.miinet.com Moore Industries-International, Inc. -
Page 71: Analog Output
High or Low value, depending on configuration. Note: Once you have configured all parameters, download to the unit by selecting “Download” in the Transfer dropdown menu located in the Status Bar. Or, click the button in the Tool Bar. Moore Industries-International, Inc. www.miinet.com - 71 -... -
Page 72: User's Manual
Once you have finished, click “Unfix”. Note: While performing Analog Output Trimming functions, you may notice a message in the “SPA Status” display reading “**OUTPUT FIXED**”. Clicking the “Unfix” button will clear this message. - 72 - www.miinet.com Moore Industries-International, Inc. -
Page 73: User's Manual
SOURCE 2-WIRE TRANSMITTER To USB (COM) Port of PC Universal AC/DC Power AC/DC Supply MULTIMETER HOOK-UPS FOR OUTPUT TRIMMING EXTERNAL POWER SUPPLY MULTIMETER MULTIMETER MULTIMETER CURRENT OUTPUT SOURCE CURRENT OUTPUT SINK VOLTAGE OUTPUT Moore Industries-International, Inc. www.miinet.com - 73 -... -
Page 74: User's Manual
Port of PC Universal AC/DC Power AC/DC Supply MULTIMETER HOOK-UPS FOR OUTPUT TRIMMING EXTERNAL POWER SUPPLY – MULTIMETER MULTIMETER MULTIMETER + – + – – CURRENT OUTPUT SOURCE CURRENT OUTPUT SINK VOLTAGE OUTPUT - 74 - www.miinet.com Moore Industries-International, Inc. -
Page 75: Scaling
You may also use the Quick Set feature to configure your Scaling parameters and download the settings. Configure your parameters and click the Quick Set button in the window. The settings you have chosen will be applied and downloaded to your unit. Moore Industries-International, Inc. www.miinet.com - 75 -... -
Page 76: Custom Curve
After all of your data has been entered, you must use the Custom Curve dropdown menu to save your newly created custom table (“Save Custom Curve”) and to download it to your SPA (“Download Custom Curve”). See Figure 5.12. - 76 - www.miinet.com Moore Industries-International, Inc. -
Page 77: User's Manual
Configure your parameters and click the Quick Set button in the window. Note: When the Custom Curve feature is enabled for your unit, the SPA will display “CC” in the lower left corner of its LCD. Moore Industries-International, Inc. www.miinet.com - 77 -... -
Page 78: Section 6: Operation And Maintenance
Cycle power to the unit, and if the error occurs again, return the unit to the factory for service. EEPROM blank *ERROR BLANK Other or combination of errors *ERROR SPA2 Reference Junction Compensation *ERROR RJC Resistor Burnout Watchdog failure *ERROR WDOG... -
Page 79: Maintenance
Moore Industries uses a system of model and serial numbers to keep track of all of the information on every unit it sells and services. If a problem occurs with your SPA2, check for a tag affixed to the unit listing these numbers. Supply the Customer Support representative with this information when calling. -
Page 80: Section 7: Specifications
Input Impedance: Current (19.2 oz to 21.8 oz) ±0.009% of max. span/°C inputs, 20ohms; Voltage inputs, 1Mohm Input Over-Range Protection: Voltage inputs, ±30Vdc; Current inputs, Specifications and information subject to change without notice. - 80 - www.miinet.com Moore Industries-International, Inc. -
Page 81: User's Manual
Programmable Limit Alarm Trips May 2018 Table 7.1. Long-Term Stability Input-to-Output (Years) Input-to-Relay (Years) Stability (% of maximum span) Current Inputs 0.081 0.14 0.18 0.047 0.81 0.105 0.16 Voltage Inputs 0.093 0.21 0.066 0.114 0.147 Moore Industries-International, Inc. www.miinet.com www.miinet.com - 81 -... -
Page 82: Spa 2 Tprg Specifications
(19.2 oz to 21.2 oz) Temperature on Reference T/C inputs, 40Mohms, Junction Compensation (T/C nominal inputs only): ±0.005°C per °C Input Over-Range change of ambient temperature Protection: ±5Vdc Specifications and information subject to change without notice. - 82 - www.miinet.com Moore Industries-International, Inc. -
Page 83: User's Manual
R, S 0.00075°C + 0.005% of reading 0.0038°C + 0.005% of reading 0.0003°C + 0.005% of reading 0.00043°C + 0.005% of reading 0.5microvolts + 0.005% of reading *Accuracy of Ni672 is 0.002°C Moore Industries-International, Inc. www.miinet.com www.miinet.com - 83 -... -
Page 84: User's Manual
-270 to 1316°C -130 to 1300°C (±0.72°F) (81°F) (-454 to 2400.8°F) (-202 to 2372°F) ±0.8°C 100°C 0 to 2338°C 0 to 2300°C (±1.44°F) (180°F) (32 to 4240.4°F) (32 to 4172°F) ±30microvolts -50 to 1000mV - 84 - www.miinet.com Moore Industries-International, Inc. -
Page 85: Section 8: Ordering Information
(One copy provided free with each order) 750-75E05-01 Serial Configuration Cable for use in Part Number connecting the SPA to a PC 803-053-26 Part Number Fuse Protected, Non-Isolated USB 804-030-26 Communication Cable Moore Industries-International, Inc. www.miinet.com www.miinet.com - 85 -... -
Page 86: Warranty Disclaimer
Return Policy For a period of thirty-six (36) months from the date of shipment, and under normal conditions of use and service, Moore Industries (“The Company”) will at its option replace, repair or refund the purchase price for any of its manufactured products found, upon return to the Company (transportation charges prepaid and otherwise in accordance with the return procedures established by The Company), to be defective in material or workmanship.
Need help?
Do you have a question about the SPA2 and is the answer not in the manual?
Questions and answers