Table of Contents
Advertisement
Quick Links
Advertisement
Table of Contents

Subscribe to Our Youtube Channel
Related Manuals for Moore Industries SPT


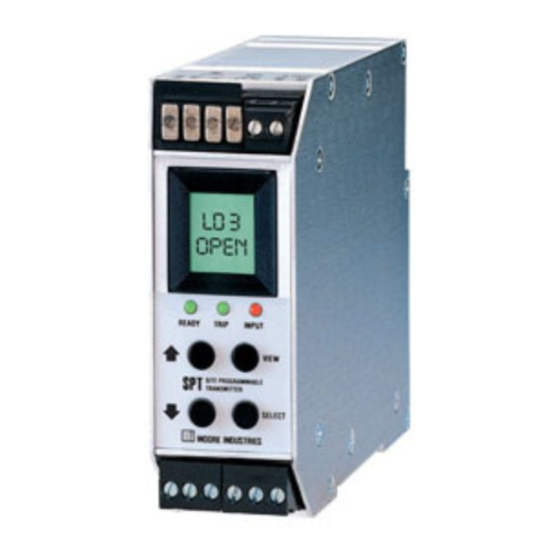
Summary of Contents for Moore Industries SPT
- Page 1 May 2016 Site-Programmable Temperature Transmitter 224-761-00 C...
- Page 2 Providing Instrumentation fast from our Quick-Ship Facilities! • Signal Transmitters • Temperature Transmitters • I/P and P/I Converters • Isolators and Converters • Alarm Trips • Integrators and Totalizers • Power Transducers • Instrument Power Supplies • Racks, Rails and Enclosures If you need it today —...
-
Page 3: Table Of Contents
Configuring Unit Function Options ................12 “SET FAIL” and the “C” option ................. 14 Configure Alarm ....................... 14 Alarm Terminology ........................TSD, the C Option and the SPT Alarm ..................Entering the Alarm Trip ....................... Inputting Trip Point ........................Entering Deadband ........................ - Page 4 Figure 17. Connecting SPT Terminals and Input Hookups ............................ Table 1. SPT Input Codes and Accuracy Ratings ..............................Table 2. How the C Option Works with the SPT if the Sensor Fails ........................Table 3. SPT Terminals ......................................Table 4. LED Meanings ......................................
-
Page 5: Introduction
No hand-held configurator or sophisticated bench equip- sembly of the unit unnecessary. ment is needed to get the SPT up and running. Unit control is done with four push buttons on the front panel. The following guidelines are used throughout the... -
Page 6: Specifications
Page 2 Specifications Performance Maximum Unit Error: Performance Burnout Protection: Ambient Operating Temperature Output Accuracy + Cold User-programmable. Front Range: –25°C to +65°C (continued) Conditions Junction Reference panel push buttons select (–13°F to +149°F) Ratings Accuracy + Input Accuracy upscale or downscale drive Storage Temperature (See Table 1, Accuracy) Range: –40°C to +80°C... -
Page 7: Table 1. Spt Input Codes And Accuracy Ratings
Page 3 Table 1. SPT Input Codes and Accuracy Ratings α∗∗ Ω (@0°C) Range Input Accuracy Minimum Span** Input* PT 3750 1000 –185°C to +540°C ±0.2°C (–301°F to +1004°F) Pt 3850 100, 200, –200°C to +850°C 100Ω: ±0.2°C; 300, 400, (–328°F to +1562°F) -
Page 8: Ordering Information
500°C, for example) specify: to the SPT. EP-equipped units retain the capability to be switched from sink to source. SPT / R5 - (–200) - 500C / 4-20MA / U [DIN] The Interface Solution Experts... -
Page 9: Unit Setup
Bear in mind, however, that because there is so much about the SPT that can be controlled or If the unit is equipped with the C option for an alarm output, set by the user, it may take a few runs through the setup the alarm’s failsafe/non-failsafe function is also controlled... -
Page 10: Figure 2. Setting The Internal Dip Switches To Source Or Sink Current, Or To Provide Voltage
Page 6 Figure 2. Setting the Internal DIP Switches to Source or Sink Current, or to Provide Voltage SET CURRENT SOURCE/SINK VOLTAGE MEANS MEANS SOURCE CURRENT SINK CURRENT VOLTAGE FRONT BACK Figure 3. Setting the Internal DIP Switches for Failsafe or Non-failsafe Alarm Function (C-equipped SPTs Only) SET FAILSAFE/NON-FAILSAFE MEANS MEANS... -
Page 11: The Spt Menus
Page 7 Main Menu/View Settings The SPT Menus When first powered up, the SPT defaults to a display of SPT operating parameters are set, and their settings measured value. Pressing VIEW accesses a series of stored in on-board, non-volatile memory. There are four displays that show, in succession, the settings currently push buttons on the unit front panel. -
Page 12: Figure 4. Navigating The Spt Main Menu
Page 8 Figure 4. Navigating the SPT Main Menu VIEW CURRENT SETTINGS DISPLAY OF VIEW PROCESS (WITH -C OPTION) VALUE SELECT READY TRIP INPUT VIEW SITE-PROGRAMMABLE TRANSMITTER SELECT IS THE SECURITY JUMPER INSTALLED? PASSWORD PRESS SELECT MENU TO ACCESS MENU:... -
Page 13: Entering Password
Page 9 Note: Entering Password To change the password, remove the internal This menu is accessed if the Password Jumper is installed password jumper, or (with the jumper in) enter (see Figure 1). Figure 5 shows how to enter a password. the correct password, then refer to the procedure/menu shown in Figure 11. -
Page 14: Choosing Sensor Input Type
ON or The menu to set or change the Password OFF. stored in SPT memory is presented later in Use the arrow buttons to toggle the this manual. See Figure 11. display, turning RJC ON or OFF, and press SELECT. -
Page 15: Figure 6. Choosing The Sensor Input Type
Page 11 Figure 6. Choosing the Sensor Input Type DISPLAY OF PROCESS SELECT VALUE READY TRIP INPUT VIEW SITE-PROGRAMMABLE TRANSMITTER SELECT IS THE SECURITY JUMPER INSTALLED? PASSWORD PRESS SELECT MENU TO ACCESS MENU: TO CHOOSE INPUT TYPE TO DISPLAY THE LAST TO SCROLL THRU SENSOR SELECTION PRESS... -
Page 16: Configuring Unit Function Options
Page 12 5. Skip to step 10. Configuring Unit Function Options 6. If an RTD was selected in step 3, the This menu is for selecting miscellaneous options asso- next screen displayed may offer ciated with unit function. selections for a resistance range, “XXXX OHMS”. -
Page 17: Figure 7. Configuring Unit Function Options
Page 13 Figure 7. Configuring Unit Function Options DISPLAY OF PROCESS SELECT VALUE READY TRIP INPUT VIEW SITE-PROGRAMMABLE TRANSMITTER SELECT IS THE SECURITY JUMPER INSTALLED? PASSWORD PRESS SELECT MENU TO ACCESS MENU: PRESS TO SET ENGINEERING UNITS, ETC. TO SET PRESS ENGINEERING SELECT... -
Page 18: Set Fail" And The "C" Option
2. Use the up or down arrow to toggle Figure 8 gives an overview. the display between “FAIL HIGH” and “FAIL LOW”. Table 2. How the C Option Works with the SPT if the Sensor Fails Which "SET FAIL" Does Alarm Trip How does the Analog Ouptut... -
Page 19: Figure 8. Configuring The Alarm Parameters (C Option-Equipped Units Only)
Page 15 Figure 8. Configuring the Alarm Parameters (C Option-equipped units ONLY) DISPLAY OF PROCESS SELECT VALUE READY TRIP INPUT VIEW SITE-PROGRAMMABLE TRANSMITTER SELECT IS THE SECURITY JUMPER INSTALLED? PASSWORD PRESS SELECT MENU TO ACCESS MENU: DISPLAYS ENGINEERING UNITS TO ENTER DESIRED SETTINGS FROM TRIP POINT TO INCREASE... -
Page 20: Alarm Terminology
Alarm Terminology wants an alarm relay to change state, going from alarm If the SPT to be installed is equipped with the alarm option, to non-alarm. The reset point is not necessarily the same Moore Industries suggests that all users take a few... -
Page 21: Tsd, The C Option And The Spt Alarm
Sensor Failure and Alarm Output. To complement Note: TSD, the C option enables the SPT to provide alarm output There are two options for setting the trip on sensor failure. points of the alarm on the C-equipped SPT, “ENTR TRIP”... -
Page 22: Entering The Alarm Trip
– Inputting Trip Point SIMULATOR An input signal can be applied to the input terminals of the SPT, using the setup shown in Figure 10, and the unit can “capture” the trip point value. To input the trip point: Ω... -
Page 23: Entering Deadband
The display will show the value in the engineer- If the SPT is equipped with the C option, this parameter ing units selected in the “CONF effects how the unit behaves in the event of a sensor OPTS”... -
Page 24: Setting Latching/Non-Latching Functions
From “SET LAT” press the down ar- Note: row to access the exit screen. The SPT password can be any number between 00 and 99. To review inputs, use the arrows to scroll through the alarm parameters and then press SELECT to access the When the security jumper is NOT installed, settings for the parameter displayed. -
Page 25: Configuring Zero And Full Scale - Smart Ranging
3. Use the arrows to raise or lower the the analog output 0 and 100% output without having to value displayed according to the incorporate the SPT into any calibration setup. requirements of the application. Figure 12 shows the menu. -
Page 26: Figure 12. Configuring Zero And Full Scale
Page 22 Figure 12. Configuring Zero and Full scale DISPLAY OF PROCESS SELECT VALUE READY TRIP INPUT VIEW SITE-PROGRAMMABLE TRANSMITTER SELECT IS THE SECURITY JUMPER INSTALLED? PASSWORD PRESS SELECT MENU TO ACCESS MENU: PRESS NOTE: PRESSING THE = SELECT BUTTON SELECT UP ARROW = VIEW BUTTON... -
Page 27: Inputting Zero And Full Scale
Inputting Zero and Full Scale Note: Referred to as “Standard Ranging”, this menu allows the SPT zero and full scale settings are non- user to enter the values for the analog output 0 and 100% interactive. It is not necessary to perform this based on actual input. -
Page 28: Figure 13. Inputting Zero And Full Scale
Page 24 Figure 13. Inputting Zero and Full Scale DISPLAY OF PROCESS SELECT VALUE READY TRIP INPUT VIEW IS THE SITE-PROGRAMMABLE TRANSMITTER SELECT SECURITY JUMPER INSTALLED? PASSWORD PRESS SELECT MENU TO ACCESS MENU: PRESS NOTE: = SELECT BUTTON PRESSING THE SELECT PRESS UP ARROW... -
Page 29: Trimmimg Output
“TRIM OUT”. 2. Press SELECT to access the menu. The “TRIM ZERO” screen will be Figure 14. Setting Up for Trimming the SPT Output displayed. 3. Use the arrow buttons to choose the MILLIVOLT... -
Page 30: Figure 15. Trimming Output
Page 26 Figure 15. Trimming Output DISPLAY OF PROCESS SELECT VALUE READY TRIP INPUT VIEW SITE-PROGRAMMABLE TRANSMITTER SELECT IS THE SECURITY JUMPER INSTALLED? PASSWORD SELECT PRESS MENU TO ACCESS MENU: PRESS NOTE: PRESSING THE = SELECT BUTTON SELECT UP ARROW = VIEW BUTTON PRESS VIEW... -
Page 31: Installation
Mounting the SPT on a grounded rail. To mount the SPT on Top Hat DIN rail, seat the upper • All input signals to, and output signals from Moore extrusion on the back panel over the top of the rail and Industries’... -
Page 32: Connections
Connections Figure 17 shows how to hook up the various sensor in- puts, and Table 3 summarizes unit terminal designations. Figure 17. Connecting SPT Terminals and Input Hookups T/C HOOKUP RTD HOOKUPS MULTIPLE RTD HOOKUPS FOR AVERAGED OR DIFFERENTIAL OUTPUTS... -
Page 33: Operation
C-equipped SPT will always show red when the input is in alarm, and green in non-alarm. Table 4. LED Meanings COLOR INPUT CONDITION Normal operation. Indicated that the SPT has run its startup diagnostics and all Green internal circuitry is functioning properly. Ready No color The LED goes out if internal error occurs. -
Page 34: Error Codes
Table 5 lists the error codes, and the action to take if they are displayed on start-up. The SPT is equipped with a full set of internal diagnos- tics that check unit operation and configuration on power- up. If there are problems with the unit’s microprocessor, or with conflicting settings in memory, the LCD will show an error code. -
Page 35: Customer Service
Page 31 If problems involve a particular SPT , there are several Customer Service pieces of information you can gather before you call the factory that will help our staff to get you answers more Moore Industries is recognized as the industry leader in efficiently. - Page 36 Page 32 Trip point, programming 18 Index ENTR DB 18 ENTR TRIP 18 INPUT TRIP 18 ALRM EXIT 17 ALRM HI LO 14 Symbols # OF WIRES 12 ## PASS 20 C Option 4, 14 55 PASS 10 CONF ALRM 17 XXXX OHMS 12 CONF OPTS 12 CONF SENS 10...
- Page 37 Page 33 HI/LO Alarms 19 Non-failsafe Alarm 16 SET HILO 19 Normal 17 SET LAT 19 High alarm 16, 19 High/Low 7 Operation 29 Options 4 Contact Closure Output. 4 INP TRIP 18 EP 4 Input Codes 3 Externally Powered. 4 Input trip point 18 OPTS EXIT 12 INP TRIP 18...
- Page 38 Page 34 DUAL 2W 12 DUAL 3W 12 Unit Function Options 12 RJC ON or OFF 10 CONF OPTS 12 XXXX OHMS 12 OPTS EXIT 12 SET FAIL 14 SET FULL 21 (continued on next page) SET HILO 19 wiring 28 SET LAT 20 Terminals 28 SET ZERO 21...
- Page 39 Providing Instrumentation fast from our Quick-Ship Facilities! • Signal Transmitters • Temperature Transmitters • I/P and P/I Converters • Isolators and Converters • Alarm Trips • Integrators and Totalizers • Power Transducers • Instrument Power Supplies • Racks, Rails and Enclosures If you need it today —...
- Page 40 4. Ship the equipment to the Moore Industries location nearest you. The returned equipment will be inspected and tested at the factory. A Moore Industries representative will contact the person designated on your documentation if more information is needed. The repaired equipment, or its replacement, will be returned to you in accordance with the shipping instructions furnished in your documentation.
Need help?
Do you have a question about the SPT and is the answer not in the manual?
Questions and answers