
Subscribe to Our Youtube Channel
Related Manuals for Regada STR 1


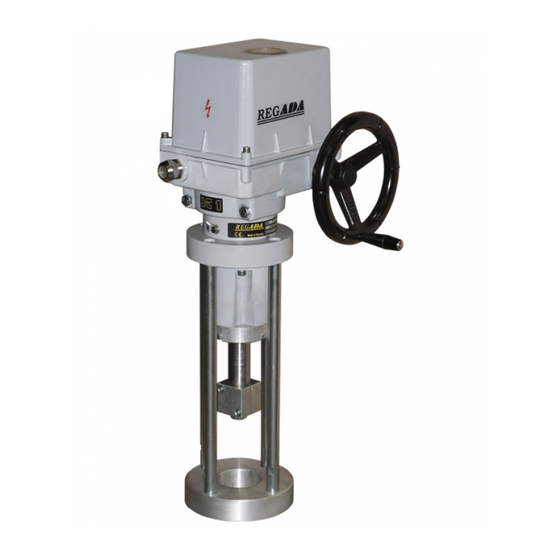
Summary of Contents for Regada STR 1
- Page 1 INSTALLATION, SERVICE AND MAINTENANCE INSTRUCTIONS Electric linear-thrust actuators ST 1, STR 1 ® 74 0721 02 74 0721 02...
- Page 2 TEST CERTIFICATE ELECTRIC LINEAR THRUST ACTUATOR ST 1, STR 1 Type number 491........Power supply........V ..Hz Serial number ......... Switching-off thrust ..........N Production year ........Set switching-off thrust ........N Wiring diagram ........Operating speed........mm/min ..............
-
Page 3: Table Of Contents
Please read these instructions carefully before mounting and operating the actuator! Preventive and safety-measures applied on the actuator can not offer required safety level till the actuator and its safety systems are not applied by required and described way and if installation and maintenance is not applied according to applicable instructions and rules! Contents General data ..............................2... -
Page 4: General Data
(regulating bodies -valves, etc.). EA of ST 1 types are provided for remote control of closing bodies, and EA of STR 1 types for automotive control of regulating bodies in both directions of their movement. They can be equipped with means of measuring and control of technological processes where an unified analogue direct current or voltage signal is an information bearer on their input and/or output. -
Page 5: Data Specified On Electric Actuator
ST 1, STR 1 1.3 Data specified on electric actuator Nameplate: Warning plate: Nameplate contains the basic data concerning identification, performance and electricity: indication of producer, type, serial number, max. load thrust and switching-off thrust, protection code, operating speed, supply voltage and current. -
Page 6: Lifetime Of Actuators
ST 1, STR 1 1.5.1 Lifetime of actuators The lifetime of an electric actuator (EA) is at least 6 years. EA used for closing mode (closing valves) comply with the requirements for at least 15,000 working cycles (cycle C – O – C: for linear EA). -
Page 7: Power Supply And Duty Cycle
2. EA ST 1 is possible connect with an external controller and use this EA as controlled EA, for this EA stands duty cycle and power parameters as for type STR 1 with built-in controller. For EA with controller we do not suggest operating speed 63 and 80 mm per min. -
Page 8: Appreciation Of The Product And Packing
ST 1, STR 1 The EA ST 1, STR 1 are delivered in solid packages guaranteeing resistance in accordance with EN 60 654 (IEC 60 654-1 and IEC 60 654-3). Package is a box. Products in boxes is possible to load on the pallets (pallet is returnable). On the outer side of the package is stated: •... -
Page 9: Description, Function And Specifications
(6) (located in the control area) and cable bushings (12), or connector with cable bushings The STR 1 version is equipped with an electronic controller. The electronic controller allows automatic output unit position adjustment in dependency on input signal value and provides additional functions. -
Page 10: Basic Specifications
ST 1, STR 1 2.2 Basic specifications Basic EA specifications: switching-off thrust [N], operating speed [mm/min], operating stroke [mm], max. load thrust [N] and electric motor parameters are given in Table 1. Table 1: Basic specifications Electric motor Max. load Max. - Page 11 ST 1, STR 1 Switching-off Voltage ............max. 250 V; 50/60 Hz; 2 A; or 250 V DC; 0,1 A; or 24 V DC; 2 A Hysteresis of position switches .........................max. 3% Switching-off thrust is adjusted to maximum value with tolerance ± 10 % if not agreed else.
- Page 12 ST 1, STR 1 Electronic positional transmitter (EPV) - converter R/I (B3) 2-wire version - without built-in power supply, or with built-in power supply Current signal ..........................4 ÷ 20 mA (DC) Power supply voltage ........................15 to 30 V DC Load resistance (at version without build-in power supply)........max.
-
Page 13: Installation And Dismantling Of Actuator
ST 1, STR 1 Supply voltage: ....terminal 61 (L1) -1(N) .....230 V AC, ±10% Frequency: ......50/60 Hz ±2% Input control signals - analogue: ... 0 - 20 mA ............. 4 - 20 mA ............. 0 - 10 V Input resistance for signal 0/4 - 20 mA ...................... - Page 14 ST 1, STR 1 Mechanical connection with connection dimensions according to DIN • Properly defat contact surfaces of the EA connecting flange and the valve. • Check the nameplates to assure that actuator and valve strokes are the same. • Set the actuator (A) and the valve (B) to the position ”closed“.
-
Page 15: Electric Connection And Checking Of Function
ST 1, STR 1 3.1.2 Electric connection and checking of function Follow up with connecting the EA with mains or master system. 1. Follow instructions in the part "Requirements for professional qualification"! 2. While laying electrical line abide by the instructions for heavy current installations. -
Page 16: Dismantling
If any of the functions is fault check connecting of the switches according to wiring diagrams. In the STR 1 version with the built-in electronic controller (Fig.9) it is needed to perform autocalibration for assuring optimal functioning. -
Page 17: Adjusting Of Actuator
ST 1, STR 1 4. Adjusting of actuator Abide by safety measures! After mechanical connection, electrical connection and checking of connection and function start setting and adjustment of the device. The adjustment can be performed at a mechanically and electrically connected EA. -
Page 18: Adjustment Of Resistant Transmitter (Fig. 5)
"open" is proportionally reduced. In the EA STR 1 with controller 2000Ω resistant transmitters are used. In the other cases if the resistant branch is lead to the terminal board the resistance of the transmitters is according to the customer's specification. -
Page 19: Epv - 3-Wire Version (Fig. 7)
ST 1, STR 1 Adjustment of the EPV in EA STR 1 with controller • Disconnect the circuit with removing a jumper on the terminals 81 and 82. • Disconnect the control signal from the terminals 86/87 and 88. •... -
Page 20: Adjustment Of The Capacitive Transmitter Cpt1/A (Fig.8)
ST 1, STR 1 Adjustment of the Capacitive Transmitter CPT1/A (Fig.8) The chapter describes adjustment of the capacitive transmitter to the specified parameters (standard values of output signals) in case they are reset. The capacitive transmitter serves as a position transmitter of electric actuators with unified output signal of 4÷20 mA in electric actuators ST, or as a feedback of a position... -
Page 21: Adjustment Of Position Controller (Fig. 9)
Setting of the controller is performed using buttons and LED diodes. Adjust the position and thrust switches and the position transmitter before adjustment of the controller. Laying of adjusters and signalling elements on the board of the REGADA controller is shown on Fig.9: SW1 button... -
Page 22: Watching Operation And Error States
ST 1, STR 1 Notes: The controller at autocalibration automatically sets the feedback type - resistant/current (*) Parameters set in the production plant, if customer has not stated else. (**) Input signal 4 mA - position "closed" 20 mA - position "open"... -
Page 23: Service, Maintenance And Troubleshooting
ST 1, STR 1 5. Service, maintenance and troubleshooting Service . In general it is provided that service of the EA is performed by a qualified worker in accordance with requirement given in Chapter 1! 2. After putting the EA into operation it is needed to verify whether during manipulation any scratch on surface occurred, it is to be removed to prevent actuator against corrosion! The EA ST or STR requires just negligible service. -
Page 24: Troubleshooting
ST 1, STR 1 After every potential flooding of the product check, whether there is no water inside. After eventual water penetration, dry the product before repeated putting into operation and replace damaged sealings, resp. other parts of EA. identically check also tightness of cable bushings and replace them, if they are damaged. -
Page 25: Enclosures
ST 1, STR 1 7. Enclosures 7.1 Wiring diagrams Wiring diagrams ES ST 1... - Page 26 ST 1, STR 1...
- Page 27 ST 1, STR 1 Wiring diagrams ES STR with controller...
- Page 28 ST 1, STR 1 Diagram of work of position and thrust switches outlets ....open close NC - COM COM - NO NC - COM COM - NO NC - COM COM - NO NC - COM COM - NO...
- Page 29 Z78a ...connection of 3-phase electric motor Z90c ....connection of 3-phase electric motor with local control Z232f...connection of local control for EA STR 1 - 230 V AC, 24 V AC Z232g..connection of local control for EA STR 1 - 24 V DC Z240a..connection of EA STR 1 with controller and with resistive feedback with 1~motor...
-
Page 30: Dimensional Drawings Flange Iso 5210
ST 1, STR 1 7.2 Dimensional drawings Flange ISO 5210 P-1169 Flange DIN 3358 P-1231 EA with local control... - Page 31 ST 1, STR 1 P-1170 Pillars...
- Page 32 ST 1, STR 1...
- Page 33 ST 1, STR 1 P-1228 The EA with local control...
-
Page 34: Guarantee Service Check Report
ST 1, STR 1 7.3 Guarantee service check report Service center:D Date of repair: Guarantee repair no.: User of actuator: Claim applied by: Actuator type number: Actuator production number: Product claim fault: Detected product fault: Used spare parts: Remarks: Issued on a day:... -
Page 35: Post Guarantee Service Check Report
ST 1, STR 1 7.4 Post guarantee service check report Service center: Date of repair: User of actuator: Actuator operating place : Actuator type number: Actuator production number: Detected product fault: Used spare parts: Remarks: Issued on a day: Signature:... -
Page 36: Commercial Representation
ST 1, STR 1 7.5 Commercial representation Slovak Republic: Regada, s.r.o., Strojnícka 7, 080 01 Prešov Tel.: +421 (0)51 7480 460, Fax: +421 (0)51 7732 096, E-mail: regada@regada.sk...
Need help?
Do you have a question about the STR 1 and is the answer not in the manual?
Questions and answers