
Related Manuals for Regada SO 2-Ex


Summary of Contents for Regada SO 2-Ex
- Page 1 INSTALLATION, SERVICE AND 1026 MAINTENANCE INSTRUCTIONS Explosion-proof electric multi - turn actuators SO 2-Ex 74 0868 02 Supplement, part C...
- Page 2 TEST CERTIFICATE EXPLOSION-PROOF ELECTRIC PART-TURN ACTUATOR SO 2-Ex Type number ........... Power supply ..........V .....Hz Serial number ..........Switch-off torque............Nm Production year ..........Operating speed ............min Wiring diagram ..........Adjusted number of revolutions ........Warranty period ........months Transmitter...............
-
Page 3: Table Of Contents
Maintenance to assure inexplosiveness ....................27 Troubleshooting............................28 Accessories and Spare Parts ..........................28 Enclosures ...............................29 Wiring diagrams SO 2-Ex..........................29 Wiring diagrams SO 2-Ex with controller ....................30 Dimensional drawings ..........................33 Guarantee service check report ........................40 Post guarantee service check report......................41 Commercial representation ........................42 Issue: 02/2020, revised according to supplement part C No.: 74086802, revised according to... -
Page 4: General Information
. EA of SO 2-Ex types are provided for remote control of closing bodies, and EA of SO 2-Ex with controller for automotive control of regulating bodies. They are equipped by measuring and technological processes controlling means;... -
Page 5: Data Specified On Electric Actuator
Protection of the Product EA SO 2-Ex and SO 2-Ex with controller has no own protection against short circuit. That is why the power supply has to contain a suitable protection device (a breaker or a fuse) that can also serve as a main switch. - Page 6 SO 2-Ex Graphic symbols on electric actuator The graphic symbols used on electric actuator substitute the text messages. Some of them are in accordance with EN ISO 7010, ISO 7000 and IEC 60417 within valid edition. Dangerous voltage (EN ISO 7010-W012)
-
Page 7: Warranty Conditions
SO 2-Ex Warning for safety use 1. Products are assigned for operation in environment consist of gas, steam and vapours, with temperature range from –25°C up to +55°C; and special version for ultra low temperatures from –50°C up to +40°C, from -50°C up to +55°C or from -60°C up to +55°C, to pressure range from 0.8 to 1.1 bar. -
Page 8: Operation Conditions
SO 2-Ex 1.6 Operation Conditions 1.6.1 Location of the Products and Operation Position The EA can be built-in and operated in the sheltered places of industrial objects without any temperature or humidity control and with a protection against direct climate exposure (e.g. direct sunshine). except the special version designed for waste water treatment plants, water management, the selected chemical plants and tropic conditions. -
Page 9: Power Supply And Operation Modes
Note: 1. The duty cycles consists of the kind of load, the loader and the frequency of switching. 2. Once EA SO 2-Ex is connected to the external controller unit, also use it as a control EA where the maxi-... -
Page 10: Packaging, Transport, Storing And Unpacking
(by placement to racks, or on palettes), chemicals and foreign interventions • There shall be no corrosive gases present in the storage areas. The EA SO 2-Ex are delivered in solid packages, assuring the resistance according to the requirements of standards EN/IEC 60654. -
Page 11: Description, Functioning And Specifications
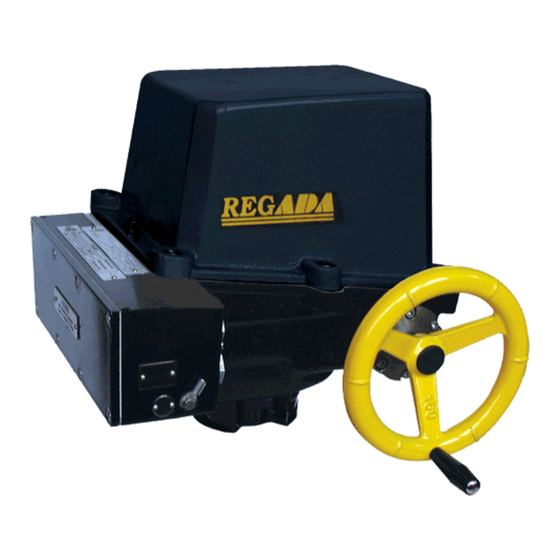
2. Description, Functioning and Specifications Descriptions and Functioning The EA SO 2-Ex are of the compact design with several connected modules. They consist of two functionally different main parts. The gear part is made of flange with a coupling for connection with the controlled part and gearings placed in the bottom case;... -
Page 12: Specifications
SO 2-Ex 2.2 Specifications Basic Specifications are given in the table 1. Table 1: Basic Specifications Electric motor Operation Switching Nominal Maximum speed torque Capacitor load torque ±10[%] ±10 [%] Supply voltage Power Curren capacity Speed output [rev/min] [rev] [Nm]... - Page 13 Potentiometer linearity error:....................±2.5 [%] Potentiometer hysteresis:....................max.2,5 [%] for SO 2-Ex "O" (open) ..≥ 93%, "Z" (closed) ..........≤ 5% for SO 2-Ex with controller "O" (open) ... ≥ 85 % and ≤ 95%; "Z" (closed) ≥ 3 % and ≤ 7%...
- Page 14 SO 2-Ex Capacitive (B3): non-contact, life 10 cycles 2-wire connection with power supply or without power supply The current signal 4 ÷ 20 mA (DC) is acquired from the capacitive transmitter supplied from the internal or an external voltage supply source. The electronics of the transmitter is protected against eventual wrong polarity and current overloading.
- Page 15 SO 2-Ex Electronic position controller (N) Controller software equipment: A) Function and parameters programmable functions: • with functional buttons SW1, SW2 and LED diodes D3, D4 directly placed on controller • with computer or terminal equipped with corresponding programme, using RS 232 interface.
-
Page 16: Mechanical Connection
SO 2-Ex 2.2.1 Mechanical connection: • with flanges (ISO 5210, DIN 338, GOST R 55510) Main and connecting dimensions are given in the dimensional drawings. 2.2.2 Electric connection • with terminal board (X): max. 21 terminals - connecting cable size max. 1.5 mm 2 cable bushings –... -
Page 17: Electric Connection With Mains Or Checking Of Functions
SO 2-Ex 3.1.2 Electric Connection with Mains or Checking of Functions Follow up with connecting the EA with mains or master system. 1. Follow instructions given in the Chapter “Requirements for Professional Qualification...“ ! 2. While laying electric wiring follow instructions for heavy-current appliances installations! 3. -
Page 18: Dismantling
SO 2-Ex In the SO 2-Ex version with the built-in electronic controller it is needed to perform autocalibration for assuring optimal functioning. The procedure is as follows Set the actuator to a mid-position (position and torque switches are not switched) Press the button SW1 for about 2 sec (i.e. -
Page 19: Adjustment
SO 2-Ex 4. Adjustment Keep safety regulations! Follow the prescribed procedure to assure that the EA is not connected to mains when live not to cause any injury by electrical current! After mechanical connection, electrical connection and checking of connection and function start setting and adjustment of the device. - Page 20 SO 2-Ex • reset the EA back by the stroke where the “Closed” position is to be indicated and turn the cam (30) counter clockwise until switch S6 switches over (26); • once the EA is adjusted manually tighten the central milled nut (23) to lock the cams and tighten the lock nut (22) while simultaneous holding the milled nut;...
- Page 21 SO 2-Ex TABLE 2 MAX. STROKE STROKE LINE OPERATING ANGLE SPEED 1.° 3,125 2.° 6,25 3.° 12,5 4.° 5.° 6.° 7.° 1.° 2.° 3.° 4.° 5.° 6.° 7.° 1.° 2.° 3.° III. 4.° 5.° 6.° 7.° SLIDING GEAR SLIDING SCREW GEAR 8.°...
-
Page 22: Adjustment Of Resistant Transmitter (Fig.4)
Rotate the transmitter shaft (11) until resistance of ≤5% of the nominal transmitter resistance can be read on the meter in case of EA SO 2-Ex, and 3 up to 5% of the nominal transmitter resistance in case of EA SO 2-Ex with controller with EPV , i.e. -
Page 23: Adjustment Of The Electronic Position Transmitter (Epv) - The Resistive Transmitter (Potentiometer) With The Converter Ptk 1
SO 2-Ex 4.4 Adjustment of the Electronic Position Transmitter (EPV) - the Resistive Transmitter (Potentiometer) with the Converter PTK 1 EPV – the 2-wire version (Fig. 5) The position transmitter with the converter PTK1 is in the plant adjusted to have the output current signal on the terminals 81-82 as follows: •... -
Page 24: Adjustment Of Capacitive Transmitter Cpt1/A
The capacitive transmitter serves as a position transmitter of electric actuators with unified output signal of 4÷20 mA in electric actuators SO 2-Ex, or as a feedback of a position controller, or if required it functions also as a remote position transmitter of electric actuators with unified output signal of 4÷20 mA in electric actuators SO 2-Ex with controller. - Page 25 SO 2-Ex • Repeat the procedure until the change from 4 to 20 mA is reached with deviation less then 0,5 %. • Disconnect the meter and lock the screws with a varnish. Adjustment of the Capacitive Transmitter with the Power Supply 1.) Check the power supply: 230 V AC ±10% on the terminals 1,61, resp.
-
Page 26: Adjustment Of Position Controller (Fig. 9)
Setting of the controller is performed using buttons and LED diodes. Adjust the position and torque switches and the position transmitter before adjustment of the controller. Laying of adjusters and signalling elements on the board of the REGADA controller is shown on Fig. 9: SW1 button... -
Page 27: Watching Operation And Error States
SO 2-Ex Controller setting procedure: The initialization routine starts at the switched-on controller, zero system deviation and short pressing of the SW1 button for ca 2 sec (i.e. until the diode D3 got on). Loosing the button some of the default menus starts (usually control signal) what is shown with 1 blink on the D3 diode as well as one of the default parameters (usually control signal of 4-20mA) what is shown with 1 blink on the D4 diode. -
Page 28: Service And Maintenance
SO 2-Ex 5. Service and Maintenance 5.1 Service In general it is supposed that the EA is serviced by a qualified person as required in the Chapter 1! After the EA is put into operation it is necessary to check whether during manipulation its surface finishing was not damaged –... -
Page 29: Maintenance To Assure Inexplosiveness
SO 2-Ex 5.3 Maintenance to assure inexplosiveness A half an hour before removing of the actuator cover it is needed to switch power supply off. The given period is required to assure cooling of the electric motor and the space heater below the admissible temperature value of the temperature class T5 (+100°C). -
Page 30: Troubleshooting
SO 2-Ex 5.4 Troubleshooting • In case of a mains failure the EA stands in the position where it was before the failure occurred. If needed the EA can be reset using the manual control (with the handwheel). When necessary EA... -
Page 31: Enclosures
SO 2-Ex 7. Enclosures 7.1 Wiring diagrams SO 2-Ex... -
Page 32: Wiring Diagrams So 2-Ex With Controller
SO 2-Ex 7.2 Wiring diagrams SO 2-Ex with controller... - Page 33 SO 2-Ex...
- Page 34 Z32 .....wiring diagram of double resistant transmitter Z254a..wiring diagram of EA SO 2-Ex with controller and current feedback for electric motor – for 230 V AC Z249....wiring diagram of EA SO 2-Ex with controller with resistant feedback – for 230 V AC Z257d..3-wire version of EPV - without power supply...
-
Page 35: Dimensional Drawings
SO 2-Ex 7.3 Dimensional drawings... - Page 36 SO 2-Ex...
- Page 37 SO 2-Ex...
- Page 38 SO 2-Ex...
- Page 39 SO 2-Ex...
- Page 40 SO 2-Ex...
- Page 41 SO 2-Ex...
-
Page 42: Guarantee Service Check Report
SO 2-Ex 7.4 Guarantee service check report Service center:D Date of repair: Guarantee repair no.: User of actuator: Claim applied by: Actuator type number: Actuator production number: Product claim fault: Detected product fault: Used spare parts: Remarks: Issued on a day:... -
Page 43: Post Guarantee Service Check Report
SO 2-Ex 7.5 Post guarantee service check report Service center: Date of repair: User of actuator: Actuator operating place : Actuator type number: Actuator production number: Detected product fault: Used spare parts: Remarks: Issued on a day: Signature:... -
Page 44: Commercial Representation
Tel.: +421 (0)51 7480 460, Fax: +421 (0)51 7732 096, E-mail: regada@regada.sk Czech republic: REGADA Česká s.r.o. (Ltd.) – exclusive representation REGADA, s.r.o. (Ltd.) for sale of electric actuators Kopaninská 109 252 25 Ořech PRAHA – západ Tel.: +420 257 961 302...
Need help?
Do you have a question about the SO 2-Ex and is the answer not in the manual?
Questions and answers