Table of Contents
Advertisement
Advertisement
Table of Contents

Related Manuals for Nidek Medical ARK-700


Summary of Contents for Nidek Medical ARK-700
- Page 1 Auto Ref/keratometer operation manual ARK-700...
- Page 2 Contents Import Notice Environmental Factors Safety Information 1. General Description 2. Features 3. Notes for using the instrument 4. Description of Parts 5. Instruction of screen 6. Menu 7. Measurement 8. Removal of usual fault and service informaion 9. Inspection and Maintenance 10.
-
Page 3: General Safety Information
WARRANTY Please use Auto Ref-keratometer after you read the manual carefully. It is not allowed to add the any factors which will be caused machine problem . This manual contains information necessory for correct and effective operation of Auto Ref-keratometer and provides specifications and procedures for operation and maintenance。... - Page 4 Caution sign DESCRIPTION Only operate the instrument with the power supply indicated on the stick. Otherwise, it may result in fire or electric shock. WARNING Be sure to turn OFF the power switch before connecting or disconnecting the cables.Also do not handle them with wet hands.Otherwise, you may get an WARNING electric shock that may result in death or serious injury.
- Page 5 Not only refractometry and keratometry but aslo base cave of contact lens and corneal diameter can be measured with this instrument. ◆ Wide measurement range Because ARK-700 covers from -30Dto +25D in refractometry and from R5mmto R10mm in keratometry, almost of all examinee can be measured. ◆ Accurate mesurement...
- Page 6 ◆ In the case of sudden heating of the room in cold areas, wait until the thermal shock disappears before measurement. ◆ Consult the dealer to connect this instrument with other equipment ◆ Keep the optical parts of the examinee side clean. A fingerprint or other substances on the optical parts may cause an error or inaccurate results.
- Page 7 Operation Buttons ① ② ③ ④ ① Print button(to print out the measured results) ② Indicator lamp(indicate the power on/off and the printer paper exist/no) ③ Paper perforating key(press the key to print out the measurement result) ④ Up and down chinrest(Adjust the height of the chinrest) Marks: For the point ③and ④,haven not add these function now.
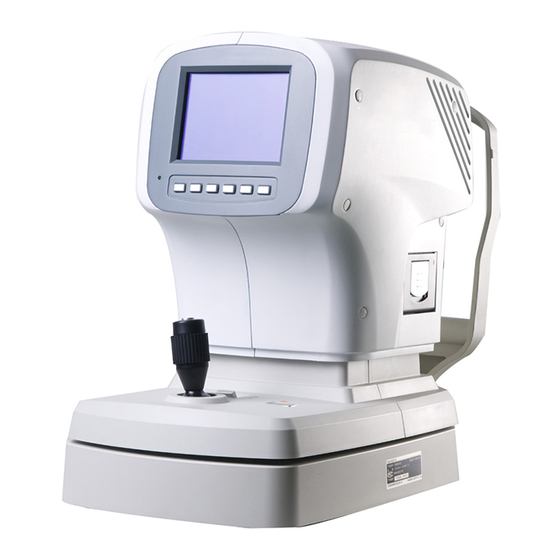
- Page 8 5、Screen display 1、Place Auto re/keratometer on the table. (Figure 1) 5.1 L/R Sign: Flashing sign indicates the current measured eye 5.2 The number of power/corneal parameters measured 5.3 Step selection (shortcut key) 5.4 Astigmatism symbol selection (shortcut key) 5.5 VD selection (shortcut key) 5.6 PD value display 5.7 Power display 5.8 Corneal value display...
- Page 9 6、Menu (Figure 2) 6.1 Measurement Mode Selection Touch this key to pop up three measurement mode menu (as shown in Figure 2), the user can choose to touch any measurement mode menu under need (KER for Keratometry mode, R/K for RefracKeratometry mode, REF for Refractometry mode) 5.2 Auto/Manual Measurement Selection (partial model) Touch this key to select auto measurement mode (A) or manual measurement mode (M) 5.3 Auto/Manual Tracking and Focusing Selection (this model do not have this function)
- Page 10 Left/right eyes data can be recorded max.10 items separately. Touch REF to display the recorded refractometry data only, touch KER to display the recorded keratometry data only, touch CLEAR key to clear the recorded data, touch RETURN key to return to the measurement interface.
- Page 11 (Figure 5) MODE:Keratometry radius measurement (mm), keratometry power measurement (D) and average value display (AVG) optional STEP:Keratometry power precision display REFRACTIVE INDEX:Factory defaults to 1.3375 6.6.3 Mode setting (Figure 6) (Figure 6) MODE: Manual measurement mode and auto measurement mode optional (Auto measurement icon for grey said this model without this feature) BEEP: Sound prompt when operating.
- Page 12 STAND BY: Instrument standby time setting (5 minutes, 10 minutes, 30 minutes and 60 minutes optical) (touch any key to wake up) 6.6.4 Printing setting and printing paper replacement (Figure 7) (Figure 7) AUTO: When ON selected, the measurement results will be printed out automatically after the both eyes measurement finished (in this case, the data is cleared automatically) When OFF selected, press the print key on panel to print out the measurement results.
- Page 13 (Figure 8) 8.6.5 Data setting Figure 9 (Figure 9) DISP: Date, month and year display mode DATE: Edit or modify the exact time of date and month and year TIME: Edit or modify the exact time of second and minute and hour COUNT: When ON or OFF selected, recording the number of patients in main interface will be refreshed or not No.: Patient number setting, patient measuring number setting.
- Page 14 Touch DATE, TIME and NUMBER options, enter the sub menu as shown below, select the appropriate number, press ENT key to confirm and preserve, press RETURN key to quit. Press BS key to delete one by one, press C key to clear all. (Figure 10) (Figure 10) 6.6.6 Printing message setting (Figure 11) MSG1 for company name or product model number setting...
- Page 15 Touch the yellow blank space to enter the message editing menu (Figure 12) (Figure 12) ENTER key for confirming and preserving A/a for capital/small letter conversion BS for deleting single letter SPA key for space bar CRL key for clearing all letters 6.6.7 Data transfer setting (Figure 13) (Figure 13)
- Page 16 According to the requires of the connected devices, customers choose the corresponding baud rate, and open the auto option, the measurement data will be automatically transferred to the connected devices, meanwhile the refractometer data will be automatically cleared. MEASUREMENT Suitable crowd and contraindication Target patients for adults and children, and crowd of eye power range (-20 m +20 m ).
- Page 17 7.3 Measurement The measurement alignment method of this device for pupil and center measurement cross target in coincidence 7.3.1 Manual focusing and measurement (7.11 and 7.12 key for M) Hold the operation lever, quickly shift the sliding body to left side, keeping the measurement window roughly aligning with the patient’s right eye socket.
- Page 18 (Figure 15) Shift the sliding body to right side, repeat the above steps, measure the patient’s left eye. Both eyes measurement over, pupil distance will be displayed automatically on the corresponding position. Choose whether or not to print the measurement results according to settings (auto printing or data output transmission over, the data on screen will be automatically cleared).
- Page 19 (Figure 16) 7.3.3 Measurement error prompt During measurement, if the patients found having eyelid ptosis, eyelash disturbance, cataract, microcoria, keratopathy, corneal vertex and pupil center noncoincidence, the error prompt will appear on screen when the instrument can’t measure normally, please select the manual measurement mode or force measurement mode (long press the measurement button).
- Page 20 contact the original manufacturer or local agent to repair. ●Please provide us with the following information: Instrument name and model number Instrument serial number Fault phenomenon (detailed as possible) (1.) Accessory maintenance limitation Providing maintenance accessories to maintain the instrument functions during the instrument lifetime (2.) Processing of instrument ●...
- Page 21 MAIN TECHNICAL INDEXES 9.1 Measurement Performance Parameters 9.1.1 Corneal Vertical Distance(VD): 0.00mm、12mm、13.75mm、15mm 、0.06 m 、0.12 m 、 9.1.2 SPH: -20.00 m ~ +20.00 m ( VD=12mm,0.01 m 0.25 m unit ), deep myopia measurement available 9.1.3 CYL: 0.00 m ~ ± 6.00 m (0.25 m unit) 9.1.4 Cylinder Form: -、+、...
Need help?
Do you have a question about the ARK-700 and is the answer not in the manual?
Questions and answers