Table of Contents
Advertisement
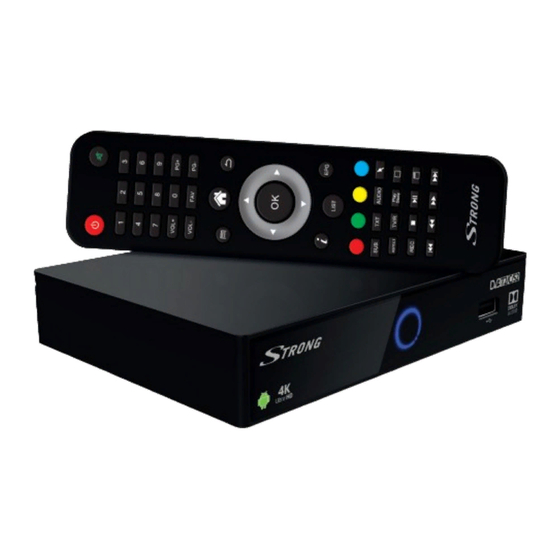
Hybrid UHD Android Receiver
SRT 2402
User Manual
Používateľská príručka
Bedienungsanleitung
Instrukcja obsługi
Manuel d'utilisation
Telepítési Utasítás
Manuale d'uso
Korisnički priručnik
Manual del Usuario
Ръководство за потребителя
Manual do Utilizador
Руководство пользователя
Bruksanvisning
Посібник користувача
Návod k obsluze
Android 7.1
Advertisement
Table of Contents

Related Manuals for Strong SRT 2402


Summary of Contents for Strong SRT 2402
- Page 1 Hybrid UHD Android Receiver SRT 2402 User Manual Používateľská príručka Bedienungsanleitung Instrukcja obsługi Manuel d’utilisation Telepítési Utasítás Manuale d’uso Korisnički priručnik Manual del Usuario Ръководство за потребителя Manual do Utilizador Руководство пользователя Bruksanvisning Посібник користувача Návod k obsluze Android 7.1...
- Page 2 SRT 2402 S/PDIF (coax.) ANT IN/ SAT IN CABLE IN ETHERNET USB: 5 V 500 mA max. AUDIO Play TV/R ASPECT Store...
- Page 3 ANT IN/ SAT IN CABLE IN SRT 2402 S/PDIF (coax.) ANT IN/ ANT IN/ SAT IN CABLE IN CABLE IN ETHERNET USB: 5 V 500 mA max. SRT 2402 S/PDIF (coax.) ANT IN/ SAT IN CABLE IN ETHERNET USB: 5 V 500 mA max.
- Page 4 Supplied by STRONG Austria Represented by STRONG Ges.m.b.H. Franz-Josefs-Kai 1 1010 Vienna Austria Email: support_at@strong.tv 02 Oct 2018 14:25...
- Page 5 SES ASTRA. Eutelsat and HOT BIRD are registered trademarks of Eutelsat Communications. Skype is a trade mark of Skype and STRONG is not affiliated, sponsored, authorised or otherwise associated by/with the Skype group of companies. HDMI, the HDMI logo and High-Definition Multimedia Interface are trademarks or registered trademarks of HDMI Licensing LLC in the United States and other countries.
-
Page 6: Table Of Contents
TABLE OF CONTENT 1.0 INTRODUCTION 5.0 HOW TO USE THE ANDROID PLATFORM 11 1.1 Safety Instructions 5.1 Connect to Wi-Fi networks 1.2 Equipment Set-up 5.2 Open the browser 1.3 Accessories 5.3 Picture gallery 1.4 Usage of external USB devices 5.4 Video player 5.5 Music library 2.0 YOUR RECEIVER 5.6 S link for streaming from other devices 13... -
Page 7: Introduction
1.0 INTRODUCTION Thank you for choosing the Android receiver by STRONG. It has been produced with the latest new technology and offers extensive entertainment and great versatility. We wish you many hours of new great experiences exploring the Android world and watching IP, cable, terrestrial and satellite TV in High Definition and satellite even in Ultra High Definition quality! 1.1 Safety Instructions... -
Page 8: Equipment Set-Up
It is a necessity that you only use an approved extension and compatible wiring that is suitable „ „ for the electrical power consumption of the installed equipment. Please ensure that the electrical power supply corresponds with the voltage on the electrical identification plate at the back of the device. -
Page 9: Usage Of External Usb Devices
STRONG cannot guarantee compatibility with all types of USB devices such as web cams, „ „ keyboards, mouse devices, storage devices. STRONG cannot guarantee perfect operation when a HDD and a web cam are used at the same „ „ time. -
Page 10: Rear Panel
2.3 Rear Panel Fig. 2 1. ANT IN/CABLE IN To connect to your antenna or wall connector provided by the cable operator for reception of broadcast signals. 2. SAT IN To connect to your satellite antenna for reception of broadcast signals. 3. -
Page 11: Installing The Batteries
27. u/2 Turns Timeshift on or off in the DTV mode; starts/resumes playback in the multimedia mode Recording List in the DTV mode 29. 7 Fast rewind during playback 30. 5/6 Press and hold 5 6 for seconds to draw the playing progress as your desire, then press u PAUSE] to start the playing from the new position. -
Page 12: Connecting To The Internet
3.3 Connecting to the Internet Fig. 6 a. For the best performance we advise using a wired connection to your router. b. Alternatively, you can use the in-built wireless adapter to connect to the Internet via your wireless router. NOTE: Be aware that the Internet speed will be reduced by walls or long distance between the receiver and the router when using wireless connection. -
Page 13: First Installation
4.0 FIRST INSTALLATION This procedure will enable you to enjoy and set up your Android receiver in just a few steps. It is recommended to follow the First Installation step by step. It will guide you through the basic installation and channel searching process. - Page 14 Select Next and confirm with OK to go to Step 2. Step 2: Channel scan Start Scan: Press OK to enter this menu which shows the options for channel scanning. Selection of DVB-T/T2 Installation allows you to search terrestrial channels by using an indoor or outdoor antenna. If you selected DVB-S/DVB-C during the previous step parameter Tuner Type, you will get the DVB-C Installation option which allows you to search cable broadcasted channels.
-
Page 15: How To Use The Android Platform
Please add these manually if you miss them or check our website www.strong.tv for latest updates. After the above steps have been made the receiver will go into viewing mode and you can use and enjoy Should some steps not be set as you wish or if you like to restart the wizard, you can do so from the DTV and select DTV settings and confirm with OK to enter. -
Page 16: Open The Browser
Forget a wireless network You can make the device forget about the details of a wireless network that you have added, if you don’t want your device to connect to it automatically or if it is a network that you use no longer. 1. -
Page 17: S Link For Streaming From Other Devices
Here you can find interesting recommended applications. 5.8 Applications NOTE: STRONG cannot warrant and cannot be hold responsible of the (mal-) function and working of third party apps. Some applications function only well in devices with GPS. 5.8.1 Browse for applications You can browse for apps by category and sort them in different ways. -
Page 18: Open All Applications
5.8.3 Download and install an application Find an app you want and open its details screen. In the details screen of the app, you can read more about it including costs, rating and user comments and information about the developer. Click to download and install the app. -
Page 19: Network
6.1 Network In this menu you can change or setup the connection to the Internet by Wi-Fi or LAN (RJ45 cable) as explained in point 5.1 Enter and store your passwords and/or gateway ports here. 6.2 Display Here you can set your {Screen resolution}, {Screen position}, HDR to SDR} and {SDR to HDR} 6.2.1 Screen resolution In this menu you can select your preferred HDMI output resolution, which is supported by the connected TV. -
Page 20: Screen Saver
From time to time you can check if there is an improved software version available. This can be checked and downloaded from our website www.strong.tv. Enter the type number into the service support on our website. If there is an improved software version, you can download the file and copy it to the root of a USB device. -
Page 21: Date And Time
SRT 2402 is switched ON by the remote control.* Set One key power off to ON to use all connected CEC supported equipment that shall be switched OFF when SRT 2402 is switched OFF by the remote control.* * CEC supported equipment is NOT always compatible with each other. - Page 22 7.3.1 AV Settings Aspect Ratio Select Auto for automatically adjustment of the screen size. Select Full to enlarge 4:3 video format to full screen in zoom mode. Zap Mode Select Hold Screen to keep the last screen frozen until the next channel appears.
-
Page 23: Recording Functions
Insert a USB HDD into one of the free USB slots. Alternatively, you can use USB sticks but it must be high speed and high capacity for recording of HD content. Storage Select the USB device you like to use for the recording function. Recording Duration The recording time is set to 3 hours as default. - Page 24 7.5.1 Satellite Installation In this menu below you will find level and quality bars to optimize the signals for your dish. Use p/q to select one or more satellites. Press OK to mark or unmark them. As soon as you have made your selection, press u to jump to the right side of the screen where you can select a satellite and add the corresponding settings as DiSEqC ports.
-
Page 25: Electronic Programme Guide (Epg)
If the DTV part shows problems with reception, first check if all cables and connectors still are in good condition. - Page 26 Problem Possible reason Remedy The remote control is not The battery is exhausted Change the batteries working. Apps such as You Tube can’t be A standard mouse/air mouse is Use a standard mouse or install controlled like scroll down or required to control touch screen.
-
Page 27: Technical Specifications
Forgotten your PIN code Default PIN is 1234 Contact your local Service Hotline or send an email to our support via www.strong.tv The external USB HDD does not The power consumption is too Connect an extra power supply start. - Page 28 0.30 kg Data Protection: Please be aware that STRONG, its manufacturing partners, the application providers and the providers of the services may collect and use technical data and related information, including but not limited to technical information about this device, system and application software and peripherals. STRONG,...
Need help?
Do you have a question about the SRT 2402 and is the answer not in the manual?
Questions and answers