Table of Contents
Advertisement
Instructions for Use
i-PAD CU-SP1 AUTO
The information in these Instructions for Use applies to the i-PAD CU-SP1 AUTO. This
information is subject to change. Please contact CU Medical Systems, Inc. or its authorized
representatives for information on revisions.
Revision History
Edition1
Publication Date: March 2014
Document No.: SPA-OPM-E-01
Published by: CU Medical Systems, Inc.
Printed in the Korea
Copyright
© 2014 CU Medical Systems, Inc.
No part of these Instructions for Use may be reproduced without the permission of CU
Medical Systems, Inc.
Medical Device Directive
The i-PAD CU-SP1 AUTO complies with the requirements of the Medical Device Directive
2007/47/EC and its revisions.
Important:
Quick defibrillation is needed if sudden cardiac arrest occurs. Since the chance of success is
reduced by 7% to 10% for every minute that defibrillation is delayed, defibrillation must be
performed promptly.
1
Advertisement
Table of Contents
Troubleshooting

Related Manuals for CU Medical Systems i-PAD CU-SP1 AUTO


Summary of Contents for CU Medical Systems i-PAD CU-SP1 AUTO
- Page 1 Instructions for Use i-PAD CU-SP1 AUTO The information in these Instructions for Use applies to the i-PAD CU-SP1 AUTO. This information is subject to change. Please contact CU Medical Systems, Inc. or its authorized representatives for information on revisions. Revision History...
- Page 2 The i-PAD CU-SP1 AUTO is manufactured by: CU Medical Systems, Inc. 130-1, Dongwhagondan-ro, Munmak-eup, Wonju-si, Gangwon-do, Korea 220-801 Authorized EU Representative Medical Device Safety Service Schiffgraben 41, 30175 Hannover, Germany Contact Us Product and Order Inquiries Overseas Sales Team CU Medical Systems, Inc.
-
Page 4: Table Of Contents
3.1 S ..................13 TANDARD ACKAGE ONTENTS 3.2 S -PAD CU-SP1 AUTO ................14 ETTING UP THE I HOW TO USE THE I-PAD CU-SP1 AUTO................. 16 4.1 C ......................16 HAIN OF URVIVAL 4.2 P ..................17 REPARATION FOR EFIBRILLATION Step 1: Place pads on the patient.................. - Page 5 6.2.2 Replacing Supplies ....................35 Disposable Battery Pack ......................... 35 Replacing the Pads ......................... 38 6.2.3 Cleaning the i-PAD CU-SP1 AUTO ................. 39 DISPOSAL ......................... 39 TROUBLESHOOTING ....................... 40 8.1 S ........................40 ESTS 8.2 D ......................... 42 EVICE TATUS 8.3 T...
-
Page 6: Introduction
Hereinafter, "device" refers to [CU-SP1 AUTO] "We" or “Us" refers to CU Medical Systems, Inc. "Pads" refers to defibrillation electrode pads, "Battery Pack" refers to a disposable battery pack. -
Page 7: Overview
Overview Thank you for purchasing the i-PAD CU-SP1 AUTO. This device can be effectively and safely used for a long period if you familiarize yourself with the instructions, warnings, precautions, and notices contained in these Instructions for Use prior to its use. -
Page 8: Introduction
After charging is completed, the equipment delivers an electric shock automatically. The i-PAD CU-SP1 AUTO is easy to use. It guides the you throughout a rescue operation using voice prompts and indicators (LED and graphical indicators). The i-PAD CU-SP1 AUTO is small, light, highly portable, and battery powered. It is highly suitable for use in public, out-of-hospital settings. -
Page 9: Local Protocol
Intended Users The i-PAD CU-SP1 AUTO is intended for use in or out of the hospital by emergency care personnel or healthcare professionals or laypersons. The manufacturer recommends that users train on the use of the device. 1.3 Local Protocol Please contact your local health authority for information on the requirements of ownership and usage of defibrillators. -
Page 10: Device Features
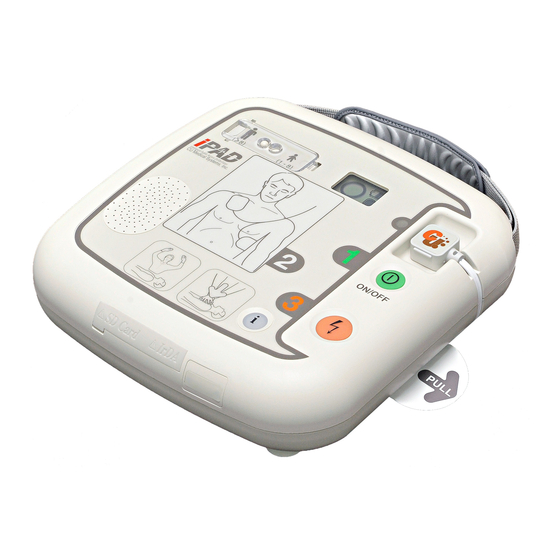
2. Device Features... - Page 11 Power Button Turns the device on or off. (When the device is on, a green LED is lit) i-Button Reports device usage (the total hours of the last usage and number of shocks) checks the S/W version downloads events and ECG data via an IrDA and SD Card ...
- Page 12 CPR Detection Indicates performance of CPR on the patient. Indicator (The indicator is lit if CPR is performed, and flashes if CPR is not performed) Battery Pack The disposable power source of the device. IrDA Port Transmits and receives treatment data between the device and a personal computer.
-
Page 13: Preparation For Use
3. Preparation for Use 3.1 Standard Package Contents The following are the standard package contents of this device CU-SP1 AUTO Fully automated External Defibrillator Instructions for Use 1 Battery Pack (Disposable) 1 Pack of Adult Pads (Disposable) Please contact the manufacturer for replacement supplies (refer to [Appendix B: Parts and Accessories] of these Instructions for Use). -
Page 14: Setting Up The I-Pad Cu-Sp1 Auto
WARNING Only parts and accessories recommended and approved by CU Medical Systems, Inc. must be used with the i-PAD CU-SP1 AUTO. Using unapproved parts and accessories may compromise the safety and effectiveness of the i-PAD CU-SP1 AUTO. Extra battery packs and pads are recommended. - Page 15 Only accessories and cables that are authorized by the manufacturer should be used with the i-PAD CU-SP1 AUTO. There is a possibility of explosion or fire if the product is used in the presence of flammable agent or in an OXYGEN enriched atmosphere due to the arc discharge caused by electrical shock.
-
Page 16: How To Use The I-Pad Cu-Sp1 Auto
4. How to Use the i-PAD CU-SP1 AUTO 4.1 Chain of Survival If you think that you are witnessing someone go down in sudden cardiac arrest, perform the chain of actions recommended by the American Heart Association (AHA) in its Chain of Survival emergency response to sudden cardiac arrest. -
Page 17: Preparation For Defibrillation
• Set the switch to adult defibrillation mode as shown in the following picture Child victim (victim is under 25kg or 8 years old) If the pediatric pads are attached, the i-PAD CU-SP1 AUTO automatically adjusts its defibrillation energy output for pediatric defibrillation regardless of the position of the Adult/Pediatric Selection Switch (i.e. - Page 18 • Set the switch to pediatric defibrillation mode as shown in the following picture If a young victim is over 25kg or 8 years old, or if you are not sure of the exact weight or age: • DO NOT DELAY TREATMENT •...
- Page 19 ③ Remove clothes from patient's chest. CAUTION Time is essential for the cardiac arrest patient. Tear or cut clothes if removing them will take time. Dry the patient's skin such that pads can adhere well on the chest. Shave hair on the chest if necessary.
- Page 20 ⑥ Take pads out of the pads package. ⑦ Refer to the pictures on both pads. Adult Pads Pediatric Pads CAUTION The adhesive material on the pads starts to dry out as soon as the package is opened. Use immediately after opening.
-
Page 21: Step 1: Place Pads On The Patient
Defibrillation in Adult Mode Step 1: Place pads on the patient. ① Remove pad 1 from the single liner and stick the pad to the patient’s upper chest as shown below. ② Remove pad 2 from the single liner, and stick the pad to the patient’s side torso as shown below. -
Page 22: Step 2: Automatic Shock Delivery If Needed
Step 2: Automatic shock delivery if needed . The device acquires and analyzes the patient's ECG immediately after being connected. The device will instruct you not to touch the patient by flashing the Do-Not-Touch-Patient Indicator and by issuing the voice prompt: “Do not touch the patient, analyzing heart rhythm”. After analyzing the ECG, the device will determine whether or not the patient needs defibrillation. - Page 23 If the patient does not need defibrillation, the device will do the following in sequence: • the device announces that the patient does not need a defibrillating shock and that you may touch the patient. • the CPR Mode Indicator is lit. •...
-
Page 24: Step 3: Perform Cpr
Step 3: Perform CPR. Perform CPR when the i-PAD CU-SP1 AUTO instructs you to do so. By default, the CU-SP1 AUTO gives voice instruction for CPR during pause for CPR after a shock delivery. When voice instruction for CPR is needed outside of the default setting, press the flashing blue i-Button for at least 15 seconds. - Page 25 If you have not been trained in CPR, you should perform only chest compression or follow the instructions of the emergency medical services’ agent on the phone. If you are trained for CPR and able to perform ventilation, perform the chest compression along with ventilation.
-
Page 26: Defibrillation Procedures In Pediatric Mode
Follow the instructions below when giving first aid during pediatric cardiac arrest. • When giving first aid during a pediatric cardiac arrest, ask others to call the emergency medical center and to bring the i-PAD CU-SP1 AUTO while you are performing pediatric CPR. -
Page 27: After Using The I-Pad Cu-Sp1 Auto
• Dispose of the used pads properly. Place a new pouch of defibrillator pads into the pads storage compartment. See to it that the pads are not beyond their expiration date. The i-PAD CU-SP1 AUTO uses disposable pads. Do not reuse them. Refer to Section [6.2.2: Replacing Supplies] on how to replace the pads. -
Page 28: Saving And Transferring Treatment Data
(PC). CAUTION This i-PAD CU-SP1 AUTO keeps the data of the 5 most recent treatment operations and can save up to 3 hours of ECG data for each rescue operation. ECG data beyond 3 hours will not be recorded. - Page 29 ③ When the i-Button is pressed for more than 1 second in standby mode, the mode changes into administrator mode with voice guide. ④ The device then gives you a summary (the total hours of the last device use and the number of defibrillation shocks delivered).
- Page 30 ③ The device gives the you a summary (the total hours of the last device use and the number of defibrillation shocks delivered). ④ The voice guide gives the S/W version of the device. ⑤ When instructed to transfer the treatment history, press the i-Button to transfer the data. If there is treatment data in the device’s internal memory: ①...
-
Page 31: Device Setting
5.3 Device Setting 5.3.1 CPR Guide Setting The default CPR setting on CU-SP1 AUTO is 5 cycles with 30 chest compressions and 2 breaths in accordance with the American Heart Association (AHA) 2010 CPR Guidelines. However, you may customize these. You can set the following: •... - Page 32 ⑥ The voice guide will give information regarding the current CPR guide setting. ⑦ Press the i-Button to change the setting, or wait for 3 seconds to go to the next step. (When the setting is completed, the i-Button flashes twice in blue.) ⑧...
- Page 33 By default, Detailed Guide Selection is OFF during CPR so that you can concentrate on the compression rate and ventilation guidance. If you want the Detailed Guide Selection to be ON during CPR, set it ON as outlined in the previous pages. ...
-
Page 34: Maintenance
6. Maintenance 6.1 Device Storage Please refer to the precautions below when storing the Device in order to avoid device damage. PROHIBITION Do not operate or store the device in conditions that are beyond the following. specified limits. • Storage Conditions The device is stored together with the defibrillator pads and the battery pack is inserted - ready to be used in an emergency Temperature: 0℃... -
Page 35: Maintenance
Refer to [Section 8.1: Self-Tests] for more information. CAUTION Inspect the i-PAD CU-SP1 AUTO daily to ensure that it is always ready for an emergency. Check the current status of the device, battery, and pads as displayed on the Status LCD. - Page 36 2. Insert a new battery pack in the direction of the arrow with the label facing upward as shown in the figure below. 3. Push the battery pack until you hear it click into place.
- Page 37 CAUTION Battery Pack Precautions • Do not subject the battery pack to serious physical impact. • Do not attempt to open or break apart the battery pack • Do not let the battery pack come into contact with open flames or hot objects. •...
-
Page 38: Replacing The Pads
• Check the cable outside the packaging pouch for possible defects. WARNING Only pads provided by the manufacturer should be used with the i-PAD CU-SP1 AUTO. Using pads other than the one specified by the manufacturer may affect defibrillation effectiveness. -
Page 39: Cleaning The I-Pad Cu-Sp1 Auto
IrDA port may be damaged. Do not use a detergent containing abrasive ingredients. Do not sterilize the i-PAD CU-SP1 AUTO. 7. Disposal Dispose of CU-SP1 AUTO and its accessories in accordance with local regulations. -
Page 40: Troubleshooting
8. Troubleshooting 8.1 Self-Tests The following table lists the self-tests done by the device. Self-Test Type Description Battery Insertion Runs when the battery pack is inserted into the device. Test Perform this test: • Before the device is deployed • After each use •... - Page 41 Power ON Test The device performs a self-diagnostic test when the Power Button is pressed Run-time Test The device monitors itself in real-time during its operation. Periodic This device performs self-diagnostic tests daily, weekly and monthly. The Self-Diagnostic periodic self-test checks important features of the device such as the Test battery status, pads status and internal circuits.
-
Page 42: Device Status
8.2 Device Status The status of the device is indicated by the following symbols: Indicator Description Note Status LCD The device is functioning normally. Device Operation Status LCD The device has an error. Device Operation Status LCD The battery is fully charged. Battery Level Indicator Status LCD Less than half battery power remains. -
Page 43: Troubleshooting
8.3 Troubleshooting The device informs you of its current status or of problems via status indicators, beeps, and/or voice instruction. Refer to the following for details: 8.3.1 Troubleshooting While the Device is Operating Symptom/Voice Instruction Cause Resolution Immediately replace the Status LCD An error has occurred in defibrillator and perform... -
Page 44: Troubleshooting While The Device Is Not Operating
If the problem cannot be solved during an emergency, you should follow the following steps: ① Quickly replace the defibrillator if possible. ② If no replacement device is available, check the patient's condition and perform CPR as necessary. Continuously check the patient's condition and perform CPR until the emergency medical services arrives. -
Page 45: Device Service
Distributor Person in Charge This device is warranted by CU Medical Systems, Inc. against defects in materials and workmanship for five full years from the date of original purchase. During the warranty period, we will repair or, at our option, replace at no charge a device that proves to be defective, provided you return the device, shipping prepaid, to us or to our authorized representative. - Page 46 The i-PAD CU-SP1 AUTO must be serviced only by authorized personnel. The i-PAD CU-SP1 AUTO will be serviced free of charge during the warranty period. After the warranty period, the cost of material and service shall be shouldered by the user.
-
Page 47: Appendix
Appendix A . Rescue Protocol... - Page 48 A’ Voice Prompt: “Do not touch the patient.” “Analyzing heart rhythm.” i-PAD CU-SP1 detect/decide: ECG Shockable? Voice Prompt: “Shock advised.” Voice Prompt: “No shock advised.” Voice Prompt: “Stand by for automatic shock delivery.” “Warning: No one should be touching the patient.” Charging Complete? Voice Prompt: “Shock will be delivered in(3, 2, 1)”...
-
Page 50: Parts And Accessories
B . Parts and Accessories To order replacement parts and accessories, cite the part and ordering numbers given in the following table. B.1 Standard Accessories Name Part Number Ordering Number Adult Pads (disposable) CUA1007S SP1-OA04 Disposable Battery Pack(Long-life) CUSA1103BB SP1-OA03 Instructions for Use SPA-OPM-E-01 B.2 Optional Accessories... -
Page 51: Description Of Symbols
C . Description of Symbols C.1 i-PAD CU-SP1 AUTO Defibrillator Symbol Description Power ON/OFF button i-Button Adult / Pediatric Selection Switch Do-Not-Touch-Patient Indicator CPR Detection Indicator Defibrillation-proof type BF applied part General warning sign Refer to instruction manual/booklet CE Mark; meets the requirements of the European Medical Device Directive 2007/47/EC and its revisions. -
Page 52: I -Pad Cu-Sp1 Auto Defibrillator (Continue ) . 오류! 책갈피가 정의되어 있지 않습니다
C.1 i-PAD CU-SP1 AUTO Defibrillator (Continue) Symbol Description Separate collection for electrical and electronic equipment... -
Page 53: I-Pad Cu-Sp1 Auto Packaging
C.2 i-PAD CU-SP1 AUTO Packaging Symbol Description Stack up to 6 cartons high only This side up Keep dry Fragile; breakable Use no hooks Storage Temperature limits: 0℃ to 43℃(32℉ to 109℉) recyclable CE Mark; meets the requirements of the European Medical Device Directive 2007/47/EC and its revisions. -
Page 54: Accessories
C.3 Accessories C.3.1 Disposable Battery Pack (CUSA1103BB, CUSA1103BS) Symbol Description Lithium Manganese Dioxide battery Direct current Lot Number Do not expose the battery to high heat or open flames. Do not incinerate the battery. Do not mutilate the battery or open the battery case Do not crush the battery Refer to instruction manual/booklet Separate collection for electrical and electronic equipment... -
Page 55: Pads (Cua1007S, Cua1102S)
C.3.2 Pads (CUA1007S, CUA1102S) Symbol Description Temperature limits: 0℃ to 43℃(32℉ to 109℉) Lot number Expiration date Single use only; do not reuse Do not fold or bend. Refer to instruction manual/booklet General warning sign Contains no latex Expiration Date and Lot number sticker Pads pull –out (direction indicator) CE Mark;... -
Page 56: Glossary
D . Glossary 1 CPR 1 CPR consists of 5 cycles. (When the device is set to 5 cycles as default) 1 Cycle Refers to 30 chest compressions followed by 2 breaths during CPR. (When the device is set to the default setting [30:2]) If you specify the number of compression and number of breath, the cycle is performed in accordance with the specified protocol. - Page 57 Arrhythmia An abnormal heart rhythm. Battery Pack A disposable battery that supplies power to the i-PAD CU- SP1 AUTO. Cardiac Arrest A patient with cardiac arrest symptoms. This device should be Patient used for the patient with the following symptoms: No response, no movement and no normal breathing.
- Page 58 Electric Shock This device charges large energy in a short time and performs defibrillation via an electric shock. Error A status in which the device does not properly operate. Refer to [Section 8.3: Troubleshooting] for more information. Fibrillation Refers to an irregularity of the heart causing ineffective circulation.
- Page 59 Pads Connector The connector on the pads that is used to connect the pads with the i-PAD CU-SP1 AUTO. Applied part Defibrillation electrode pads Patient isolation type BF, defibrillation protected PC S/W CU Expert PC software used to modify the settings of the i-PAD CU-SP1 (CU-EX1) AUTO and to manage treatment data.
- Page 60 Defibrillator (AED) Standby Mode The mode of the i-PAD CU-SP1 AUTO when the Power Button is OFF but the battery pack is inserted. If shown on the Status LCD while the device is in standby mode, the device is ready to be used as needed in an emergency).
-
Page 61: Device Specifications
E . Device Specifications Model Name: CU-SP1 AUTO Physical Category Nominal Specifications Dimensions 260㎜ x 256㎜ x 69.5㎜ (Width x Length x Height) Weight 2.4㎏ (Including the battery pack and pads) Environmental Category Nominal Specifications Operational Status (The device is in emergency use) Temperature: 0℃... - Page 62 Defibrillator Category Nominal Specifications Operating Mode Fully-automatic Waveform e-cube biphasic (Truncated exponential type) Output Energy 150 J at 50 Ω load for adults 50 J at 50 Ω load for children Charge Control Controlled by an automated patient analysis system Charging Time Within 10 seconds from when the voice instruction, "An electric shock is needed."...
- Page 63 Defibrillator Category Nominal Specifications Shock Delivery Adult pads in the anterior-anterior position Vector Pediatric pads in the anterior-posterior position Patient Isolation Type BF, defibrillation protected time(ms) Biphasic Truncated Exponential Type. The shock waveform profile is automatically compensated for the patient’s transthoracic impedance. A = first phase duration B = second phase duration0 C = interphase duration...
- Page 64 Output Waveform for Child (50 Joules) Patient First Phase Second Phase Peak Energy Energy Impedance duration duration Current Accuracy (Joules, J) (Ohms, Ω) (milliseconds, ms) (milliseconds, ms) (Joules, J) 35.4 50.2 50(±15%) 18.4 50.7 50(±15%) 12.3 49.7 50(±15%) 49.5 50(±15%) 10.6 10.6 50.3...
- Page 65 ECG Analysis System - ECG Database Test 90% One Minimum Test Performan Shock No Shock Observed Sided Lower Rhythm Rhythms test sample sample ce goal Decision Decision Performance Confidence Class size size Limit 97.26% >90% (213/219) Coarse VF sensitivity sensitivity 81.02% >75% (111/137)
- Page 66 Control Devices, Indicators, Voice Instructions Category Nominal Specifications Control Devices Power Button, i-Button, Adult/Pediatric Selection Switch Status LCD Displays device status, battery level and pads status Indicator Do-Not-Touch-Patient Indicator: Lights when the defibrillator is analyzing or delivering an electric shock. Pads Patch Position Indicators: Flashes when the defibrillator is turned on;...
- Page 67 Self-Diagnostic Test Auto Power On Self-Test, Run-time Self-Test Daily, Weekly, and Monthly Self-Test Manual Battery Pack Insertion Test (done when the user inserts the battery pack into the battery pack compartment of the device) Disposable Battery Pack Category Nominal Specifications Battery Type 12V DC, 2.8Ah LiMnO...
- Page 68 Adult Defibrillation Pads (CUA1007S) Category Nominal Specifications Type Adult Electrode Area 120 cm Cable Length Total 120 cm (Inside the pouch: 95 cm, Outside the pouch: 25 cm) Shelf life At least 36 months from the date of manufacture Pediatric Defibrillation Pads (CUA1102S) Category Nominal Specifications Type...
-
Page 69: Electromagnetic Compatibility
Guidance and manufacturer’s declaration – electromagnetic emissions The i-PAD CU-SP1 AUTO is intended for use in the electromagnetic environment specified below. The customer or the user of the i-PAD CU-SP1 AUTO should assure that it is used in such an environment. - Page 70 Guidance and manufacturer’s declaration – electromagnetic immunity The i-PAD CU-SP1 AUTO is intended for use in the electromagnetic environment specified below. The customer or the user of the i-PAD CU-SP1 AUTO should assure that it is used in such an environment.
- Page 71 Guidance and manufacturer’s declaration – electromagnetic immunity The i-PAD CU-SP1 AUTO is intended for use in the electromagnetic environment specified below. The customer or the user of the i-PAD CU-SP1 AUTO should assure that it is used in such an environment.
- Page 72 RF transmitters, an electromagnetic site survey should be considered. If the measured field strength in the location in which the i-PAD CU-SP1 AUTO is used exceeds the applicable RF compliance level above, the CU-SP1 AUTO should be observed to verify normal operation.
- Page 73 The i-PAD CU-SP1 AUTO is intended for use in an electromagnetic environment in which radiated RF disturbances are controlled. The customer or the user of the i-PAD CU-SP1 AUTO can help prevent electromagnetic interference by maintaining a minimum distance between portable and...
Need help?
Do you have a question about the i-PAD CU-SP1 AUTO and is the answer not in the manual?
Questions and answers
How many bars should be showing on thew battery when its fully charged. It has been showing 2 bars for 3 months. The green light is flashing!!
When the CU Medical Systems CU-SP1 AUTO battery is fully charged, the Status LCD will display the battery level indicator showing that the battery is fully charged. The specific number of bars is not mentioned.
This answer is automatically generated