Table of Contents
Advertisement
Quick Links
Instructions for Use
i-PAD CU-SP2
The information in these Instructions for Use applies to the i-PAD CU-SP2. This information is
subject to change. Please contact CU Medical Systems, Inc. or its authorized representatives
for information on revisions.
Revision History
Edition 3.1
Publication Date: April 2, 2018
Document No.: SP2-OPM-E-03
Published by: CU Medical Systems, Inc.
Printed in the Republic of Korea
Copyright
© 2018 CU Medical Systems, Inc.
No part of these Instructions for Use may be reproduced without the permission of CU Medical
Systems, Inc.
Medical Device Directive
The i-PAD CU-SP2 complies with the requirements of the Medical Device Directive 93/42/EEC
and its revisions.
Important:
Quick defibrillation is needed if sudden cardiac arrest (SCA) occurs. Since the chance of
success is reduced by 7% to 10% for every minute that defibrillation is delayed, defibrillation
must be performed promptly.
However, defibrillation may not work on some patients even when administered promptly due to
the fundamental causes of SCA.
1
Advertisement
Table of Contents

Related Manuals for CU Medical Systems i-PAD CU-SP2


Summary of Contents for CU Medical Systems i-PAD CU-SP2
- Page 1 Instructions for Use i-PAD CU-SP2 The information in these Instructions for Use applies to the i-PAD CU-SP2. This information is subject to change. Please contact CU Medical Systems, Inc. or its authorized representatives for information on revisions. Revision History Edition 3.1 Publication Date: April 2, 2018 Document No.: SP2-OPM-E-03...
- Page 2 The i-PAD CU-SP2 is manufactured by: CU Medical Systems, Inc. 130-1, Donghwagongdan-ro, Munmak-eup, Wonju-si, Gangwon-do, 220-801 Republic of Korea Authorized EU Representative Medical Device Safety Service Schiffgraben 41, 30175 Hannover, Germany Contact Us Product and Order Inquiries Overseas Sales Team CU Medical Systems, Inc.
-
Page 4: Table Of Contents
3.1 S TANDARD ACKAGE ONTENTS ............................14 3.2 K CCESSORIES ........................... 15 3.3 P REPARATION FOR HOW TO USE THE I-PAD CU-SP2 ..................17 ..............................17 4.1 LCD S CREEN ................................. 20 4.2 S ..............................22 4.3 M HANGE ......................23 4.4 P... - Page 5 4.11.1 Changing the Energy Value ....... 41 4.11.2 Charging the Device and Administering Electric Shock Treatment ............................42 4.11.3 Using R-Sync AFTER USING THE I-PAD CU-SP2 ..................44 ......................... 44 5.1 M AINTENANCE FTER ..................45 5.2 S AVING AND...
- Page 6 ..........................78 A.1 S TANDARD CCESSORIES ........................... 78 A.2 O PTIONAL CCESSORIES DESCRIPTION OF SYMBOLS ....................79 ........................... 79 B.1 CU-SP2 D EFIBRILLATOR ............................80 B.2 CU-SP2 P ACKAGING ............................... 81 B.3 A CCESSORIES ........................81 B.3.1 Rechargeable Battery Pack ..................
-
Page 7: Introduction
The company or its authorized distributor is not responsible for any injury incurred by the user or patient due to any apparent negligence or improper use by the user. Hereinafter, "Device" refers to [CU-SP2], "We" or “Us" refers to CU Medical Systems, Inc., "Pads" refers to disposable defibrillation electrode pads for adult or pediatric modes, and "Battery Pack"... -
Page 8: Overview
Overview Thank you for purchasing the i-PAD CU-SP2. This device can be effectively and safely used for a long period if you familiarize yourself with the instructions, warnings, precautions, and notices contained in these Instructions for Use prior to its use. -
Page 9: Product Information
In manual mode, the user determines whether the patient needs a defibrillation shock or not. 1.2 Indicated Use ① Semi-Automated Mode The i-PAD CU-SP2 is indicated for use on patients that are exhibiting the symptoms of sudden cardiac arrest (SCA) with all of the following signs: No movement and no response when shaken ... -
Page 10: Intended Users
CPR or the use of the defibrillator for quick and systematic emergency treatment. ② Manual Mode In this mode, the i-PAD CU-SP2 is intended for use by health care professionals and emergency rescue personnel who have been trained in advanced cardiac life support. 1.4 Additional Information Please contact CU Medical Systems, Inc. -
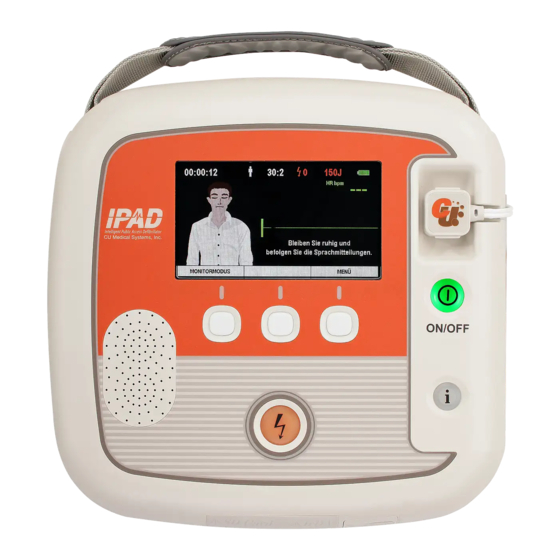
Page 11: Device Features
2. Device Features Graphic LCD Defibrillator Pads Connector Pads Storage Compartment i-Button Power Button Soft Keys IrDA Port SD Card Port Battery Pack Shock Button... - Page 12 Turns the device on or off. (When the device is on, a green Power Button LED backlight is lit.) Provides the following information by voice and LCD screen i-Button • Reports device usage (the total hours of the last usage and number of shocks) •...
-
Page 13: Preparation For Use
3. Preparation for Use 3.1 Standard Package Contents The following are the standard package contents of this device. CU-SP2 Semi-automated / Manual Instructions for Use External Defibrillator 1 Pack of Adult Pads (Disposable) 1 Battery Pack (Disposable) -
Page 14: Key Accessories
3.2 Key Accessories 1 Pack of Pediatric Pads IrDA Adapter SD Card 1 Battery Pack (Rechargeable) CU-EM1 (ECG Transmission Device) Printer Battery Charge Dock Battery Charger... -
Page 15: Preparation For Use
Please keep spare pads and battery packs handy to quickly respond to emergency situations. 3.3 Preparation for Use Do the following to set up the i-PAD CU-SP2. ① Open the package and verify that it contains all the items listed in the packing list. - Page 16 Only accessories and cables that are authorized by the manufacturer should be used with the i-PAD CU-SP2. When the product is used for asynchronous defibrillation treatment in Manual mode, do not use it on patients who show any of the following symptoms: - responsiveness, normal movement, normal breathing and detectable pulse.
-
Page 17: How To Use The I-Pad Cu-Sp2
4. How to Use the i-PAD CU-SP2 4.1 LCD Screen The configuration of the Graphic LCD Screen is as shown below. The screen configuration can be changed according to the 'Graphic Instruction'. For detailed instructions on setting the 'Graphic Instruction', please refer to [Section 5.4: Device Setup] of these Instructions for Use. - Page 18 Guides the user in operating the device. Image Guide Operation Time Displays the actual operation time of the device. Printer / CU-EM1 Displayed when using the Printer / CU-EM1. Printer: Connection Status CU-EM1: Adult / Pediatric Mode Changes based on the Adult / Pediatric Mode of the device. ...
- Page 19 The Graphic LCD Screen illustrated in these Instructions for Use may not match the actual screen during operation depending on the device settings. The Printer and CU-EM1 are not a part of the standard package contents. If you want to purchase them, please contact us by referring to [Appendix A: Parts and Accessories] of these Instructions for Use.
-
Page 20: Soft Keys
4.2 Soft Keys There are three Soft Keys in the center of the i-PAD CU-SP2, which operate the device and the menu mode. The Soft Keys operate in two modes: Operation Mode and Menu Mode. When in Operation Mode, the functions of the Soft Keys are changed according to the 'Manual Override'. - Page 21 (The 'x' refers to the 'No. of Artificial Respirations' under the CPR setting.) When pressed, the device will enter the Menu Mode. Button 3 MENU For further details on the Menu Mode, please refer to [Section 5.4: Device Setup] in these Instructions for Use. ※...
-
Page 22: Mode Change
Button 2 is activated only when the device is set to Pediatric Mode. When 'Manual Override' is set to 'OFF', Soft Keys 1 and 3 will be deactivated after attaching the pads on the patient. 4.3 Mode Change The operation mode change is accomplished by pressing the i-button while the device is on. -
Page 23: Procedure For Using The Device
(e.g. call 911 or the equivalent service in your locality). 2. Early CPR – Perform CPR. 3. Early defibrillation – Use this device (i-PAD CU-SP2). Using this device can be summarized in 3 steps: After pressing the Power Button, Step 1: Place pads on the patient. -
Page 24: Reparation For Efibrillation
4.5 Preparation for Defibrillation ① Turn the device on by pressing the Power Button. When the power turns ON the following occurs in sequence: Beeper: The beeper will beep for 1 second. A self-test will be initiated. The device will give voice instructions to call emergency medical services and on the 'Adult / Pediatric Mode'. - Page 25 ② Remove clothes from patient's chest. Time is essential for the cardiac arrest patient. Thus, time should not be wasted in completely removing their clothes. Tear or cut clothes to attach the pads as soon as possible, if removing them will take too much time.
- Page 26 ⑤ Refer to the pictures on both pads and accurately identify the locations where the pads will be attached. Adult Pads Pediatric Pads The adhesive material on the pads starts to dry out as soon as the package is opened. Use immediately after opening.
-
Page 27: Efibrillation In Dult Ode
4.6 Defibrillation in Adult Mode Step 1: Place pads on the patient. ① Remove pad 1 from the single liner and stick the pad to the patient’s upper right chest below the collarbone as shown below. ② Remove pad 2 from the single liner and stick the pad to the patient's left side torso in line with the armpit as shown below. -
Page 28: Step 2: Press The Shock Button When Instructed
Step 2: Press the Shock Button when instructed. The device acquires and analyzes the patient's ECG immediately after being connected. According to the device settings, automatic analysis will become available, along with ANALYZE and CHARGE. If the device is set to automatic analysis, the device will automatically start analyzing the ECG as soon as the pads are attached to the patient. - Page 29 If the patient does not need defibrillation, the device will do the following in sequence: The device announces that the patient does not need a defibrillating shock and that you may touch the patient. Then the voice instruction for CPR starts. ...
-
Page 30: Step 3: Perform Cpr
Step 3: Perform CPR. The user must immediately perform CPR while temporarily suspending emergency treatment on the patient. During this step, the device will give voice instructions for the pause period. When voice instruction for CPR is needed, press the flashing blue i-Button within 15 seconds. For further details on CPR, please refer to the [CPR Method] below. - Page 31 4. Artificial Respiration Method Pinch the patient's nose as shown in the figure below, place your mouth over the patient’s mouth, and blow in sufficient air to make the chest rise significantly. After the CPR Guidance, the device automatically starts reanalysis of the patient's ECG according to the device settings, or the user can press 'ANALYZE' button to start the reanalysis.
-
Page 32: Defibrillation In Pediatric Mode
• When giving first aid during a pediatric cardiac arrest, ask others to call the emergency medical center and to bring an i-PAD CU-SP2 while you are performing pediatric CPR. • Since most pediatric cardiac arrests are caused by suffocation rather than heart failure, when there is no one else around, perform CPR for 1 to 2 minutes, call the emergency medical services, and then get an i-PAD CU-SP2. -
Page 33: Printer
When a paired printer is turned on while administering defibrillation on the patient, ECG and event analysis from the point of the ECG analysis to the defibrillation will be printed. Printers not designated by the manufacturer are not compatible with the i-PAD CU-SP2. Turn on the printer prior to use. -
Page 34: Monitor Mode
Monitor Mode is used in connection with the CU-EM1 (ECG transmission device). In Monitor Mode, the i-PAD CU-SP2 uses Bluetooth to receive ECG data from the CU-EM1 and displays it on the LCD Screen. When using Monitor Mode, the pads cannot be used and defibrillation cannot be performed. - Page 35 The CU-EM1 can be connected and used with up to 10m of open space between the CU-EM1 and the i-PAD CU-SP2. The CU-EM1 is not a part of the standard package contents. If you want to purchase the CU- EM1, please contact us by referring to [Appendix A: Parts and Accessories] of these Instructions for Use.
-
Page 36: Cu-Em1
4.10 CU-EM1 (ECG Transmission Device) 4.10.1 Device Features 3-Lead ECG Measurement Cable LOW Battery Indicator Power and Connection Indicator Lead-Fault Indicator Power Button Belt Clip Battery Cover... -
Page 37: Button And Indicators
4.10.2 Button and Indicators Indicator Description Power Button This button turns the CU-EM1 on and off. LOW Battery Indicator The red indicator will light when the remaining battery of the CU-EM1 falls below 10%. You need to recharge the battery when the LOW Battery Indicator is on. Power and Connection Indicator The blue indicator will light when the CU-EM1 is turned on. -
Page 38: How To Use The Cu-Em1
4.10.4 How to Use the CU-EM1 ① Turn the device on by pressing the Power Button. When the power of the CU-EM1 is turned ON, the following occurs in sequence: Beeper: The beeper will beep for 0.5 seconds. Connection Indicator: The blue indicator will light. ②... - Page 39 For further details on charging the battery of the CU-EM1, please refer to [Section 6.2: Maintenance] of these Instructions for Use. In order to turn the CU-EM1 off after use, press the Power Button for at least 1 second. ...
-
Page 40: Manual Mode
4.11 Manual Mode (Optional) This function will be installed by default if manual mode has been optionally added upon purchasing the CU-SP2. To use the manual mode, you must set the device mode to Manual Mode. For further details on setting the manual mode, please refer to [Section 5.4: Device Setup] in these Instructions for Use. -
Page 41: Charging The Device And Administering Electric Shock Treatment
2J, 3J, 5J, 7J, 10J, 20J, 30J, 50J 4.11.2 Charging the Device and Administering Electric Shock Treatment In manual mode, the user may, in his/her own discretion, charge the i-PAD CU-SP2 and administer defibrillation. After attaching the pads on the patient, press ‘CHARGE’ using Soft Key 3 if the patient’s ECG is shockable. -
Page 42: Using R-Sync
If you want to stop charging, press the 'DISARM' button using Soft Key 3. When pressed, the device will cease charging and dump the shock energy internally. When armed, the Shock Button will flash in orange to signal readiness for defibrillation. At this time, you can administer defibrillation by pressing the Shock Button. - Page 43 The usage authority differs for each device mode. Manual Mode: Only medical professionals may use this mode. AED Mode • ANALYZE: Only licensed emergency medical technicians or medical professionals may use this mode. • CHARGE: Only medical professionals may use this mode. •...
-
Page 44: After Using The I-Pad Cu-Sp2
Use. If the device shuts down normally after running a self-test on the battery, the device status is normal. The i-PAD CU-SP2 uses disposable pads. Dispose of the used pads and replace them with new pads after checking their expiration date. For further details on replacing the pads, please refer to [Section 6.2.2: Replacing the Pads] in these Instructions for Use. -
Page 45: Saving And Transferring Treatment Data
(PC) and is not erased even if the device is turned off. The i-PAD CU-SP2 saves the 3 most recent treatments and is able to save up to 17 hours for each event. If more than 17 hours of ECG data are recorded for one event, any ECG data over 17 hours will not be recorded. - Page 46 ③ If the i-Button is pressed for more than 1 second in standby mode, the device will switch to Administration Mode and give instructions by voice and LCD Screen. ④ The device displays the summary (the total hours of the last device usage and the number of defibrillation shocks delivered) of the device usage on the LCD Screen.
- Page 47 2. Transferring Data via IrDA The data may be transferred to the PC by using the PC software (CU Expert Ver.3.70 or higher), which is provided by the manufacturer. [CU Expert] is a PC software that includes ECG review and printing functions. ①...
- Page 48 ② There are at most 3 treatment data. The first treatment data is the most recent. ③ Press the Shock Button to change the transfer order of the treatment data as follows: 1st treatment data 2nd treatment data 3rd treatment data 1st treatment data .. ④...
-
Page 49: Data Review
5.3 Data Review If the Defibrillator Pads Connector has not been inserted or the pads have not yet been attached to the patient, you can press Soft Key 3 on the device to enter Menu Mode. In Menu Mode, you can easily check the device setup and the treatment data saved on the device. ①... -
Page 50: Event Review
⑤ Select the review method. The options are 'Event Review', 'ECG', 'Partial Print', and 'Print All'. • Event Review: Displays the list of events saved on the device. • ECG: Displays the ECG data saved on the device. • Partial Print: The user selects and prints the segment to review. •... -
Page 51: Ecg
5.3.2 ECG You can check the ECG saved in the internal memory of the device. Select 'ECG' to play the saved ECG. You can press the pause button in the center to stop playing. After stopping, you can move to the next or previous page by using the Left/Right arrow buttons. Press the i-Button to exit 'ECG'. -
Page 52: Print All
Once connected, the printer will print the ECG and event list of the selected segment. Press the i-Button to stop printing. 5.3.4 Print All Select 'Print All' to directly connect to the printer. When connected, the device will print all saved events and ECGs. -
Page 53: Device Setup
5.4 Device Setup In i-PAD CU-SP2, you can set the operation of the device and the CPR Guidance under Menu Mode. If the Defibrillator Pads Connector has not been inserted or the pads have not yet been attached to the patient, you can press Soft Key 3 on the device to enter Menu Mode. -
Page 54: Setting The Operation Of The Device
The second tab displays the treatment data saved on the device. For further details on 'DATA REVIEW' on the second tab, please refer to [Section 5.3: Data Review] in these Instructions for Use. The third tab is for exiting Menu Mode. ... - Page 55 The Device Mode setup is an additional option. This function will not be installed by default if Manual Mode has not been optionally added upon purchasing the CU-SP2. If you want to purchase the Device Mode option, please contact us by referring to [Appendix A.3: Service Center] of these Instructions for Use.
- Page 56 Adult / Pediatric Mode • Adult: The device will operate in Adult Mode. In the case of a pediatric patient, connecting the device with the pediatric pads connector will automatically switch the device to Pediatric Mode. • Pediatric: The device will operate in Pediatric Mode. When set to Pediatric Mode, the device will maintain the mode even if it is connected to the adult pads connector.
- Page 57 Date & Time • Set the date and time of the CU-SP2. External Device This setting pairs the CU-SP2 with the printer and CU-EM1 (ECG transmission device). Selecting 'External Device' displays 'Printer' and 'CU-EM1' on the left side of the screen. The model numbers of devices currently connected to the CU-SP2 are displayed on the right.
- Page 58 If no device is found, the CU-SP2 will display the following message for 3 seconds and return to the previous page. Check and select a device from the list to pair with the CU-SP2. After selecting, the CU-SP2 will test connection with the selected device. After testing, the CU-SP2 will save the connection information and return to the previous page.
- Page 59 The CU-SP2 can only communicate with the devices designated by the manufacturer. Before pairing the CU-SP2 with an external device (Printer, CU-EM1), turn on the power of the device to be connected. When the CU-SP2 is paired with an external device, the external device will operate as follows: •...
- Page 60 New Password Confirm Password Security Mode Setting (ON/OFF)
- Page 61 [Device Setup] Setup Option Set Value Default AED Mode Device Mode AED Mode Manual Mode Analyze, Manual Override Charge, Adult, Adult / Pediatric Mode Adult Pediatric Fixed 150J, Fixed 200J, Shock Energy Fixed 150J Escalating (150J-200J), Escalating (150J-150J -200J) 5mm/mV, 10mm/mV, ECG Gain 10mm/mV...
-
Page 62: Setting The Cpr Guide
5.4.3 Setting the CPR Guide The CU-SP2 complies with the 2011 Korea Guidelines for CPR recommended by the Korean Association of Cardiopulmonary Resuscitation (KACPR) and the 2010 Guidelines for CPR recommended by the American Heart Association (AHA). The default CPR is set to 5 cycles of 30 chest compressions followed by 2 artificial respirations. - Page 63 The CU-SP2 does not provide Detailed Guide on chest compression and artificial respiration during CPR by default. To receive Detailed Guide, change the Detailed Guide setting to 'ON'. Once Detailed Guide is set to 'ON', the device will provide detailed voice instructions on CPR. ...
-
Page 64: Maintenance
6. Maintenance 6.1 Device Storage Please refer to the precautions below when storing the device. Do not store in an environment with large fluctuations in temperature. • Storage Environment The device is connected to the pads and battery pack, and is ready for immediate use in case of an emergency. -
Page 65: Aintenance
6.2 Maintenance 6.2.1 Device Inspection This device provides a self-test. The device performs a self-test as soon as the battery is inserted, automatically turns off after the test is completed, and regularly turns on to perform the self-test. If the user wants to initiate the self-test, remove the battery and then reinsert. For further details on self-tests, please refer to [Section 7.1: Self-Tests] in these Instructions for Use. - Page 66 How to replace the battery pack 1. Remove the spent battery pack by pulling it out while pressing the locking mechanism on the bottom of the device. Refer to the figure below. 2. Insert a new battery pack in the direction of the arrow with the label facing upward as shown in the figure below.
- Page 67 How to recharge the battery pack Rechargeable batteries that are low can be reused after recharging. You can recharge the battery by using the Battery Charger and Battery Charge Dock provided by the manufacturer. Familiarize yourself with the Battery Charger manual before use. ...
- Page 68 ③ Charging the CU-EM1 Battery Rechargeable batteries that are low can be reused after recharging. You can recharge the battery by using the Battery Charger and Battery Charge Dock provided by the manufacturer. The red LED lights up on the Battery Charger when charging, and the green LED lights up when charging is complete.
- Page 69 Precautions for using the battery pack • Do not subject to impact, disassemble or damage the device. • Do not place the device near hot objects such as heating appliances. • Do not keep the battery pack near metal objects. This may cause a short-circuit. •...
-
Page 70: Replacing The Pads
6.2.3 Replacing the Pads You cannot use expired pads. Check if the pads package is damaged. You should use only the pads provided by the manufacturer. How to replace pads 1. Check the expiration date of the pad. Refer to the figure below for checking the expiration date. -
Page 71: Cleaning The I-Pad Cu-Sp2
3. Insert the pads connector of the new pads into the Pads Connector Insert, and then put the Pads Package in the Pads Storage Compartment. Refer to the figure below. 6.2.4 Cleaning the i-PAD CU-SP2 Always clean the device and accessories with a soft cloth. The following detergents may be used to clean the exterior surface of the device: •... -
Page 72: Troubleshooting
7. Troubleshooting 7.1 Self-Tests There are several types of self- test. Each self-test examines different contents. Refer to the table below for details. Self-Test Description Type Perform the battery self-test of inserting the battery pack in the following events: • When initially purchasing the device •... - Page 73 If the self-test fails during operation and defibrillation cannot be administered, the device will instruct you to get a replacement defibrillator and will guide CPR by voice. To learn more about the error, first press the Power Button to turn off the device. Press and hold down the i-Button, and the device will notify the error by voice and LCD Screen, and then automatically shut down.
-
Page 74: Device Status
7.2 Device Status The device notifies the user of its status in the following ways: Indicator Description Remarks The device detected an error (e.g., low i-Button: Flashing in red battery). Press the i-Button to identify the error. The device is ready to deliver an electric Shock Button: Flashing in shock. -
Page 75: Roubleshooting
7.3 Troubleshooting The device informs you of its current status or of problems via status indicators, beeps, and/or voice instruction. Refer to the following for details: Symptom/Voice Instruction Cause Resolution Voice Prompt : “Low battery”, Replace the battery with a The battery is low. -
Page 76: Device Service
Distributor Person in Charge This device is warranted by CU Medical Systems, Inc. against defects in materials and workmanship for five full years from the date of original purchase. During the warranty period, we will repair or, at our option, replace at no charge a device that proves to be defective, provided you return the device, shipping prepaid, to us or to our authorized representative. - Page 77 The i-PAD CU-SP2 must be serviced only by authorized personnel. The i-PAD CU-SP2 will be serviced free of charge during the warranty period. After the warranty period, the cost of material and service shall be shouldered by the user.
-
Page 78: Appendix
Appendix A. Parts and Accessories To order replacement parts and accessories, cite the part and ordering numbers given in the following table. A.1 Standard Accessories Name Part Number Ordering Number Adult Defibrillation Pads CUA1007S (disposable) Disposable Battery Pack(Long-life) CUSA1103BB Instructions for Use SP2-OPM-E-03 A.2 Optional Accessories Carrying Case... -
Page 79: Description Of Symbols
B. Description of Symbols B.1 CU-SP2 Defibrillator Symbol Description Power Button (ON/OFF) i-Button Shock Button Caution: Refer to related documents. Protected against dust limited ingress(no harmful deposit) Protected against low pressure jets of water from all directions – limited ingress BF Type, defibrillation-proof equipment Refer to instruction manual/booklet CE Mark;... -
Page 80: Cu-Sp2 Packaging
B.2 CU-SP2 Packaging Symbol Description Stacking No. (Up to 6) Load Upwards Avoid Moisture Fragile No Hooking Temperature Limit: Store at a temperature between 0℃ ~ 43℃. Recyclable EU Representative CE Mark; meets the requirements of the European Medical Device Directive 2007/47/EC and its revisions. Manufactured Date Manufacturer Serial Number... -
Page 81: Accessories
B.3 Accessories B.3.1 Rechargeable Battery Pack Symbol Description Lithium Ion Battery LOT Number Manufactured Date Manufacturer Do not break or apply pressure on the battery. Do not discard the battery indiscriminately. Discard in accordance with local regulations. Refer to instruction manual/booklet General warning sign Warning;... -
Page 82: Disposable Battery Pack(Cusa1103Bb)
B.3.2 Disposable Battery Pack(CUSA1103BB) Symbol Description Lithium Manganese Dioxide Battery LOT Number Manufactured Date Manufacturer Do not break or apply pressure on the battery. Do not discard the battery indiscriminately. Discard in accordance with local regulations. Refer to instruction manual/booklet General warning sign Warning;... -
Page 83: Pads
B.3.3 Pads Symbol Description Temperature Limit: Store at a temperature between 0℃ ~ 40℃. LOT Number Expiration Date Reference Order Number Disposable (Do Not Reuse) Do not fold or crush this product. Contains no Latex Expiration Date Caution: Refer to related documents. CE Mark;... -
Page 84: Glossary
C. Glossary 1 CPR 1 CPR consists of 5 cycles. (When the device is set to 5 cycles as default) Refers to 30 chest compressions followed by 2 breaths during 1 Cycle CPR. (When the device is set to the default setting [30:2]) If you specify the number of compression and number of breath, the cycle is performed in accordance with the specified protocol. - Page 85 A patient with cardiac arrest symptoms. This device should be Cardiac Arrest Patient used for the patient with the following symptoms: No response, no movement and no normal breathing. Communication A port that sends and receives data between the device and PC. Port Condensation Moisture has an adverse effect on the device when condensation...
- Page 86 The button for checking the most recent device usage, displaying error messages, transferring ECG and event data, etc. Internal discharge The i-PAD CU-SP2 dumps the charge in its defibrillating capacitor into an internal load If you do not press the Shock Button or if the (disarm) device determines that the patient does not need an electric shock due to the change in the patient's ECG.
- Page 87 (the position may be switched with pad 1). Pads Connector The connector on the pads that is used to connect the pads with the i-PAD CU-SP2. Pairing The process of connecting the Device with an external Bluetooth device for communication.
- Page 88 Standby Mode The mode where the power of the device is OFF but the device executes periodic self-tests to ensure that the device is always ready for use in emergency situations. Refers to CU Medical Systems Inc.
-
Page 89: Device Specifications
D. Device Specifications Model Name: CU-SP2 Product Exterior Category General Specifications Dimensions 260㎜ x 256㎜ x 69.5㎜ (Width x Length x Height) Weight 2.4㎏ (Including the battery pack and pads) Environmental Conditions Category General Specifications Operating Environment (The device can be used immediately in case of an emergency.) Temperature: 0°C ~ 40°C (32°F ~ 104°F) Humidity: 5% ~ 95% (a location with no condensation) Storage Environment (The device has pads and a battery and is ready to be used for an... - Page 90 Defibrillator General Specifications Category Operation Type Dual Mode (semi-automated, manual) External Defibrillator Output Type e-cube biphasic (Truncated exponential type) AED Mode Output Energy • 150J±4J, 200J±6J at 50Ω load for adults • 50J±2J at 50Ω load for children Manual Mode (Optional) •...
- Page 91 Voice instruction (Press the flashing orange button.) Arming Indicator Flashing Shock Button Beeper Time from End of At least 6 seconds from the completion of CPR to the shock delivery CPR to Administering Shock Disarm The device disarms the electric load under the following situations: •...
- Page 92 Biphasic Truncated Exponential Type The shape of the waveform is automatically adjusted according to the patient's defibrillation impedance. In the graph, A is the duration of the first phase of the waveform, B is the duration of the second phase, C is the delay between phases (500μs), and D is the peak current. Output Waveform for Adults (200 Joules) First Phase Second Phase...
- Page 93 Output Waveform for Adults (150 Joules) First Phase Second Phase Patient Peak Discharging Energy Interval Interval Impedance Current Energy Accuracy (milliseconds, (milliseconds, (Ohms, Ω) (Joules, J) (Joules, J) 64.5 147.8 150 (±4J) 32.7 149.7 150 (±4J) 22.5 151.5 150 (±4J) 15.9 148.1 150 (±4J)
- Page 94 ECG Accuracy General Specifications Category ECG Acquisition Route Lead II Response Frequency 1 Hz ~ 30 Hz ECG Analysis System Category General Specifications Analyzes whether the rhythms of the patient's impedance and Function ECG require a defibrillation 25Ω ~ 175Ω Measured Impedance Range ...
- Page 95 ECG Analysis System – ECG Database Test 90% One Minimum Test Performa Shock No Shock Observed Sided Lower Rhythm Rhythms test sample sample nce goal Decision Decision Performance Confidence Class size size Limit 97.26% >90% Coarse VF (213/219) sensitivity sensitivity 81.02% >75% Fast VT...
- Page 96 Control Devices, Indicators, Voice Instructions Category General Specifications Control Devices Power Button, i-Button, Shock Button, 3 Soft Keys Graphic LCD Displays the operating status of the device and instructions Shock Button: Flashes in orange when the defibrillator is charged Indicators and ready to deliver a shock.
- Page 97 CU-SP2 Battery Pack (Rechargeable) Model CUA1802RB (3INR/19/65) Battery Type 10.8VDC, 2.5Ah Li-ion, rechargeable Capacity For fully charged new batteries, at least 60 shocks or 3 hours of operation at 25°C (77°F) Charging Time with Approximately 3 hours to 100%. Approximately device off 2.8 hours to 90%.
- Page 98 Adult Defibrillation Pads Category General Specifications Type Adult Pad Size 110 cm ± 10% Cable Length 120cm ± 5cm Pad Storage Life At most 36 months from the date of manufacture Patient contacting material meets requirements of ISO Bio-Compatibility 10993-5,-10 (Biological Evaluation of Medical Device) Pediatric Defibrillation Pads Category General Specifications...
- Page 99 memory through the PC software (CU-Expert). Bluethooth 2.1 + EDR, class 2 module Bluetooth Operating Frequency Range(OFR): 2402 – 2480 MHz Modulation: GFSK, π/4 DQPSK, 8DPSK Uses Bluetooth to communicate with the Printer or the CU- EM1 (ECG transmission device) 9,600bps or higher Communication speed...
- Page 100 Battery Type 3.7V DC, 1.0Ah Li-ion, rechargeable Capacity For fully charged new batteries, at least 10 hours of operation at 25°C (77°F) Standby Life (After If stored and managed in accordance with instructions in Inserting the Battery) the document: At least 6 months from the date of installation into the i-PAD CU-SP2 ...
-
Page 101: Electromagnetic Compatibility
Guidance and manufacturer’s declaration The i-PAD CU-SP2 is intended for use in the electromagnetic environment specified below. The customer or the user of the i-PAD CU-SP2 should assure that it is used in such an environment. Basic EMC standard Phenomenon... - Page 102 The i-PAD CU-SP2 should not be used adjacent to or stacked with other equipment. If adjacent or stacked use is necessary, the i-PAD CU-SP2 should be observed to verify normal operation in the configuration in which it will be used.
Need help?
Do you have a question about the i-PAD CU-SP2 and is the answer not in the manual?
Questions and answers